cec37981e75cf8bb184a40233d62daab.ppt
- Количество слайдов: 35
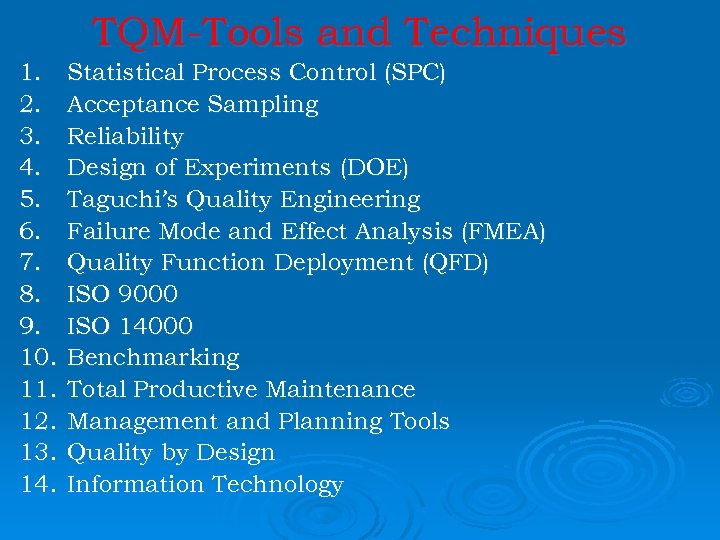 TQM-Tools and Techniques 1. 2. 3. 4. 5. 6. 7. 8. 9. 10. 11. 12. 13. 14. Statistical Process Control (SPC) Acceptance Sampling Reliability Design of Experiments (DOE) Taguchi’s Quality Engineering Failure Mode and Effect Analysis (FMEA) Quality Function Deployment (QFD) ISO 9000 ISO 14000 Benchmarking Total Productive Maintenance Management and Planning Tools Quality by Design Information Technology
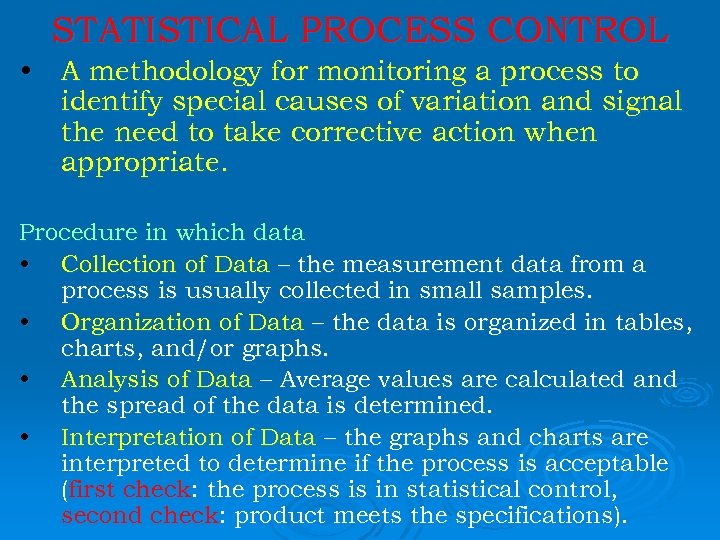 STATISTICAL PROCESS CONTROL • A methodology for monitoring a process to identify special causes of variation and signal the need to take corrective action when appropriate. Procedure in which data • Collection of Data – the measurement data from a process is usually collected in small samples. • Organization of Data – the data is organized in tables, charts, and/or graphs. • Analysis of Data – Average values are calculated and the spread of the data is determined. • Interpretation of Data – the graphs and charts are interpreted to determine if the process is acceptable (first check: the process is in statistical control, second check: product meets the specifications).
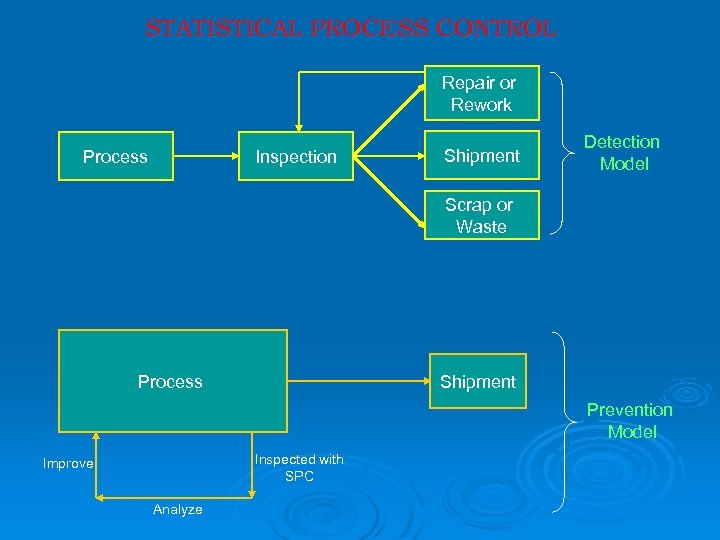 STATISTICAL PROCESS CONTROL Repair or Rework Process Inspection Shipment Detection Model Scrap or Waste Process Shipment Prevention Model Inspected with SPC Improve Analyze
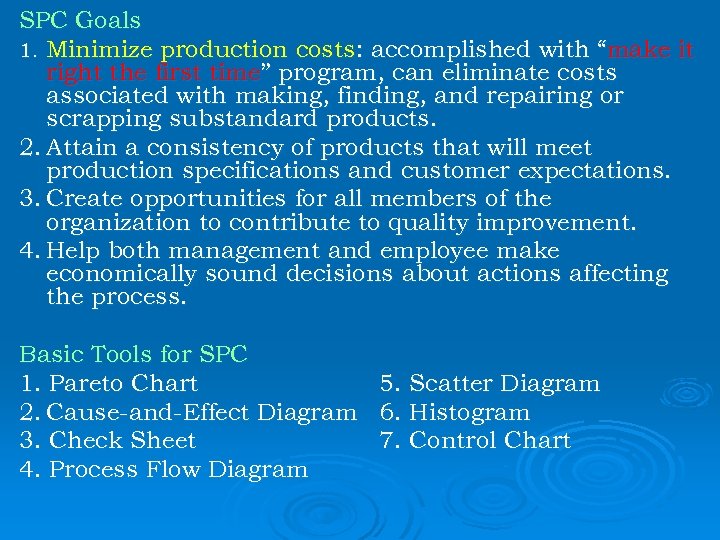 SPC Goals 1. Minimize production costs: accomplished with “make it right the first time” program, can eliminate costs associated with making, finding, and repairing or scrapping substandard products. 2. Attain a consistency of products that will meet production specifications and customer expectations. 3. Create opportunities for all members of the organization to contribute to quality improvement. 4. Help both management and employee make economically sound decisions about actions affecting the process. Basic Tools for SPC 1. Pareto Chart 2. Cause-and-Effect Diagram 3. Check Sheet 4. Process Flow Diagram 5. Scatter Diagram 6. Histogram 7. Control Chart
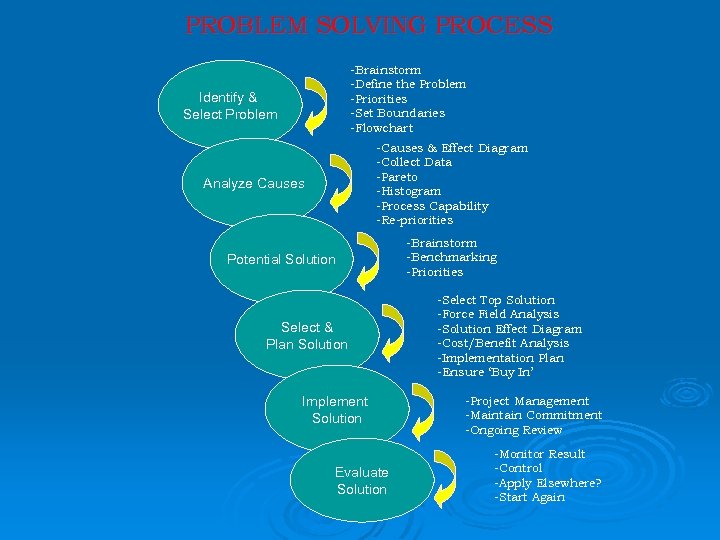 PROBLEM SOLVING PROCESS -Brainstorm -Define the Problem -Priorities -Set Boundaries -Flowchart Identify & Select Problem -Causes & Effect Diagram -Collect Data -Pareto -Histogram -Process Capability -Re-priorities Analyze Causes Potential Solution Select & Plan Solution Implement Solution Evaluate Solution -Brainstorm -Benchmarking -Priorities -Select Top Solution -Force Field Analysis -Solution Effect Diagram -Cost/Benefit Analysis -Implementation Plan -Ensure ‘Buy In’ -Project Management -Maintain Commitment -Ongoing Review -Monitor Result -Control -Apply Elsewhere? -Start Again
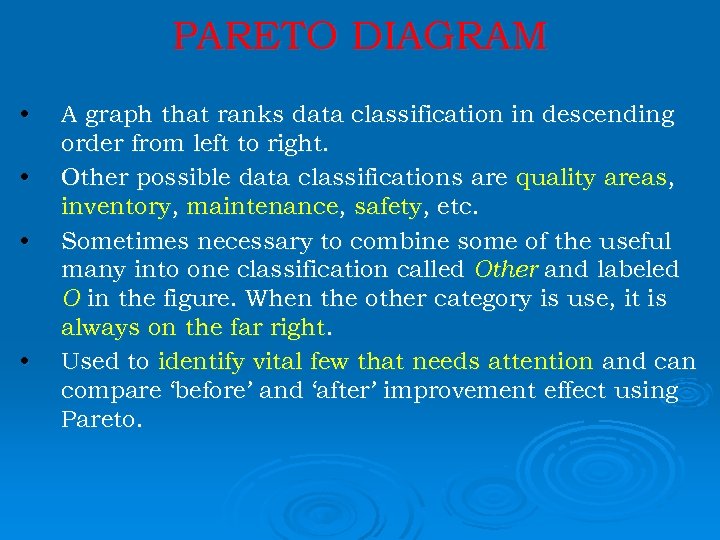 PARETO DIAGRAM • • A graph that ranks data classification in descending order from left to right. Other possible data classifications are quality areas, inventory, maintenance, safety, etc. Sometimes necessary to combine some of the useful many into one classification called Other and labeled O in the figure. When the other category is use, it is always on the far right. Used to identify vital few that needs attention and can compare ‘before’ and ‘after’ improvement effect using Pareto.
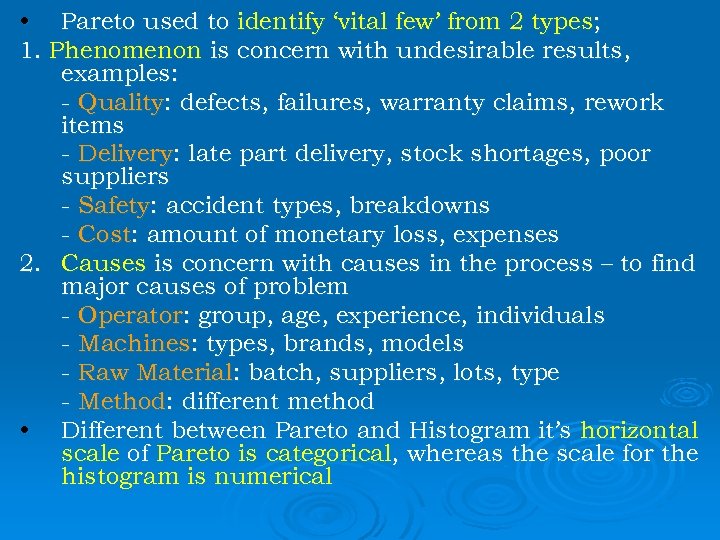 • Pareto used to identify ‘vital few’ from 2 types; 1. Phenomenon is concern with undesirable results, examples: - Quality: defects, failures, warranty claims, rework items - Delivery: late part delivery, stock shortages, poor suppliers - Safety: accident types, breakdowns - Cost: amount of monetary loss, expenses 2. Causes is concern with causes in the process – to find major causes of problem - Operator: group, age, experience, individuals - Machines: types, brands, models - Raw Material: batch, suppliers, lots, type - Method: different method • Different between Pareto and Histogram it’s horizontal scale of Pareto is categorical, whereas the scale for the histogram is numerical
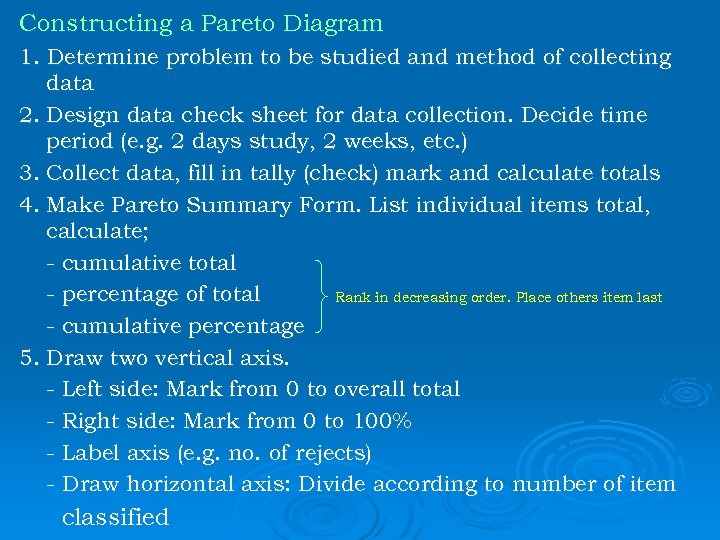 Constructing a Pareto Diagram 1. Determine problem to be studied and method of collecting data 2. Design data check sheet for data collection. Decide time period (e. g. 2 days study, 2 weeks, etc. ) 3. Collect data, fill in tally (check) mark and calculate totals 4. Make Pareto Summary Form. List individual items total, calculate; - cumulative total - percentage of total Rank in decreasing order. Place others item last - cumulative percentage 5. Draw two vertical axis. - Left side: Mark from 0 to overall total - Right side: Mark from 0 to 100% - Label axis (e. g. no. of rejects) - Draw horizontal axis: Divide according to number of item classified
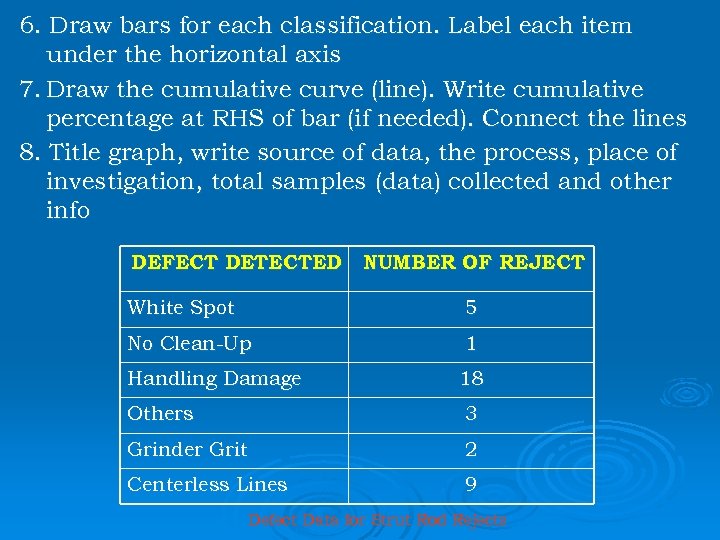 6. Draw bars for each classification. Label each item under the horizontal axis 7. Draw the cumulative curve (line). Write cumulative percentage at RHS of bar (if needed). Connect the lines 8. Title graph, write source of data, the process, place of investigation, total samples (data) collected and other info DEFECT DETECTED NUMBER OF REJECT White Spot 5 No Clean-Up 1 Handling Damage 18 Others 3 Grinder Grit 2 Centerless Lines 9 Defect Data for Strut Rod Rejects
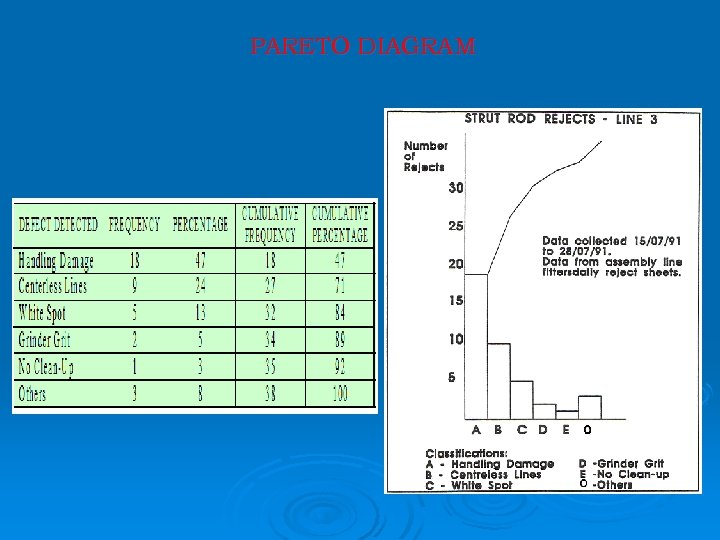 PARETO DIAGRAM
 CAUSE-and-EFFECT DIAGRAM • A picture composed of lines and symbols designed to represent a meaningful relationship between an effect and its causes. • Used to investigate either a “bad” effect and to take action to correct the causes or a “good” effect and to learn those causes responsible. • The effect is the quality characteristics that needs improvement. • Causes are usually broken down into the major causes of work methods, materials, machines, man’s, environment, etc. Each major causes is further subdivided into numerous minor causes.
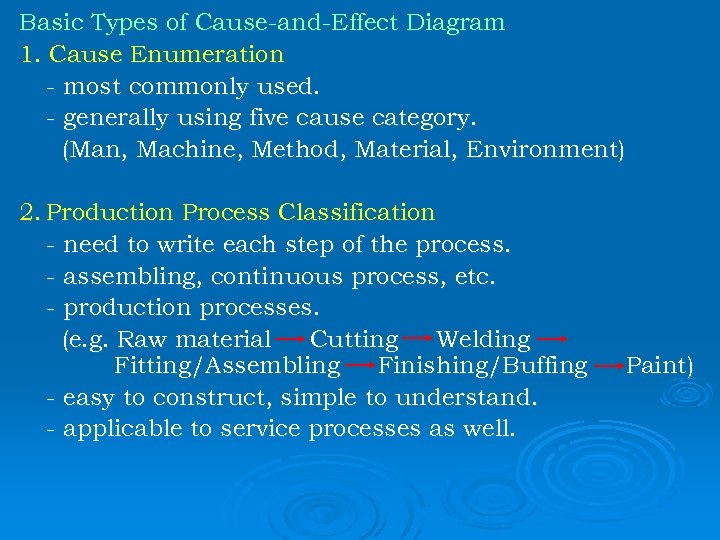 Basic Types of Cause-and-Effect Diagram 1. Cause Enumeration - most commonly used. - generally using five cause category. (Man, Machine, Method, Material, Environment) 2. Production Process Classification - need to write each step of the process. - assembling, continuous process, etc. - production processes. (e. g. Raw material Cutting Welding Fitting/Assembling Finishing/Buffing - easy to construct, simple to understand. - applicable to service processes as well. Paint)
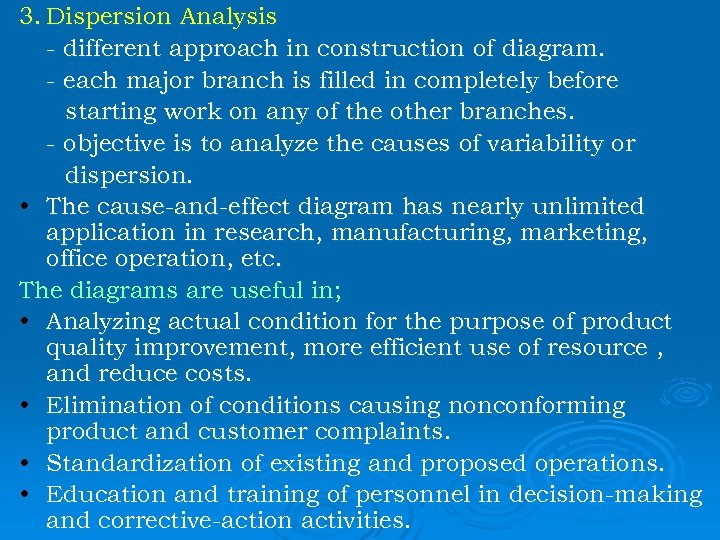 3. Dispersion Analysis - different approach in construction of diagram. - each major branch is filled in completely before starting work on any of the other branches. - objective is to analyze the causes of variability or dispersion. • The cause-and-effect diagram has nearly unlimited application in research, manufacturing, marketing, office operation, etc. The diagrams are useful in; • Analyzing actual condition for the purpose of product quality improvement, more efficient use of resource , and reduce costs. • Elimination of conditions causing nonconforming product and customer complaints. • Standardization of existing and proposed operations. • Education and training of personnel in decision-making and corrective-action activities.
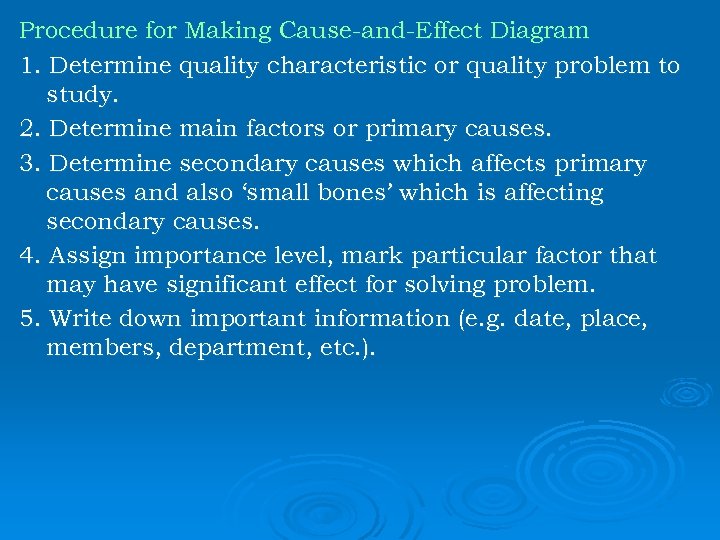 Procedure for Making Cause-and-Effect Diagram 1. Determine quality characteristic or quality problem to study. 2. Determine main factors or primary causes. 3. Determine secondary causes which affects primary causes and also ‘small bones’ which is affecting secondary causes. 4. Assign importance level, mark particular factor that may have significant effect for solving problem. 5. Write down important information (e. g. date, place, members, department, etc. ).
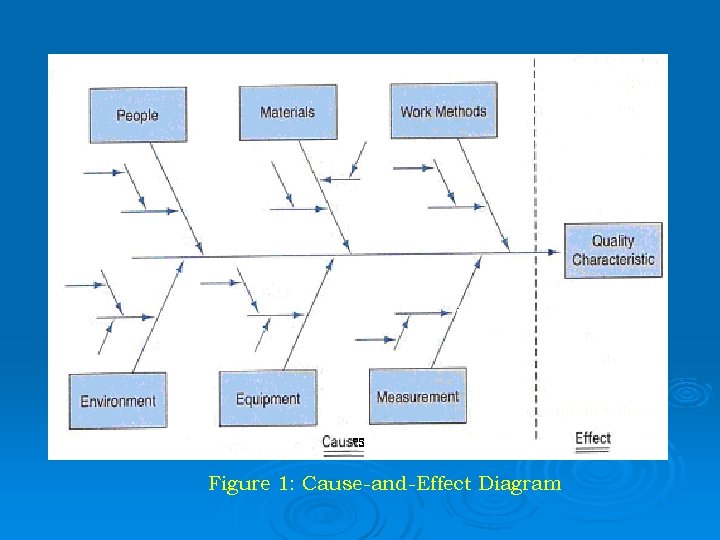 Figure 1: Cause-and-Effect Diagram
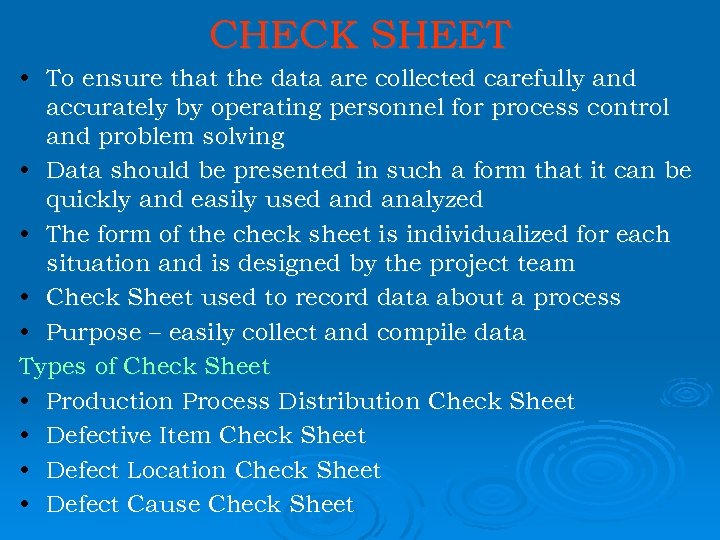 CHECK SHEET • To ensure that the data are collected carefully and accurately by operating personnel for process control and problem solving • Data should be presented in such a form that it can be quickly and easily used analyzed • The form of the check sheet is individualized for each situation and is designed by the project team • Check Sheet used to record data about a process • Purpose – easily collect and compile data Types of Check Sheet • Production Process Distribution Check Sheet • Defective Item Check Sheet • Defect Location Check Sheet • Defect Cause Check Sheet
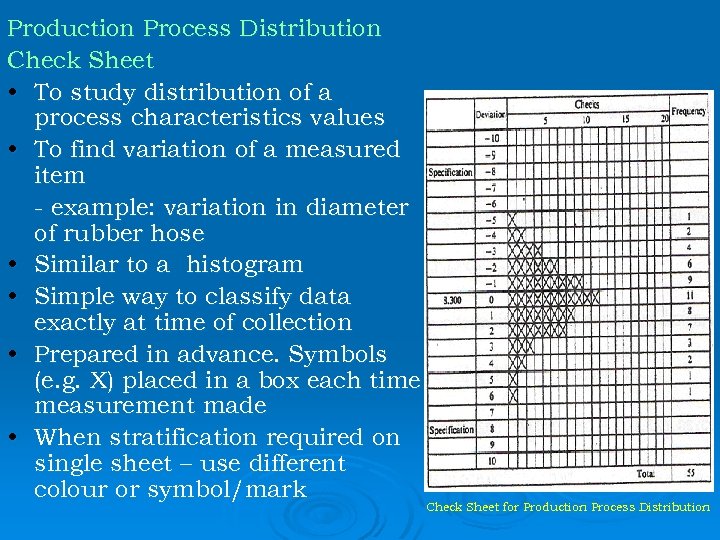 Production Process Distribution Check Sheet • To study distribution of a process characteristics values • To find variation of a measured item - example: variation in diameter of rubber hose • Similar to a histogram • Simple way to classify data exactly at time of collection • Prepared in advance. Symbols (e. g. X) placed in a box each time measurement made • When stratification required on single sheet – use different colour or symbol/mark Check Sheet for Production Process Distribution
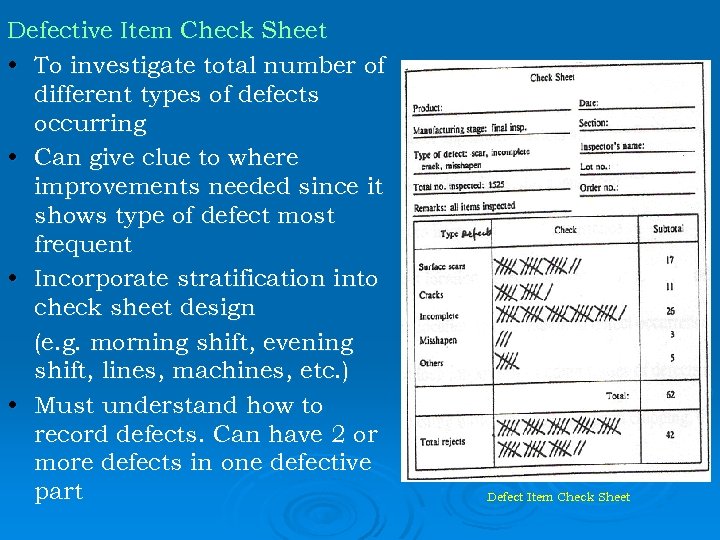 Defective Item Check Sheet • To investigate total number of different types of defects occurring • Can give clue to where improvements needed since it shows type of defect most frequent • Incorporate stratification into check sheet design (e. g. morning shift, evening shift, lines, machines, etc. ) • Must understand how to record defects. Can have 2 or more defects in one defective part Defect Item Check Sheet
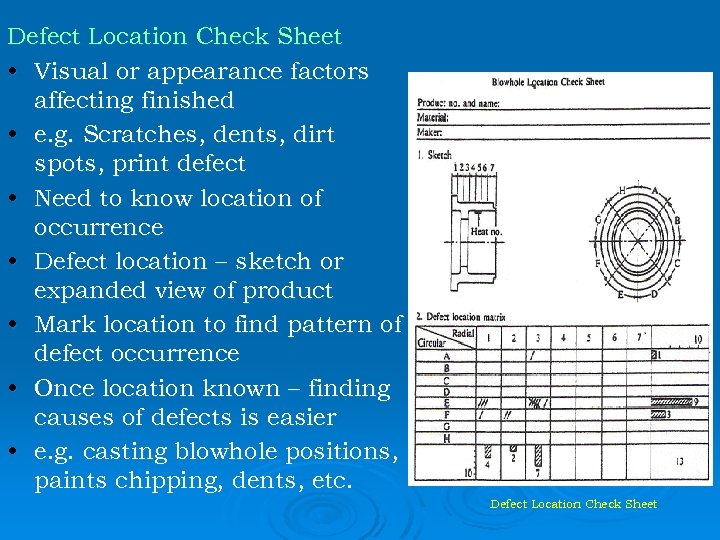 Defect Location Check Sheet • Visual or appearance factors affecting finished • e. g. Scratches, dents, dirt spots, print defect • Need to know location of occurrence • Defect location – sketch or expanded view of product • Mark location to find pattern of defect occurrence • Once location known – finding causes of defects is easier • e. g. casting blowhole positions, paints chipping, dents, etc. Defect Location Check Sheet
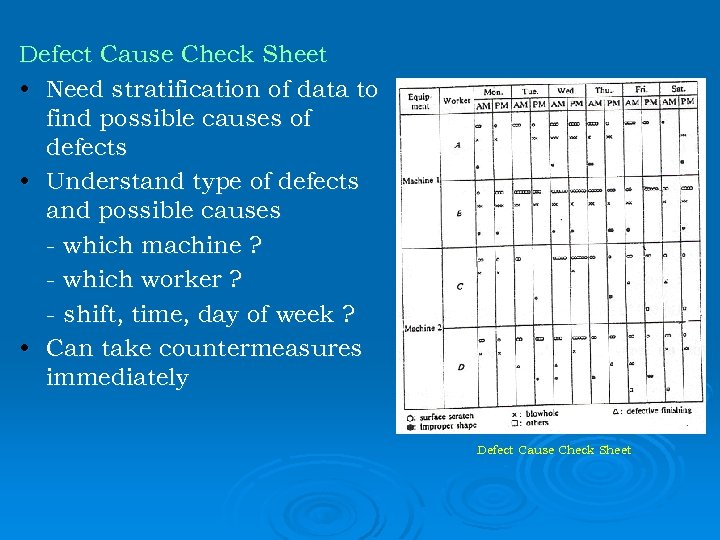 Defect Cause Check Sheet • Need stratification of data to find possible causes of defects • Understand type of defects and possible causes - which machine ? - which worker ? - shift, time, day of week ? • Can take countermeasures immediately Defect Cause Check Sheet
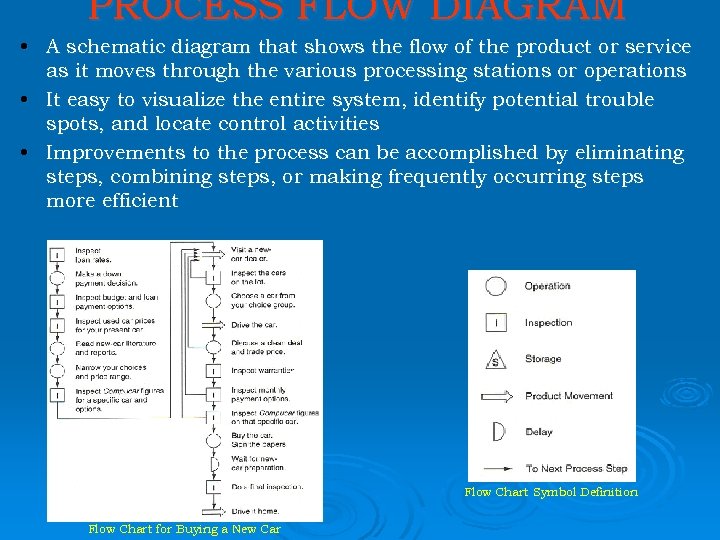 PROCESS FLOW DIAGRAM • A schematic diagram that shows the flow of the product or service as it moves through the various processing stations or operations • It easy to visualize the entire system, identify potential trouble spots, and locate control activities • Improvements to the process can be accomplished by eliminating steps, combining steps, or making frequently occurring steps more efficient Flow Chart Symbol Definition Flow Chart for Buying a New Car
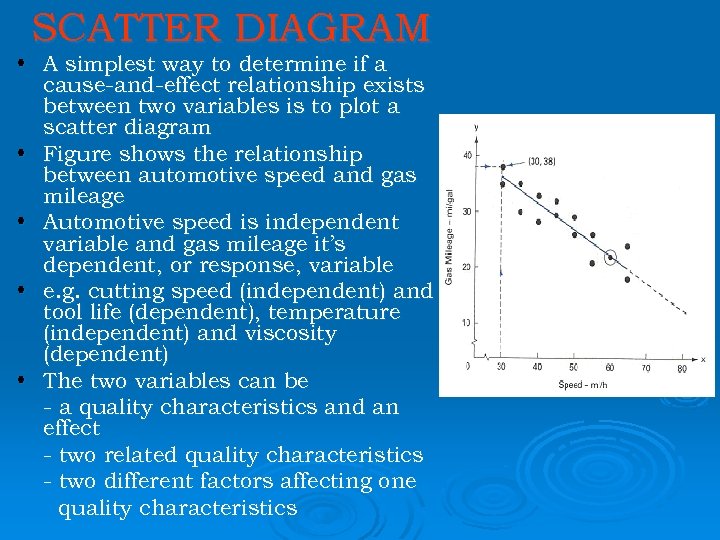 SCATTER DIAGRAM • A simplest way to determine if a cause-and-effect relationship exists between two variables is to plot a scatter diagram • Figure shows the relationship between automotive speed and gas mileage • Automotive speed is independent variable and gas mileage it’s dependent, or response, variable • e. g. cutting speed (independent) and tool life (dependent), temperature (independent) and viscosity (dependent) • The two variables can be - a quality characteristics and an effect - two related quality characteristics - two different factors affecting one quality characteristics
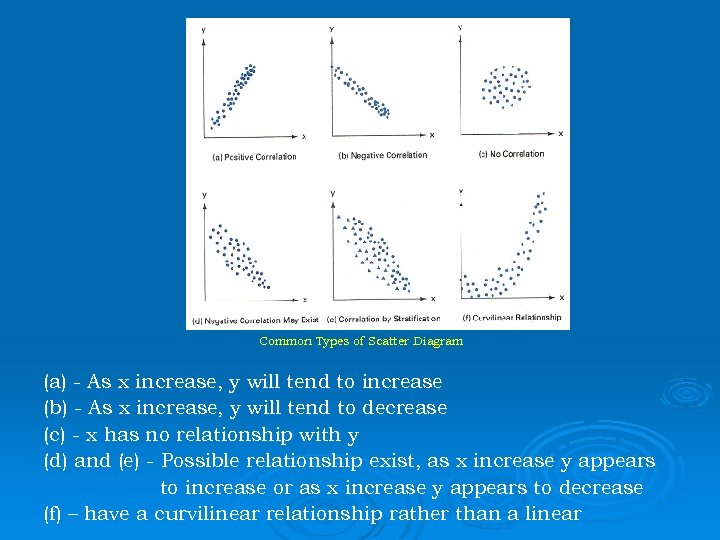 Common Types of Scatter Diagram (a) - As x increase, y will tend to increase (b) - As x increase, y will tend to decrease (c) - x has no relationship with y (d) and (e) - Possible relationship exist, as x increase y appears to increase or as x increase y appears to decrease (f) – have a curvilinear relationship rather than a linear
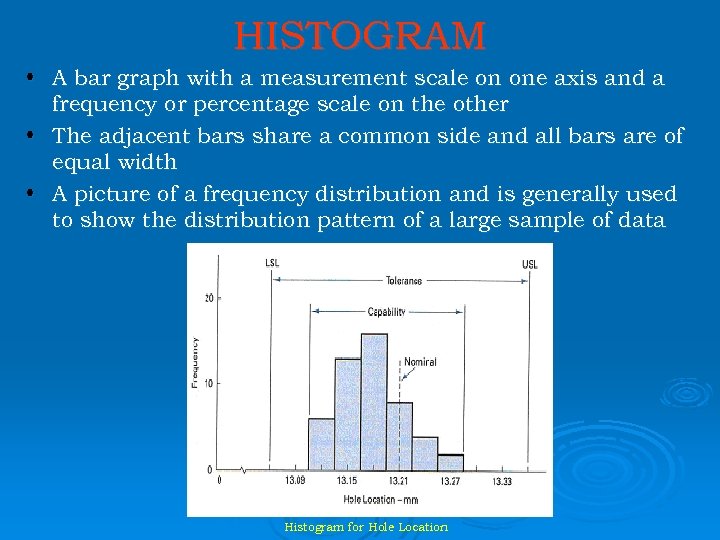 HISTOGRAM • A bar graph with a measurement scale on one axis and a frequency or percentage scale on the other • The adjacent bars share a common side and all bars are of equal width • A picture of a frequency distribution and is generally used to show the distribution pattern of a large sample of data Histogram for Hole Location
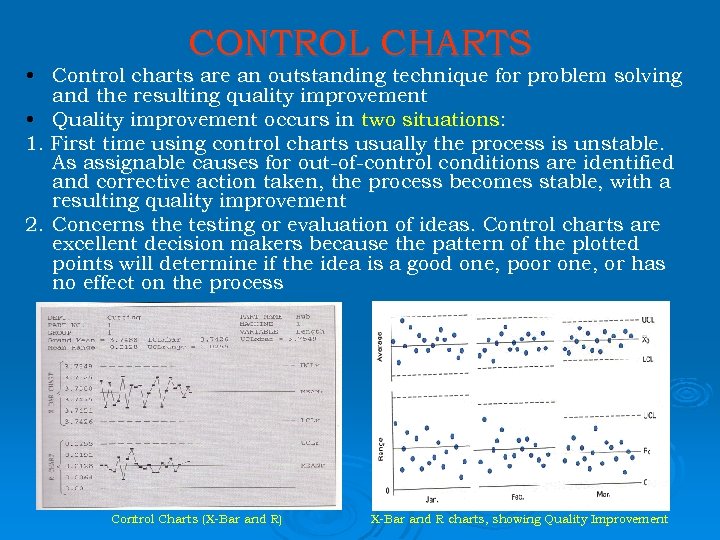 CONTROL CHARTS • Control charts are an outstanding technique for problem solving and the resulting quality improvement • Quality improvement occurs in two situations: 1. First time using control charts usually the process is unstable. As assignable causes for out-of-control conditions are identified and corrective action taken, the process becomes stable, with a resulting quality improvement 2. Concerns the testing or evaluation of ideas. Control charts are excellent decision makers because the pattern of the plotted points will determine if the idea is a good one, poor one, or has no effect on the process Control Charts (X-Bar and R) X-Bar and R charts, showing Quality Improvement
 TQM-Tools and Techniques Acceptance Sampling • See Chapters 6 Reliability • See Chapter 7 Design of Experiments (DOE) • Used to determine those variables in a process that are critical and their target values • Three approaches - Classical - Taguchi - Shainin
 TQM-Tools and Techniques Taguchi’s Quality Engineering • Loss function concept • Concept of robustness Failure Mode Effect Analysis (FMEA) • Combines technology and experience of people to identify failure modes and planning for its elimination • It is a “before-the-event action • Two types of FMEA-Design and Process
 TQM-Tools and Techniques Quality Function Deployment (QFD) • Ensures accurate deployment of the “voice-of-thecustomer” • Answers the following questions: - What do customers want? - Are all wants equally important? - Will delivering perceived needs yield a competitive advantage? - How can we change the product, service or process? - How does an engineering decision affect customer perception? - Does an engineering change affect other technical descriptors? - What is the relationship to parts deployment, process planning, and production planning?
 TQM-Tools and Techniques ISO stands for International Organization for Standards. The 9000 series is a standardized Quality Management System (QMS). It consist in three standards • ISO 9000 covers fundamentals and vocabulary • ISO 9001 is the requirements • ISO 9004 provides guidance for performance improvement • Benchmarking is a new way of doing business that was developed by Xerox in 1979. The idea is to find another company that is doing a particular process better than your company, and then, using that information to improve the process.
 TQM-Tools and Techniques • • Total Productive Maintenance (TPM) is a technique that utilizes the entire work force to obtain the optimum use of equipment. The technical skills in TPM are: daily equipment checking, machine inspection, fine-tuning machinery, lubrication, trouble-shooting, and repair.
 TQM-Tools and Techniques Management and Planning Tools (Chapter 8): 1. Affinity diagram 2. Interrelationship diagram 3. Tree diagram 4. Prioritization matrices 5. Matrix diagram 6. Process decision program chart 7. Activity network diagram
 TQM-Tools and Techniques • • Quality by Design is the practice of using a multidisciplinary team to conduct product or service conception, design, and production planning at one time. The major benefits are faster product development, shorter time to market, better quality, less work-inprocess, fewer engineering change orders, and increased productivity
 TQM-Tools and Techniques Product Liability Consumers are initiating lawsuits in record numbers as a result of injury, death, and property damage from faulty product or service design of faulty workmanship. Reasons for injuries: • Behavior or knowledge of a user • Environment where the product is used • Whether or not the factory has designed and the product using safety analysis and quality control
 TQM-Tools and Techniques • Information Technology is defined as computer technology (either hardware or software) for processing and storing information, as well as communications technology for transmitting information.


