2ea94a77ad55c9826503e07e38e026cc.ppt
- Количество слайдов: 34


Spring 2007 www. umsl. edu/~iclabs

Power. Point Basics n Why is it a good tool to use? n n n Easier than 3 X 5 Note Cards Organized presentations are “heard” better More information can be given AND REMEMBERED Pictures can be used along with words Handouts can be used as well

Power. Point Basics n Microsoft Product n Works like WORD n n Text control Cut, Copy and Paste Control Color control Many Menu items the same n n n Insert Toolbars Clip. Art

Power. Point Basics n Before you begin n Know your topic Know your audience Know ‘how’ it will be presented n n Live Intranet or Internet Static or ‘available’ file Practice, Practice

Power. Point Basics n How to begin n n Start->Programs->Office Apps->Power. Point Open a Blank presentation or Design Template n Choose appropriate color and theme n Do not let the design take over the presentation n Color DOES matter Text Size n Type of Text n

Test Slide § Is this a viable option for text size? § § § How about this font? This one? Colors? – How is this? – Or this?

Power. Point Basics n Opening Title Slide n n Occurs when you open Power. Point How to insert a NEW SLIDE

Power. Point Basics n Main body of Slides n 4 Types

Power. Point Basics n 1. Informational n n 2. Visual n n n Images, charts, graphs, pictures Content Layout 3. Combination n n Text or Text and Content layout Text and Content Layouts 4. Other

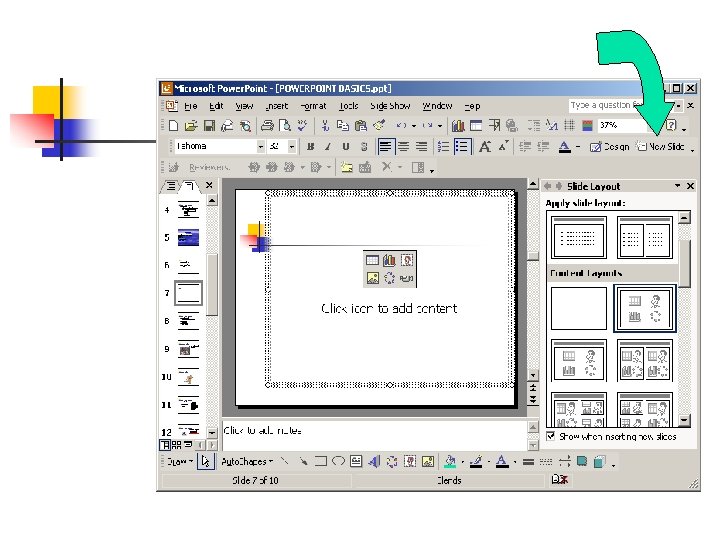
The right side of the screen shows the different choices for SLIDE LAYOUT The BLUE BOX will highlight the layout chosen

Power. Point Basics n n Notice the layout chosen has a title section and a “bulleted” text area below (just like this slide) Click on another layout and see how the slide changes

Bullet Format n Choose “Slide Layout” in “Common Tasks” n Choose any of the bullet formats n bullets with title n two columns with bullets n bullets with charts n bullets with clip art

How to add Clip Art n n n Select “Slide Layout” from the Common Tasks menu Select one of the layouts that include Clip Art Follow the directions on the computer to add the Clip Art

Adding Clip Art n n Double click the clip art box Now you can view all of your choices of clips

Selecting and Adjusting Art n Select your art n Select “insert clip” n Adjust the picture to your desired size

Example Slides n Pictures always talk LOUDER!

Boring Talk? ADD “Pizazz”

How to add Charts n Select “Slide Layout” from the Common Tasks menu n Select one of the layouts that include Charts n Follow the directions on the computer to add the Chart

Adding Charts n n Double click the chart box or Click on Chart icon in toolbar Enter information in spreadsheet Right click on the chart to change options

Power. Point Basics n n Excel Graphs “As you can see from these numbers…. . ”

How to Open Your Slide Show 1. Use the tool bar below on the left after opening presentation n click the icon on the right (looks like a projection screen) 2. Use the menu bar above n Go to Slide Show menu n Select “View Show”

To View the Next or Previous Slide n To view the next slide: n n left click the mouse once press the down arrow on the keyboard press the Page Down button on the keyboard To view the previous slide: n n n right click the mouse once and select “Previous Slide” from the menu press the up arrow on the keyboard press the Page Up button on the keyboard

Power. Point Basics n n Web site Links can be added as well and used in the presentation www. microsoft. com

Power. Point Basics n K. I. S. S. n Do not distract audience n n n Custom Animation Sounds Transition from Slide to Slide n n Movement Timing

Transition from Slide to Slide n n Click on “Slide Show” in Menu bar Click on “Slide Transition” n n Option menu opens on right Click on desired option n n This option is then previewed for you on this slide Click different choices to see what works best

Transition from Slide to Slide n Modify the transition n n Change the Speed Add sound Change HOW the slide is to advance by checking the box for “On mouse click” or “Automatically after” and set the time Apply to all slides or just to this one

Power. Point Basics n BR CAREFUL OF OVER DOING n n n Do not forget the real reason Do not get into the “Uh’s and Ah’s” Do not “wow” them so much so that they do not remember the purpose of your presentation.

Power. Point Basics n Saving your file n n n Large size, do not try to hurry Print off copies of slides, (6 slides each) for notes Add notes to the bottom for your use

Power. Point Basics n Questions?

Power. Point Basics n Self-quiz n n n 5 slide show Design Template for ALL slides UMSL as Topic Audience is High School Seniors Title slide n n Custom Animation Slide Transition

Power. Point Basics n Self-quiz Continued n n n Insert Image from UMSL website List UMSL Web site URL Save your document

Attention !!!!!! n Duplex Printing is now available in our Labs.

Additional Information n www. micros. umsl. edu n n http: //mell. umsystem. edu n n The Microcomputer Program at the University of Missouri-St. Louis offers day and evening computer courses as part of the Chancellor's Certificate series. Microsoft E-Learning Library has tutorials on many MS Office products available to all UMSL students and staff http: //www. umsl. edu/stg n The Online Student Technology Guide has answers to many computing questions.
2ea94a77ad55c9826503e07e38e026cc.ppt