- Размер: 6.3 Mегабайта
- Количество слайдов: 3
Описание презентации Replacement of compressor 【 Scroll compressor 【 Terminal по слайдам
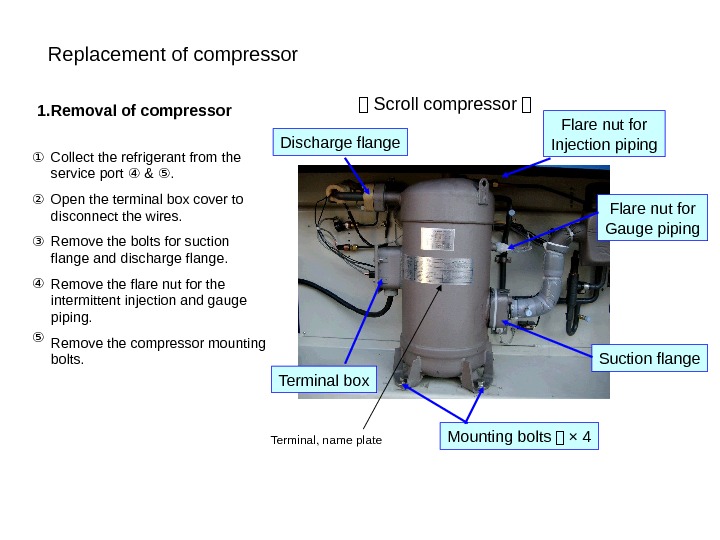
 Replacement of compressor 【 Scroll compressor 【 Terminal box Discharge flange Flare nut for Injection piping Suction flange Flare nut for Gauge piping Mounting bolts 【 × 4 Terminal, name plate 1. Removal of compressor Collect the refrigerant from the service port & . ④ ⑤ Open the terminal box cover to disconnect the wires. Remove the bolts for suction flange and discharge flange. Remove the flare nut for the intermittent injection and gauge piping. Remove the compressor mounting bolts. ① ② ③ ④ ⑤
 Replacement of compressor 【 Terminal box 【 CTPLay wires at the left side of the terminal board. BLACK 24 White 23 Red 22 yellow 132 Gray 131 Wire color Wire number Pay an utmost attention not to wire incorrectly for the compressor. Otherwise, the compressor may turn in reverse direction causing burn out. Terminal, name plate
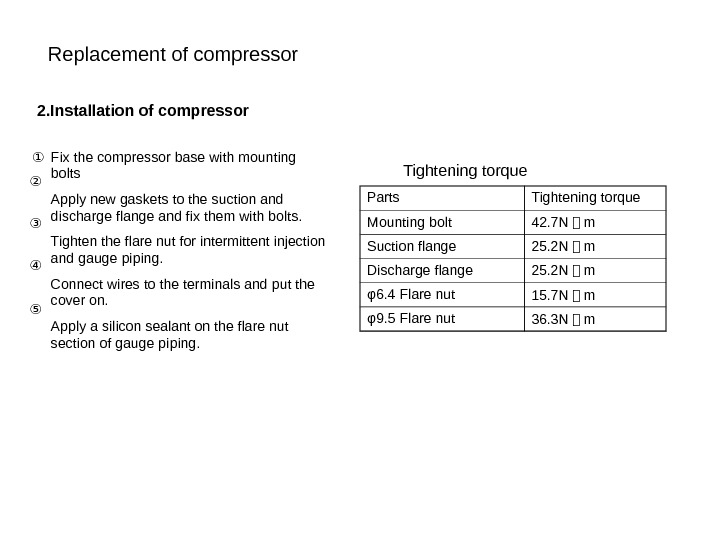
 Replacement of compressor 2. Installation of compressor Fix the compressor base with mounting bolts Apply new gaskets to the suction and discharge flange and fix them with bolts. Tighten the flare nut for intermittent injection and gauge piping. Connect wires to the terminals and put the cover on. Apply a silicon sealant on the flare nut section of gauge piping. ① ② ③ ④ ⑤ Parts Tightening torque Mounting bolt 42. 7 N 【 m Suction flange 25. 2 N 【 m Discharge flange 25. 2 N 【 m φ6. 4 Flare nut 15. 7 N 【 m φ9. 5 Flare nut 36. 3 N 【 m. Tightening torque


