05f961a46ad74e9bc5fb7a098106dd0b.ppt
- Количество слайдов: 61
 Quality Control of Industrial Painting Operations William D. Corbett KTA-Tator, Inc.
 Webinar Content • • Industry standards for coating application QC Developing a quality control plan for painting Navigating a Technical (Product) Data Sheet Measuring ambient conditions and surface temperature Witnessing mixing, thinning and application procedures Calculation and measurement of wet film thickness Dry film thickness measurement Post-application testing ØCure/hardness ØHoliday/pinhole detection ØAdhesion ØIdentifying application defects
 Learning Objectives/Outcomes • Completion of this webinar will enable the participant to: Ø Describe the industry standards that pertain to coating application Ø Prepare a Quality Control Plan for painting Ø Describe the content of a Technical (Product) Data Sheet Ø Measure environmental conditions and surface temperature prior to coating mixing Ø Evaluate mixing, thinning and application procedures Ø Calculate and measure wet film thickness Ø Measure dry film thickness Ø Perform post-application testing
 Industry Standards for Coating Application • SSPC-PA 1 Shop, Field and Maintenance Painting of Steel • SSPC-PA 2 (frequency and tolerance of coating thickness measurements on steel) • SSPC-PA 9 (frequency and tolerance of coating thickness measurements on concrete) • ASTM E 337 (use of whirling/aspirating psychrometers) • ASTM D 4414 (wet film thickness measurement) • ASTM D 7091/D 6132 (dry film thickness measurement) • ASTM D 5402/D 4752/D 3363/D 1640 (drying, curing, hardness) • ASTM D 5162/D 4787 (holiday/pinhole detection) • ASTM D 3359/D 6677/D 4541/D 7234 (adhesion)
 SSPC Paint Application Specification No. 1 (PA 1) • Shop, Field and Maintenance Painting of Steel • Common specification reference • Contains 14 Sections: 1. 2. 3. 4. 5. 6. 7. Scope Description Referenced Standards Definitions Pre-application Procedures Factors Affecting Application Methods 8. Shop Coating 9. Field Coating 10. Repair of Damaged Coatings 11. Appl. Proc. For Coatings 12. Curing & Handling 13. Inspection 14. Safety & Environmental
 Purpose of a Quality Control Plan • Provides QC Inspector with: ØA systematic inspection and testing plan that covers all phases of work in sequence ØA written document that lists what to inspect, how to inspect and the acceptance criteria ØA tool to enable an inspector to navigate through and extract inspection check points from the specification • May be a required contract submittal
 Benefits of a Quality Control Plan Coating specifications can be complex documents Specifications typically contain the quality requirements for a coatings project Good inspection doesn’t happen by accident; it requires planning QC plans make specification compliance more streamlined and complete Provides a key communication tool between QA and QC inspection personnel
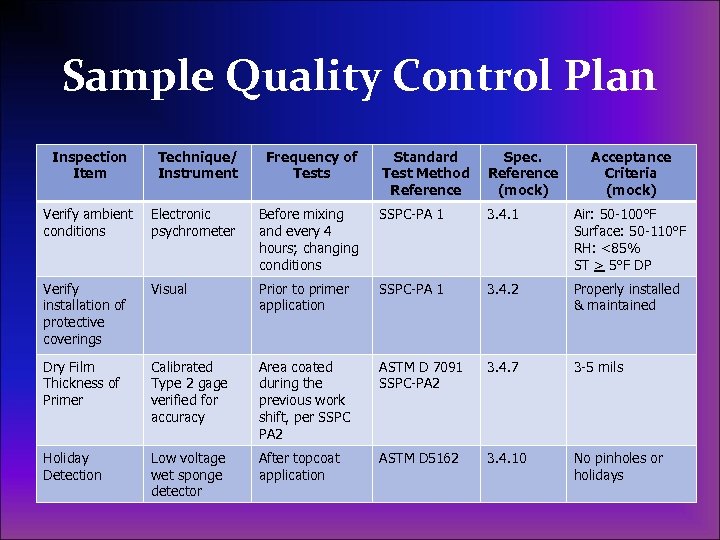 Sample Quality Control Plan Inspection Item Technique/ Instrument Frequency of Tests Standard Test Method Reference Spec. Reference (mock) Verify ambient conditions Electronic psychrometer Verify installation of protective coverings Acceptance Criteria (mock) Before mixing and every 4 hours; changing conditions SSPC-PA 1 3. 4. 1 Air: 50 -100°F Surface: 50 -110°F RH: <85% ST > 5°F DP Visual Prior to primer application SSPC-PA 1 3. 4. 2 Properly installed & maintained Dry Film Thickness of Primer Calibrated Type 2 gage verified for accuracy Area coated during the previous work shift, per SSPC PA 2 ASTM D 7091 SSPC-PA 2 3. 4. 7 3 -5 mils Holiday Detection Low voltage wet sponge detector After topcoat application ASTM D 5162 3. 4. 10 No pinholes or holidays
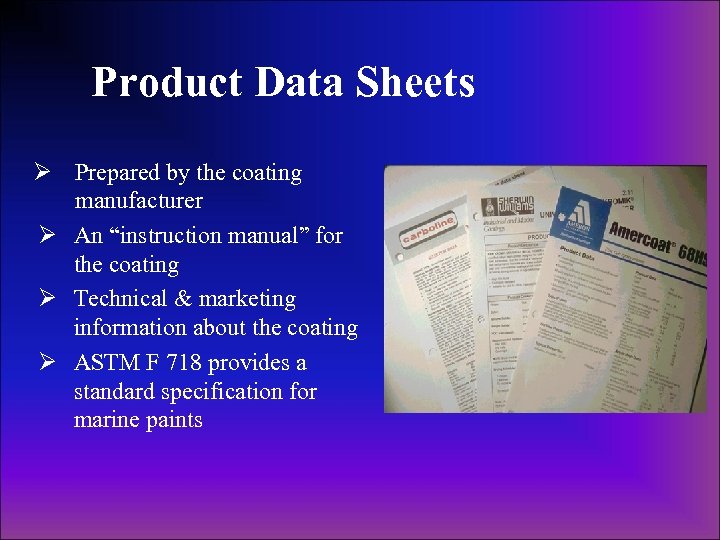 Product Data Sheets Ø Prepared by the coating manufacturer Ø An “instruction manual” for the coating Ø Technical & marketing information about the coating Ø ASTM F 718 provides a standard specification for marine paints
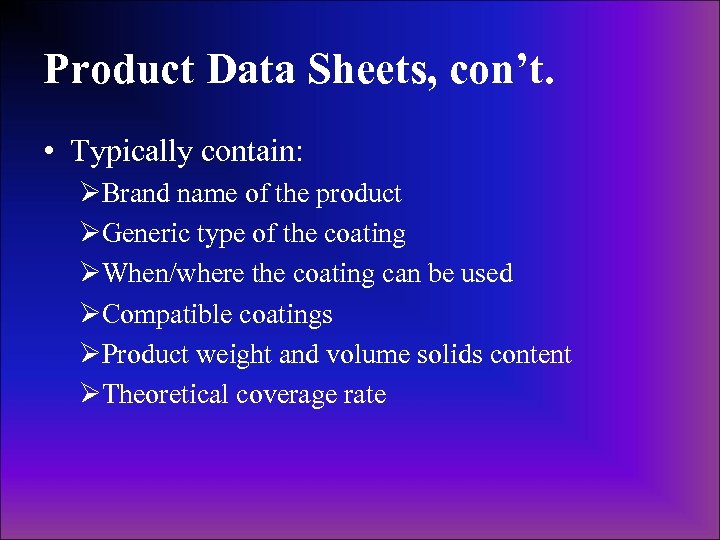 Product Data Sheets, con’t. • Typically contain: ØBrand name of the product ØGeneric type of the coating ØWhen/where the coating can be used ØCompatible coatings ØProduct weight and volume solids content ØTheoretical coverage rate
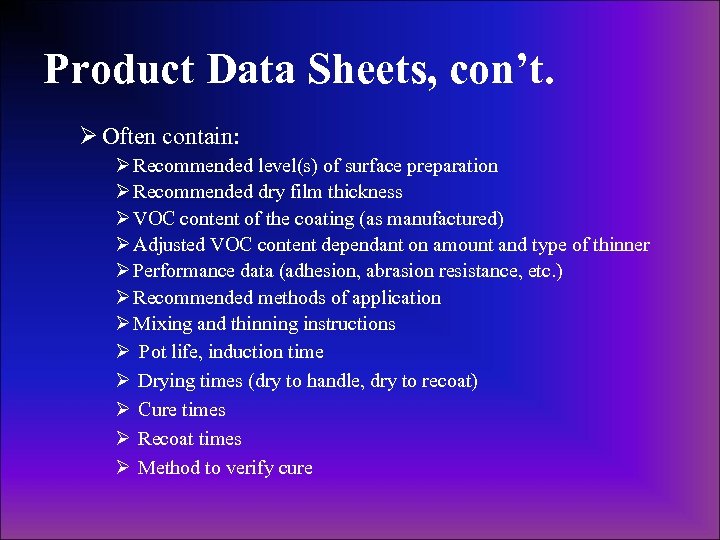 Product Data Sheets, con’t. Ø Often contain: Ø Recommended level(s) of surface preparation Ø Recommended dry film thickness Ø VOC content of the coating (as manufactured) Ø Adjusted VOC content dependant on amount and type of thinner Ø Performance data (adhesion, abrasion resistance, etc. ) Ø Recommended methods of application Ø Mixing and thinning instructions Ø Pot life, induction time Ø Drying times (dry to handle, dry to recoat) Ø Cure times Ø Recoat times Ø Method to verify cure
 Product Data Sheets Vs. Specification Requirements • Product data sheets contain recommendations • When the PDS and the project specification differ, the specification is the governing document (contract) • The specification may invoke the PDS • QC inspector should note discrepancies/vague information and advise the owner at the bidding stage and at the pre-job meeting
 Environmental Conditions for Coating Application • Air Temperature (min. & max. ) • Relative Humidity (min. or max) • Dew Point Temperature • Surface Temperature [min. 5 °F (3°C)] above Dew Point Temperature • Wind Speed (max. )
 Significance of Conditions • Air Temperature Ø Too cold or too hot can affect coating application & curing • Relative Humidity Ø Too damp or too dry can affect coating application & curing • Surface Temperature Ø Too cold or too hot can affect application & curing • Surface temperature at or below dew point temperature will result in condensation
 Significance of Conditions, con’t. • Wind Speed Ø Too windy can affect application (dry spray) and cause overspray damage • Mixing/application of coatings under adverse weather conditions can void the manufacturer’s warranty and is considered a specification nonconformance
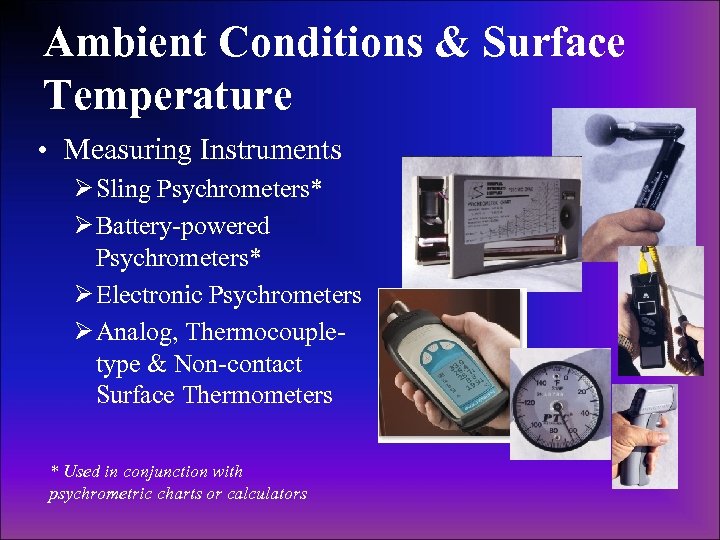 Ambient Conditions & Surface Temperature • Measuring Instruments Ø Sling Psychrometers* Ø Battery-powered Psychrometers* Ø Electronic Psychrometers Ø Analog, Thermocoupletype & Non-contact Surface Thermometers * Used in conjunction with psychrometric charts or calculators
 Sling Psychrometer
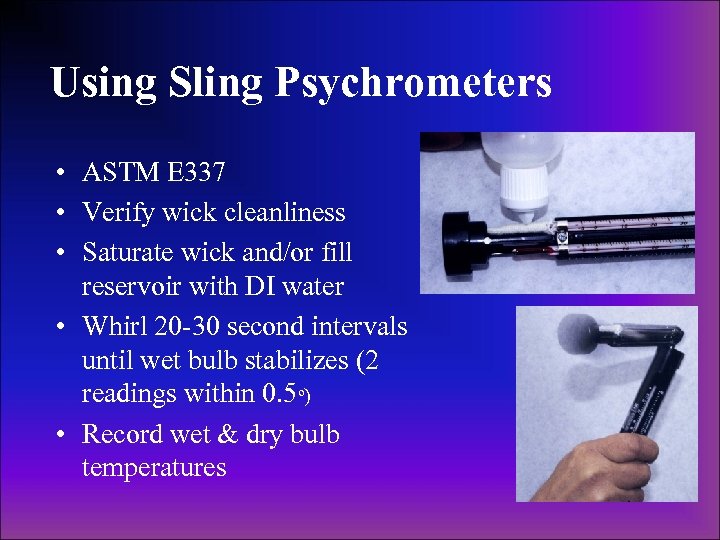 Using Sling Psychrometers • ASTM E 337 • Verify wick cleanliness • Saturate wick and/or fill reservoir with DI water • Whirl 20 -30 second intervals until wet bulb stabilizes (2 readings within 0. 5 o) • Record wet & dry bulb temperatures
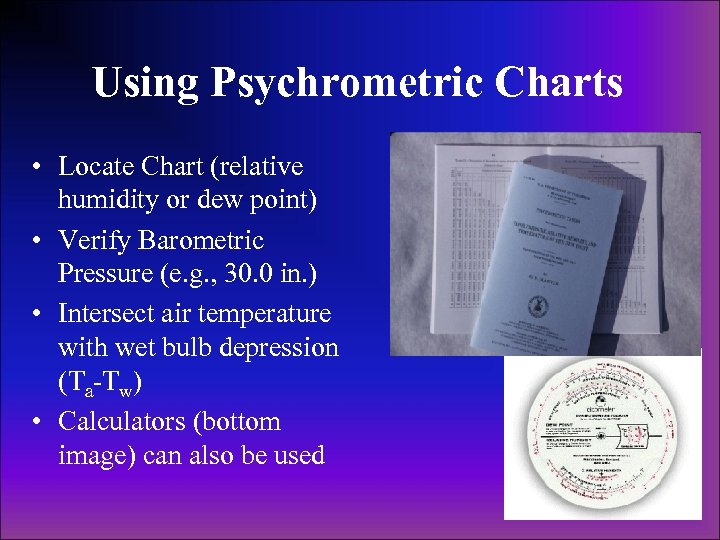 Using Psychrometric Charts • Locate Chart (relative humidity or dew point) • Verify Barometric Pressure (e. g. , 30. 0 in. ) • Intersect air temperature with wet bulb depression (Ta-Tw) • Calculators (bottom image) can also be used
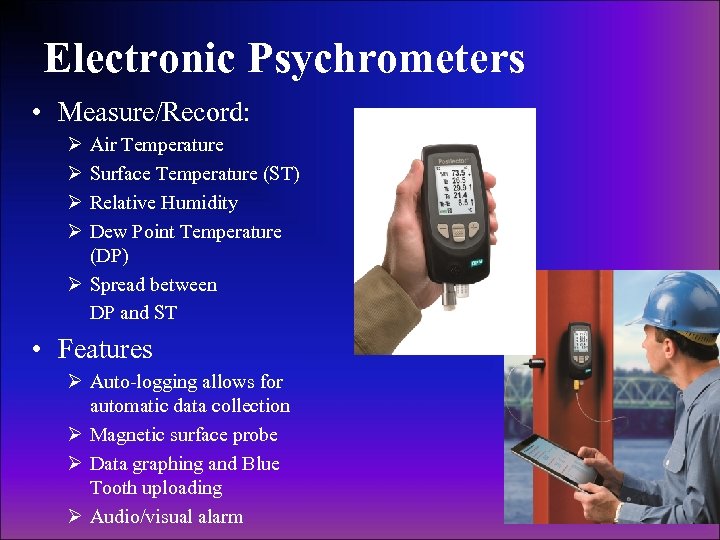 Electronic Psychrometers • Measure/Record: Ø Ø Air Temperature Surface Temperature (ST) Relative Humidity Dew Point Temperature (DP) Ø Spread between DP and ST • Features Ø Auto-logging allows for automatic data collection Ø Magnetic surface probe Ø Data graphing and Blue Tooth uploading Ø Audio/visual alarm
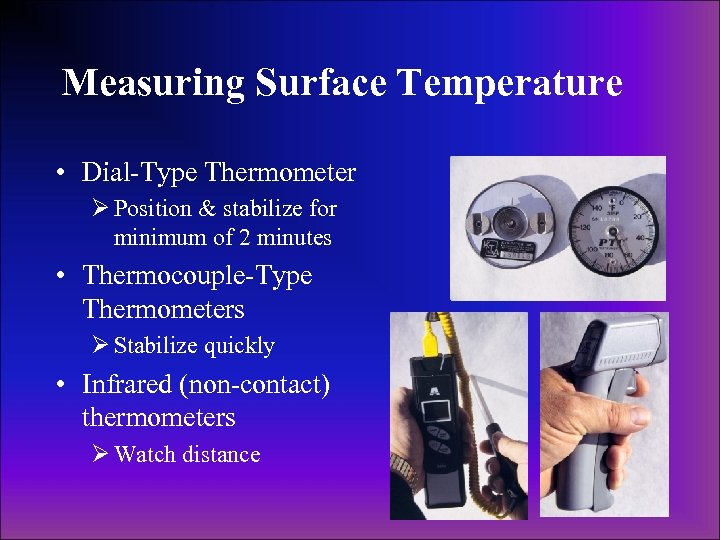 Measuring Surface Temperature • Dial-Type Thermometer Ø Position & stabilize for minimum of 2 minutes • Thermocouple-Type Thermometers Ø Stabilize quickly • Infrared (non-contact) thermometers Ø Watch distance
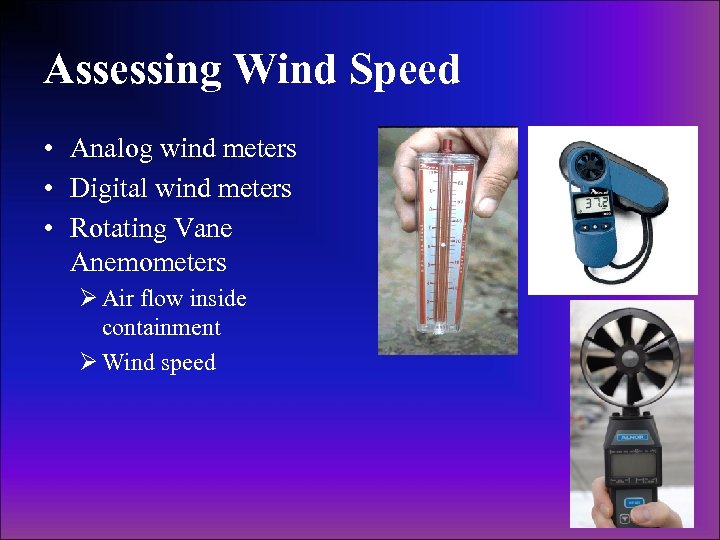 Assessing Wind Speed • Analog wind meters • Digital wind meters • Rotating Vane Anemometers Ø Air flow inside containment Ø Wind speed
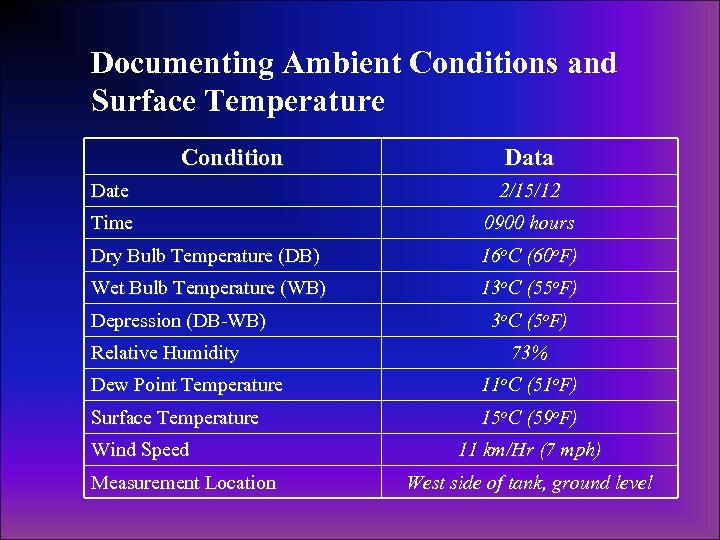 Documenting Ambient Conditions and Surface Temperature Condition Data Date 2/15/12 Time 0900 hours Dry Bulb Temperature (DB) 16 o. C (60 o. F) Wet Bulb Temperature (WB) 13 o. C (55 o. F) Depression (DB-WB) Relative Humidity 3 o. C (5 o. F) 73% Dew Point Temperature 11 o. C (51 o. F) Surface Temperature 15 o. C (59 o. F) Wind Speed Measurement Location 11 km/Hr (7 mph) West side of tank, ground level
 Significance of 5°F (3°C) • Theoretically, a small (<1°F) increase (surface temperature over dew point) will preclude moisture formation • Minimum increase of 5°F (3°C) compensates for: Ø Instrument tolerances Ø Varying conditions Ø Changing conditions
 Location and Frequency of Data Acquisition • Location Ø Dictated by where the work is being performed (e. g. , inside vs. outside of a containment; balcony of elevated storage tank vs. ground level) Ø If interior, with ventilation in operation Ø Shops: Blast or Paint bay area • Frequency Ø Prior to mixing of coatings Ø Four-hour data collection intervals is common Ø More frequent measurement if conditions are changing
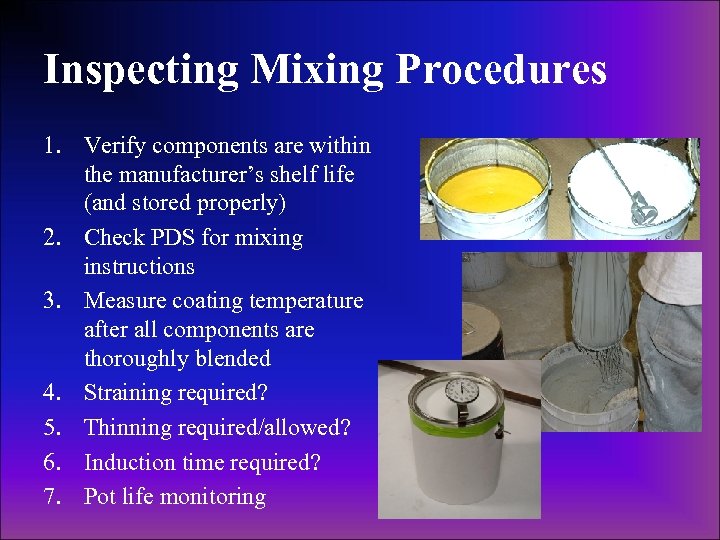 Inspecting Mixing Procedures 1. Verify components are within the manufacturer’s shelf life (and stored properly) 2. Check PDS for mixing instructions 3. Measure coating temperature after all components are thoroughly blended 4. Straining required? 5. Thinning required/allowed? 6. Induction time required? 7. Pot life monitoring
 Inspecting Thinning Procedures • Verify: Ø Correct type of thinner is used Ø Calculation of thinner quantity is accurate Ø Graduated containers are used to measure thinner • Consider impact on local VOC regulations
 Calculating the Target Wet Film Thickness • Sometimes the wet film thickness will be listed on the PDS (many times it is not) • Arriving at the target wet film thickness is necessary to arrive at the specified dry film thickness • Must be adjusted based on the amount of thinner added
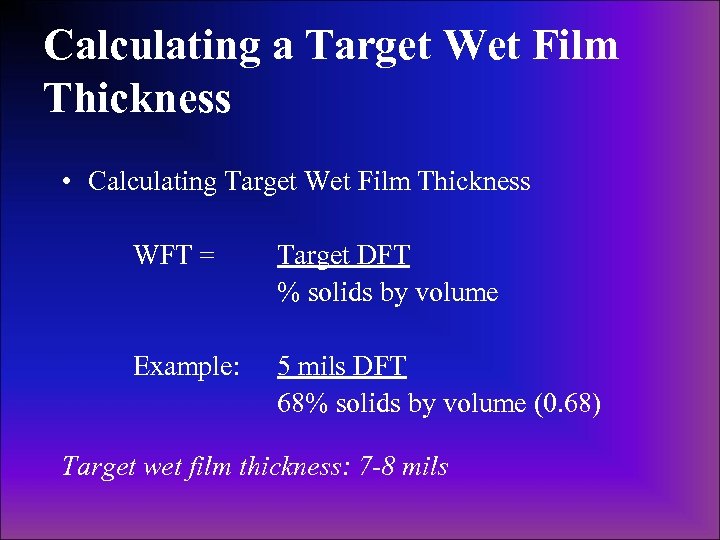 Calculating a Target Wet Film Thickness • Calculating Target Wet Film Thickness WFT = Target DFT % solids by volume Example: 5 mils DFT 68% solids by volume (0. 68) Target wet film thickness: 7 -8 mils
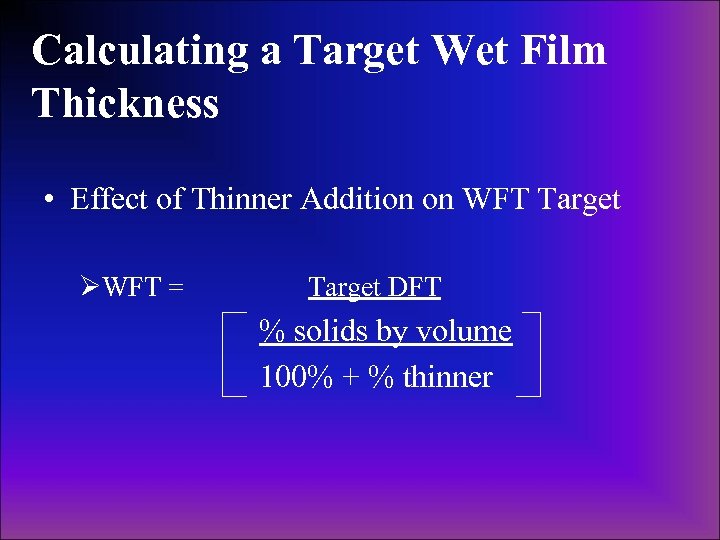 Calculating a Target Wet Film Thickness • Effect of Thinner Addition on WFT Target ØWFT = Target DFT % solids by volume 100% + % thinner
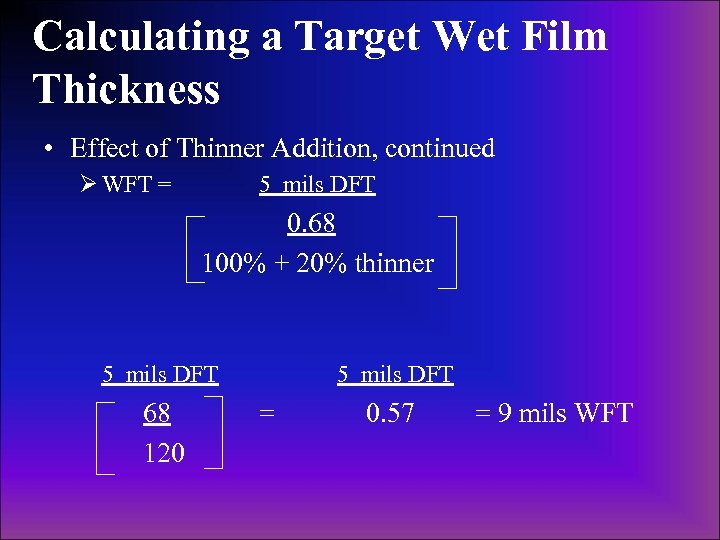 Calculating a Target Wet Film Thickness • Effect of Thinner Addition, continued Ø WFT = 5 mils DFT 0. 68 100% + 20% thinner 5 mils DFT 68 120 5 mils DFT = 0. 57 = 9 mils WFT
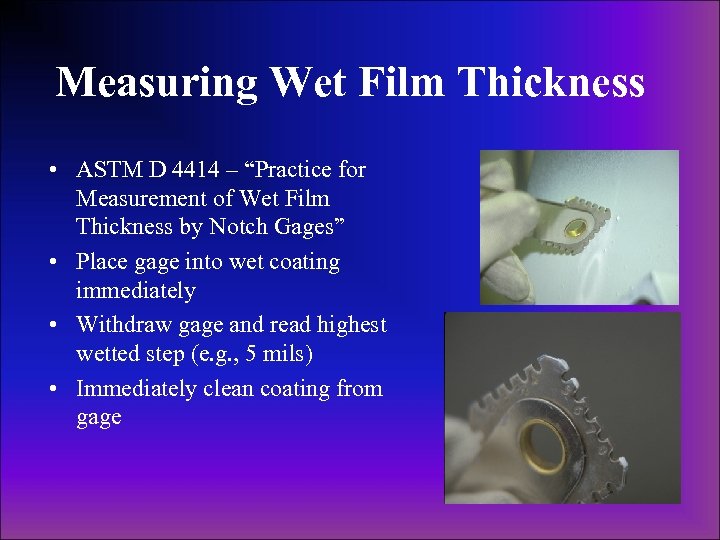 Measuring Wet Film Thickness • ASTM D 4414 – “Practice for Measurement of Wet Film Thickness by Notch Gages” • Place gage into wet coating immediately • Withdraw gage and read highest wetted step (e. g. , 5 mils) • Immediately clean coating from gage
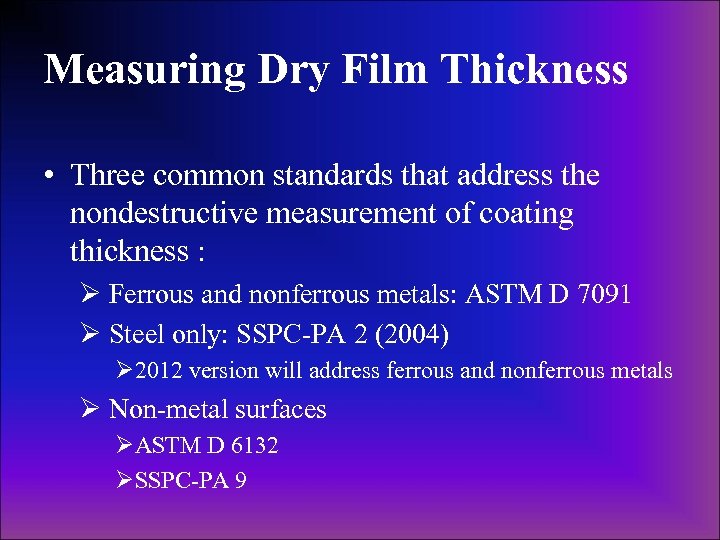 Measuring Dry Film Thickness • Three common standards that address the nondestructive measurement of coating thickness : Ø Ferrous and nonferrous metals: ASTM D 7091 Ø Steel only: SSPC-PA 2 (2004) Ø 2012 version will address ferrous and nonferrous metals Ø Non-metal surfaces ØASTM D 6132 ØSSPC-PA 9
 Measuring Dry Film Thickness • Standards provide procedures for: ØCalibration (gage manufacturer/approved lab) ØFrequency of verifying gage accuracy (user) ØFrequency of measurements (number of measurements to obtain based on the size of the structure) • SSPC-PA 2 places limits on spot and area readings vs. specified thickness
 Measuring Dry Film Thickness (SSPC-PA 2) • Requires calibration by manufacturer (typically annual) • Certificate of calibration traceable to a National Metrology Institute required • Verification of accuracy (by user) before and after each period of use • Two types of nondestructive coating thickness gages Ø Magnetic pull-off (Type 1) Ø Electronic (Type 2)
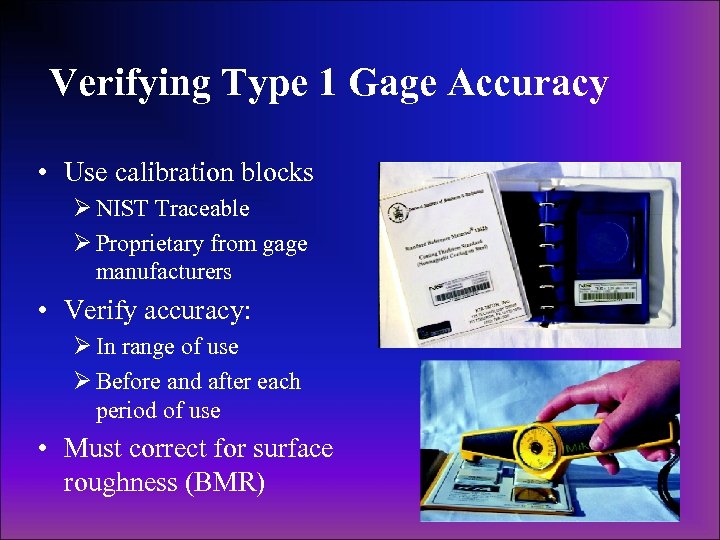 Verifying Type 1 Gage Accuracy • Use calibration blocks Ø NIST Traceable Ø Proprietary from gage manufacturers • Verify accuracy: Ø In range of use Ø Before and after each period of use • Must correct for surface roughness (BMR)
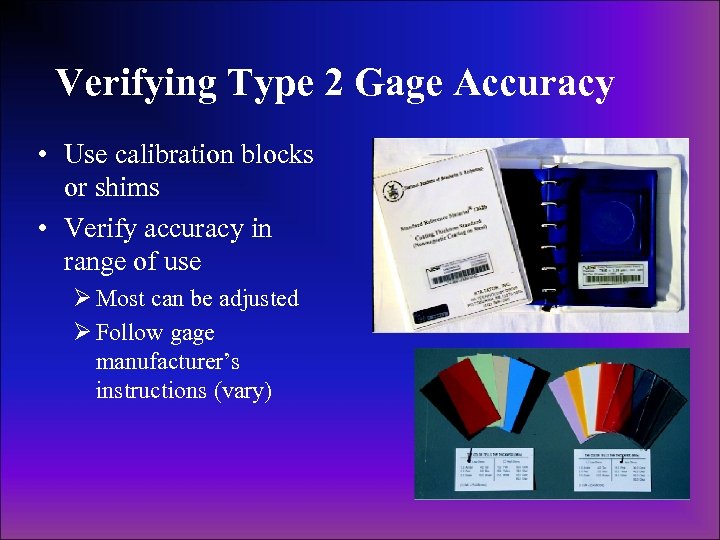 Verifying Type 2 Gage Accuracy • Use calibration blocks or shims • Verify accuracy in range of use Ø Most can be adjusted Ø Follow gage manufacturer’s instructions (vary)
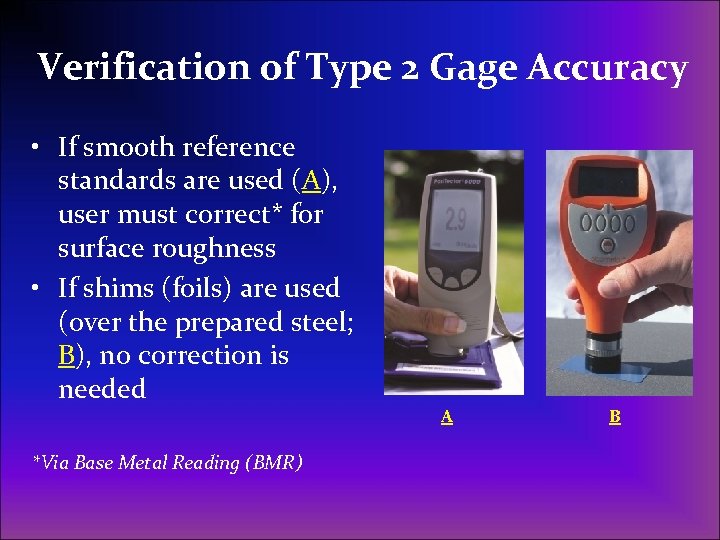 Verification of Type 2 Gage Accuracy • If smooth reference standards are used (A), user must correct* for surface roughness • If shims (foils) are used (over the prepared steel; B), no correction is needed A *Via Base Metal Reading (BMR) B
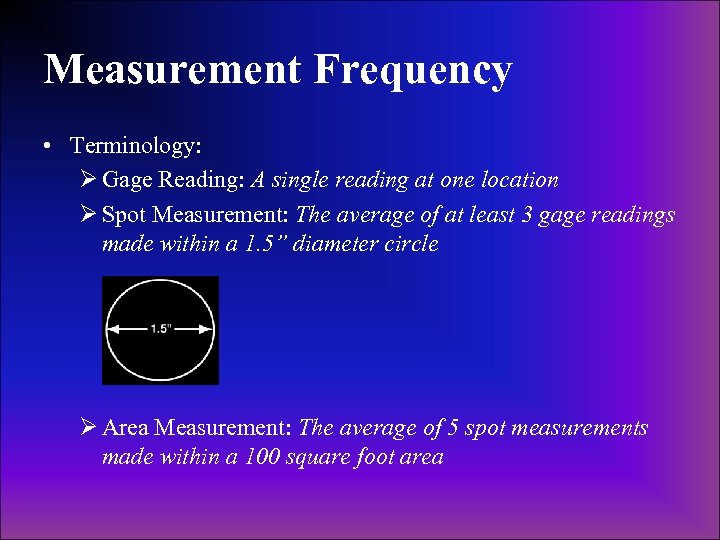 Measurement Frequency • Terminology: Ø Gage Reading: A single reading at one location Ø Spot Measurement: The average of at least 3 gage readings made within a 1. 5” diameter circle Ø Area Measurement: The average of 5 spot measurements made within a 100 square foot area
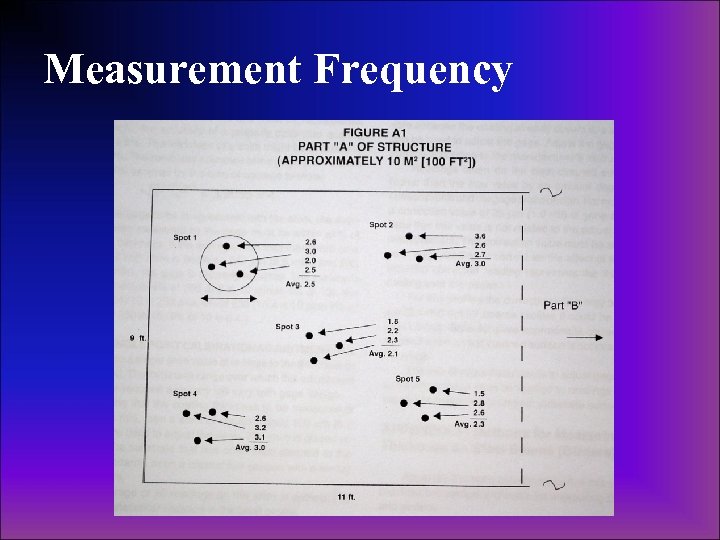 Measurement Frequency
 Dividing Structures into Test Areas • If the structure is less than 300 square feet, each 100 square feet is measured • If the structure is between 300 and 1000 square feet, select 3 random 100 square foot test areas and measure • For structures exceeding 1000 square feet, select 3 random 100 square feet testing areas for the first 1000 square feet, and select 1 random 100 square foot testing area for each additional 1000 square feet
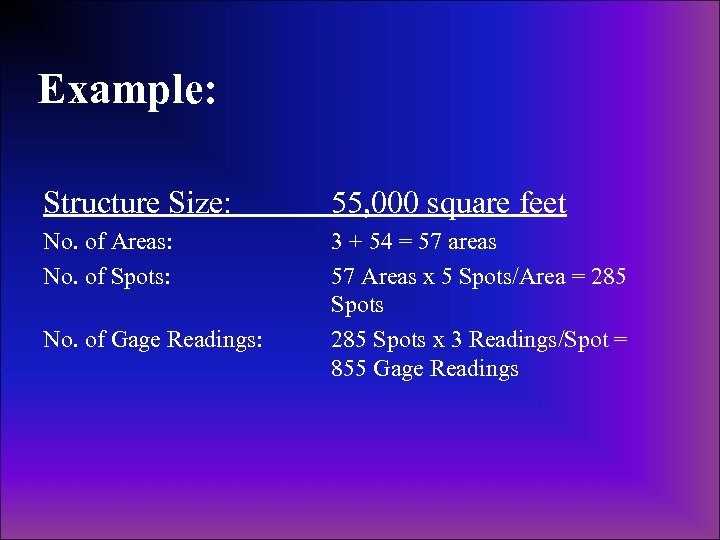 Example: Structure Size: 55, 000 square feet No. of Areas: No. of Spots: 3 + 54 = 57 areas 57 Areas x 5 Spots/Area = 285 Spots x 3 Readings/Spot = 855 Gage Readings No. of Gage Readings:
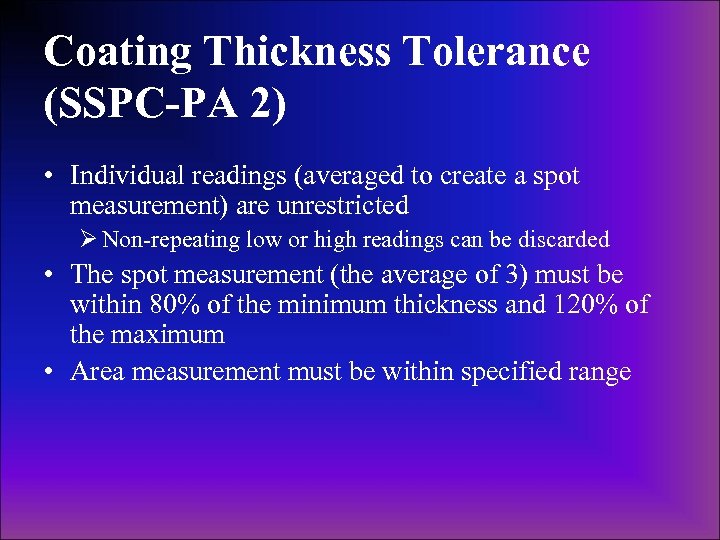 Coating Thickness Tolerance (SSPC-PA 2) • Individual readings (averaged to create a spot measurement) are unrestricted Ø Non-repeating low or high readings can be discarded • The spot measurement (the average of 3) must be within 80% of the minimum thickness and 120% of the maximum • Area measurement must be within specified range
 Assessing Intercoat Cleanliness • Airborne dust and/or abrasive may be deposited on coated surfaces • Problematic if surface is to be recoated • Requires visual or tactical (touch) examination of the surface
 Verifying Recoat Times and Temperatures • Coating materials may have a minimum and/or a maximum recoat time • Verify: ØCoating has been allowed to dry or cure the minimum amount of time ØThe next coat is applied before the maximum recoat time has been exceeded
 Detecting Pinholes and Holidays • Definitions: Ø Holidays – skips or misses in the coating/lining system Ø Pinholes – tiny voids in the coating or lining • Standards: Ø ASTM D 5162 and D 4787; NACE RP 01 -88 Ø Conducted: Ø After final coat has been applied, but before it has achieved complete cure (touch-up) Ø Specifications may require holiday testing after the application of each coat Ø May cause intercoat contamination
 Rules for Holiday Detection • Coating must be nonconductive • Substrate must be conductive • High voltage (spark) testing requires voltage setting Ø 100 to 125 volts/mil of coating ØObtain recommended test voltage from coating manufacturer ØExcessive voltage can damage coating film
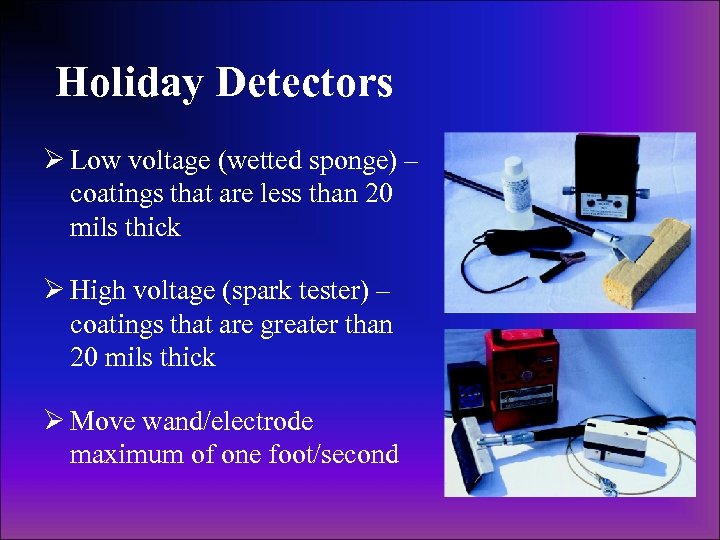 Holiday Detectors Ø Low voltage (wetted sponge) – coatings that are less than 20 mils thick Ø High voltage (spark tester) – coatings that are greater than 20 mils thick Ø Move wand/electrode maximum of one foot/second
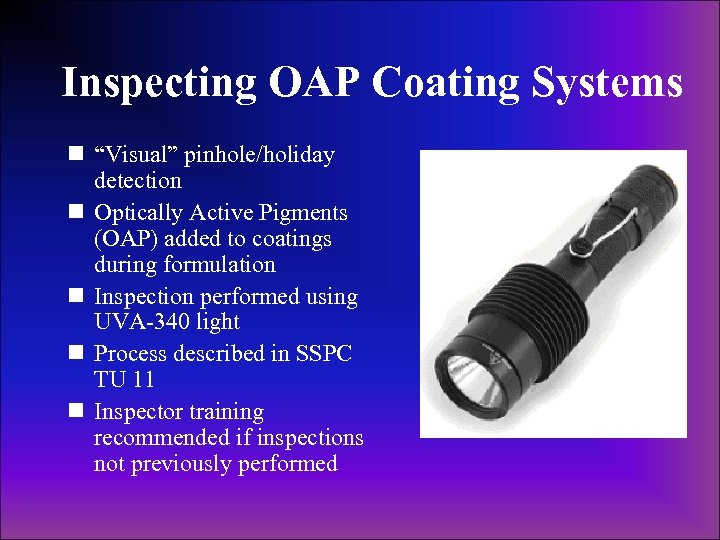 Inspecting OAP Coating Systems n “Visual” pinhole/holiday detection n Optically Active Pigments (OAP) added to coatings during formulation n Inspection performed using UVA-340 light n Process described in SSPC TU 11 n Inspector training recommended if inspections not previously performed
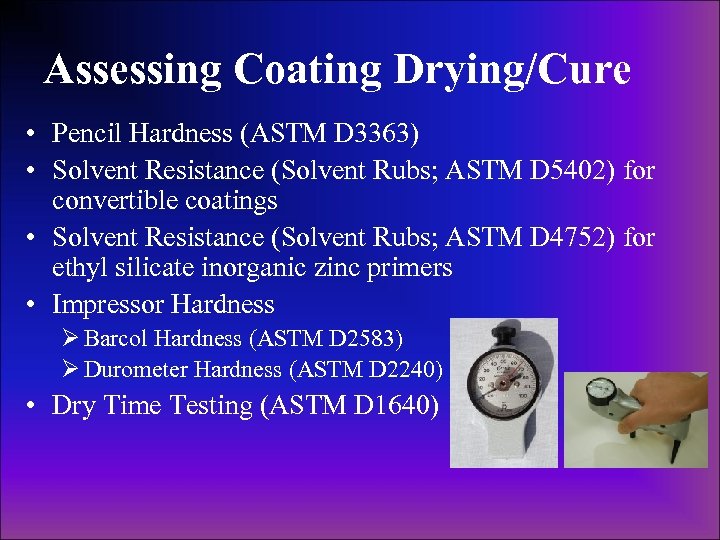 Assessing Coating Drying/Cure • Pencil Hardness (ASTM D 3363) • Solvent Resistance (Solvent Rubs; ASTM D 5402) for convertible coatings • Solvent Resistance (Solvent Rubs; ASTM D 4752) for ethyl silicate inorganic zinc primers • Impressor Hardness Ø Barcol Hardness (ASTM D 2583) Ø Durometer Hardness (ASTM D 2240) • Dry Time Testing (ASTM D 1640)
 Measuring Adhesion • Adhesion is destructive testing • Testing should not be conducted unless required • Types of coating adhesion: ØThe adhesion of the coating to the substrate ØThe adhesion of the coating layers to each other ØThe inner-strength of each coating layer (cohesion)
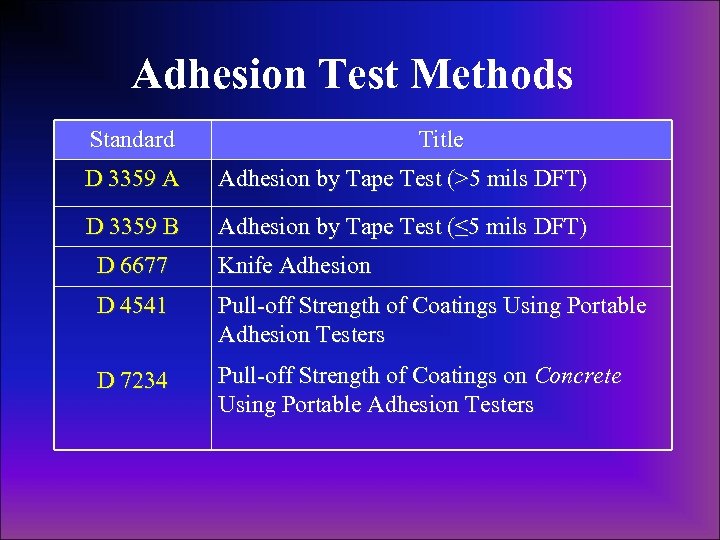 Adhesion Test Methods Standard Title D 3359 A Adhesion by Tape Test (>5 mils DFT) D 3359 B Adhesion by Tape Test (≤ 5 mils DFT) D 6677 Knife Adhesion D 4541 Pull-off Strength of Coatings Using Portable Adhesion Testers D 7234 Pull-off Strength of Coatings on Concrete Using Portable Adhesion Testers
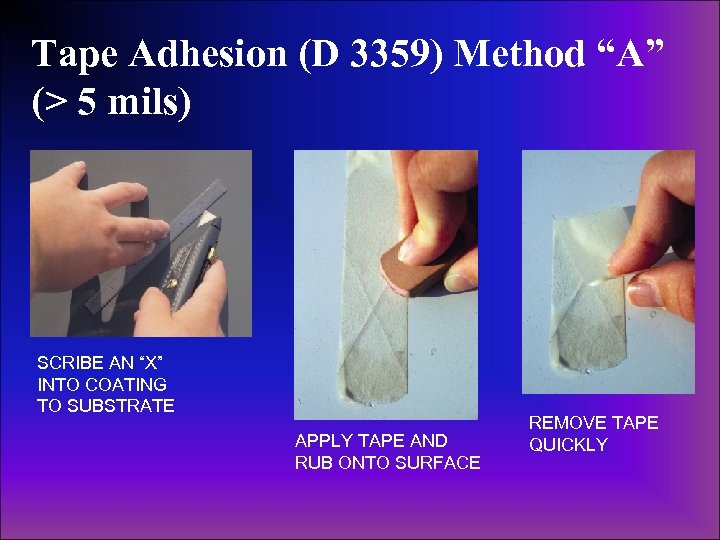 Tape Adhesion (D 3359) Method “A” (> 5 mils) SCRIBE AN “X” INTO COATING TO SUBSTRATE APPLY TAPE AND RUB ONTO SURFACE REMOVE TAPE QUICKLY
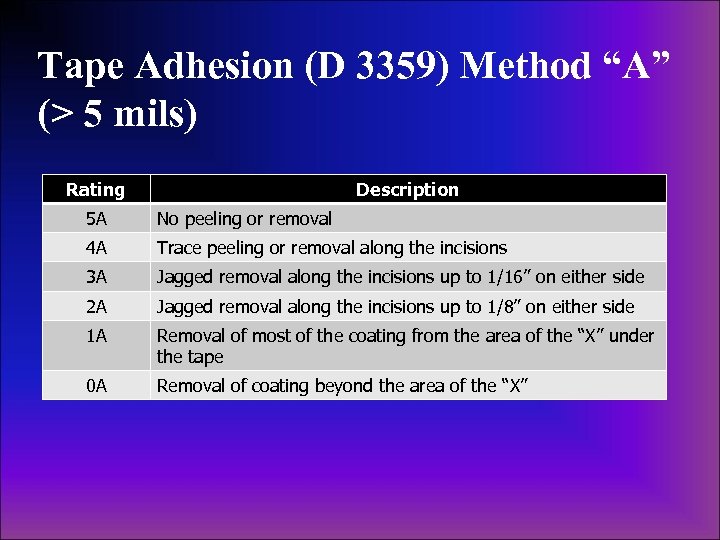 Tape Adhesion (D 3359) Method “A” (> 5 mils) Rating Description 5 A No peeling or removal 4 A Trace peeling or removal along the incisions 3 A Jagged removal along the incisions up to 1/16” on either side 2 A Jagged removal along the incisions up to 1/8” on either side 1 A Removal of most of the coating from the area of the “X” under the tape 0 A Removal of coating beyond the area of the “X”
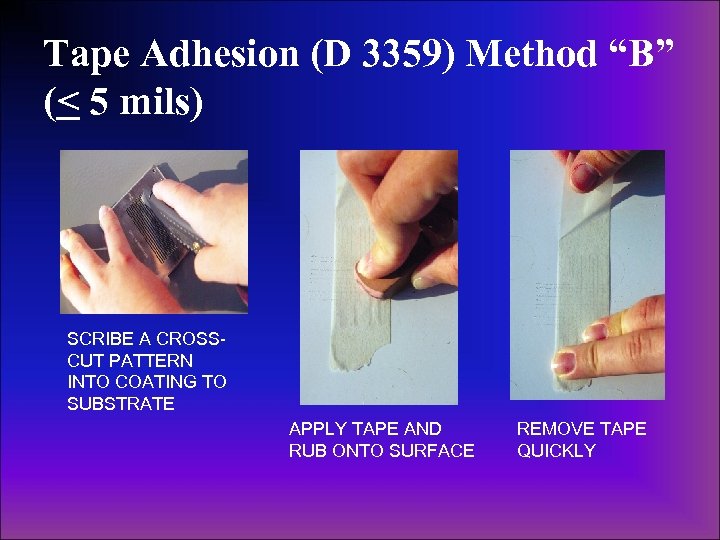 Tape Adhesion (D 3359) Method “B” (< 5 mils) SCRIBE A CROSSCUT PATTERN INTO COATING TO SUBSTRATE APPLY TAPE AND RUB ONTO SURFACE REMOVE TAPE QUICKLY
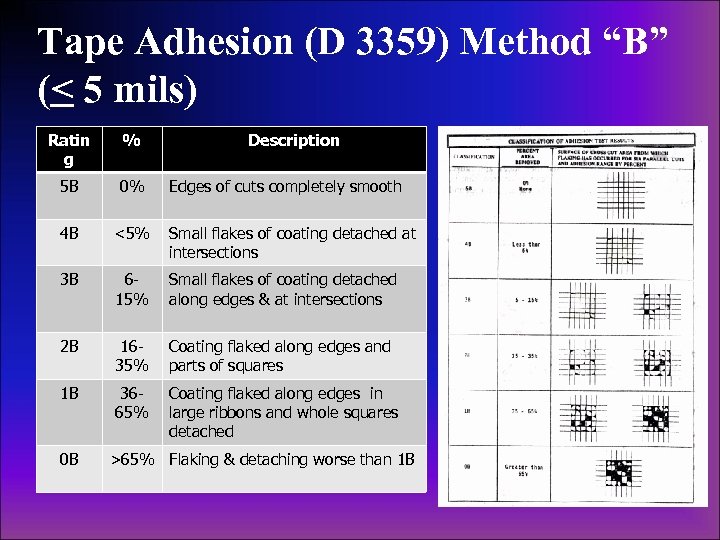 Tape Adhesion (D 3359) Method “B” (< 5 mils) Ratin g % 5 B 0% 4 B <5% Small flakes of coating detached at intersections 3 B 615% Small flakes of coating detached along edges & at intersections 2 B 1635% Coating flaked along edges and parts of squares 1 B 3665% Coating flaked along edges in large ribbons and whole squares detached 0 B Description Edges of cuts completely smooth >65% Flaking & detaching worse than 1 B
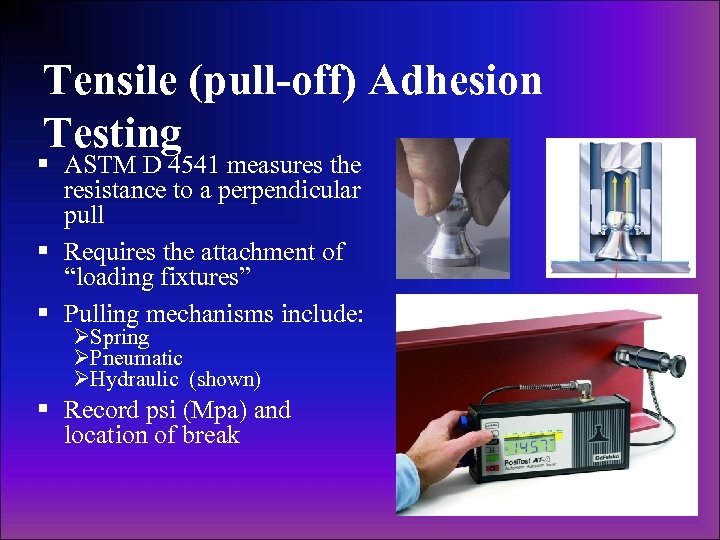 Tensile (pull-off) Adhesion Testing § ASTM D 4541 measures the resistance to a perpendicular pull § Requires the attachment of “loading fixtures” § Pulling mechanisms include: ØSpring ØPneumatic ØHydraulic (shown) § Record psi (Mpa) and location of break
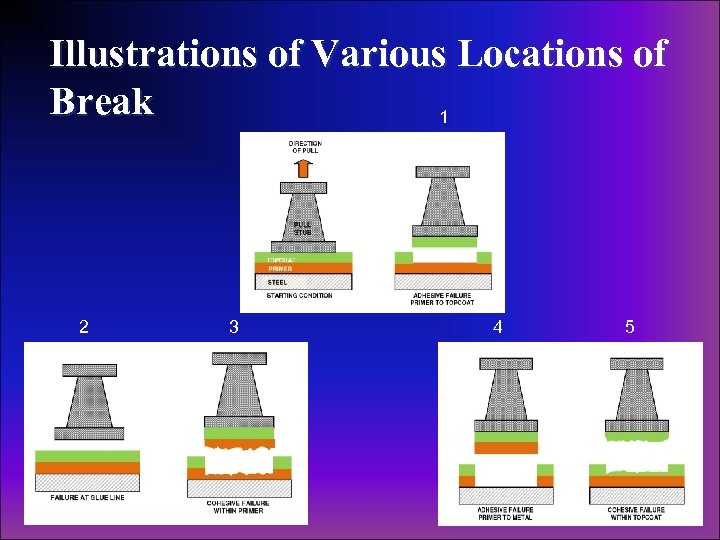 Illustrations of Various Locations of Break 1 2 3 4 5
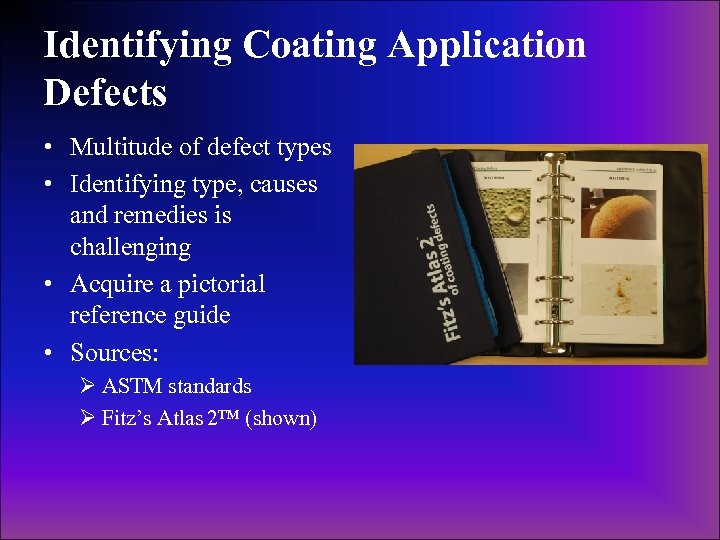 Identifying Coating Application Defects • Multitude of defect types • Identifying type, causes and remedies is challenging • Acquire a pictorial reference guide • Sources: Ø ASTM standards Ø Fitz’s Atlas 2™ (shown)
 Summary • During this webinar, we have described : Ø Industry standards for coating application Ø Developing a quality control plan for painting Ø Navigating a Technical (Product) Data Sheet Ø Measuring ambient conditions and surface temperature Ø Witnessing mixing, thinning and application procedures Ø Calculating and measuring wet film thickness Ø Dry film thickness measurement Ø Post-application testing Ø Identifying application defects
 Quality Control of Industrial Painting Operations THE END William D. Corbett KTA-Tator, Inc.


