dc30c776699e5a5c8bce39c661616ee2.ppt
- Количество слайдов: 23
Precise Automated Kinematic Calibration of RCM Robots Checkpoint Presentation Group 6
About our Project Precise Automated Kinematic Calibration of RCM Robots Main Goal: Quantify the error of Optical Tracker, Robot Remote Center of Motion Important Steps: • Calibrating the accuracy of Polaris Optical Tracking System • Quantify the error of RCM • Update Kinematic Model
Status • Done: – Report on the accuracy and precision of Polaris tracker (minimum) – In Process: Submitting Paper to Engineering Urology Society Conference 2012 • To-Do: – Observe Revolving Needle Driver Robot (Expected) – Identify errors in RCM motion (Expected) – Update Kinematic Model (Maximum)
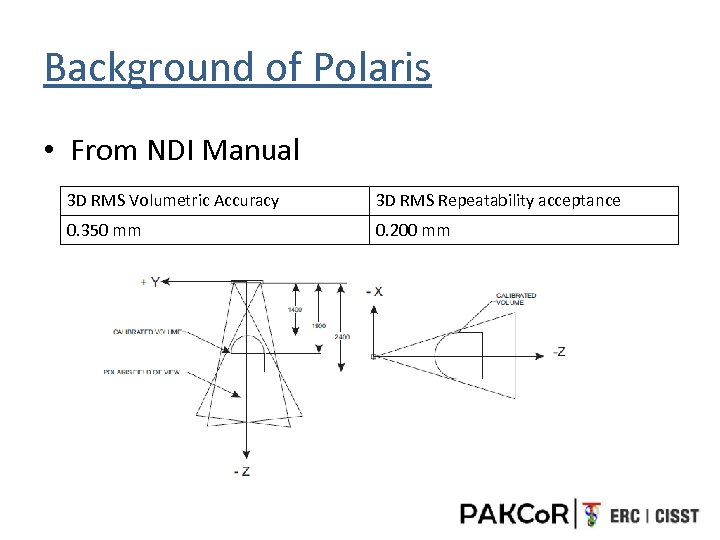
Background of Polaris • From NDI Manual 3 D RMS Volumetric Accuracy 3 D RMS Repeatability acceptance 0. 350 mm 0. 200 mm
Background of Polaris • From other papers • Accuracy assessment and interpretation for optical tracking systems, Andrew D Wile, 2004 - Good: RMS analysis, 3 D pyramid shape, 1500 position readings - Limit: Sample number Weak Apparatus (small table mill) No information about coordinate system registration • Comparative Tracking Error Analysis of Five Different Optical Tracking Systems , Rasool Khadem, 2000 - Good: Compare many trackers, use passive/active markers - Limit : Only looked at precision Did not align apparatus with tracker (plate with holes) Only 100 samples
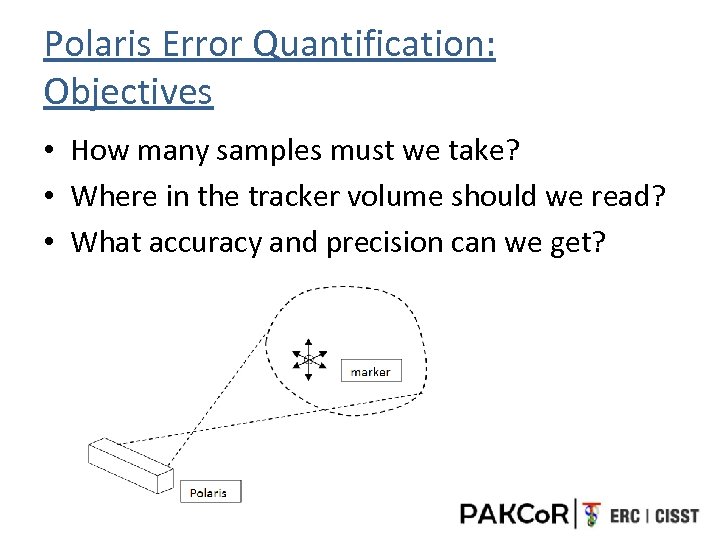
Polaris Error Quantification: Objectives • How many samples must we take? • Where in the tracker volume should we read? • What accuracy and precision can we get?
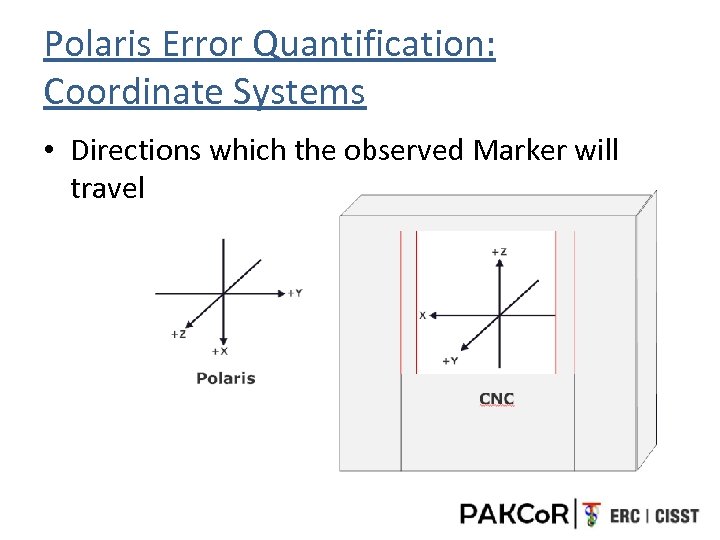
Polaris Error Quantification: Coordinate Systems • Directions which the observed Marker will travel
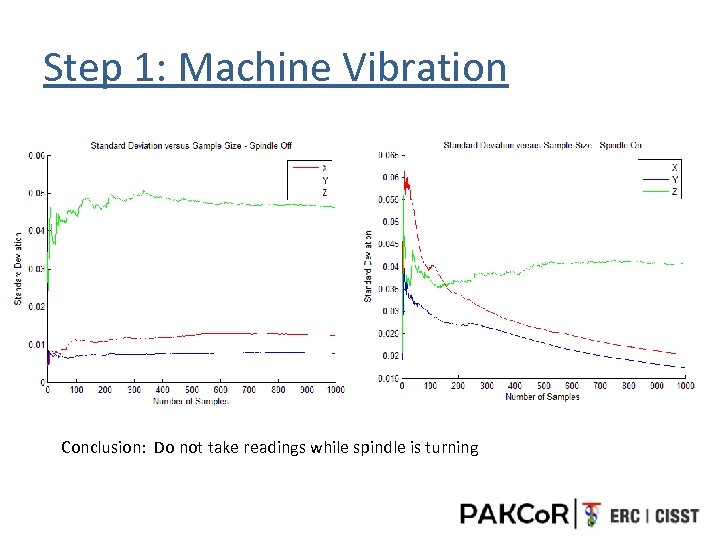
Step 1: Machine Vibration Conclusion: Do not take readings while spindle is turning
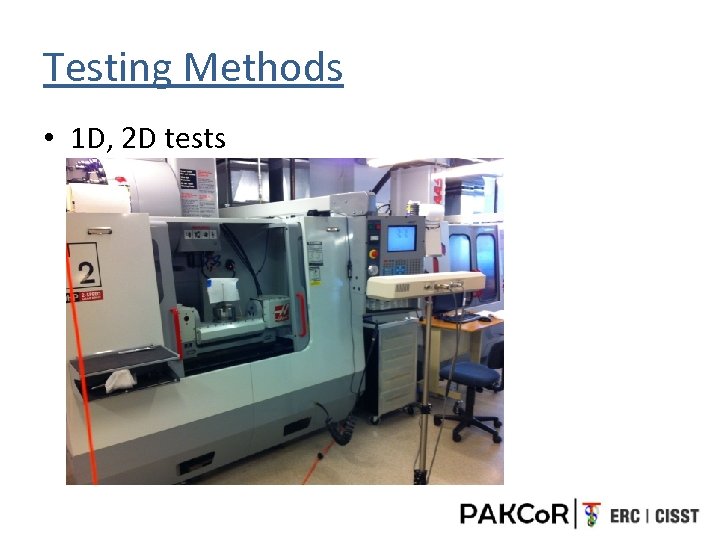
Testing Methods • 1 D, 2 D tests
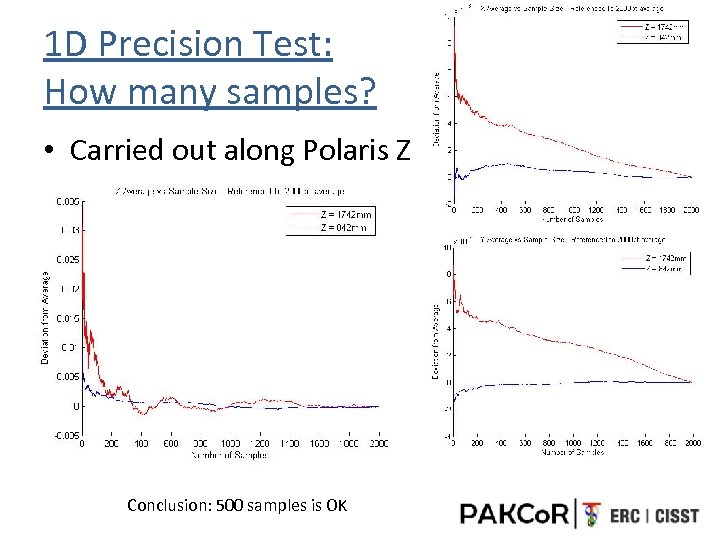
1 D Precision Test: How many samples? • Carried out along Polaris Z Conclusion: 500 samples is OK
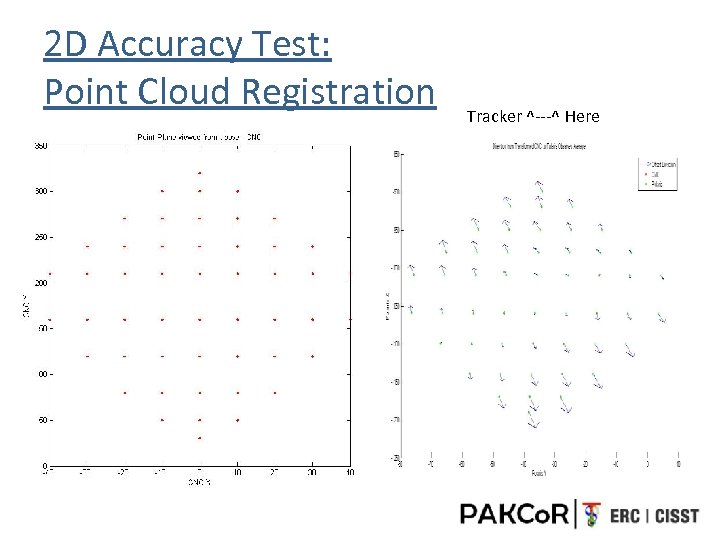
2 D Accuracy Test: Point Cloud Registration Tracker ^---^ Here
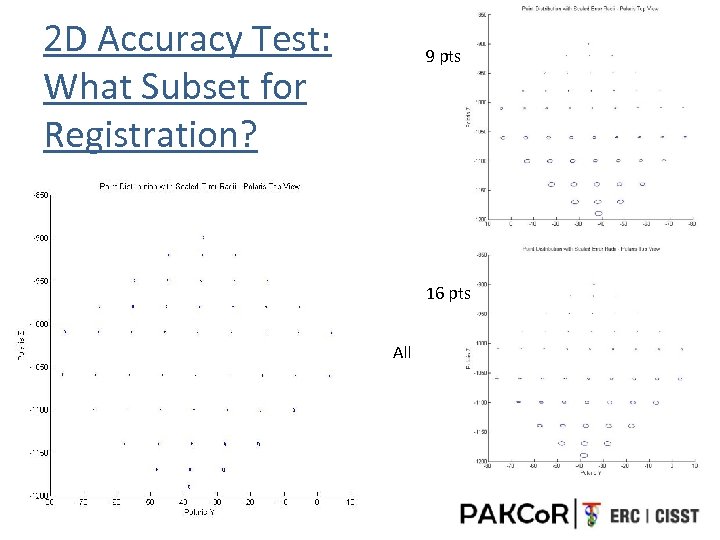
2 D Accuracy Test: What Subset for Registration? 9 pts 16 pts All
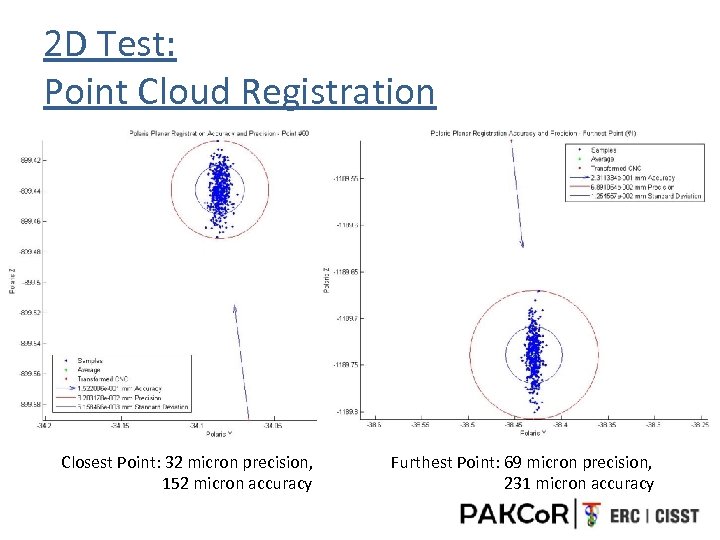
2 D Test: Point Cloud Registration Closest Point: 32 micron precision, 152 micron accuracy Furthest Point: 69 micron precision, 231 micron accuracy
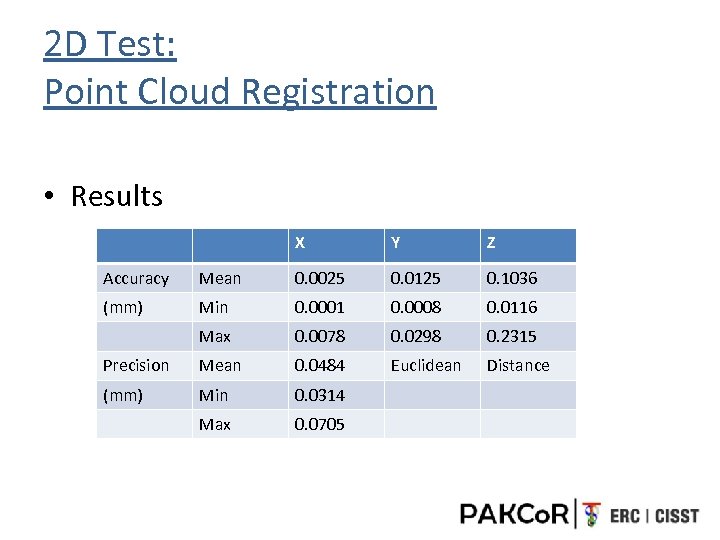
2 D Test: Point Cloud Registration • Results X Y Z Accuracy Mean 0. 0025 0. 0125 0. 1036 (mm) Min 0. 0001 0. 0008 0. 0116 Max 0. 0078 0. 0298 0. 2315 Precision Mean 0. 0484 Euclidean Distance (mm) Min 0. 0314 Max 0. 0705
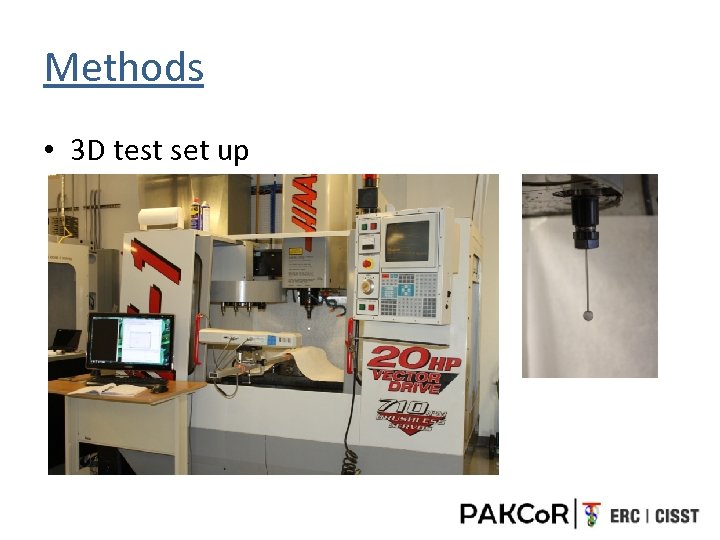
Methods • 3 D test set up
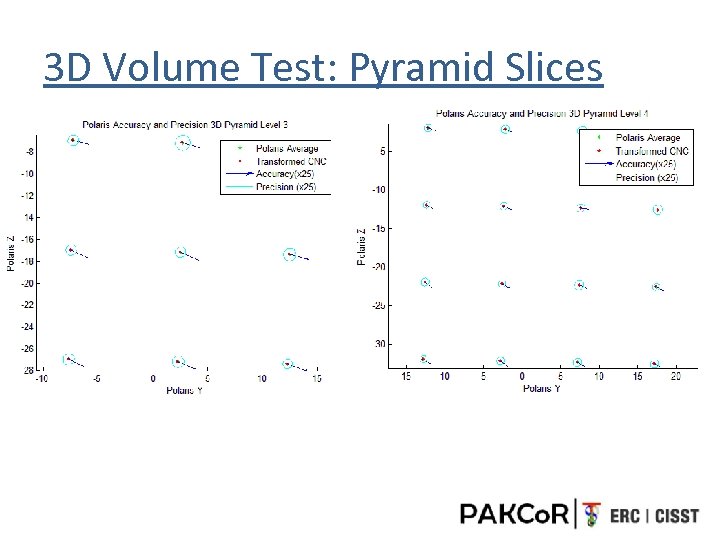
3 D Volume Test: Pyramid Slices
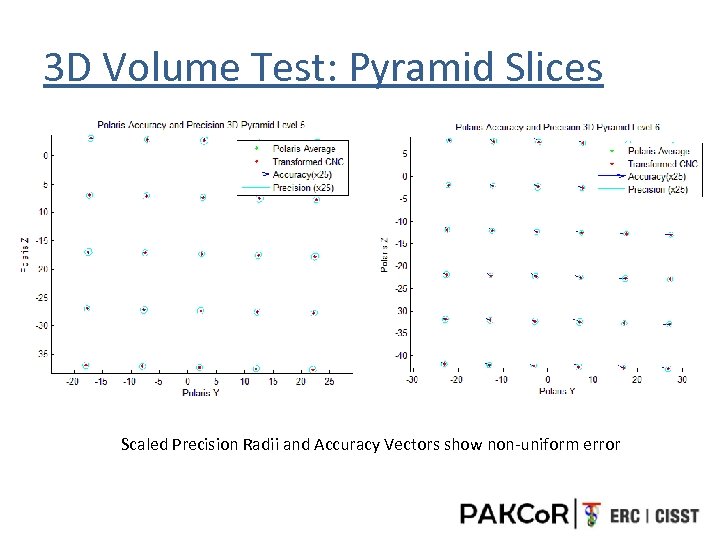
3 D Volume Test: Pyramid Slices Scaled Precision Radii and Accuracy Vectors show non-uniform error
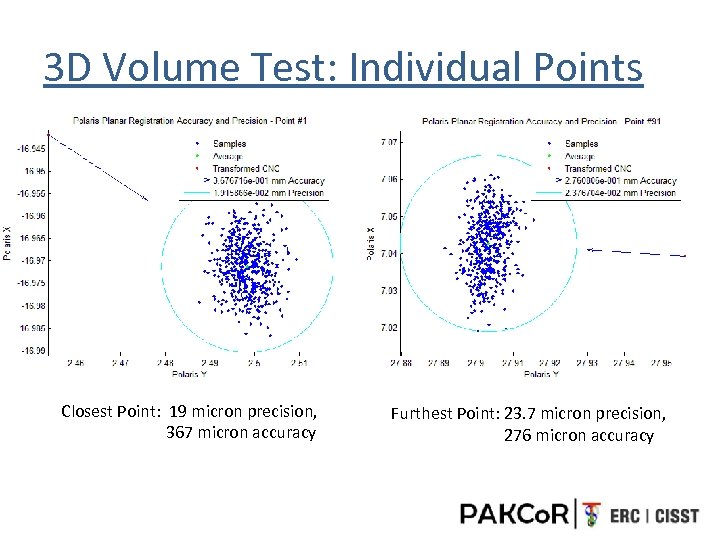
3 D Volume Test: Individual Points Closest Point: 19 micron precision, 367 micron accuracy Furthest Point: 23. 7 micron precision, 276 micron accuracy
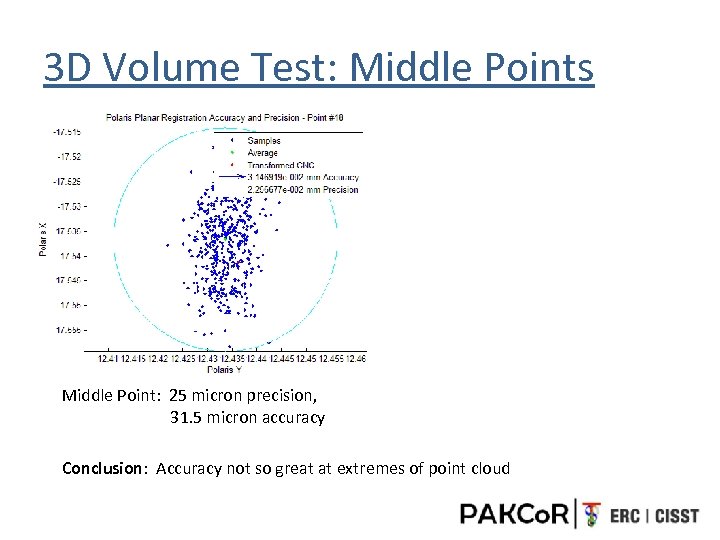
3 D Volume Test: Middle Points Middle Point: 25 micron precision, 31. 5 micron accuracy Conclusion: Accuracy not so great at extremes of point cloud
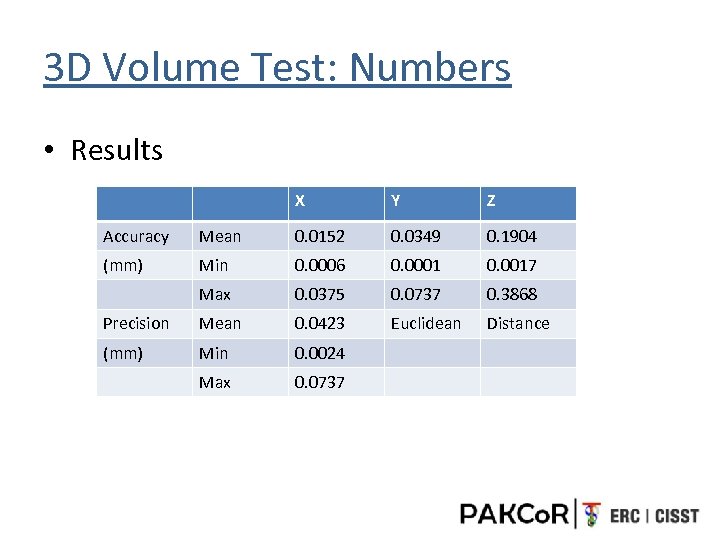
3 D Volume Test: Numbers • Results X Y Z Accuracy Mean 0. 0152 0. 0349 0. 1904 (mm) Min 0. 0006 0. 0001 0. 0017 Max 0. 0375 0. 0737 0. 3868 Precision Mean 0. 0423 Euclidean Distance (mm) Min 0. 0024 Max 0. 0737
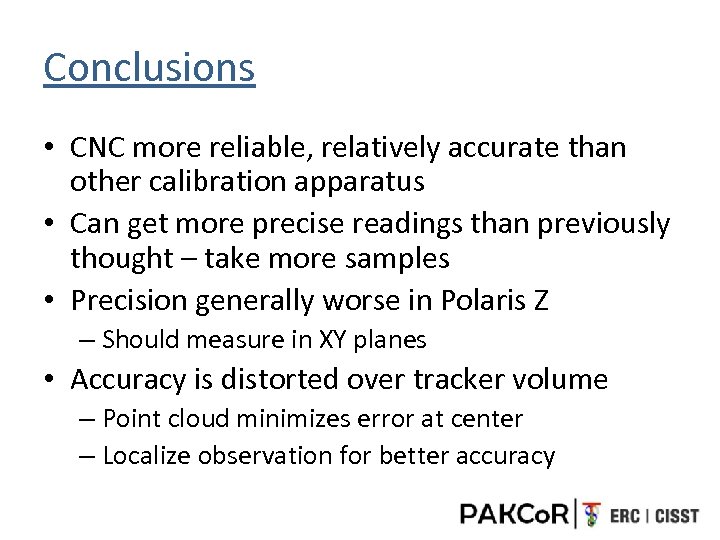
Conclusions • CNC more reliable, relatively accurate than other calibration apparatus • Can get more precise readings than previously thought – take more samples • Precision generally worse in Polaris Z – Should measure in XY planes • Accuracy is distorted over tracker volume – Point cloud minimizes error at center – Localize observation for better accuracy
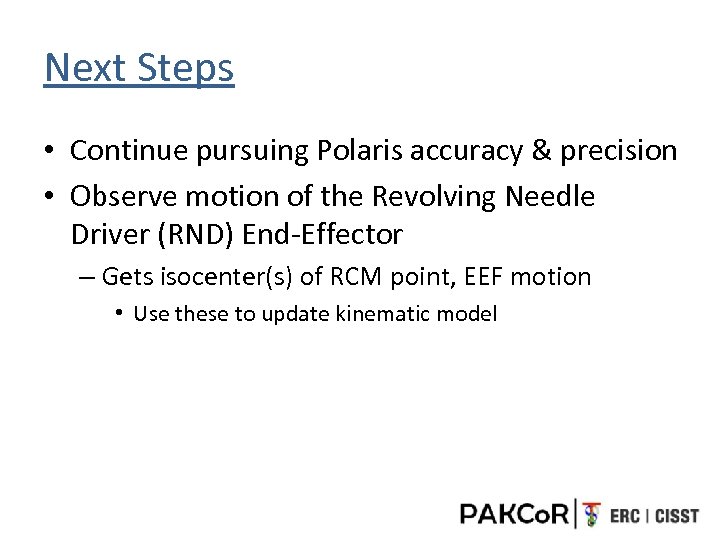
Next Steps • Continue pursuing Polaris accuracy & precision • Observe motion of the Revolving Needle Driver (RND) End-Effector – Gets isocenter(s) of RCM point, EEF motion • Use these to update kinematic model
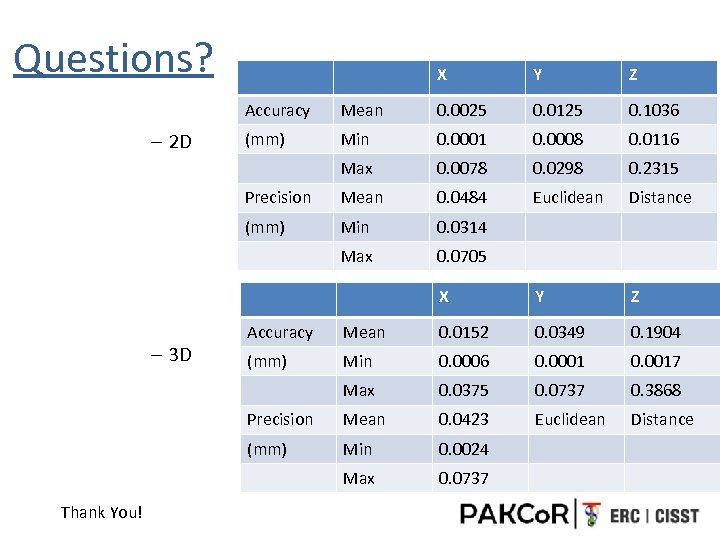
Questions? X Y Z Accuracy 0. 0025 0. 0125 0. 1036 (mm) Min 0. 0001 0. 0008 0. 0116 Max 0. 0078 0. 0298 0. 2315 Precision Mean 0. 0484 Euclidean Distance (mm) Min 0. 0314 Max 0. 0705 X – 2 D Mean Y Z 0. 0152 0. 0349 0. 1904 (mm) Min 0. 0006 0. 0001 0. 0017 0. 0375 0. 0737 0. 3868 Precision Mean 0. 0423 Euclidean Distance (mm) Min 0. 0024 Max Thank You! Mean Max – 3 D Accuracy 0. 0737
dc30c776699e5a5c8bce39c661616ee2.ppt