cc13b8b74243a4a817f1949f25126228.ppt
- Количество слайдов: 16
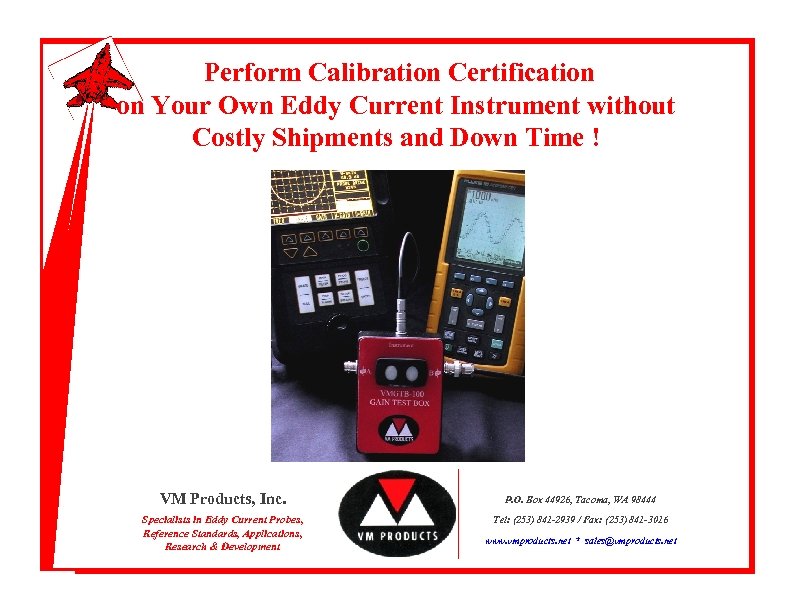
Perform Calibration Certification on Your Own Eddy Current Instrument without Costly Shipments and Down Time ! VM Products, Inc. P. O. Box 44926, Tacoma, WA 98444 Specialists in Eddy Current Probes, Reference Standards, Applications, Research & Development Tel: (253) 841 -2939 / Fax: (253) 841 -3016 www. vmproducts. net * sales@vmproducts. net
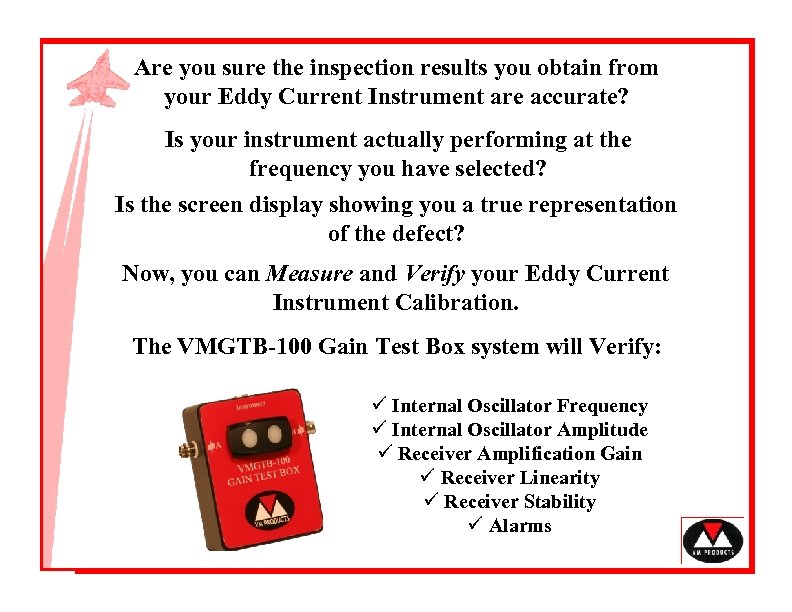
Are you sure the inspection results you obtain from your Eddy Current Instrument are accurate? Is your instrument actually performing at the frequency you have selected? Is the screen display showing you a true representation of the defect? Now, you can Measure and Verify your Eddy Current Instrument Calibration. The VMGTB-100 Gain Test Box system will Verify: ü Internal Oscillator Frequency ü Internal Oscillator Amplitude ü Receiver Amplification Gain ü Receiver Linearity ü Receiver Stability ü Alarms
The military does not presently require periodic certification of eddy current instrument calibration. Instruments not working properly could possibly be used for critical inspections. This is not the case in the commercial aviation sector. The FAA does require periodic certification of instrument calibration.
This presents the problem of taking the instrument out of service for the period of time it takes to send it in for calibration. This also creates another expense for the operator. This procedure together with the normal calibration using a certified reference standard before performing an inspection, will ensure the integrity of the instrument for the job.
This Calibration Verification procedure can be divided into two parts. Part # 1 Internal Oscillator Output The internal oscillator provides the signal to the probe and has to meet frequency and amplitude requirements. Part # 2 Receiver (Detection and Amplification) The probe signals are processed by electronic circuits such as detectors and amplifiers, before they are sent to the display. The Gain and Linearity of this part of the instrument needs to be tested.
This verification method follows the guidelines set forth in Section 5. 2. 2 Instrument Calibration/Certification of: Boeing Specification Support Standard - BSS 7048, Eddy Current Inspection, Discontinuities. This method for eddy current instrument certification has been in satisfactory operation at the Boeing Metrology Laboratory for over 7 years and has been acceptable to the FAA.
This presentation will feature the Nortec 2000 D Eddy Current Instrument as an example. Required Equipment will include: • Standard Oscilloscope with a minimum of 20 MHz bandwidth & 10 m. Volt sensitivity • Frequency Counter with a minimum range of 100 Hz - 2 MHz • Gain Test Box – VMGTB-100 • Adapter Cable – VM 99 L 16 -102 F Lemo 16 -pin to Fischer Triaxial adapter • VM 99 BB 2 BNC to BNC Cable, 2 Ft. long We have selected the Fluke 123 Scopemeter because it incorporates the Oscilloscope and Frequency Counter in one small package.
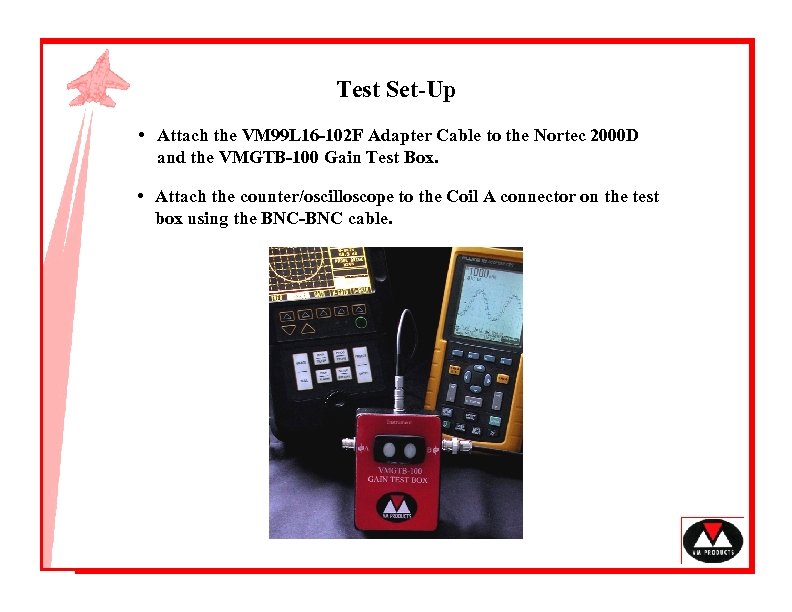
Test Set-Up • Attach the VM 99 L 16 -102 F Adapter Cable to the Nortec 2000 D and the VMGTB-100 Gain Test Box. • Attach the counter/oscilloscope to the Coil A connector on the test box using the BNC-BNC cable.
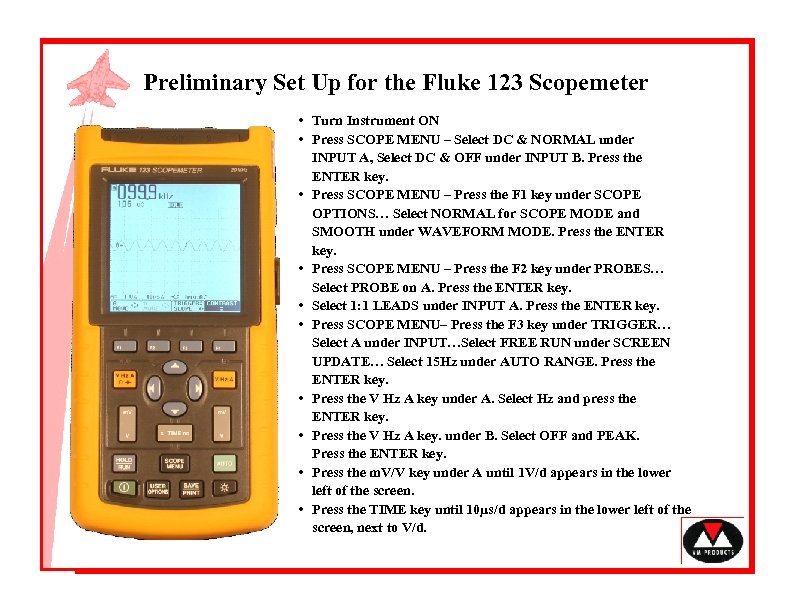
Preliminary Set Up for the Fluke 123 Scopemeter • Turn Instrument ON • Press SCOPE MENU – Select DC & NORMAL under INPUT A, Select DC & OFF under INPUT B. Press the ENTER key. • Press SCOPE MENU – Press the F 1 key under SCOPE OPTIONS… Select NORMAL for SCOPE MODE and SMOOTH under WAVEFORM MODE. Press the ENTER key. • Press SCOPE MENU – Press the F 2 key under PROBES… Select PROBE on A. Press the ENTER key. • Select 1: 1 LEADS under INPUT A. Press the ENTER key. • Press SCOPE MENU– Press the F 3 key under TRIGGER… Select A under INPUT…Select FREE RUN under SCREEN UPDATE… Select 15 Hz under AUTO RANGE. Press the ENTER key. • Press the V Hz A key under A. Select Hz and press the ENTER key. • Press the V Hz A key. under B. Select OFF and PEAK. Press the ENTER key. • Press the m. V/V key under A until 1 V/d appears in the lower left of the screen. • Press the TIME key until 10µs/d appears in the lower left of the screen, next to V/d.
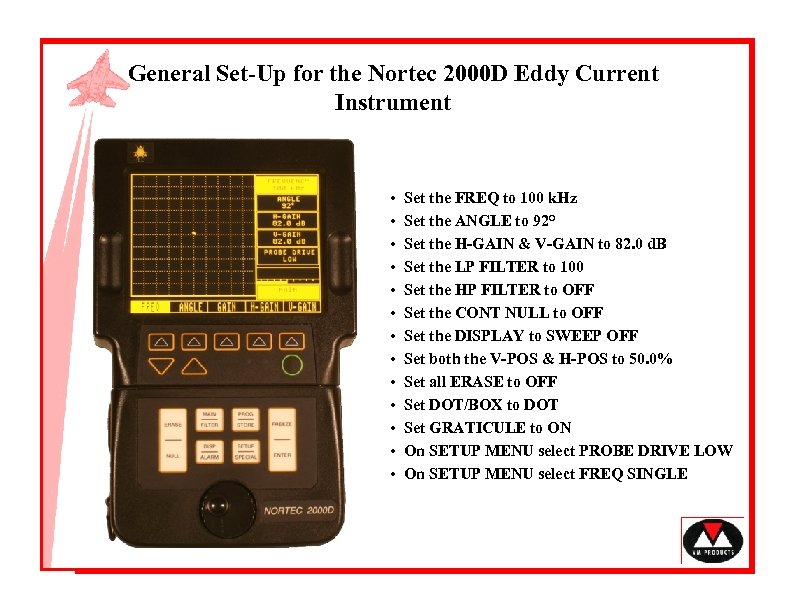
General Set-Up for the Nortec 2000 D Eddy Current Instrument • • • • Set the FREQ to 100 k. Hz Set the ANGLE to 92° Set the H-GAIN & V-GAIN to 82. 0 d. B Set the LP FILTER to 100 Set the HP FILTER to OFF Set the CONT NULL to OFF Set the DISPLAY to SWEEP OFF Set both the V-POS & H-POS to 50. 0% Set all ERASE to OFF Set DOT/BOX to DOT Set GRATICULE to ON On SETUP MENU select PROBE DRIVE LOW On SETUP MENU select FREQ SINGLE
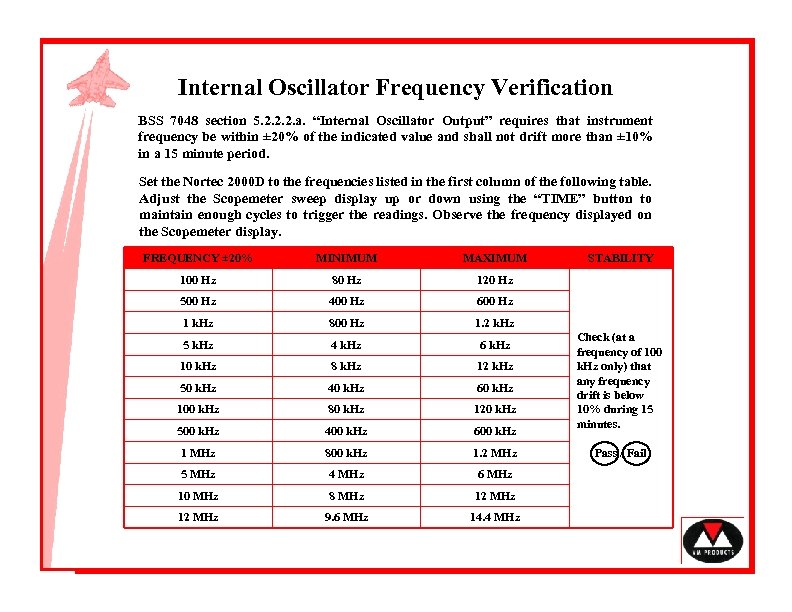
Internal Oscillator Frequency Verification BSS 7048 section 5. 2. 2. 2. a. “Internal Oscillator Output” requires that instrument frequency be within ± 20% of the indicated value and shall not drift more than ± 10% in a 15 minute period. Set the Nortec 2000 D to the frequencies listed in the first column of the following table. Adjust the Scopemeter sweep display up or down using the “TIME” button to maintain enough cycles to trigger the readings. Observe the frequency displayed on the Scopemeter display. FREQUENCY ± 20% MINIMUM MAXIMUM 100 Hz 80 Hz 120 Hz 500 Hz 400 Hz 600 Hz 1 k. Hz 800 Hz 1. 2 k. Hz 5 k. Hz 4 k. Hz 6 k. Hz 10 k. Hz 8 k. Hz 12 k. Hz 50 k. Hz 40 k. Hz 60 k. Hz 100 k. Hz 80 k. Hz 120 k. Hz 500 k. Hz 400 k. Hz 600 k. Hz 1 MHz 800 k. Hz 1. 2 MHz 5 MHz 4 MHz 6 MHz 10 MHz 8 MHz 12 MHz 9. 6 MHz 14. 4 MHz STABILITY Check (at a frequency of 100 k. Hz only) that any frequency drift is below 10% during 15 minutes. Pass / Fail
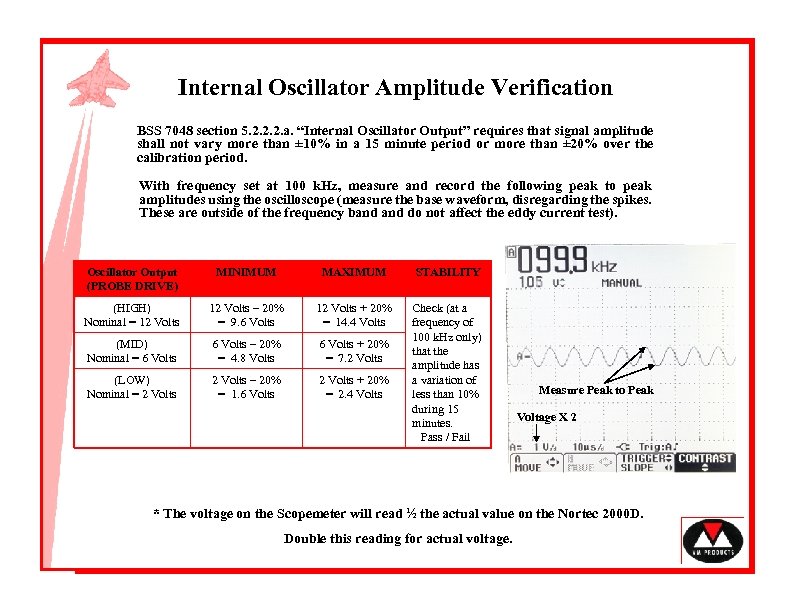
Internal Oscillator Amplitude Verification BSS 7048 section 5. 2. 2. 2. a. “Internal Oscillator Output” requires that signal amplitude shall not vary more than ± 10% in a 15 minute period or more than ± 20% over the calibration period. With frequency set at 100 k. Hz, measure and record the following peak to peak amplitudes using the oscilloscope (measure the base waveform, disregarding the spikes. These are outside of the frequency band do not affect the eddy current test). Oscillator Output (PROBE DRIVE) MINIMUM MAXIMUM STABILITY (HIGH) Nominal = 12 Volts – 20% = 9. 6 Volts 12 Volts + 20% = 14. 4 Volts (MID) Nominal = 6 Volts – 20% = 4. 8 Volts 6 Volts + 20% = 7. 2 Volts (LOW) Nominal = 2 Volts – 20% = 1. 6 Volts 2 Volts + 20% = 2. 4 Volts Check (at a frequency of 100 k. Hz only) that the amplitude has a variation of less than 10% during 15 minutes. Pass / Fail Measure Peak to Peak Voltage X 2 * The voltage on the Scopemeter will read ½ the actual value on the Nortec 2000 D. Double this reading for actual voltage.
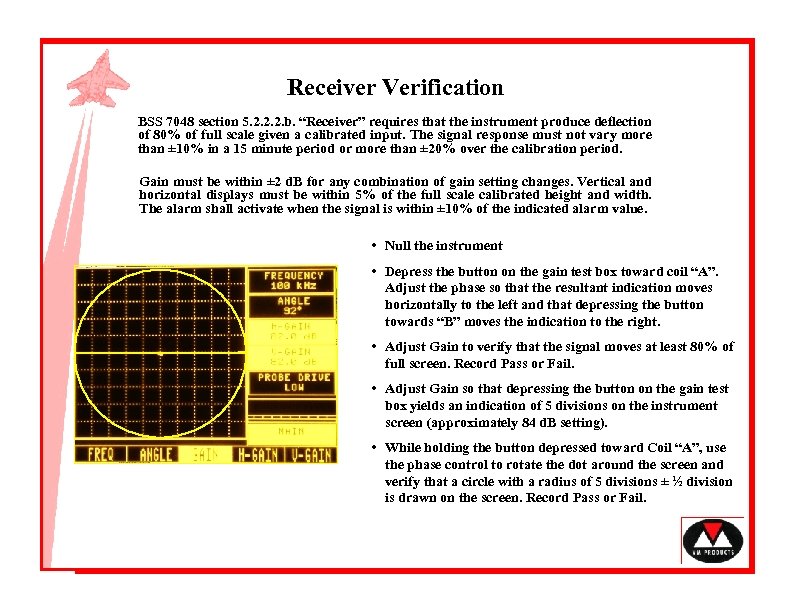
Receiver Verification BSS 7048 section 5. 2. 2. 2. b. “Receiver” requires that the instrument produce deflection of 80% of full scale given a calibrated input. The signal response must not vary more than ± 10% in a 15 minute period or more than ± 20% over the calibration period. Gain must be within ± 2 d. B for any combination of gain setting changes. Vertical and horizontal displays must be within 5% of the full scale calibrated height and width. The alarm shall activate when the signal is within ± 10% of the indicated alarm value. • Null the instrument • Depress the button on the gain test box toward coil “A”. Adjust the phase so that the resultant indication moves horizontally to the left and that depressing the button towards “B” moves the indication to the right. • Adjust Gain to verify that the signal moves at least 80% of full screen. Record Pass or Fail. • Adjust Gain so that depressing the button on the gain test box yields an indication of 5 divisions on the instrument screen (approximately 84 d. B setting). • While holding the button depressed toward Coil “A”, use the phase control to rotate the dot around the screen and verify that a circle with a radius of 5 divisions ± ½ division is drawn on the screen. Record Pass or Fail.
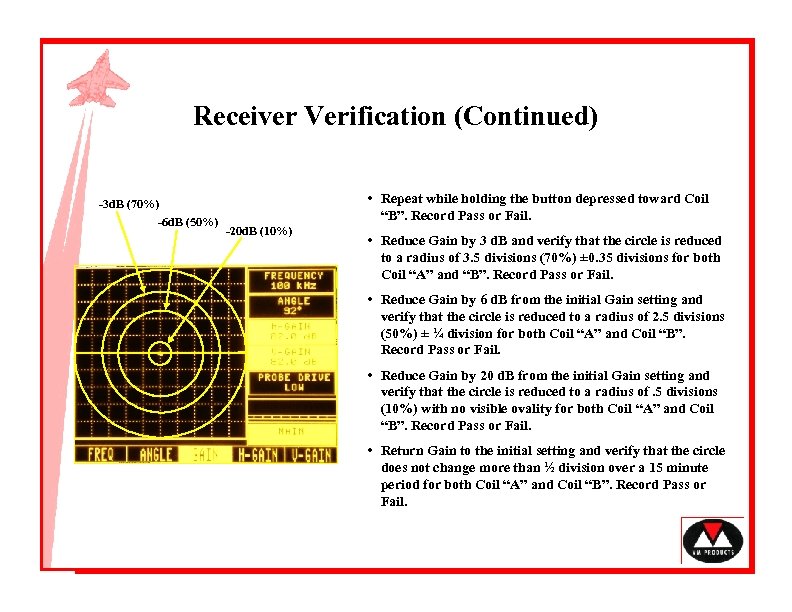
Receiver Verification (Continued) • Repeat while holding the button depressed toward Coil “B”. Record Pass or Fail. -3 d. B (70%) -6 d. B (50%) -20 d. B (10%) • Reduce Gain by 3 d. B and verify that the circle is reduced to a radius of 3. 5 divisions (70%) ± 0. 35 divisions for both Coil “A” and “B”. Record Pass or Fail. • Reduce Gain by 6 d. B from the initial Gain setting and verify that the circle is reduced to a radius of 2. 5 divisions (50%) ± ¼ division for both Coil “A” and Coil “B”. Record Pass or Fail. • Reduce Gain by 20 d. B from the initial Gain setting and verify that the circle is reduced to a radius of. 5 divisions (10%) with no visible ovality for both Coil “A” and Coil “B”. Record Pass or Fail. • Return Gain to the initial setting and verify that the circle does not change more than ½ division over a 15 minute period for both Coil “A” and Coil “B”. Record Pass or Fail.
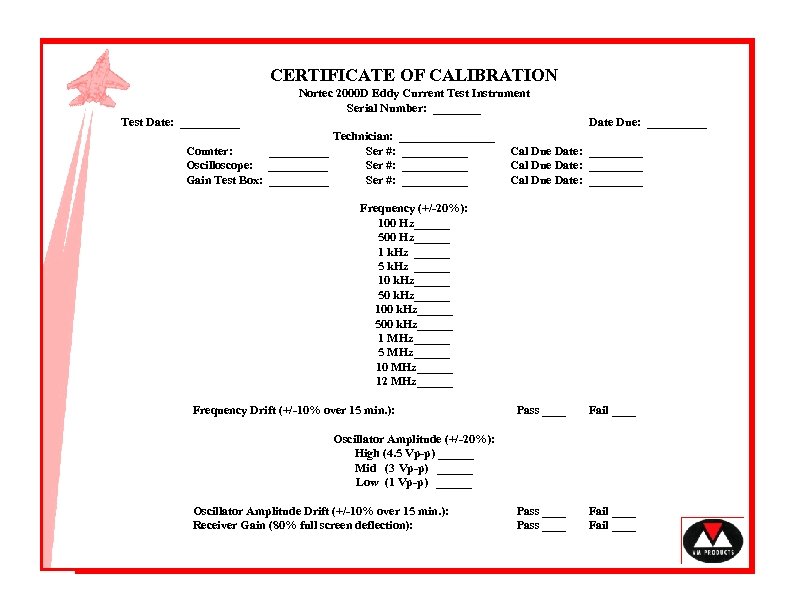
CERTIFICATE OF CALIBRATION Nortec 2000 D Eddy Current Test Instrument Serial Number: ____ Test Date: _____ Counter: _____ Oscilloscope: _____ Gain Test Box: _____ Date Due: _____ Technician: ________ Ser #: ___________ Ser #: ______ Cal Due Date: _________ Cal Due Date: _____ Frequency (+/-20%): 100 Hz______ 500 Hz______ 1 k. Hz ______ 5 k. Hz ______ 10 k. Hz______ 50 k. Hz______ 100 k. Hz______ 500 k. Hz______ 1 MHz______ 5 MHz______ 10 MHz______ 12 MHz______ Frequency Drift (+/-10% over 15 min. ): Pass ____ Fail ____ Oscillator Amplitude (+/-20%): High (4. 5 Vp-p) ______ Mid (3 Vp-p) ______ Low (1 Vp-p) ______ Oscillator Amplitude Drift (+/-10% over 15 min. ): Receiver Gain (80% full screen deflection):
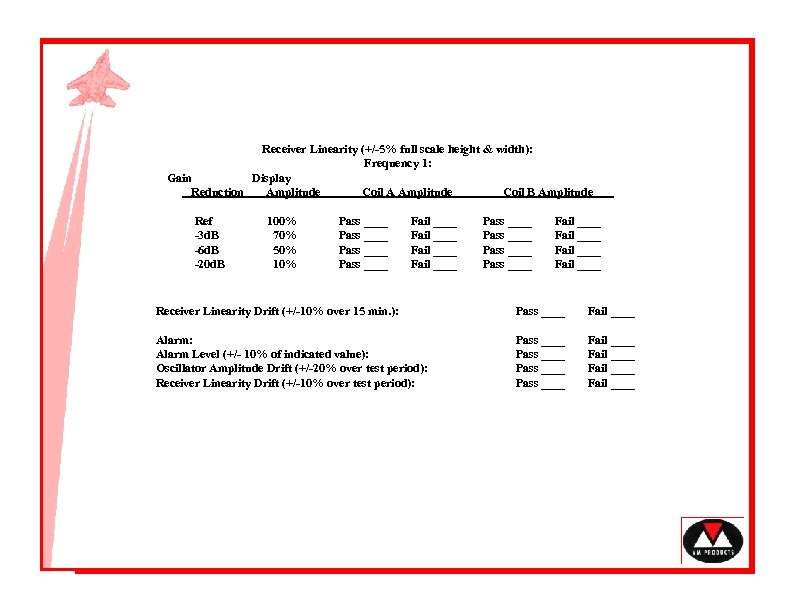
Receiver Linearity (+/-5% full scale height & width): Frequency 1: Gain Display Reduction Amplitude Coil A Amplitude Coil B Amplitude Ref -3 d. B -6 d. B -20 d. B 100% 70% 50% 10% Pass ____ Pass ____ Fail ____ Fail ____ Receiver Linearity Drift (+/-10% over 15 min. ): Pass ____ Fail ____ Alarm: Alarm Level (+/- 10% of indicated value): Oscillator Amplitude Drift (+/-20% over test period): Receiver Linearity Drift (+/-10% over test period): Pass ____ Fail ____
cc13b8b74243a4a817f1949f25126228.ppt