Sensors and transducers_lecture_26_03_13.ppt
- Количество слайдов: 16
 Optical encoders
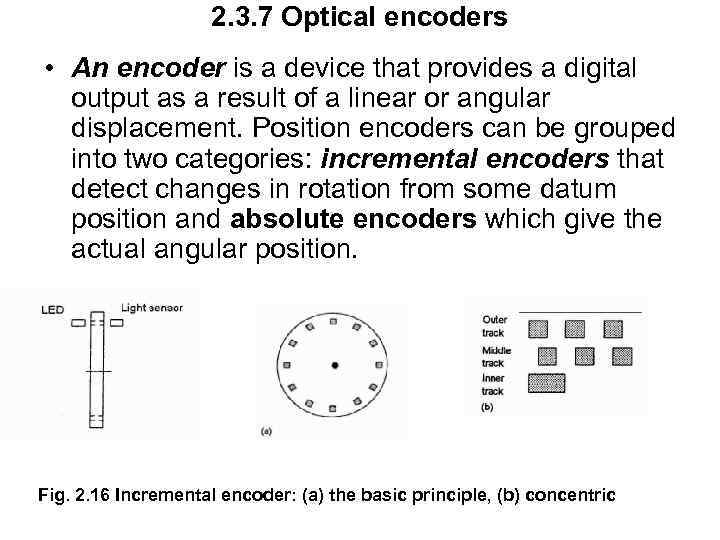 2. 3. 7 Optical encoders • An encoder is a device that provides a digital output as a result of a linear or angular displacement. Position encoders can be grouped into two categories: incremental encoders that detect changes in rotation from some datum position and absolute encoders which give the actual angular position. Fig. 2. 16 Incremental encoder: (a) the basic principle, (b) concentric
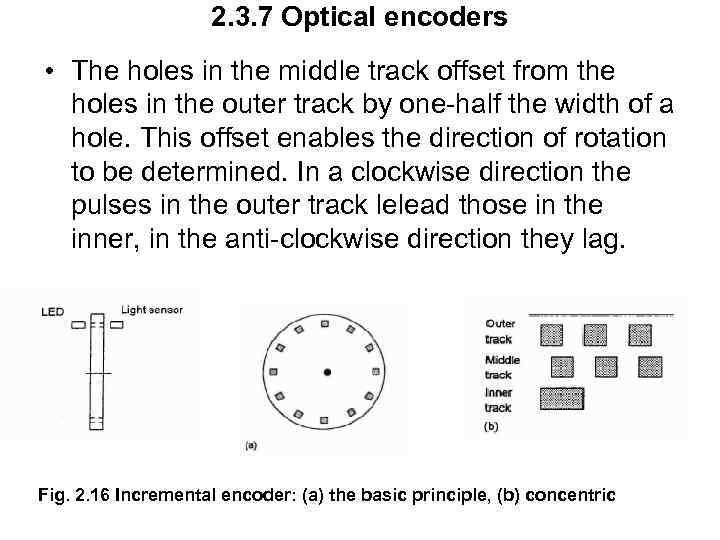 2. 3. 7 Optical encoders • The holes in the middle track offset from the holes in the outer track by one-half the width of a hole. This offset enables the direction of rotation to be determined. In a clockwise direction the pulses in the outer track lelead those in the inner, in the anti-clockwise direction they lag. Fig. 2. 16 Incremental encoder: (a) the basic principle, (b) concentric
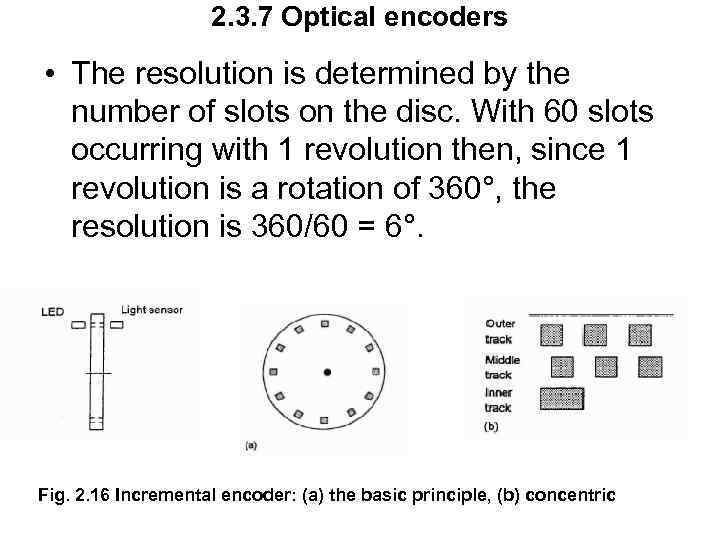 2. 3. 7 Optical encoders • The resolution is determined by the number of slots on the disc. With 60 slots occurring with 1 revolution then, since 1 revolution is a rotation of 360°, the resolution is 360/60 = 6°. Fig. 2. 16 Incremental encoder: (a) the basic principle, (b) concentric
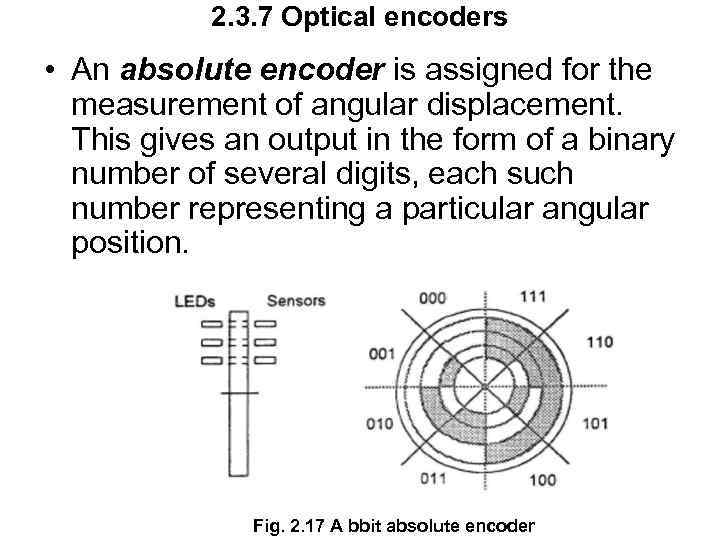 2. 3. 7 Optical encoders • An absolute encoder is assigned for the measurement of angular displacement. This gives an output in the form of a binary number of several digits, each such number representing a particular angular position. Fig. 2. 17 A bbit absolute encoder
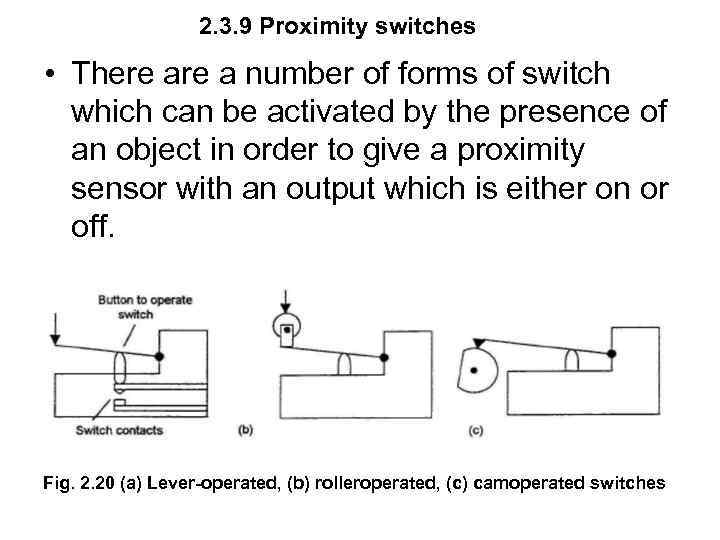 2. 3. 9 Proximity switches • There a number of forms of switch which can be activated by the presence of an object in order to give a proximity sensor with an output which is either on or off. Fig. 2. 20 (a) Lever-operated, (b) rolleroperated, (c) camoperated switches
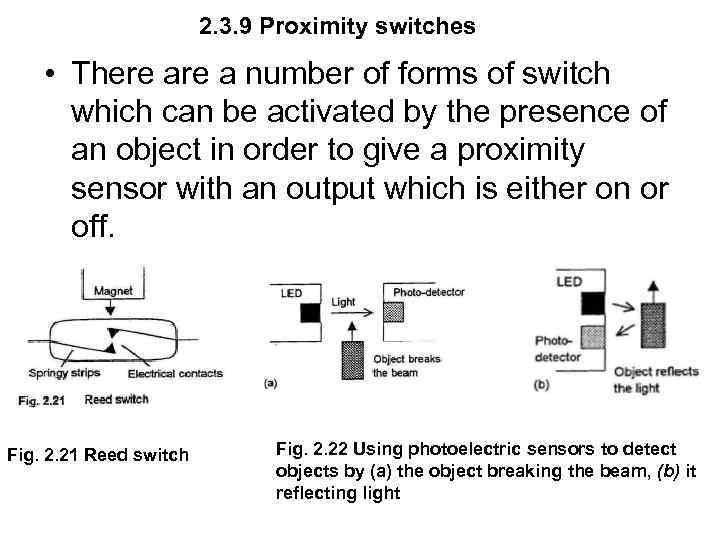 2. 3. 9 Proximity switches • There a number of forms of switch which can be activated by the presence of an object in order to give a proximity sensor with an output which is either on or off. Fig. 2. 21 Reed switch Fig. 2. 22 Using photoelectric sensors to detect objects by (a) the object breaking the beam, (b) it reflecting light
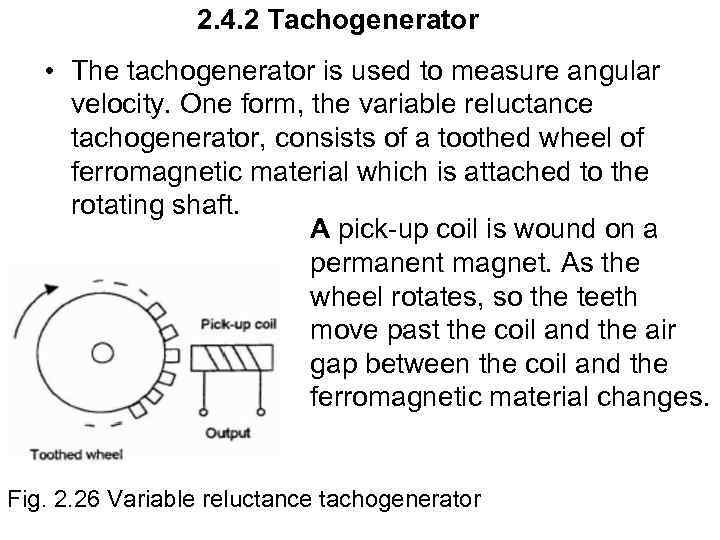 2. 4. 2 Tachogenerator • The tachogenerator is used to measure angular velocity. One form, the variable reluctance tachogenerator, consists of a toothed wheel of ferromagnetic material which is attached to the rotating shaft. A pick-up coil is wound on a permanent magnet. As the wheel rotates, so the teeth move past the coil and the air gap between the coil and the ferromagnetic material changes. Fig. 2. 26 Variable reluctance tachogenerator
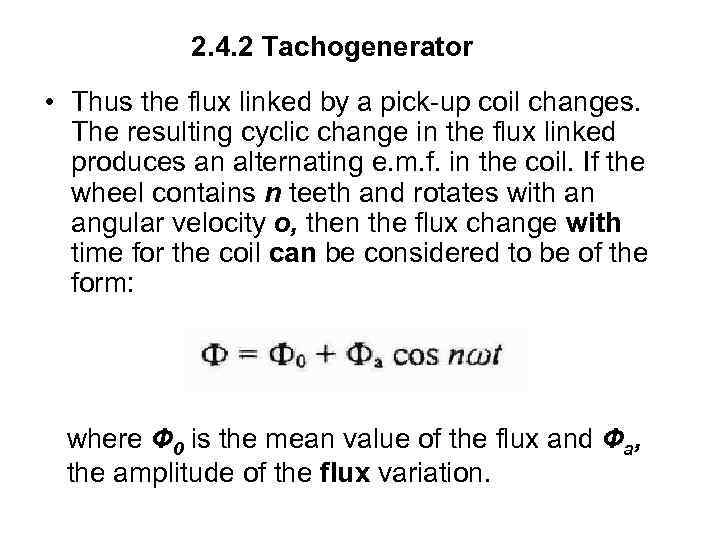 2. 4. 2 Tachogenerator • Thus the flux linked by a pick-up coil changes. The resulting cyclic change in the flux linked produces an alternating e. m. f. in the coil. If the wheel contains n teeth and rotates with an angular velocity o, then the flux change with time for the coil can be considered to be of the form: where Ф 0 is the mean value of the flux and Фa, the amplitude of the flux variation.
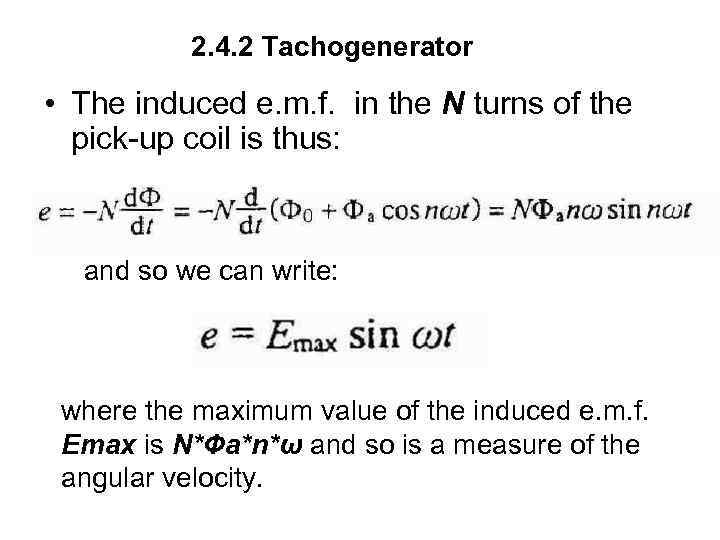 2. 4. 2 Tachogenerator • The induced e. m. f. in the N turns of the pick-up coil is thus: and so we can write: where the maximum value of the induced e. m. f. Emax is N*Фа*n*ω and so is a measure of the angular velocity.
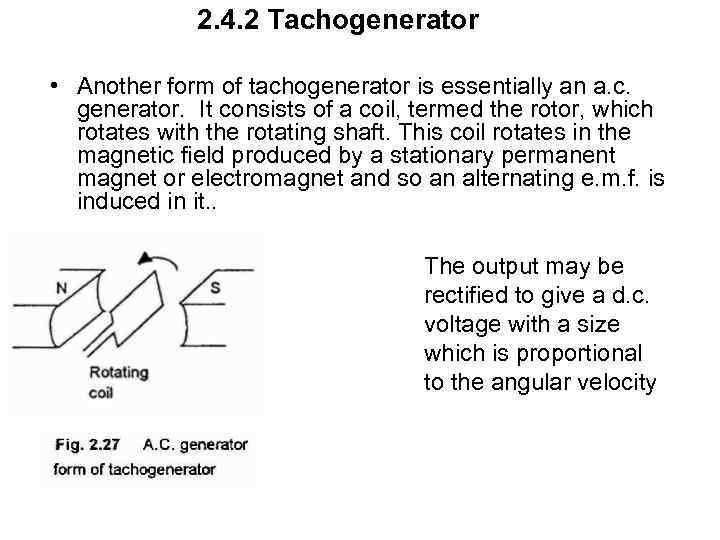 2. 4. 2 Tachogenerator • Another form of tachogenerator is essentially an a. c. generator. It consists of a coil, termed the rotor, which rotates with the rotating shaft. This coil rotates in the magnetic field produced by a stationary permanent magnet or electromagnet and so an alternating e. m. f. is induced in it. . The output may be rectified to give a d. c. voltage with a size which is proportional to the angular velocity
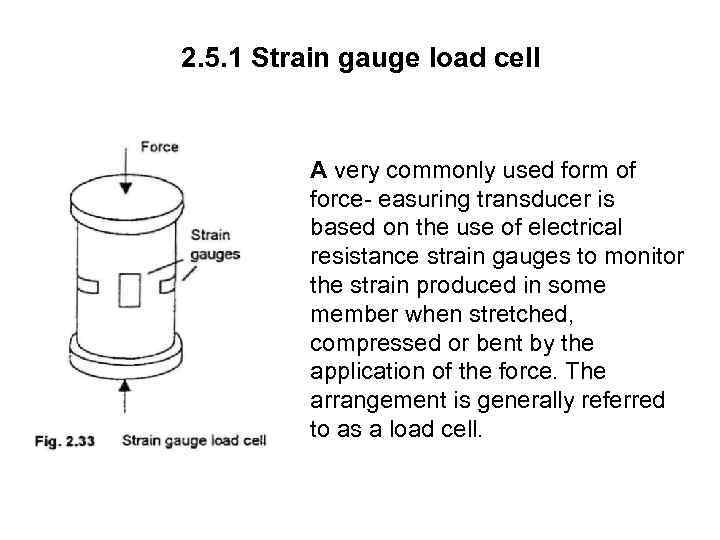 2. 5. 1 Strain gauge load cell A very commonly used form of force- easuring transducer is based on the use of electrical resistance strain gauges to monitor the strain produced in some member when stretched, compressed or bent by the application of the force. The arrangement is generally referred to as a load cell.
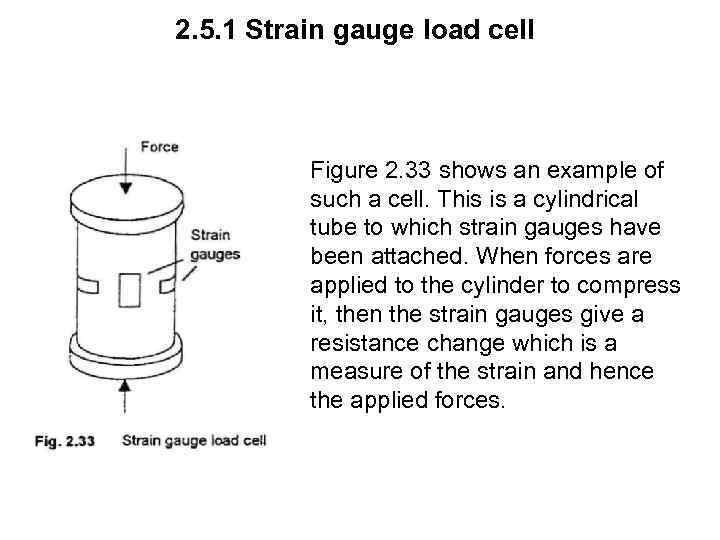 2. 5. 1 Strain gauge load cell Figure 2. 33 shows an example of such a cell. This is a cylindrical tube to which strain gauges have been attached. When forces are applied to the cylinder to compress it, then the strain gauges give a resistance change which is a measure of the strain and hence the applied forces.
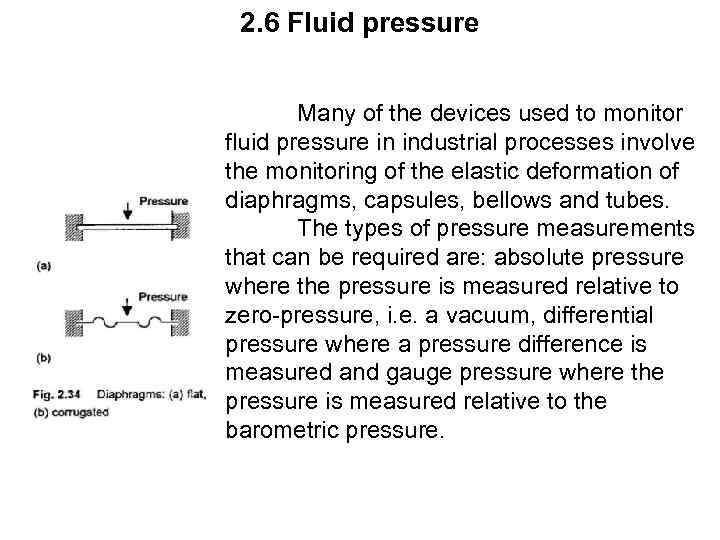 2. 6 Fluid pressure Many of the devices used to monitor fluid pressure in industrial processes involve the monitoring of the elastic deformation of diaphragms, capsules, bellows and tubes. The types of pressure measurements that can be required are: absolute pressure where the pressure is measured relative to zero-pressure, i. e. a vacuum, differential pressure where a pressure difference is measured and gauge pressure where the pressure is measured relative to the barometric pressure.
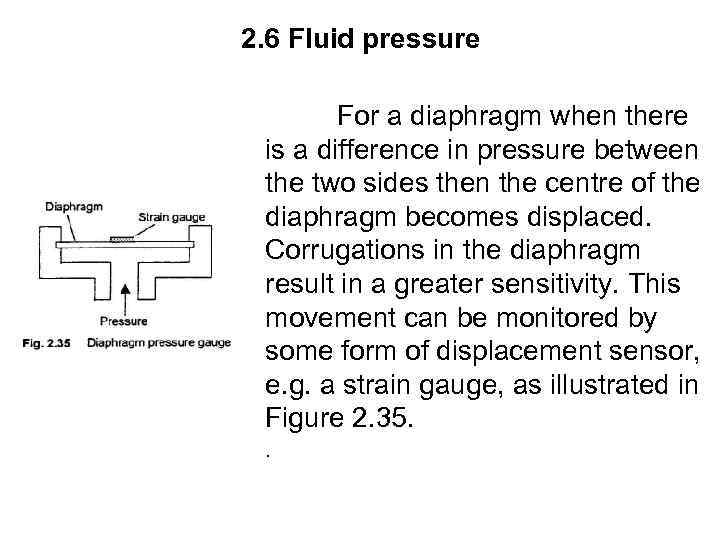 2. 6 Fluid pressure For a diaphragm when there is a difference in pressure between the two sides then the centre of the diaphragm becomes displaced. Corrugations in the diaphragm result in a greater sensitivity. This movement can be monitored by some form of displacement sensor, e. g. a strain gauge, as illustrated in Figure 2. 35. .
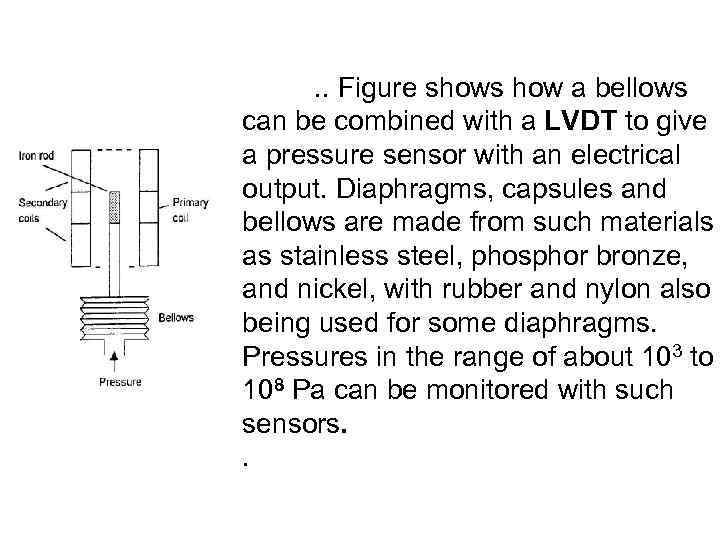 . . Figure shows how a bellows can be combined with a LVDT to give a pressure sensor with an electrical output. Diaphragms, capsules and bellows are made from such materials as stainless steel, phosphor bronze, and nickel, with rubber and nylon also being used for some diaphragms. Pressures in the range of about 103 to 108 Pa can be monitored with such sensors. .


