b86032b20778f18ec85c094c20e094d3.ppt
- Количество слайдов: 89


NIMAC for Publishers & Vendors: Using the Excel to OPF Feature & Manually Uploading Files December 2015

What is the Publisher Portal? • This portal provides publisher access to the NIMAC system. • Publishers who are registered with the NIMAC receive an account that allows them to submit NIMAS file sets to the repository. • The primary account holder is the “super user. ”

What does the Publisher Portal do? • The NIMAC Publisher Portal enables publishers to: – View, update and download your own inventory – Create “starter OPFs” for your files – Upload NIMAS file sets that are 60 MB or smaller directly into the system. – Locate and download resources such as the NIMAC Validation Wizard and the batch delivery Excel sheet
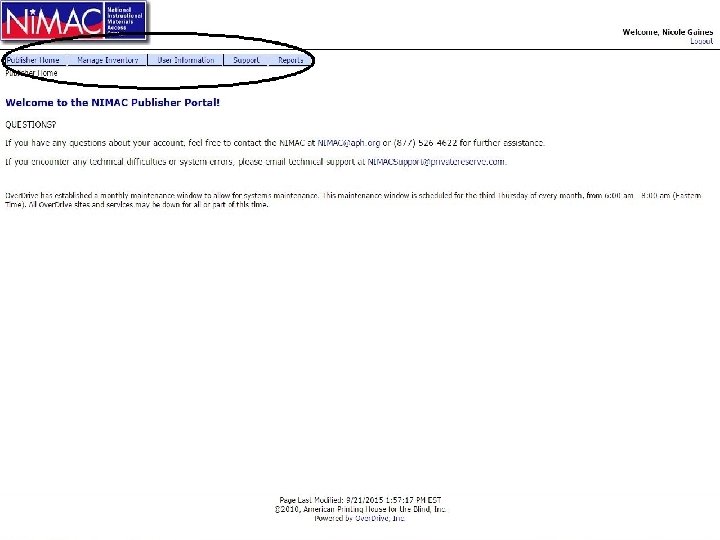

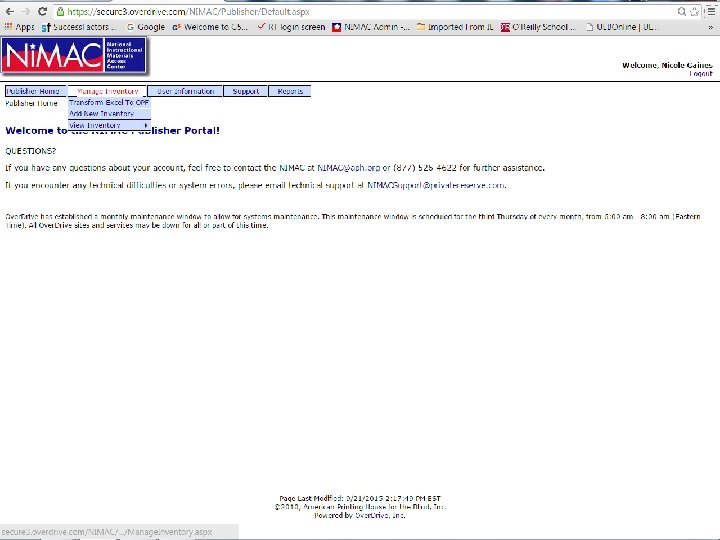
The Home Screen • The home screen has five menu tabs: • Publisher Home • Manage Inventory • User Information • Support • Reports • In this training, we will focus on the Manage Inventory functionality.

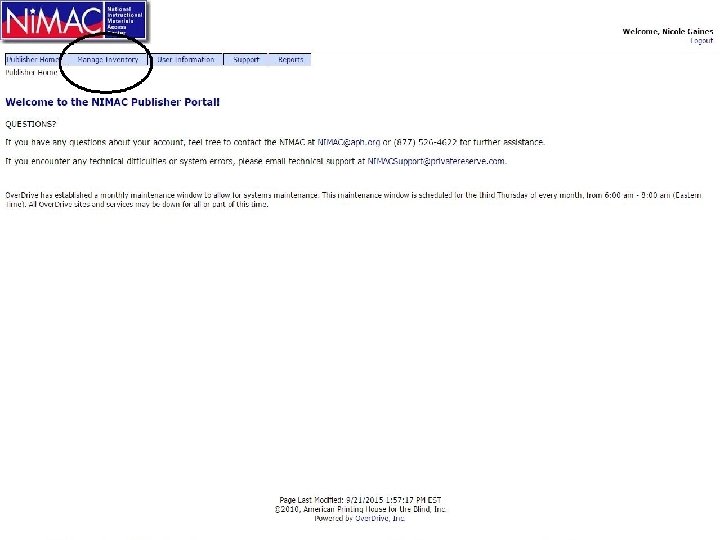
Manage Inventory • Specifically, we will cover: – How to generate correctly formatted and tagged OPF metadata using the “Transform Excel to OPF” feature – How to create metadata records in the system for new inventory – How to upload zip files for new inventory – How to search the inventory – How to upload resubmissions – How to get more help!

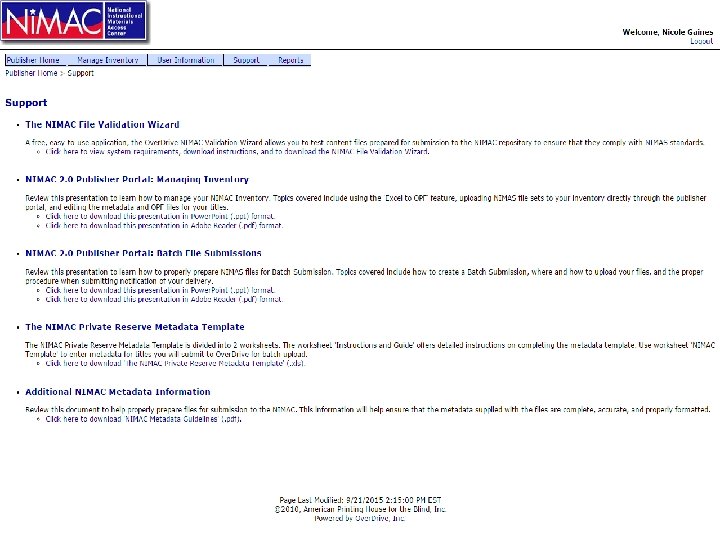
The Support Tab

A quick note about the Support Tab • The Support tab contains helpful documentation and tools that you can download anytime, including: – The NIMAC Metadata Guidelines document – The NIMAC Validation Wizard set-up file – The NIMAC Batch Load Excel Spreadsheet – This Power. Point presentation!

A quick note on getting help: • If you experience a technical problem or error while using the publisher portal, contact Over. Drive Tech Support: nimacsupport@privatereserve. com • If you have a problem related to an FTP delivery, contact the Over. Drive Batch Team : FTPNIMAC@privatereserve. com • All other questions: nimac@aph. org

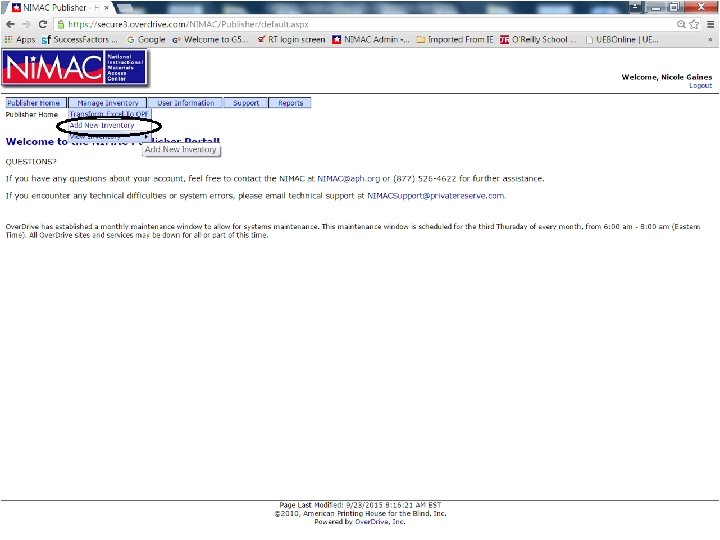
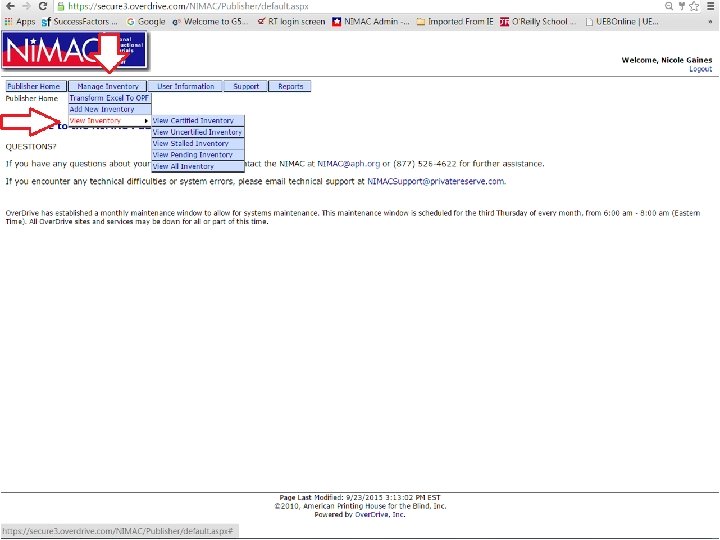
Manage Inventory • The Manage Inventory tab has three menu options: • Transform Excel to OPF • Add New Inventory • View Inventory

Transform Excel to OPF

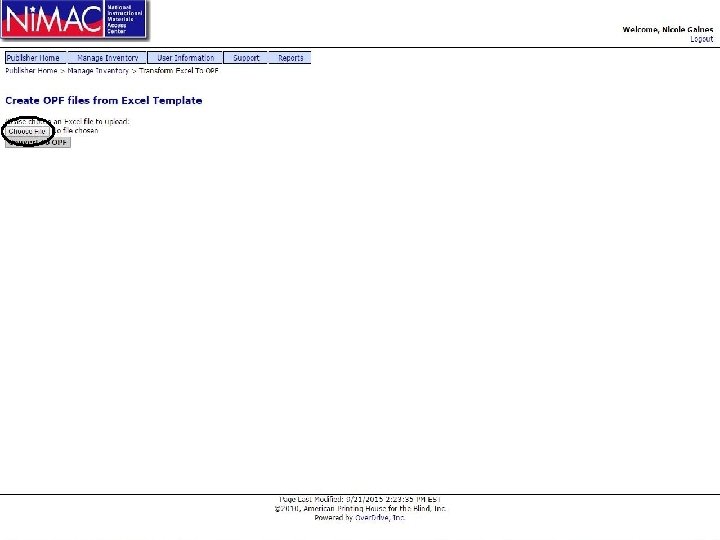
Transform Excel to OPF • This is an optional feature that allows you to convert metadata from an uploaded Over. Drive Batch Excel spreadsheet into valid OPF metadata with the correct NIMAS tags and formatting. • Using this feature can help reduce metadata errors by eliminating the need for vendors to manually enter and format metadata in the OPF file.

Transform Excel to OPF • Important: The official NIMAC Batch delivery spreadsheet is the only sheet that can be used. • This sheet is found on the Support tab and it is also available on the NIMAC website: http: //www. nimac. us/publishers. html • The system can only accept the sheet as an. xls file. If you have a later version of Excel, be sure to save the sheet as. xls and not as. xlsx.

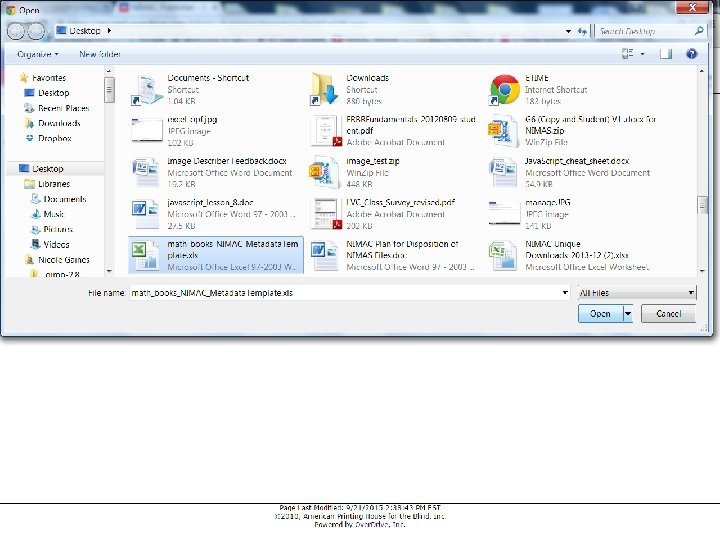
Excel to OPF • Select “Transform Excel to OPF” and click the “Choose File” button. • You will see a file selection dialogue box. • Just navigate to where your completed Excel sheet resides and click “Open. ”


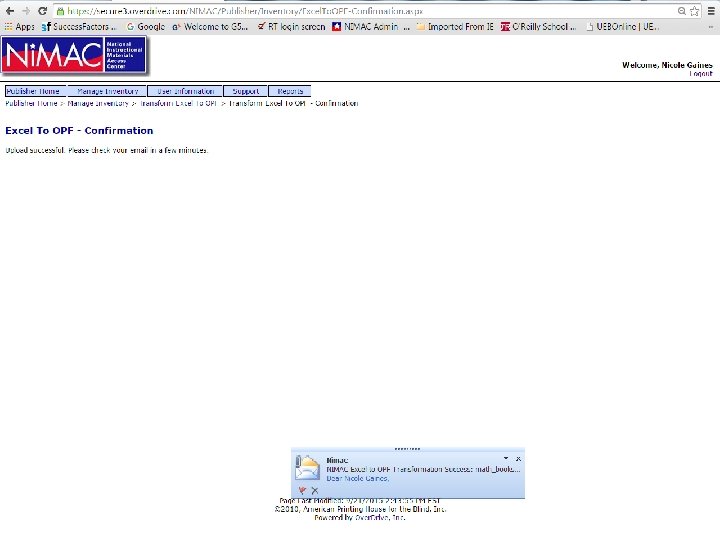
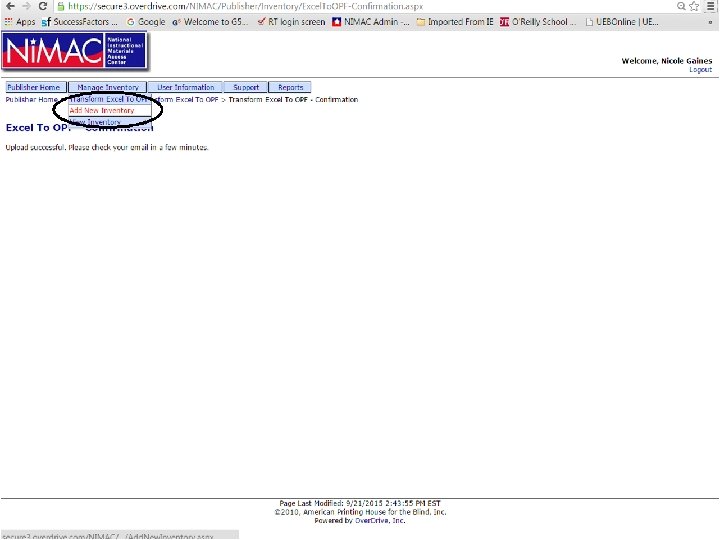
Excel to OPF • The screen then returns to the Excel to OPF page and shows the name of the file that you have chosen. • Now click “Convert to OPF. ” • You see a confirmation screen that contains a message that you should check your email shortly for the emailed zip file of “starter” OPFs.

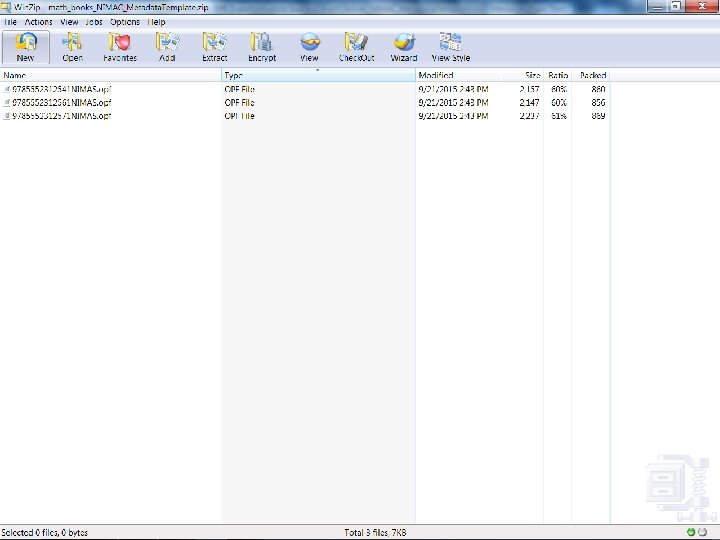
Transform Excel to OPF • The system then emails the OPF files to you in a zip file. • These files can be used in NIMAS file sets regardless of whether they are manually uploaded or submitted using batch delivery. • Note: The Excel to OPF feature does not modify or replace any OPFs that are in the NIMAC inventory.

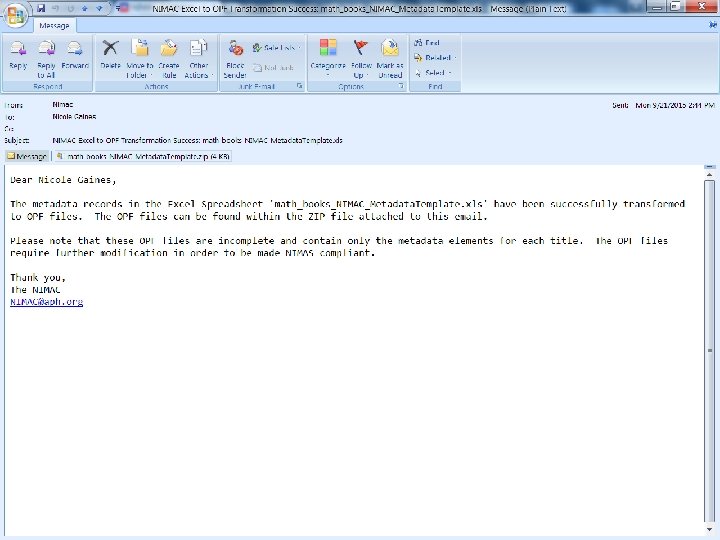

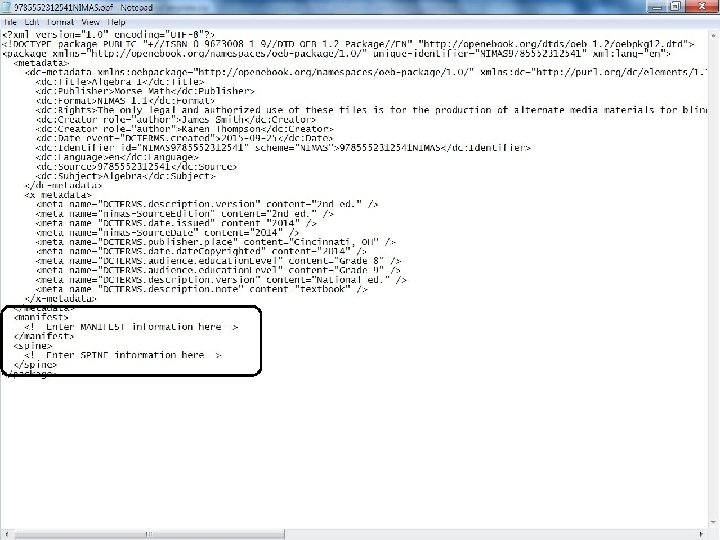
Excel to OPF • Now you can download the zip file from the automated email from the system. • When you open the “starter” OPFs, you will see that the correctly tagged and formatted metadata are present. • The Manifest and Spine portions of the OPFs must be completed for your OPFs to be valid.

File Validation • After your file set is prepared, run it through the NIMAC Validation Wizard. • (Detailed instructions found in “NIMAC for Publishers and Vendors: Overview & File Submission Procedures” on the Support tab and the NIMAC website. ) • Once you have confirmed that your file set is valid, you are ready to upload the file to the NIMAC system!

Add New Inventory

Add New Inventory • Files that are smaller than 60 MB can be uploaded directly into the system. • If you would prefer to submit smaller files by FTP, that is also fine. • Add New Inventory can ONLY be used to upload ISBNs that are not already in the system. • To upload resubmissions, the Edit Title function must be used.

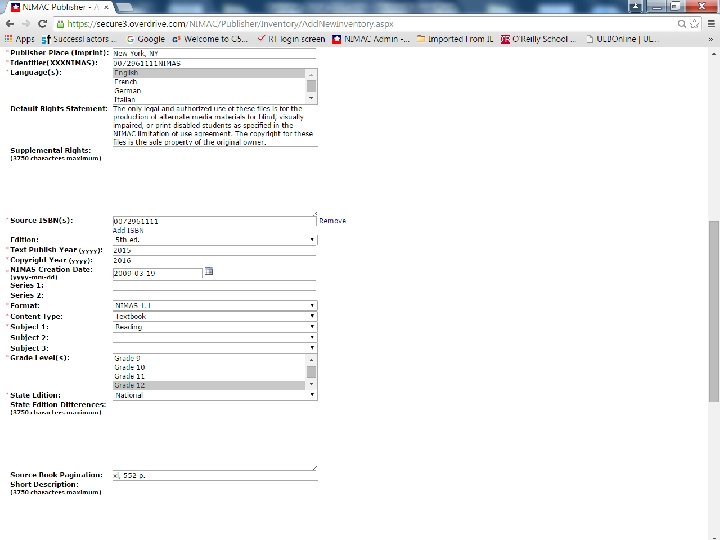
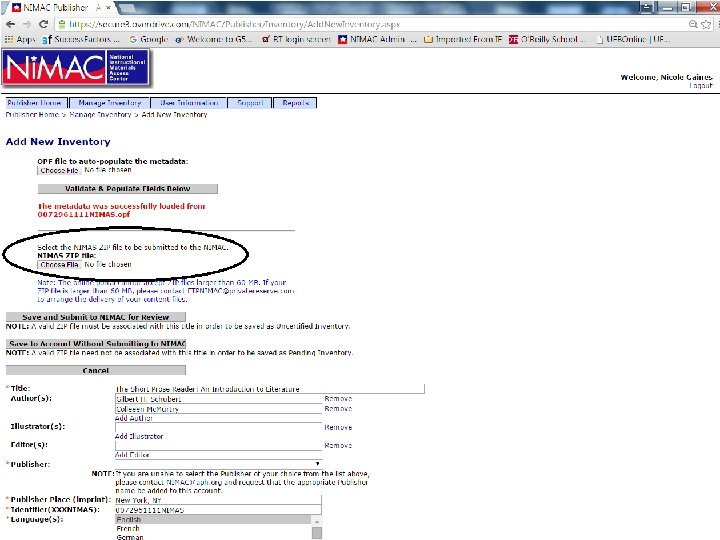
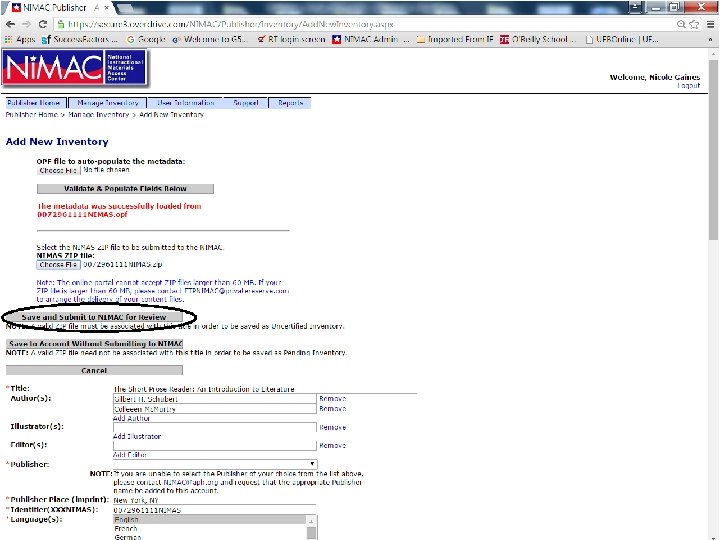
Add New Inventory • The Add New Inventory page allows the user to create a new metadata record by either manually typing in the metadata or extracting the metadata from an unzipped OPF file. • After entering the metadata, the user then uploads and saves the NIMAS zip file and record to the system.

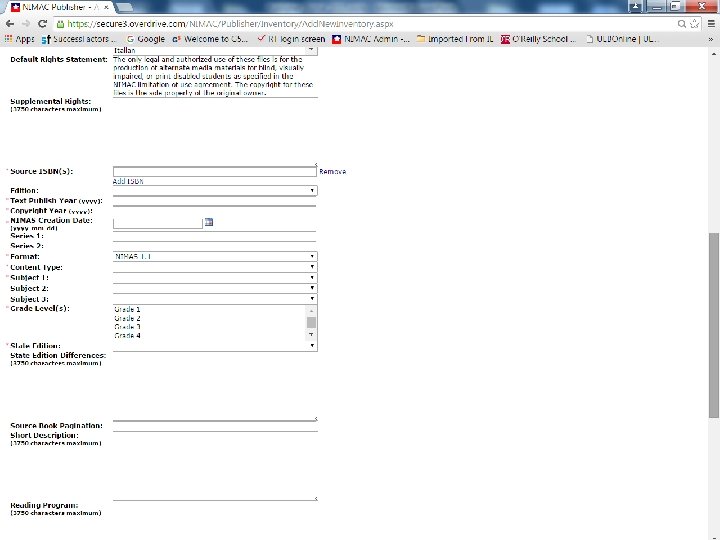
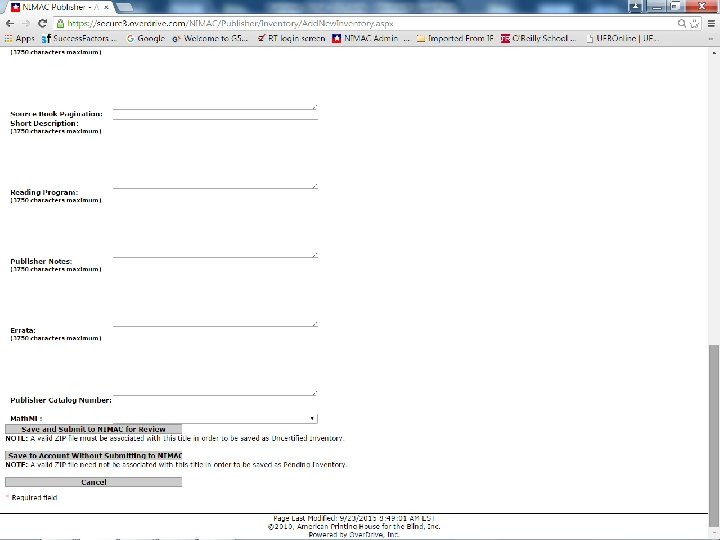
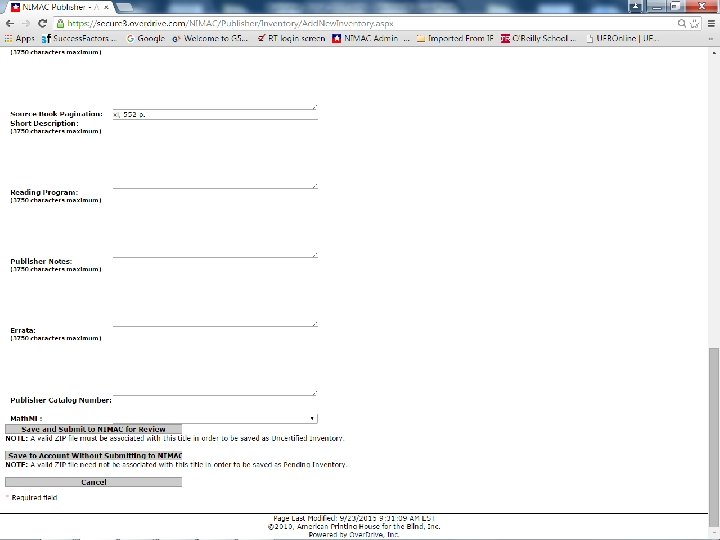
Add New Inventory • When you click on “Add New Inventory”, you will open a web form that contains all the metadata fields that are valid for NIMAS. • Required metadata are found at the top of the screen, while optional fields are further down.
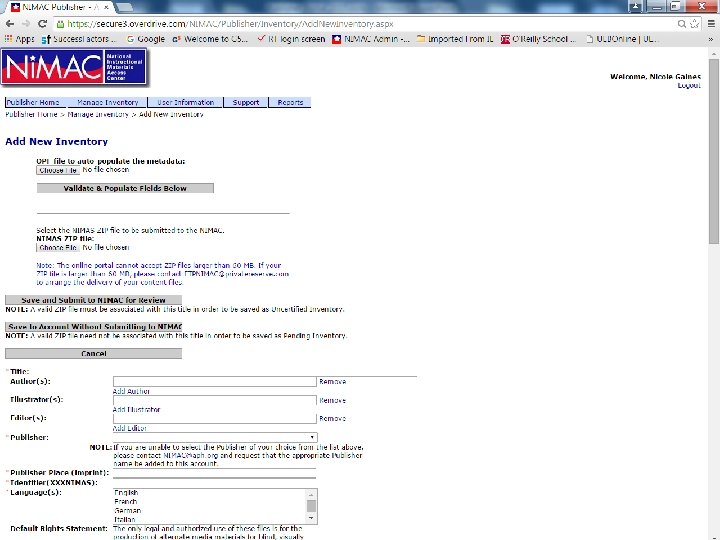

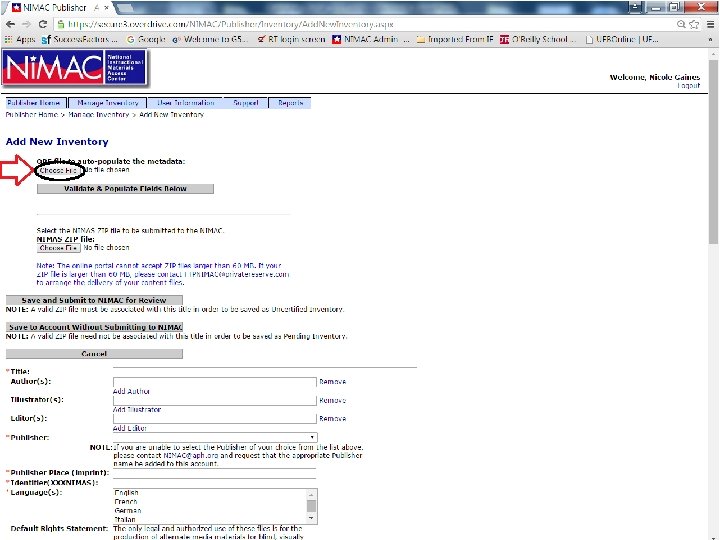
Add New Inventory • As mentioned, the system allows you to manually type in the metadata, but the easiest way to create a new record is to extract the metadata from an unzipped OPF. • Let’s walk through that now!

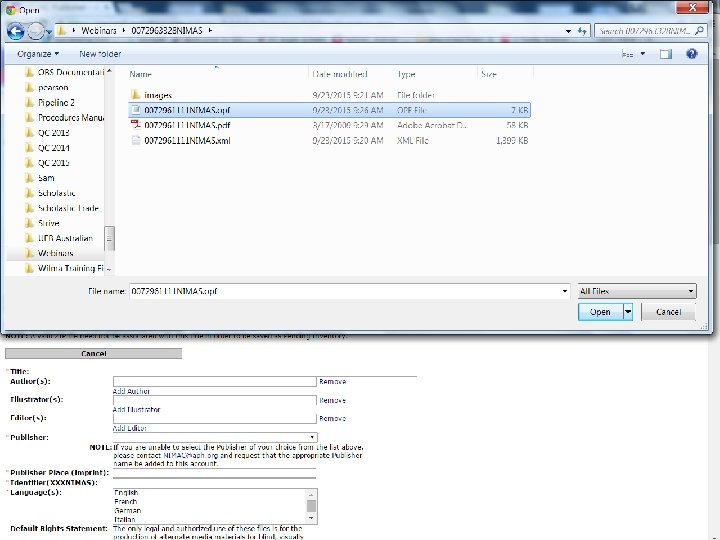
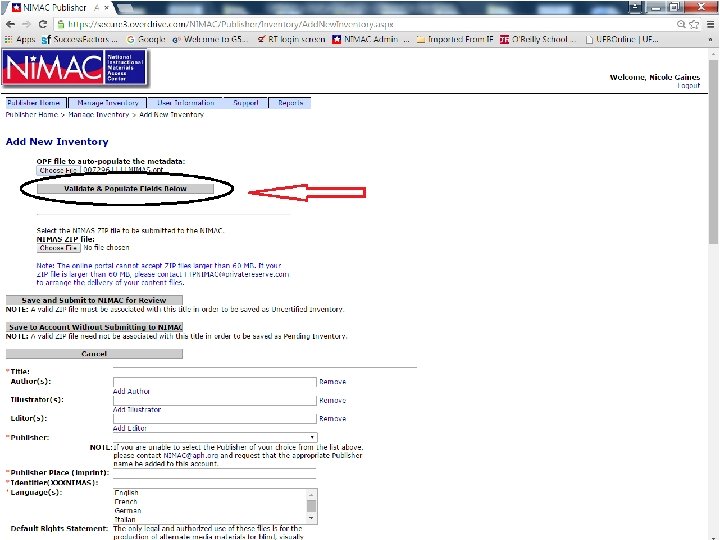
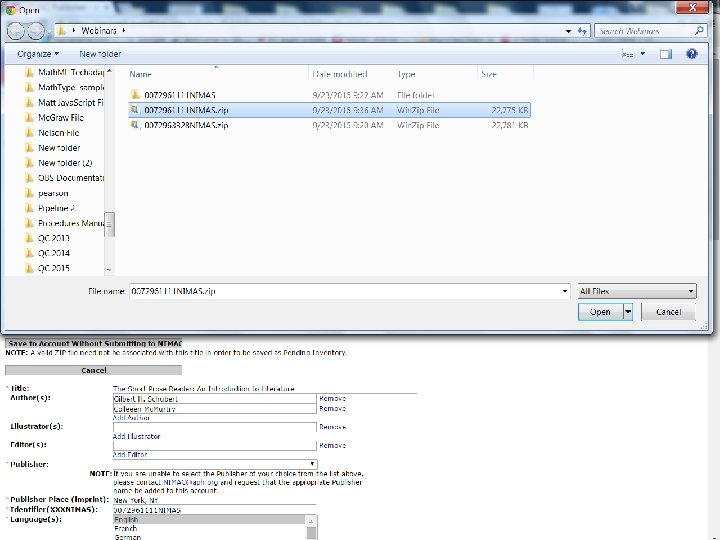
OPF Metadata Extraction • When you click “Choose File, ” you will be prompted to navigate to the unzipped OPF that you want to use. • Navigate to the file and click “Open. ” • The system will then return you to the Add New Inventory screen. • Just click “Validate & Populate Fields Below” to extract the metadata.
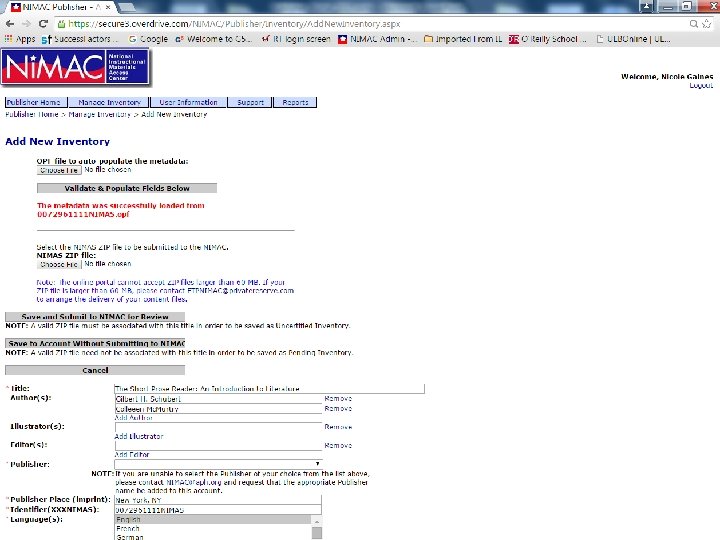

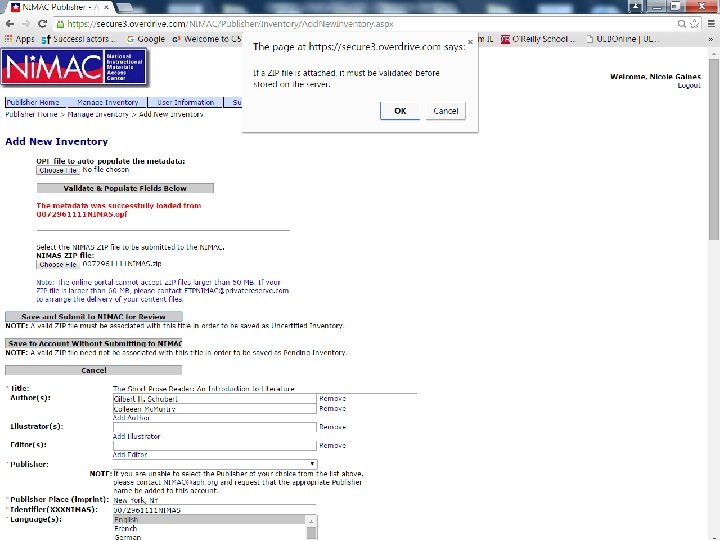
Uploading the NIMAS zip file • Once you have reviewed the extracted metadata, you will upload your zip file. • Then you will save the record and zip file at the same time. • Be sure you have run the file set through the NIMAC Validation Wizard before attempting to upload. • The system will not upload an invalid file set.

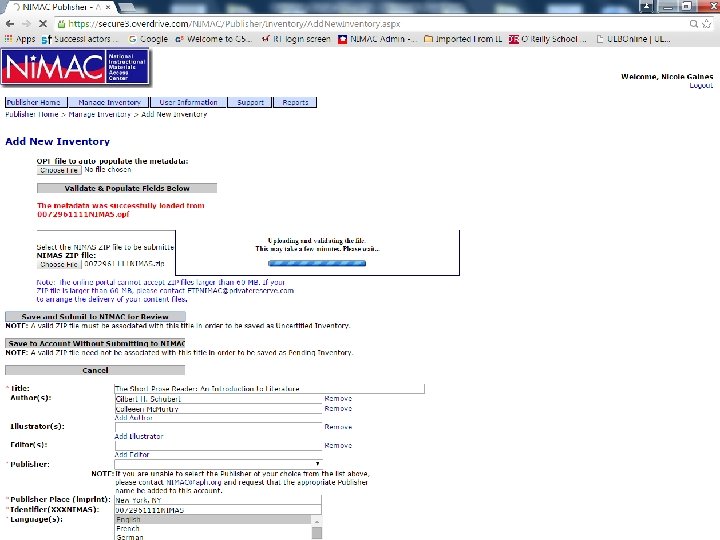
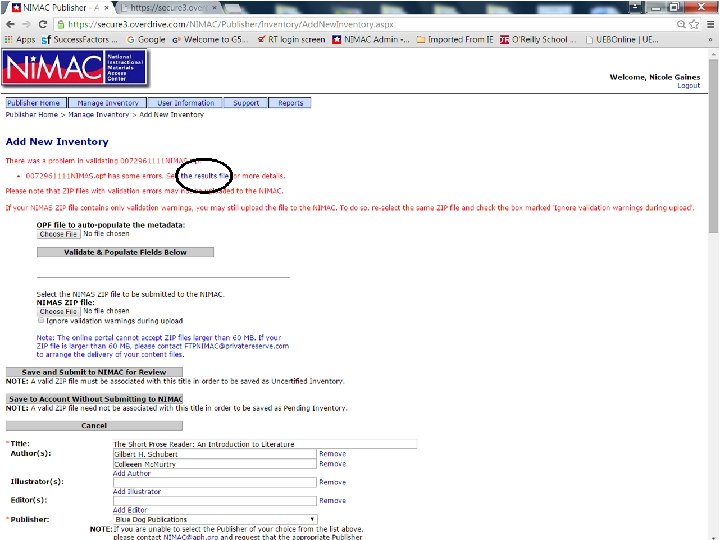
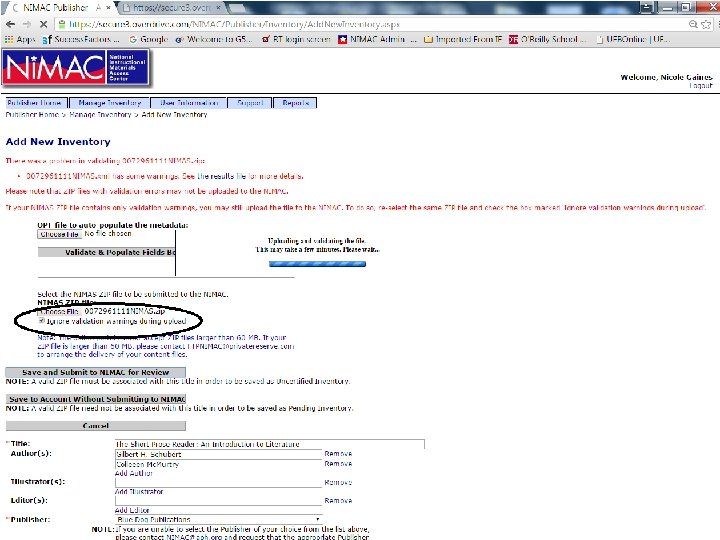
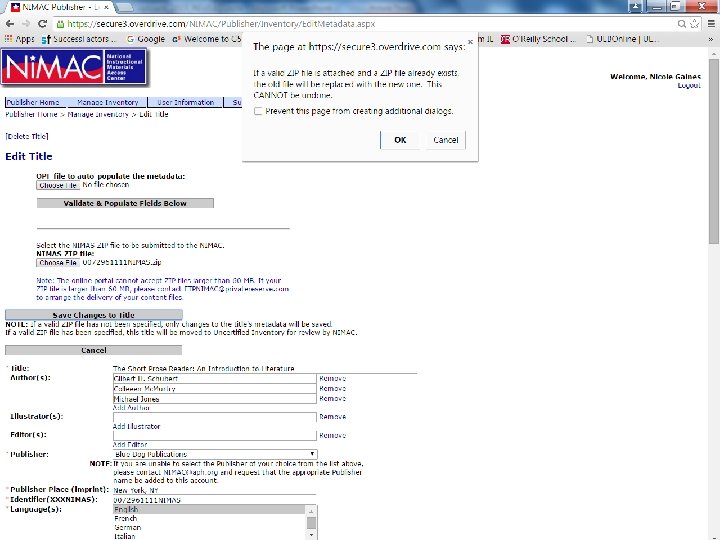
Uploading and Saving • Once you have clicked Save and Submit for Review, the system alerts you that the system will now validate the file. • When you click “Okay, ” you will see a “blue straw” that shows that validation is in progress. • If there any validation errors or warnings, you will receive a message with a link to details.

Validation Errors and Warnings • Validation errors must be corrected in order for the file to be accepted. • Warnings are “best practices” information. • We recommend that you correct these issues before uploading the zip file. • However, the system will accept the file if you check “Ignore Validation Warnings During Upload” and re-upload the zip file.


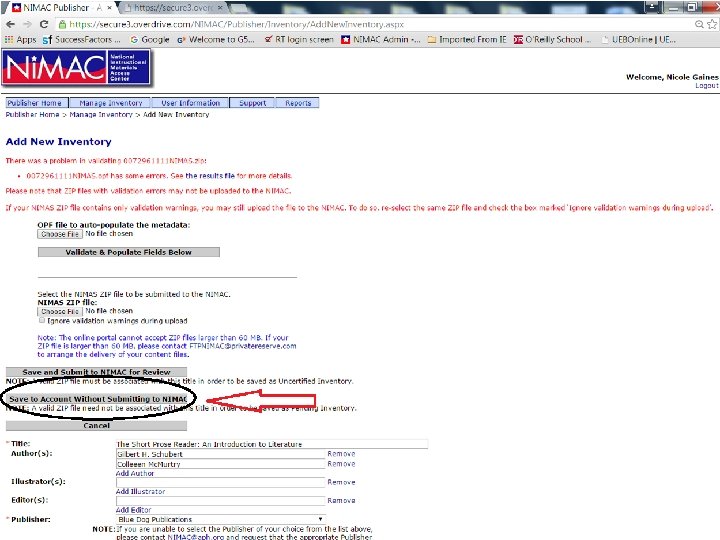
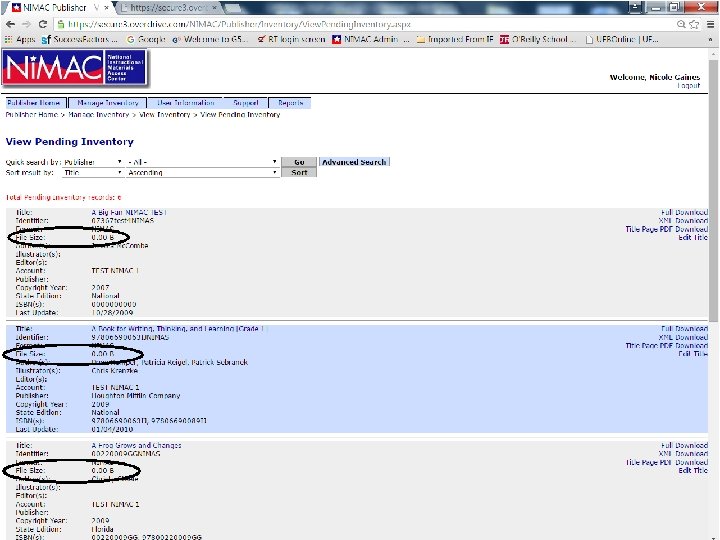
Pending Inventory • If your zip file is invalid or corrupt, the system will reject the zip file upload. • However, you can still save your metadata record and upload a valid zip file later. • To do this, select “Save to Account Without Submitting to NIMAC. ” • The record is saved to Pending inventory. • Pending inventory is not reviewed by NIMAC.

Viewing Inventory

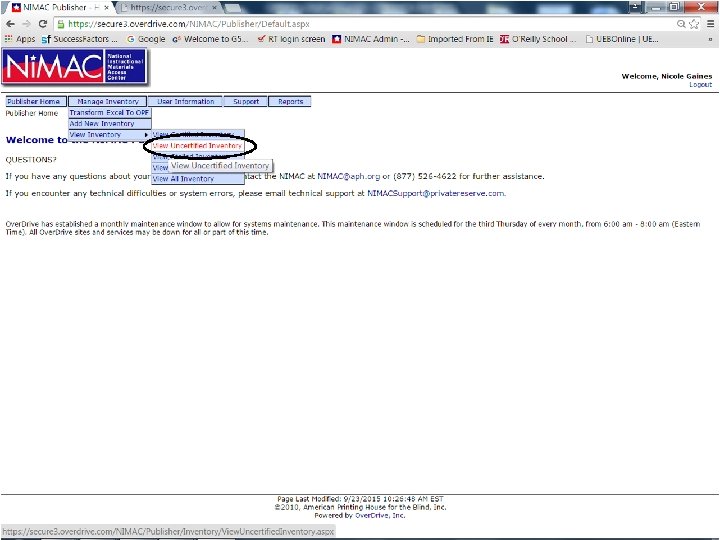
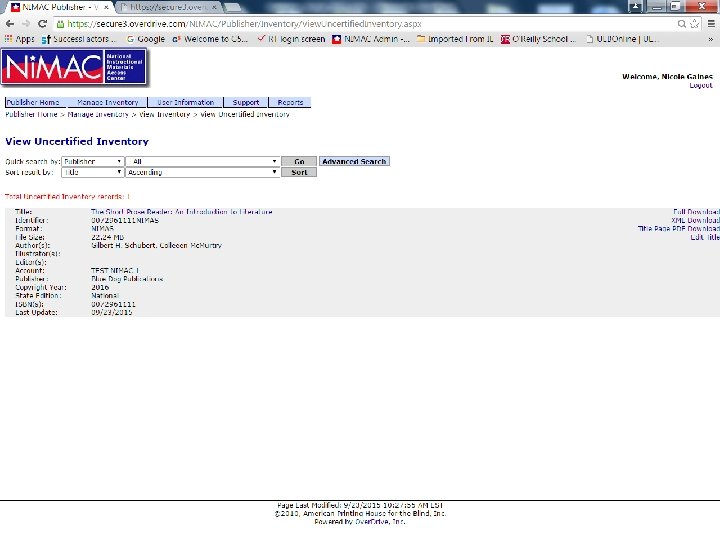
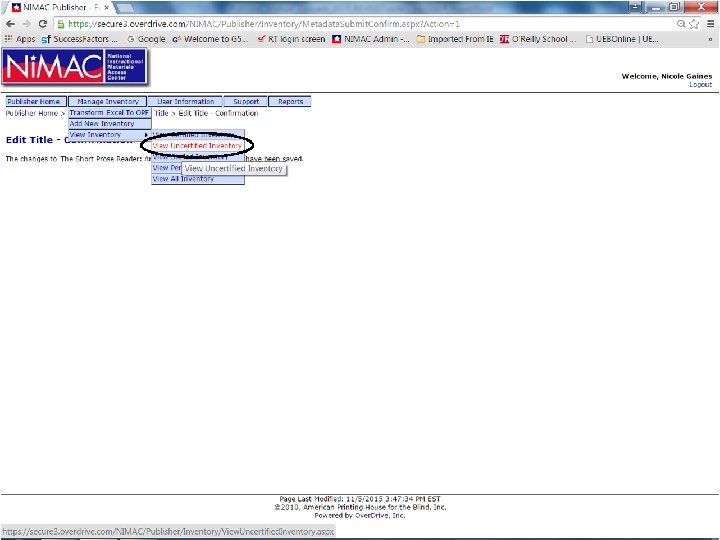
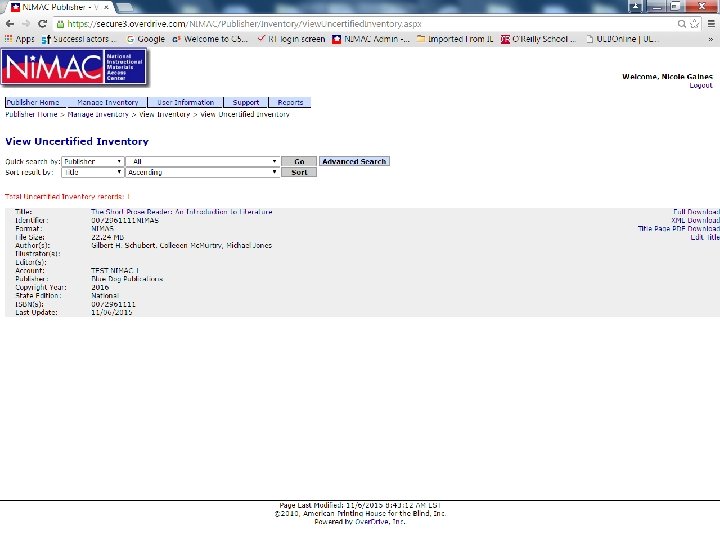
Viewing Inventory • After you have uploaded a new file, it’s a good idea to confirm that you have saved it correctly and it is now found in the system in the Uncertified category. • To locate the file just click on Manage Inventory View Uncertified inventory. • You can use a quick search by ISBN, or just browse to locate the record.

Viewing Inventory • If you inadvertently click “Save without Submitting to NIMAC” the record will appear in Pending Inventory. • You can locate the record in Pending and use the Edit Title option to save and submit the file. • Pending records that have no zip file attached will show a file size of zero.

Resubmitting Files in the Portal

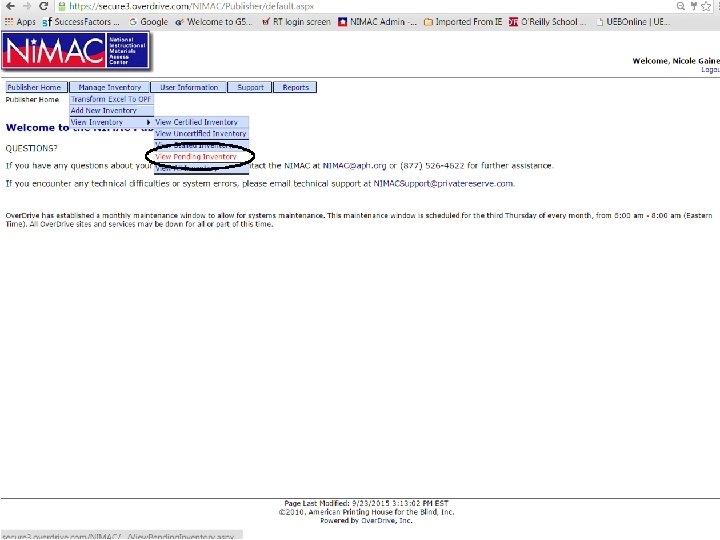
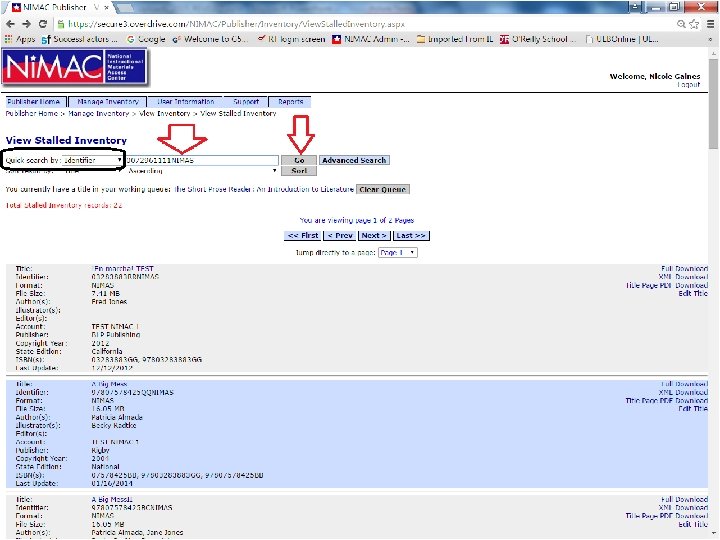
Inventory Categories • Certified: Files that have been accepted into the repository • Uncertified: Files that have been uploaded and are in the NIMAC review process. • Stalled: Files that have been rejected due to errors and are awaiting vendor corrections. • Pending: Files uploaded to the system either with or without a zip file and not submitted to NIMAC for review. • All: Displays all four inventory categories.

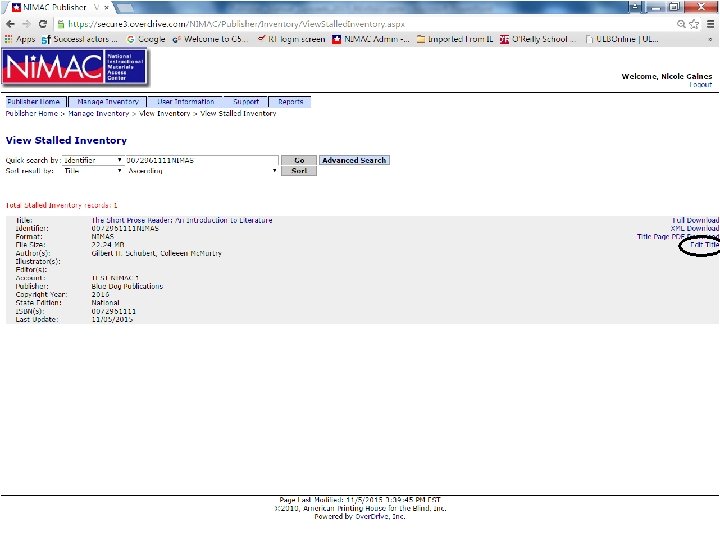
Resubmitting Files • Once a record is in the system, you can search and view it. • Records in Uncertified, Pending, or Stalled can be edited and corrected zip files uploaded, if necessary. • Certified inventory cannot be edited. • If you need to resubmit Certified files for some reason, contact NIMAC.

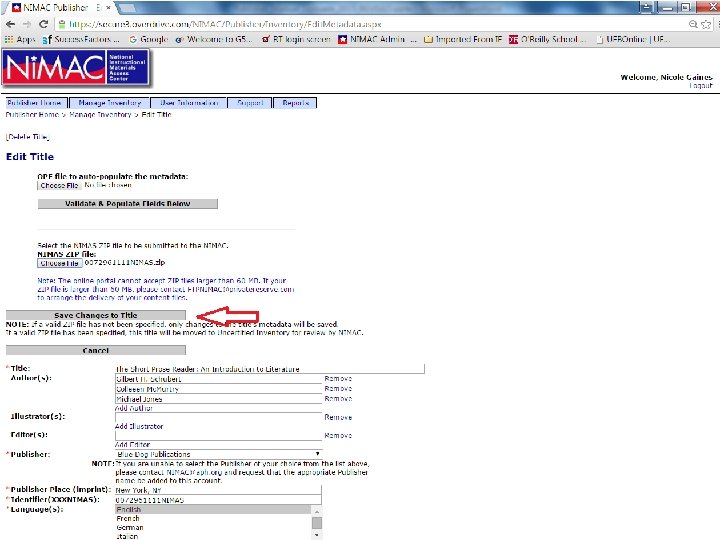
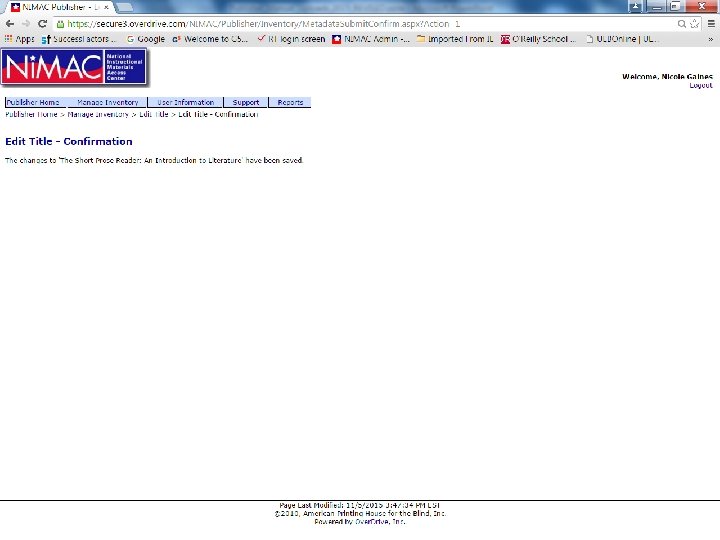
Resubmitting Files • If you need to reupload a zip file that is 60 MB or smaller, you will use the Edit Title option. • This option is found to the right of the brief metadata record. • Clicking the link opens the metadata record and provides the option to upload a new zip file.

Resubmitting Files • You can make changes to the metadata record, upload a new zip file, or both. • Once you have made any changes, just click the “Save Changes to Title” button. • If your record was previously in Pending or in Stalled, the system will automatically move it to Uncertified. • NIMAC staff check Uncertified daily for new files to review.


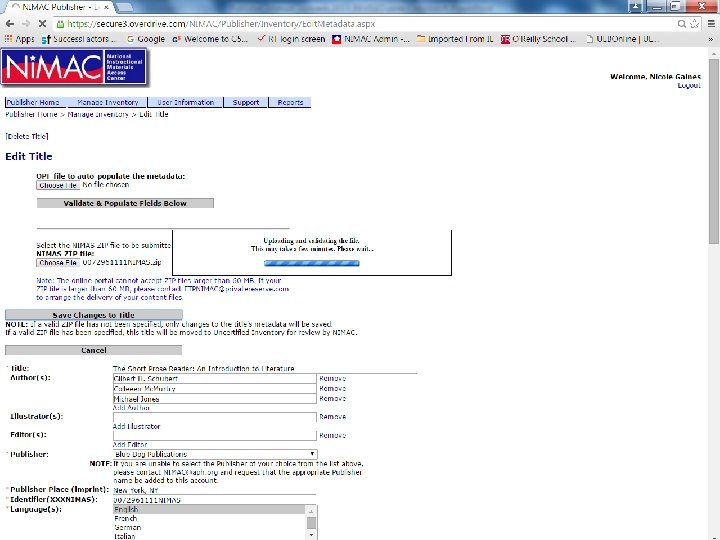

Resubmitting Files • Once the zip file has been saved and the file is back in Uncertified, NIMAC staff will review the file. • There is no need to notify Over. Drive of portal uploads as they have no involvement in processing those files. • However we do ask that you notify NIMAC at nimac@aph. org.

Congratulations! • You now know how to: – Use the Excel to OPF feature – Add new inventory using the portal – Find a file in the inventory – Upload a corrected file

Need additional help? • If you need any assistance in using the NIMAC, don’t hesitate to get in touch! nimac@aph. org 877 -526 -4622

Over. Drive Support • For technical support or help with any system errors, contact Over. Drive at: nimacsupport@privatereserve. com • For problems related to an FTP delivery, contact the Over. Drive Batch Team: FTPNIMAC@privatereserve. com

Producing NIMAS • For technical questions about the NIMAS specification or preparing NIMAS files, contact the National Center for AEM: Skip Stahl, Co-Director sstahl@cast. org 781 -245 -2212
b86032b20778f18ec85c094c20e094d3.ppt