a54277b6ea79724e6414fd4e81cd0041.ppt
- Количество слайдов: 77
 MFGT 290 MFGT Certification Class Chapters 16, 17, 18, 19, 33 Engineering Drawing, GD&T, Computer Aided Design Product Design Tools, Lean Production Professor Joe Greene CSU, CHICO MFGT 290
 Chap 16: Engineering Drawing • • • Drawing Standards Projection Systems Auxiliary and Section Views Dimensioning Tolerancing Fits Tolerances for 100% Interchaneability Surface Finish Symbols Review Questions
 Introduction • Standards are necessary in CAD design since designs are typically complex. – Designers create drawings for others to make. . – Engineering and Manufacturing needs common symbols, fonts, dimensions, call outs, section views to reduce cost of reading drawings and producing parts from them. – American • ANSI standard • ASME standard – European • ISO standard
 Introduction • History – Design standards are thought to have been used in ancient Egypt for the pyramids. – Drafting Standards started in England in the 1940 s • Stanley Parker – English worker in a torpedo factory in Scotland, devised a method of specifying cylindrical tolerance zones surrounding an absolute location from what was previously specified as rectangular plus/minus tolerances. This became true position. – 1935: American Standards Association (ASA) published first standard for engineering drawings. • Only 20 pages in length with 5 pages devoted to dimensioning. – 1940: SAE Draftsman handbook • Chevrolet division at GM detailed standards for automotive draftsmen. – 1945: US Army publication of ordinance manual specified dimensioning and tolerance for the US Army. – 1949: Military Standard 8 was published to specify dimensioning
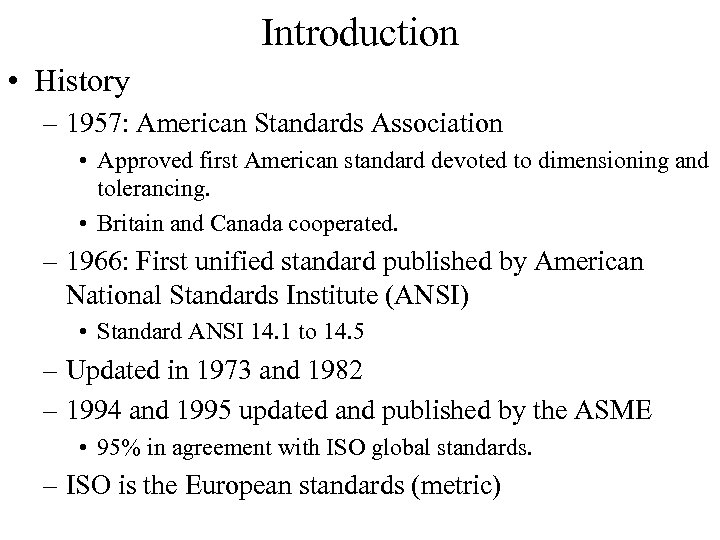 Introduction • History – 1957: American Standards Association • Approved first American standard devoted to dimensioning and tolerancing. • Britain and Canada cooperated. – 1966: First unified standard published by American National Standards Institute (ANSI) • Standard ANSI 14. 1 to 14. 5 – Updated in 1973 and 1982 – 1994 and 1995 updated and published by the ASME • 95% in agreement with ISO global standards. – ISO is the European standards (metric)
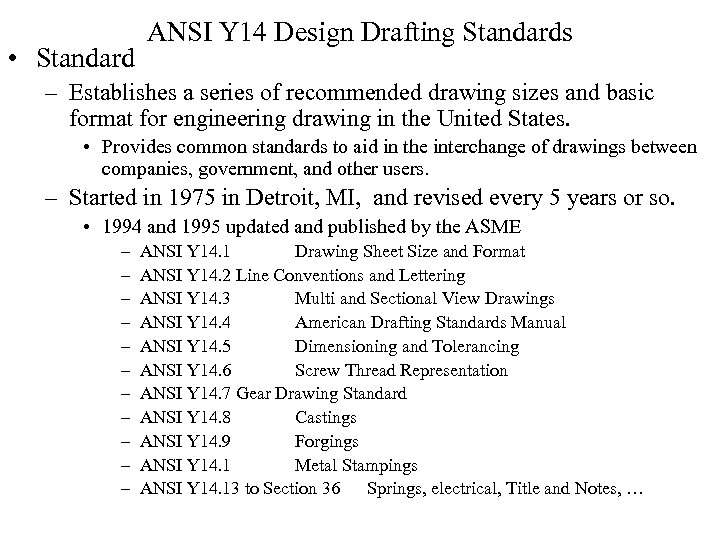 • Standard ANSI Y 14 Design Drafting Standards – Establishes a series of recommended drawing sizes and basic format for engineering drawing in the United States. • Provides common standards to aid in the interchange of drawings between companies, government, and other users. – Started in 1975 in Detroit, MI, and revised every 5 years or so. • 1994 and 1995 updated and published by the ASME – – – ANSI Y 14. 1 Drawing Sheet Size and Format ANSI Y 14. 2 Line Conventions and Lettering ANSI Y 14. 3 Multi and Sectional View Drawings ANSI Y 14. 4 American Drafting Standards Manual ANSI Y 14. 5 Dimensioning and Tolerancing ANSI Y 14. 6 Screw Thread Representation ANSI Y 14. 7 Gear Drawing Standard ANSI Y 14. 8 Castings ANSI Y 14. 9 Forgings ANSI Y 14. 1 Metal Stampings ANSI Y 14. 13 to Section 36 Springs, electrical, Title and Notes, …
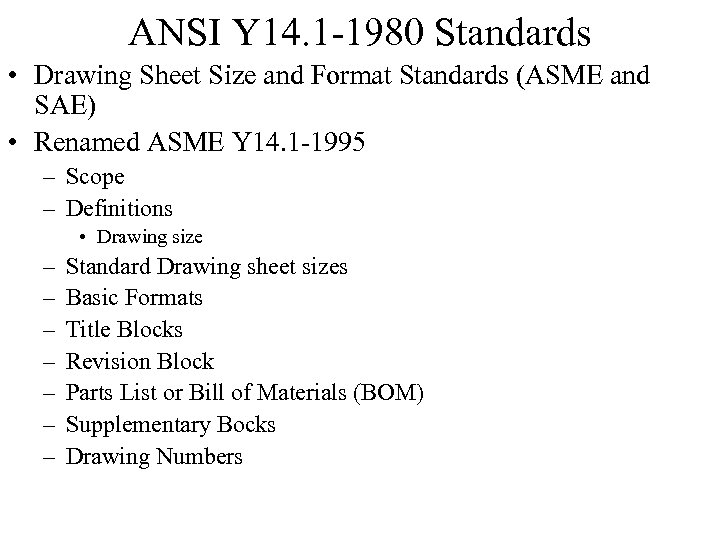 ANSI Y 14. 1 -1980 Standards • Drawing Sheet Size and Format Standards (ASME and SAE) • Renamed ASME Y 14. 1 -1995 – Scope – Definitions • Drawing size – – – – Standard Drawing sheet sizes Basic Formats Title Blocks Revision Block Parts List or Bill of Materials (BOM) Supplementary Bocks Drawing Numbers
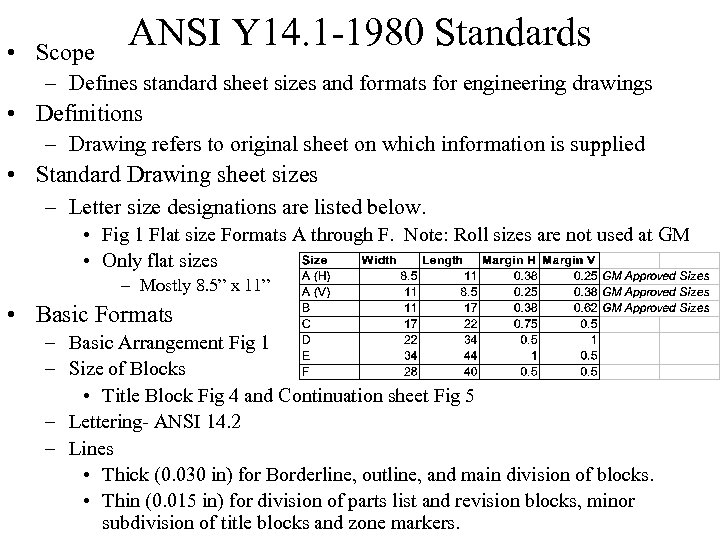 • Scope ANSI Y 14. 1 -1980 Standards – Defines standard sheet sizes and formats for engineering drawings • Definitions – Drawing refers to original sheet on which information is supplied • Standard Drawing sheet sizes – Letter size designations are listed below. • Fig 1 Flat size Formats A through F. Note: Roll sizes are not used at GM • Only flat sizes – Mostly 8. 5” x 11” • Basic Formats – Basic Arrangement Fig 1 – Size of Blocks • Title Block Fig 4 and Continuation sheet Fig 5 – Lettering- ANSI 14. 2 – Lines • Thick (0. 030 in) for Borderline, outline, and main division of blocks. • Thin (0. 015 in) for division of parts list and revision blocks, minor subdivision of title blocks and zone markers.
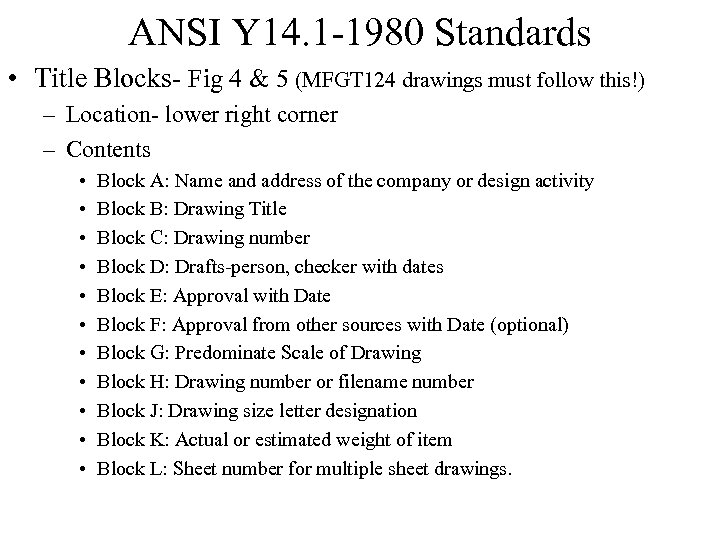 ANSI Y 14. 1 -1980 Standards • Title Blocks- Fig 4 & 5 (MFGT 124 drawings must follow this!) – Location- lower right corner – Contents • • • Block A: Name and address of the company or design activity Block B: Drawing Title Block C: Drawing number Block D: Drafts-person, checker with dates Block E: Approval with Date Block F: Approval from other sources with Date (optional) Block G: Predominate Scale of Drawing Block H: Drawing number or filename number Block J: Drawing size letter designation Block K: Actual or estimated weight of item Block L: Sheet number for multiple sheet drawings.
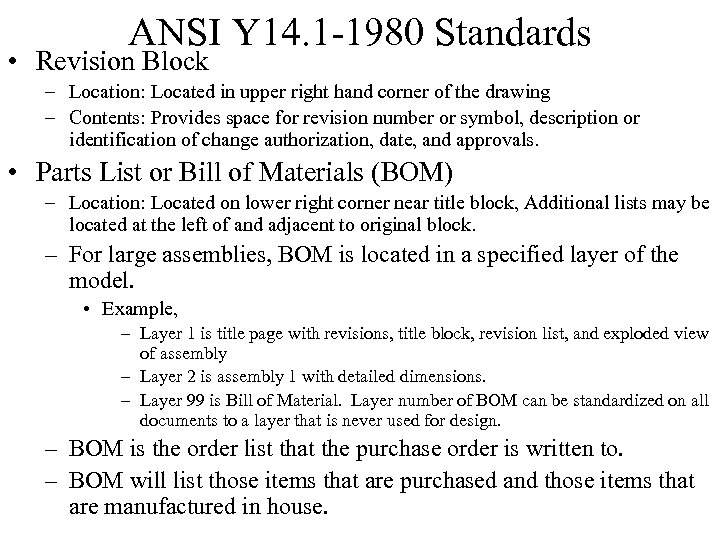 ANSI Y 14. 1 -1980 Standards • Revision Block – Location: Located in upper right hand corner of the drawing – Contents: Provides space for revision number or symbol, description or identification of change authorization, date, and approvals. • Parts List or Bill of Materials (BOM) – Location: Located on lower right corner near title block, Additional lists may be located at the left of and adjacent to original block. – For large assemblies, BOM is located in a specified layer of the model. • Example, – Layer 1 is title page with revisions, title block, revision list, and exploded view of assembly – Layer 2 is assembly 1 with detailed dimensions. – Layer 99 is Bill of Material. Layer number of BOM can be standardized on all documents to a layer that is never used for design. – BOM is the order list that the purchase order is written to. – BOM will list those items that are purchased and those items that are manufactured in house.
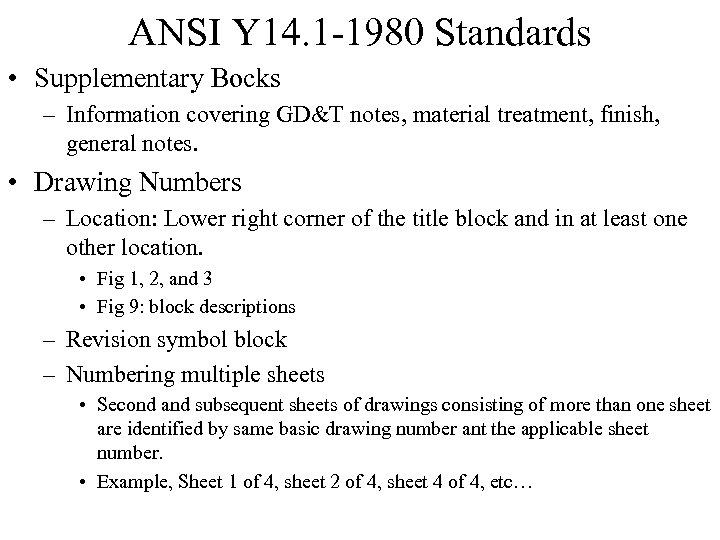 ANSI Y 14. 1 -1980 Standards • Supplementary Bocks – Information covering GD&T notes, material treatment, finish, general notes. • Drawing Numbers – Location: Lower right corner of the title block and in at least one other location. • Fig 1, 2, and 3 • Fig 9: block descriptions – Revision symbol block – Numbering multiple sheets • Second and subsequent sheets of drawings consisting of more than one sheet are identified by same basic drawing number ant the applicable sheet number. • Example, Sheet 1 of 4, sheet 2 of 4, sheet 4 of 4, etc…
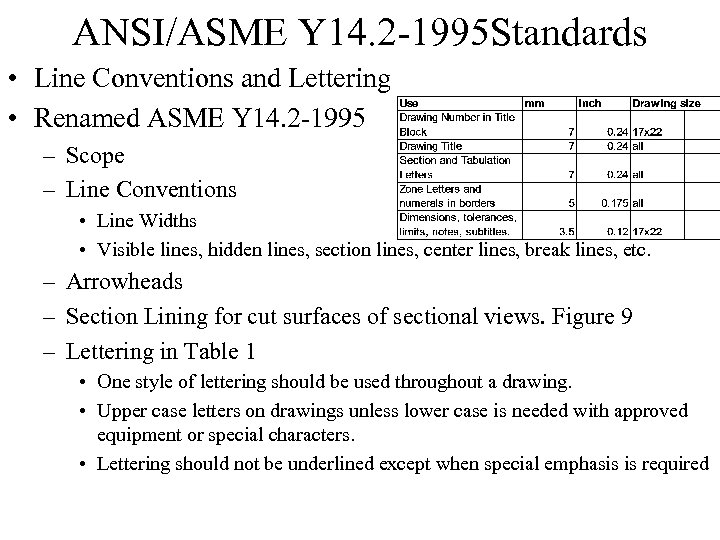
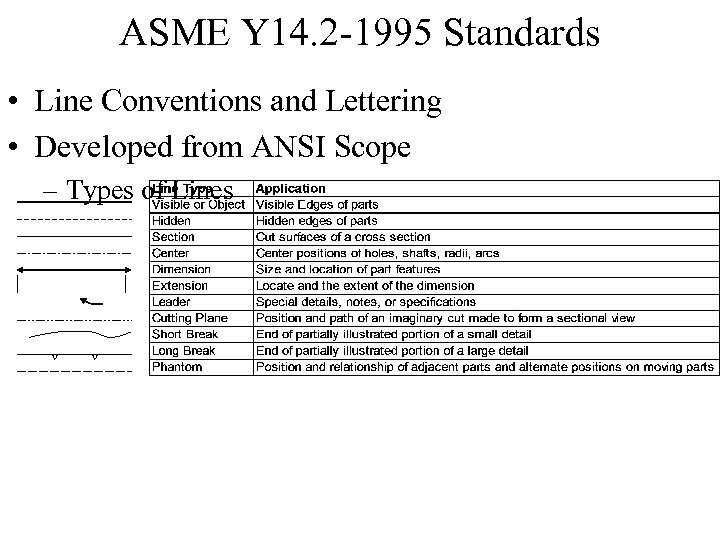
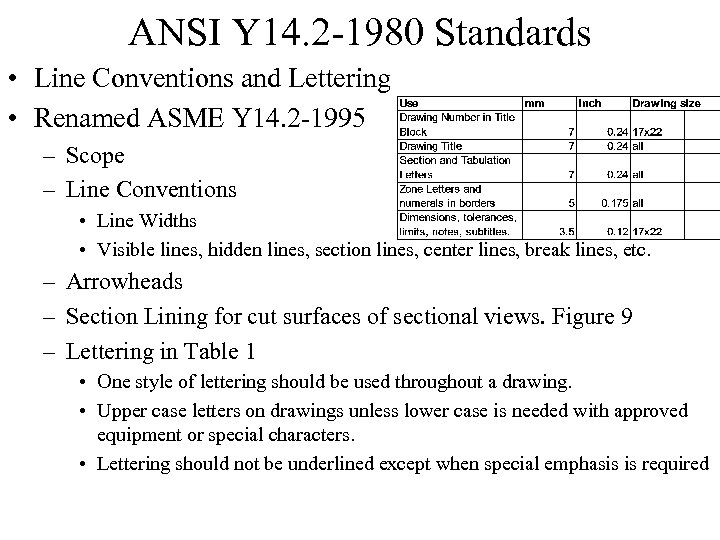 ANSI Y 14. 2 -1980 Standards • Line Conventions and Lettering • Renamed ASME Y 14. 2 -1995 – Scope – Line Conventions • Line Widths • Visible lines, hidden lines, section lines, center lines, break lines, etc. – Arrowheads – Section Lining for cut surfaces of sectional views. Figure 9 – Lettering in Table 1 • One style of lettering should be used throughout a drawing. • Upper case letters on drawings unless lower case is needed with approved equipment or special characters. • Lettering should not be underlined except when special emphasis is required
 ANSI/ASME Y 14. 2 -1995 Standards • Line Conventions and Lettering • Renamed ASME Y 14. 2 -1995 – Scope – Line Conventions • Line Widths • Visible lines, hidden lines, section lines, center lines, break lines, etc. – Arrowheads – Section Lining for cut surfaces of sectional views. Figure 9 – Lettering in Table 1 • One style of lettering should be used throughout a drawing. • Upper case letters on drawings unless lower case is needed with approved equipment or special characters. • Lettering should not be underlined except when special emphasis is required
 ASME Y 14. 2 -1995 Standards • Line Conventions and Lettering • Developed from ANSI Scope – Types of Lines V V
 ANSI/ASME Y 14. 3 -1995 Standards Quadrants US Standard • Multi and Sectional View Drawings 1 st 2 nd • From ANSI Y 14. 3 -1980 4 th 3 rd European Standard – Multiview System of Orthographic Drawings Top Front Top • Establishes orthographic views for shape descriptions – Refers to the trigonometric quadrants relative to front and top viewing planes of the part. (See Figure) • 6 principal orthographic views have third angle projection in US – Front view is under the top view (Figure Handout) – Most common views are right, top, front, (plus isometric) – Others are left, bottom, rear. • 6 principal orthographic views have first angle projection in Europe – Top view is under the front view – Multiview Drawing Applied • Number of views required to describe a part. • For complex parts, three or four views are required with one being orthographic. – Standard layout includes Front, top, side, and isometric views.
 ANSI/ASME Y 14. 3 -1995 Standards • Multi and Sectional View Drawings – Auxiliary Views • Used to show the true size & shape of features not parallel to principal views. • Projected from a principal view. – Sectional Views • Shows interior details that are clearer than exterior views due to hidden lines. • Location of sectional view is indicated by a cutting plane line and arrows. • Used to show the solid materials with thin lines at 45°. Figure 16 -6 – More than one line may occupy the same position in a view. Fig 16 -7 • • Line Order of Preference Object lines take preference over hidden lines and centerlines. Hidden lines take preference over centerlines. Cutting planes take preference over centerlines when showing path of sectional view. • Notice in the right-side-view that when ever a hidden line has precedence over a centerline, the centerline is still drawn in the view by leaving a space and then extending it beyond the edge.
 ANSI/ASME Y 14. 5 -1994 Standards • Dimensioning Standards – Dimensions describe the details of a part so it can be constructed to the proper size. – Dimensions options in Solid. Works • Determine the display and position of text and extension lines • Reference dimensions require parentheses – Parentheses can be added to a dimension at anytime through Property option. – Guidelines for dimension spacing • Space between the first dimension line and the part outline should not be less than 10 mm. • Space between subsequent parallel dimension lines should not be less than 6 mm. • Spacing may be different depending upon drawing size and scale. • Set the offset distance from last dimension to 6 mm. • Set offset distance from model to 10 mm. • Specify that unless otherwise stated, dimensions are in millimeters of inches – Arrowheads is recommended to be solid filled arrow
 ANSI/ASME Y 14. 5 -1994 Standards • Dimensions and Tolerances – All dimensions are subject to tolerancing (amount of permissible variability) – Guidelines for dimensions • Basic dimensions are identified by an enclosing frame symbol. [40] – Is exact size and shape of object which will resize the object if changed • Reference dimensions are identified by a parentheses (40) – Is intended size and for information only. Won’t resize object if changed. • Dimensioning – Chain dimension: Used when tolerances between adjacent features is more important than the overall tolerance of the feature. – Baseline dimension : used when the location of features must be controlled from a common reference point or plane. – Direct Dimensioning: Applied to control specific features – Dimension largest dimension to the outside of the inner dimensions. – Crossing dimension lines with arrow should be avoided. – Guidelines for Witness Lines • Witness lines are extension lines – Visible gap exists between the Extension line and the visible line.
 ANSI/ASME Y 14. 5 -1994 Standards • Tolerancing – – Parts typically are made in part of an assembly that has to fit together. Parts are not made to exact dimensions but are made to plus/minus. Exact dimensions would be expensive to make. Higher precision = higher costs • Gage blocks are made to very precise dimensions but are used to check parts. • Parts are made to varying degrees of accuracy depending on part requirements. – Some parts are required to be built with low precision (+/- 0. 05 in) – Some parts are required to be built with medium precision (+/- 0. 005 in) – Some parts are required to be built with high precision (+/- 0. 0005 in) – Major terms – Nominal size is designation for general ID, e. g. 9/32 drill or 2 by 4 – Basic size is size from which limits of size are derived by application of allowances and tolerances. Basic size of 9/32 drill is 0. 28125 in. – Limits are the extreme allowable sizes for a feature. +/- dim Fig 16 -11 – Tolerance is permissible variation in dimension. (Big – Small) Fig 16 -12
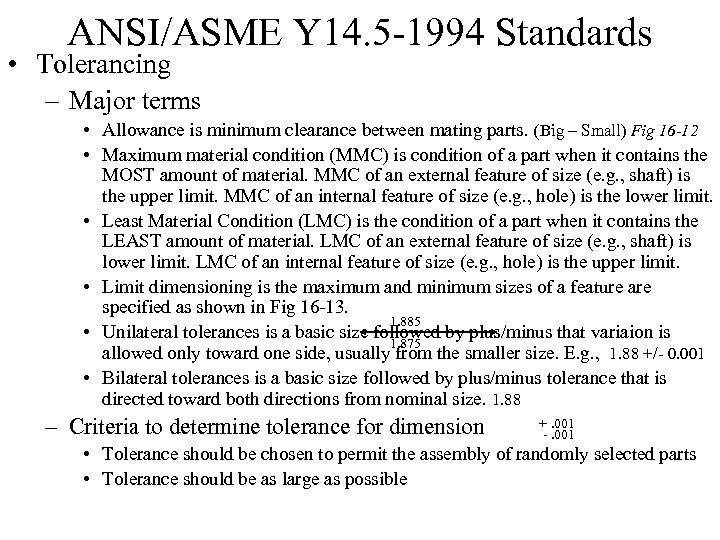 ANSI/ASME Y 14. 5 -1994 Standards • Tolerancing – Major terms • Allowance is minimum clearance between mating parts. (Big – Small) Fig 16 -12 • Maximum material condition (MMC) is condition of a part when it contains the MOST amount of material. MMC of an external feature of size (e. g. , shaft) is the upper limit. MMC of an internal feature of size (e. g. , hole) is the lower limit. • Least Material Condition (LMC) is the condition of a part when it contains the LEAST amount of material. LMC of an external feature of size (e. g. , shaft) is lower limit. LMC of an internal feature of size (e. g. , hole) is the upper limit. • Limit dimensioning is the maximum and minimum sizes of a feature are specified as shown in Fig 16 -13. 1. 885 • Unilateral tolerances is a basic size followed by plus/minus that variaion is 1. 875 allowed only toward one side, usually from the smaller size. E. g. , 1. 88 +/- 0. 001 • Bilateral tolerances is a basic size followed by plus/minus tolerance that is directed toward both directions from nominal size. 1. 88 – Criteria to determine tolerance for dimension +. 001 -. 001 • Tolerance should be chosen to permit the assembly of randomly selected parts • Tolerance should be as large as possible
 American National Standard Holes and Fits • Fits – Fit signifies type of clearance that exists between mating parts. • Clearance Fits provide some gap between mating parts. • Interference Fits have no clearance between mating parts. • Transition fits are listed to result in either a clearance or interference – American National Standard and metric sizes for holes and shafts • Set of classes of fits based on the basic hole system. • Basic hole system used from reamers and drills to produce standard size holes. • Types of fit covered – – – RC - running and sliding fits LC - clearance locational fits. LT – transition locational fits. LN – interference locational fits. FN force and shrink fits. • Tables and standards are organized on hole basis, thus basic shaft size and type of fit are needed to determine the dimension and tolerance for mating parts. • Example, RC 4 is close running fit and RC 9 is a loose running fit • Standard tables are in Machinery’s Handbook
 ANSI/ASME Y 14. 5 -1994 Standards • GD&T Standards – According to ANSI Y 14. 5 -1994 standards, the following rules should be observed: • Each dimension must have a tolerance, either applied directly or indicated by a general note. – Identified as reference, basic, or maximum dimensions are exceptions. • Dimensions for size, form, and location of features should be complete to the extent that there is full understanding of the characteristics of each feature. – Scaling (measuring from drawing) of the print is not allowed. – Assumption of a distance or size is not allowed. • Dimensions should be shown between points, lines, or surfaces having necessary and specific relationship to each other. • Dimensions must be selected and arranged to avoid accumulation of tolerances and more than one interpretation.
 ANSI/ASME Y 14. 5 -1994 Standards • GD&T Standards – According to ANSI Y 14. 5 -1994 standards, the following rules should be observed: • Multiview display should define a part without specifying manufacturing methods (CAM). – Thus, only the diameter of the hole is given and not whether it is reamed, punched, drilled, etc. • Finish allowance and shrinkage allowance can be added. • Dimensions should be selected for display to provide required information. • Wires, cables, sheets, or rods, and other display items must be specified by linear dimension, indicating the diameter or thickness. • Surfaces or centerlines shown on displays at right angles to each other are implied to be 90° apart.
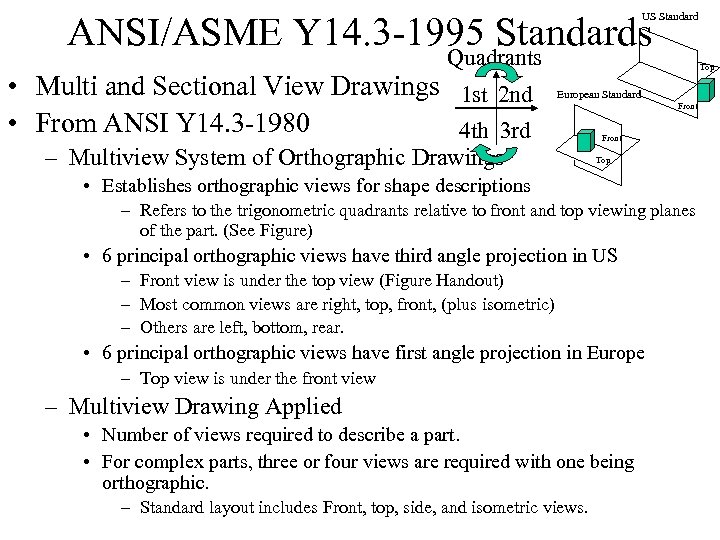
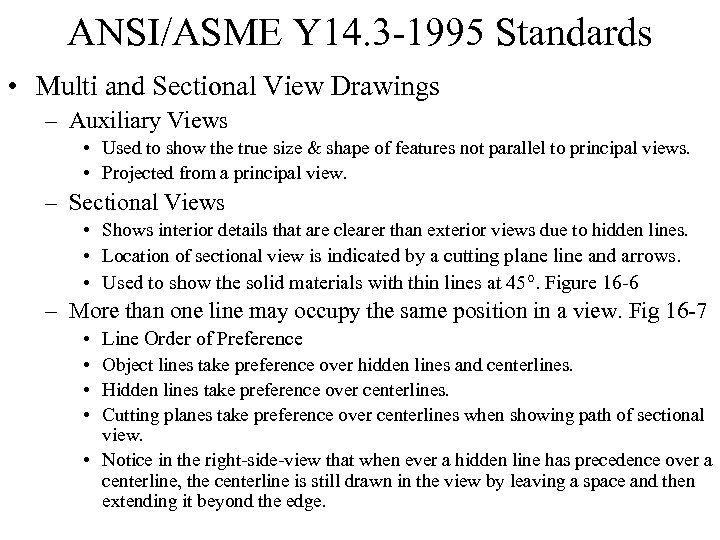
 ANSI Y 14. 3 -1980 Standards • Multi and Sectional View Drawings • Renamed ASME Y 14. 3 -1995 – Multiview System of Orthographic Drawings • Establishes orthographic views for shape descriptions • 6 principle orthographics views have thirds angle projection in US – Multiview Drawing Applied • Number of views required to describe a part. • For complex parts, three or four views are required with one being orthographic. – Standard layout includes Front, top, side, and isometric views. – – Sectional Views Conventional Representation Space Geometry Space Analysis and Applications
 Chap 17: GD&T • • GD&T Standards Feature Control Frame Five Classifications of Tolerance Review Questions
 GD&T Standards • GD&T Standards – Geometric dimensioning and tolerancing is a method of defining parts based on how they function – Current standard: ASME Y 14. 5 M-1994 • Major changes from AINSI Y 14. 5 M-1982 – Universal ISO datum feature symbol – Symmetry tolerance symbol is accepted as standard – Elimination of material symbol for regardless of feature size (RFS) » RFS condition applies when the symbols MMC and LMC are not stated on feature. • Major Rules – Rule 1 establishes the default conditions for features of size – Rule 2 establishes a default material condition for feature control frames
 GD&T Standards • GD&T Standards – Rule 1 - Set Default Conditions for Features of Size • Where only a tolerance of size is specified – The limits of size for an individual feature prescribe the extent to which variations in its form, a s well as size, are allowed. – Dimensioning rule used to ensure that features of size (FOS) will assemble with one another. » Feature size can be a cylinder or spherical surface or a set of opposed elements or surfaces associated with a size dimension. » Features are simply part surfaces. » Results in the maximum boundary for an external FOS is its maximum material condition (MMC). » Results in the minimum envelope for an internal FOS is its MMC. – To determine if two features of size will assemble, the designer compares the MMCs of the features of size.
 GD&T Standards • GD&T Standards – Rule 2 - Set Default Material Condition for Feature Control Frames
 ANSI/ASME Y 14. 5 -1994 Standards • GD&T Standards – Dimensions options in Solid. Works • Determine the display and position of text and extension lines • Reference dimensions require parentheses – Parentheses can be added to a dimension at anytime through Property option. – Guidelines for dimension spacing • Space between the first dimension line and the part outline should not be less than 10 mm. • Space between subsequent parallel dimension lines should not be less than 6 mm. • Spacing may be different depending upon drawing size and scale. • Set the offset distance from last dimension to 6 mm. • Set offset distance from model to 10 mm. – Arrowheads is recommended to be solid filled arrow
 ANSI/ASME Y 14. 5 -1994 Standards • GD&T Standards – Guidelines for dimensions • Crossing dimension lines with arrow should be avoided. • When dimension line cross, close to an arrowhead, the extension line (Witness line) must be broken. • Order of dimension – Dimension largest dimension to the outside of the inner dimensions. – Guidelines for Witness Lines • Witness lines are extension lines – Visible gap exists between the Extension line and the visible line. – Extension line extends 1. 5 mm beyond the Dimension line.
 ANSI/ASME Y 14. 5 -1994 Standards • GD&T Standards – According to ANSI Y 14. 5 -1994 standards, the following rules should be observed: • Each dimension must have a tolerance, either applied directly or indicated by a general note. – Identified as reference, basic, or maximum dimensions are exceptions. • Dimensions for size, form, and location of features should be complete to the extent that there is full understanding of the characteristics of each feature. – Scaling (measuring from drawing) of the print is not allowed. – Assumption of a distance or size is not allowed. • Dimensions should be shown between points, lines, or surfaces having necessary and specific relationship to each other. • Dimensions must be selected and arranged to avoid accumulation of tolerances and more than one interpretation.
 ANSI/ASME Y 14. 5 -1994 Standards • GD&T Standards – According to ANSI Y 14. 5 -1994 standards, the following rules should be observed: • Multiview display should define a part without specifying manufacturing methods (CAM). – Thus, only the diameter of the hole is given and not whether it is reamed, punched, drilled, etc. • Finish allowance and shrinkage allowance can be added. • Dimensions should be selected for display to provide required information. • Wires, cables, sheets, or rods, and other display items must be specified by linear dimension, indicating the diameter or thickness. • Surfaces or centerlines shown on displays at right angles to each other are implied to be 90° apart.
 ANSI/ASME Y 14. 5 -1994 Standards • GD&T Standards – Geometric Dimensioning and Tolerancing (GD&T) establishes the standard by which designers can communicate the intended function of the part to the machinist making the part and the inspector checking the part. – This standard lets the designer inform the machinist, toolmaker or fabricator what are the important features of the design when they are making the part. – The standard also lets the inspector know what are the important features to inspect form. • GD&T uses symbols to communicate the information to those involved in making the part to eliminate any misunderstanding. • Word explanations can be confusing especially with the global market and the translations of words into different languages. – A simple layout of the symbols used in GD&T can be found as follows
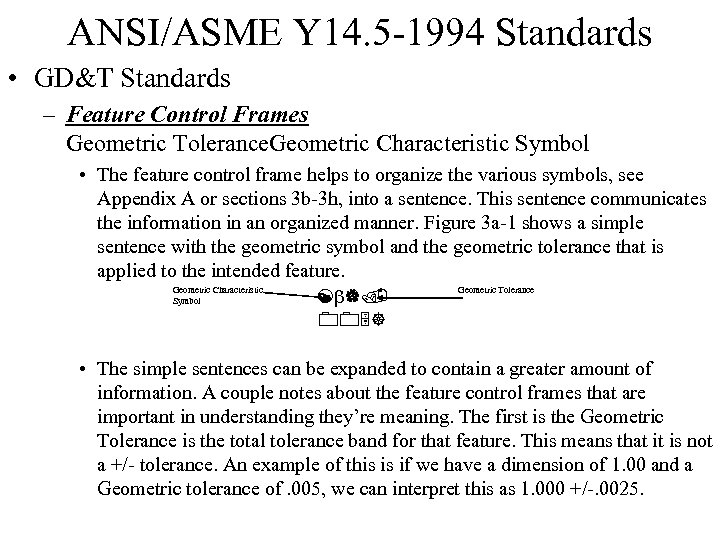 ANSI/ASME Y 14. 5 -1994 Standards • GD&T Standards – Feature Control Frames Geometric Tolerance. Geometric Characteristic Symbol • The feature control frame helps to organize the various symbols, see Appendix A or sections 3 b-3 h, into a sentence. This sentence communicates the information in an organized manner. Figure 3 a-1 shows a simple sentence with the geometric symbol and the geometric tolerance that is applied to the intended feature. Geometric Characteristic Symbol [ |. 005] Geometric Tolerance • The simple sentences can be expanded to contain a greater amount of information. A couple notes about the feature control frames that are important in understanding they’re meaning. The first is the Geometric Tolerance is the total tolerance band for that feature. This means that it is not a +/- tolerance. An example of this is if we have a dimension of 1. 00 and a Geometric tolerance of. 005, we can interpret this as 1. 000 +/-. 0025.
 Feature Control Frame • Feature Control Frame
 Five Classifications of Tolerance • Five Classifications of Tolerance
 Review Questions • Review Questions
 Chap 18: Computer Aided Design • • Wireframe, Surface, and Solid Modeling Circuit Board Layout Rapid Prototyping Review Questions
 Rapid Prototype Methods • Rapid prototypying is a process of building objects during the design phase to have a 3 -D object to check for fit, form, and function • The rapid prototype will help you visualize the dimensions of the part and see if 3 -D object is desired. • The object is made from the solid model geometry in a stereolithography file. – Stereolithography represents the 3 -D object as a shell of the part that is broken into triangles. • Rapid prototype process can bring a design on the computer to 3 -D shape in a matter of minutes to hours.
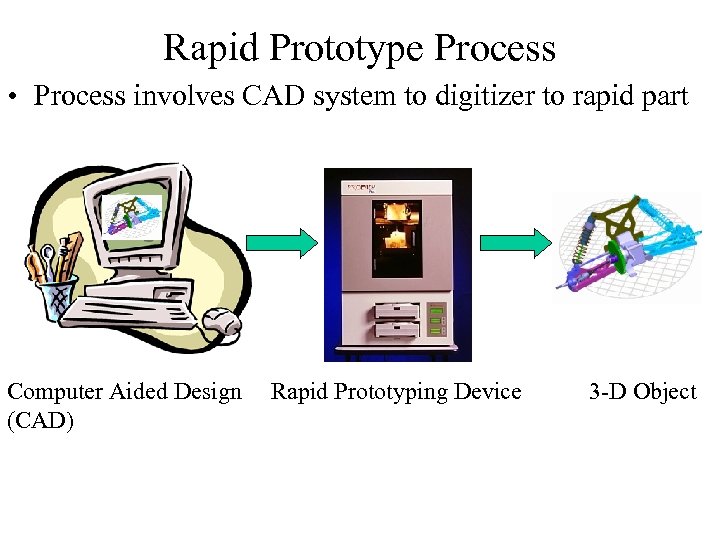 Rapid Prototype Process • Process involves CAD system to digitizer to rapid part Computer Aided Design Rapid Prototyping Device (CAD) 3 -D Object
 Stereolithography • 3 D Systems of Valencia, CA (www. 3 dsystems. com) • Founded in 1987 currently offers • SLA® (stereolithography) systems ($799, 000), • Thermo. Jet® solid object printer ($49, 995), and • SLS® (selective laser sintering) • SLA 7000, 5000, 3500, 250 series systems – Used for Limited production runs, Rapid tooling, Prototyping, Master patterns for investment casting • Licenses the complementary 3 D Keltool® • Method to produce steel mold inserts.
 • Process Stereolithography Process – UV laser cure of epoxy resin in a vat of liquid • Layer of resin above an elevator platform is illuminated with laser and adheres to top of platform. • Platform moves down and next layer drawn onto surface, etc. • Uncured resin is washed with solvent. • Part is post cured. – Specs • • • Laser: 354. 7 wavelength Build layer: 0. 076 mm Vat volume: 253. 6 L Size: W 2. 1 x D 1. 55 x H 2. 36 m Weight 1455 kg Not for office use.
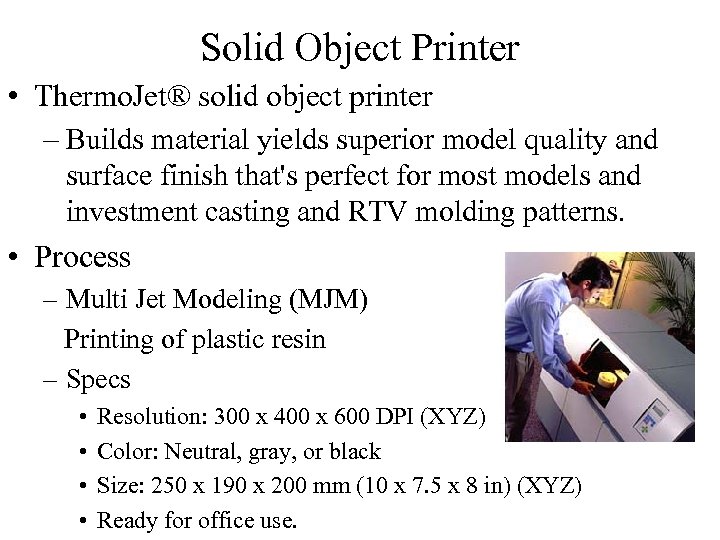 Solid Object Printer • Thermo. Jet® solid object printer – Builds material yields superior model quality and surface finish that's perfect for most models and investment casting and RTV molding patterns. • Process – Multi Jet Modeling (MJM) Printing of plastic resin – Specs • • Resolution: 300 x 400 x 600 DPI (XYZ) Color: Neutral, gray, or black Size: 250 x 190 x 200 mm (10 x 7. 5 x 8 in) (XYZ) Ready for office use.
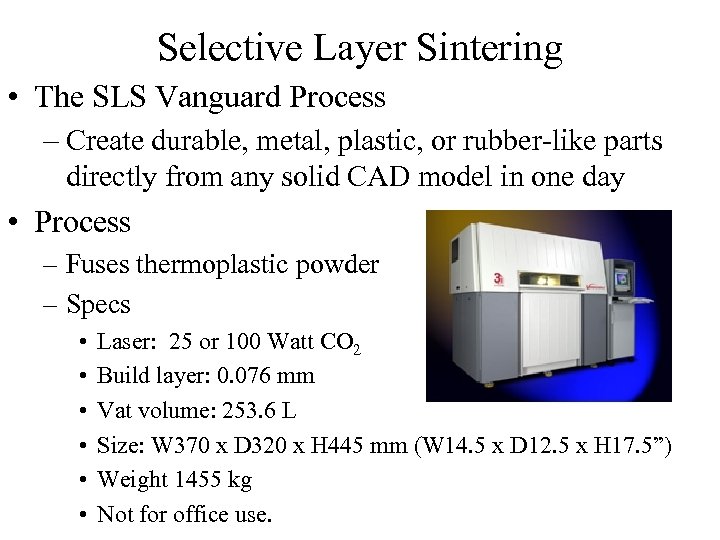 Selective Layer Sintering • The SLS Vanguard Process – Create durable, metal, plastic, or rubber-like parts directly from any solid CAD model in one day • Process – Fuses thermoplastic powder – Specs • • • Laser: 25 or 100 Watt CO 2 Build layer: 0. 076 mm Vat volume: 253. 6 L Size: W 370 x D 320 x H 445 mm (W 14. 5 x D 12. 5 x H 17. 5”) Weight 1455 kg Not for office use.
 Selective Layer Sintering (SLS) • SLS System Process – 1. Start with an STL file of your 3 -D CAD data. – 2. Enter the data into a Vanguard HS si 2™ SLS® system. – 3. Spread a layer of powdered material. As the process begins, a precision roller mechanism automatically spreads a thin layer of powdered SLS material across the build platform. – 4. Sinter a cross-section of the CAD file. Using data from the STL file, a CO 2 laser selectively draws a cross section of the object on the layer of powder. As the laser draws the cross section, it selectively "sinters" (heats and fuses) the powder creating a solid mass that represents one cross section of the part. – 5. Repeat. The system spreads and sinters layer after layer until the object is complete. – 6. Remove the part. Once the part is complete, remove it from the part build chamber and blow away any loose powder. – 7. Finish as desired. Use the part as is—or sand, anneal, coat, or paint it beforeusing it for its intended application.
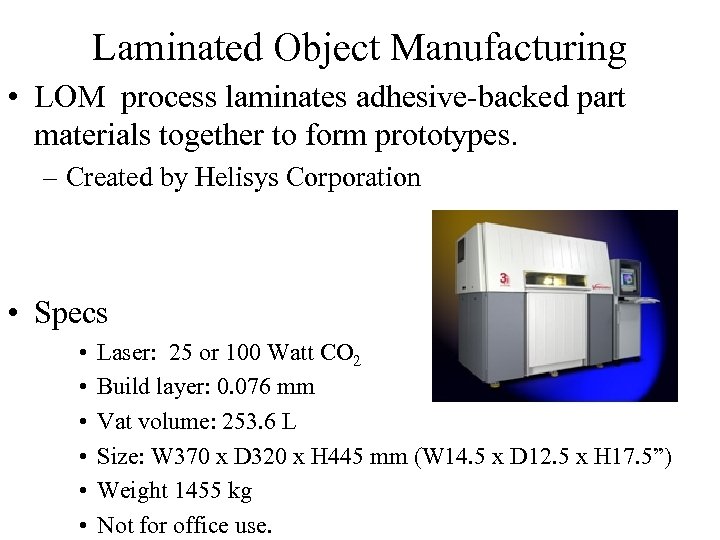 Laminated Object Manufacturing • LOM process laminates adhesive-backed part materials together to form prototypes. – Created by Helisys Corporation • Specs • • • Laser: 25 or 100 Watt CO 2 Build layer: 0. 076 mm Vat volume: 253. 6 L Size: W 370 x D 320 x H 445 mm (W 14. 5 x D 12. 5 x H 17. 5”) Weight 1455 kg Not for office use.
 Laminated Object Manufacturing • LOM process laminates adhesive-backed part materials together to form prototypes. – Created by Helisys Corporation • Process – – – – Part material enters the machine as a roll of adhesive-coated sheet. Sheet is pulled through the machine and over build area. Heated platen rolls laminate the new layer over previous layers. Laser outlines the boundary of the desired cross section of the part. Material outside the boundary area of the part is crosshatched. Process continues as additional layers are added until part is done. Crosshatched part material serves as a support for undercut features on higher layers within the part. – Manual “debugging”step is required to remove all of the small cubes of crosshatched. – Polymer material is used
 Z Corporation 3 -D Printing • Z Corporation – Licensee of 3 -D Printing process from MIT • Process – Smooth bed of starch and cellulose powder. – Liquid binder (water based) is deposited over certain regions of the bed and bound together. – Porous surface is closed with heat or with • wax for office environment, or • cyanocrylate resin for stronger part.
 Z Corporation 3 -D Printing • Z Corporation – Licensee of 3 -D Printing process from MIT • Specs • • • Build layer: Vat volume: Size: Weight Not for office use.
 Fused Deposition Modeling • Stratasys Corporation • Process – – – Extrudes plastic bead through nozzle onto heated table. Builds layers of plastic part. Plastic can be ABS, Polyester Removable support structure is built under part for support. Specs • • • Build layer: Vat volume: Size: Weight Ready for office use.
 Rapid Prototype at CSU Chico • CSU Chico selected: – Genisys XS 3 -D Printer • • Polyester material. $65 K new; $45 K reconditioned educational discount. Material cost is $6 per hour of build. Build rate size is 16 g per hour. Maximum build size is 8” x 10” x 4” Number of parts built: 30 in 6 months Maintenance contract is $6, 000 per year. (We declined) Genisys XS is smaller version of Stratasys FDM with ABS
 Chap 19: Product Design Tools • • Product Development Strategies Concurrent Engineering Design for Manufacturing Design For Assembly Failure Mode and Effects Analysis Quality Function Deployment Group Technology Review Questions
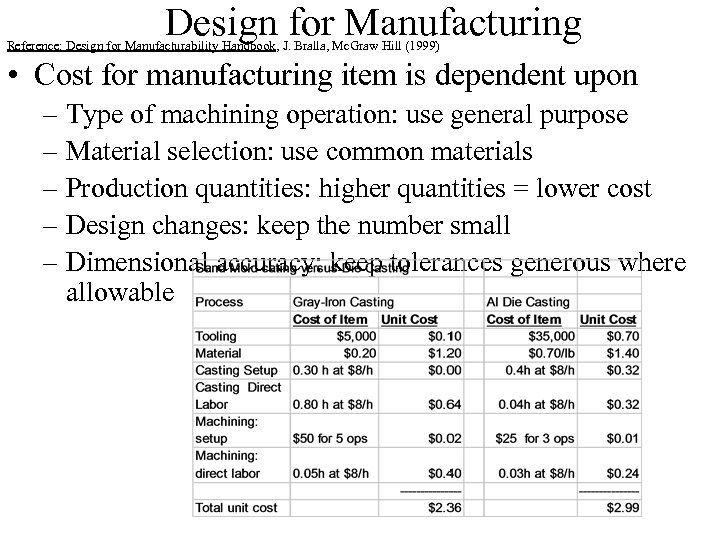 Design for Manufacturing Reference: Design for Manufacturability Handbook, J. Bralla, Mc. Graw Hill (1999) • Cost for manufacturing item is dependent upon – Type of machining operation: use general purpose – Material selection: use common materials – Production quantities: higher quantities = lower cost – Design changes: keep the number small – Dimensional accuracy: keep tolerances generous where allowable
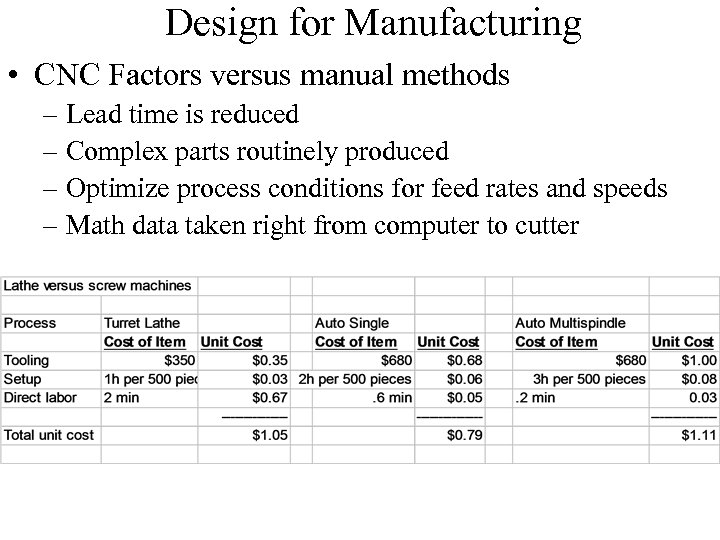 Design for Manufacturing • CNC Factors versus manual methods – Lead time is reduced – Complex parts routinely produced – Optimize process conditions for feed rates and speeds – Math data taken right from computer to cutter
 DFM Principles • • Use of standards Use of common components Design to specifications and tolerances Use of manufacturing guidelines in the early stages of design that maximize quality of manufactured part Minimize the use of materials Minimize the use of floor space in plant Locate all necessary components near functional operation Use of automated machining for minimal errors
 DFM Design Rules • Simplify the design & reduce the number of parts required. • Design for low labor cost operations, e. g. , punch hole rather than drill. • Make specific notes on drawings and avoid generalized statements, e. g. , polish this surface. • Dimensions should be made from specific surfaces and not points in space. (Don’t dimension off a center of a circle) • Minimize part weight whenever possible. • Avoid sharp corners, use generous fillets and radii. • Dimensions should be from one datum point rather than from a variety of points. • Design part so that as many operations can be used without repositioning part
 DFM Design Rules • Cast, molded, or stamped parts should be made with no stepped parting lines. • Keep uniform wall thickness. • Space holes so that they can be made in one operation without tooling weakness • Follow minimum draft requirements for cast or molded parts
 DFM Quick References • Surface finish from Various Processes • Normal maximum surface roughness of common machined parts • Dimensional tolerances from machining • Processes for flat surfaces • Processes for 2 D contoured surfaces • Processes for hollow shapes • Commonly used materials and metal working processes • Formed metal parts
 Material Selection • Proper material selection is a major factor for a successful designed and manufactured product. • Common engineering materials • Common commercial forms of selected raw materials – – – Ultimate tensile strength of selected materials Specific gravity (density) of selected materials Melting point of selected materials Thermal conductivity CLTE Relative Cost per unit weight and per unit volume
 Ferrous Metals • Hot-rolled steel – Produced in a variety of cross sections and sizes • • Round bars from 6 to 250 mm in D Square bars from 6 to 150 mm per side Rounded corners squares 10 to 200 mm per side Flat bars from 5 mm in thickness to 200 mm in width Angles, channels, tees, zees and other sections Ovals, half rounds Sheets 1. 5 mm (16 guage) or thicker and plates – Common cross-sectional shapes for hot rolled steel
 Hot-Rolled Steel • Produced by passing a heated billet, bloom, or ingot of steel through a set of shaped rollers. – Repeated passes, the rollers increase the length of the billet and change it to a cross section of specified shape and size. – After rolling the shape is pickled (immersion in water, dilute sulfuric acid) to remove scale and then is oiled • Characteristics – Produced in a variety of cross sections and sizes, which the following are: • Round bars from 6 (0. 25 in) to 250 mm in diameter • Square bars from 6 to 150 mm per side • Round-cornered squares, 10 to 200 mm per side • Flat bars from 5 mm in thickness and up to 200 mm in width (< 80 cm 2 area) • Angles, channels, tees with largest cross section dimension of 75 mm • Ovals, half rounds and other special cross sections • Sheets, 1. 5 mm or thicker – Hot rolled steel is about 30% lower in price than cold-finish steel. – HRS has more dimensional variation, rougher surface, mill scale, less straightness, less strength, and poorer machinability.
 Design Recommendations • Grade selection design criterion is to design for minimum strength – Grades with higher carbon content or low alloy content will provide lower cost parts than that can be made from plain lowcarbon grades due to lighter sections can be used. • Bending hot finished steel to help avoid fracturing material at bend: – Bend line should be at right angles to grain direction from the rolling operation. – Bend radius should be as generous as possible. • To achieve a true surface from machining, – Remove sufficient stock to get below the surface defects and irregularities. • Include seams, scale, deviations from straightness or flatness • AISI (American Iron and Steel Institute)
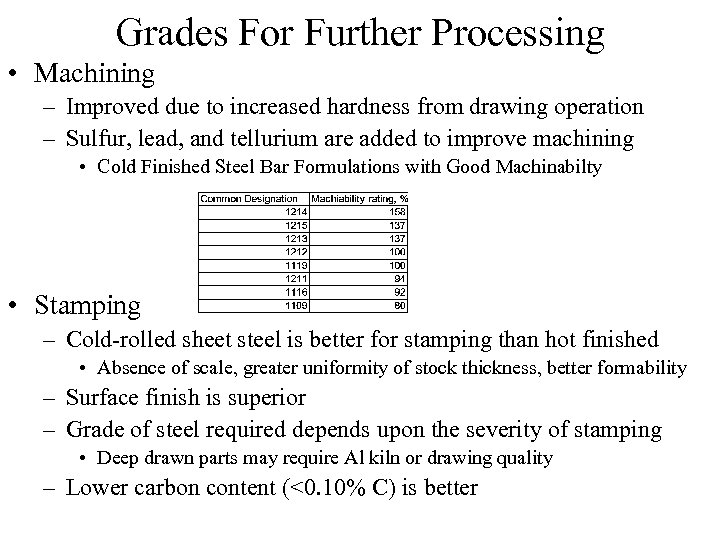 Grades For Further Processing • Machining – Improved due to increased hardness from drawing operation – Sulfur, lead, and tellurium are added to improve machining • Cold Finished Steel Bar Formulations with Good Machinabilty • Stamping – Cold-rolled sheet steel is better for stamping than hot finished • Absence of scale, greater uniformity of stock thickness, better formability – Surface finish is superior – Grade of steel required depends upon the severity of stamping • Deep drawn parts may require Al kiln or drawing quality – Lower carbon content (<0. 10% C) is better
 Grades For Further Processing • Welding – Material is fully weldable, especially low C, low-alloy steel – Distortion is inherent to arc-welding, might be better with hot finish steel – Resistance weldament is great for cold-rolled steel – Preferred material for arc and resistance welding is C < 0. 35% • Brazing – Best accomplished with steels of lower C and alloy content. • Ideal materials have C in range of 0. 13 to 0. 2% and Mn in 0. 3 to 0. 6% • Plating – All cold finish bars are suitable for plating – Additional polishing is required
 Grades For Further Processing • Heat Treating – Cold working materials are heat treatable and widely used. – Grades for heat treatment processes • • • Carburizing: 8620, 4620, 1024, 9310 Nitriding: 4140, 4340, 8640 Flame hardening: Medium carbon steels (0. 35 – 0. 70 %C) Cyaniding/carbonitriding: 1020, 1022, 1010 Induction hardening: 1045, 1038, 1144 Other through-hardening: 4140, 4130 • Painting – All cold finish bars are practical for painting – Extensive cleaning is not required
 Design Recommendations • Design approach is to specify a size and shape of material that minimize subsequent machining – Use as-drawn or as-rolled surfaces and dimensions • Other Rules – Use simplest cross-sectional shape possible; avoid holes & grooves • With special shapes, undercuts and reentrant angles can be produced but $$ – – Use standard rather than special shapes. Avoid sharp corners & use the largest filets & radii (min 0. 08 mm) Grooves width should be less deep than 1. 5 times the width. Keep section thickness as constant as possible, avoid abrupt changes should be avoided to reduce local stress concentrations – Specify the most easily formed materials and lowest cost – With tubular sections, welded rather than seamless types are more economical, especially if drawing after welding without mandrel
 Stainless Steel • Definition and Applications – Alloys that posses unusual resistance to attack by corrosive media – Applications include aircraft, railway cars, trucks, trailers, . . . • AISI developed a 3 digit numbering system for stainless steels – 200 series: Austenitic- Iron-Cr-Ni-Mn • Hardenable only by cold working and nonmagnetic – 300 series: Austenitic- Iron-Cr-Ni • Hardenable only by cold working and nonmagnetic • General purpose alloy is type 304 (S 30400) – 400 series: • Ferritic- Iron-Cr alloy are not hardenable by heat treatment or cold working – Type 430 (S 43000) is a general purpose alloy • Martensitic- Iron-Cr alloys are hardenable by heat treatment and magnetic – Type 410 (S 41000) is a general purpose alloy
 Stainless Steel • Corrosion of steels can be slowed with addition of Cr and Ni. • Stainless steels have chromium (up to 12%) and Ni (optional) – ferritic stainless: 12% to 25% Cr and 0. 1% to 0. 35% Carbon • ferritic up to melting temp and thus can not form the hard martensitic steel. • can be strengthened by work hardening • very formable makes it good for jewelry, decorations, utensils, trim – austenitic stainless: 16% to 26% Cr, 6% to 23% Ni, <0. 15% Carbon • nonmagnetic and low strength % to 25% Cr and 0. 1% to 0. 35% Carbon • machinable and weldable, but not heat-treatable • used for chemical processing equipment, food utensils, architectural items – martensitic stainless: 6% to 18% Cr, up to 2% Ni, and 0. 1% to 1. 5% C • hardened by rapid cooling (quenching) from austenitic range. • Corrosion resistance, low machinability/weldability used for knives, cutlery. – Marging (high strength) steels: 18% to 25% Ni, 7% Co, with others • heated and air cooled cycle with cold rolled • Machinable used for large structures, e. g. , buildings, bridges, aircraft
 Stainless Steel • Cold forming – 200 and 300 series: • Excellent bending characteristics – Withstand a free bend of 180° with a radius equal to ½ material thickness. – As hardness increases, the bending becomes more restrictive • Can be stretched more than carbon steel – Excellent stretch-forming characteristics, preferred 301 or 201 due to cold working induced high strength – 305 series exhibit excellent deep drawability – 400 series: • Good bending characteristics – Less ductility than the 300 series with minimum radius equal to thickness. • Cannot be stretched severely without thinning and fracturing • Can be processed for deep drawability
 Stainless Steel • Design Recommendations – Use least expensive stainless – Use rolled finishes – Use thinnest gauge required – Use thinner gauge continuously backed – Use standard roll-formed sections – Use simple sections for economy of forming – Use concealed welds to eliminate refinishing – Use stainless steel types that are especially suited to manufacturing processes, e. g. , free machining • Dimensional Factors Standard Tolerances – Provided in the Steel Products Manual for Stainless Steels – Comparable to to carbon and alloy steels
 Chap 33: Lean Production • • • Mass Production Toyota Production System Essential Components of Lean Production Just-in-time Review Questions
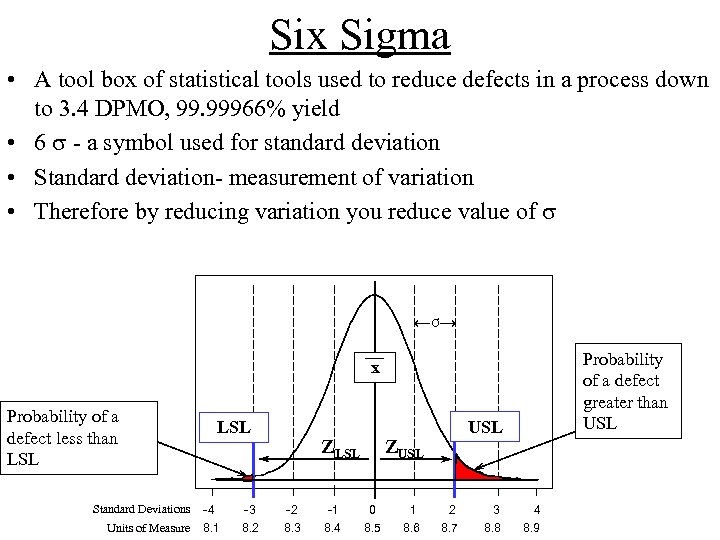 Six Sigma • A tool box of statistical tools used to reduce defects in a process down to 3. 4 DPMO, 99. 99966% yield • 6 - a symbol used for standard deviation • Standard deviation- measurement of variation • Therefore by reducing variation you reduce value of Ơ Probability of a defect greater than USL x Probability of a defect less than LSL Standard Deviations Units of Measure LSL ZLSL USL ZUSL -4 -3 -2 -1 0 1 2 3 4 8. 1 8. 2 8. 3 8. 4 8. 5 8. 6 8. 7 8. 8 8. 9
 Define • Identify Project – Customers & Stakeholders (internal/external) – Critical to Quality (CTQ) parameters • Quality Function Deployment (QFD) • Process Mapping • Fishbone • Pareto Chart • Failure Modes and Effects Analysis (FMEA) • Develop Team Charter – Business Case • Proposal of why the project should be done • Explanation of consequences from no action • Demonstration of possible financial or other business gain – Problem Statement – Goal Statement – Team Member Responsibilities
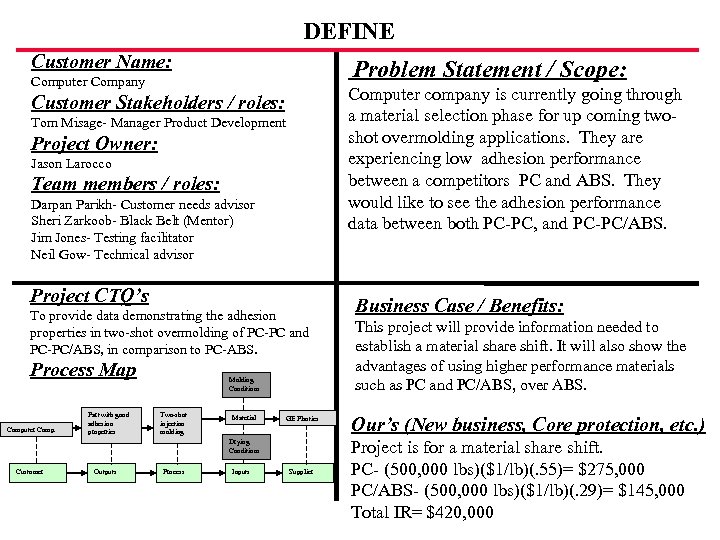 DEFINE Customer Name: Problem Statement / Scope: Computer Company Computer company is currently going through a material selection phase for up coming twoshot overmolding applications. They are experiencing low adhesion performance between a competitors PC and ABS. They would like to see the adhesion performance data between both PC-PC, and PC-PC/ABS. Customer Stakeholders / roles: Tom Misage- Manager Product Development Project Owner: Jason Larocco Team members / roles: Darpan Parikh- Customer needs advisor Sheri Zarkoob- Black Belt (Mentor) Jim Jones- Testing facilitator Neil Gow- Technical advisor Project CTQ’s To provide data demonstrating the adhesion properties in two-shot overmolding of PC-PC and PC-PC/ABS, in comparison to PC-ABS. Process Map Computer Comp. Part with good adhesion properties Molding Conditions Two-shot injection molding Material GE Plastics Drying Conditions Customer Outputs Process Inputs Supplier Business Case / Benefits: This project will provide information needed to establish a material share shift. It will also show the advantages of using higher performance materials such as PC and PC/ABS, over ABS. Our’s (New business, Core protection, etc. ) Project is for a material share shift. PC- (500, 000 lbs)($1/lb)(. 55)= $275, 000 PC/ABS- (500, 000 lbs)($1/lb)(. 29)= $145, 000 Total IR= $420, 000
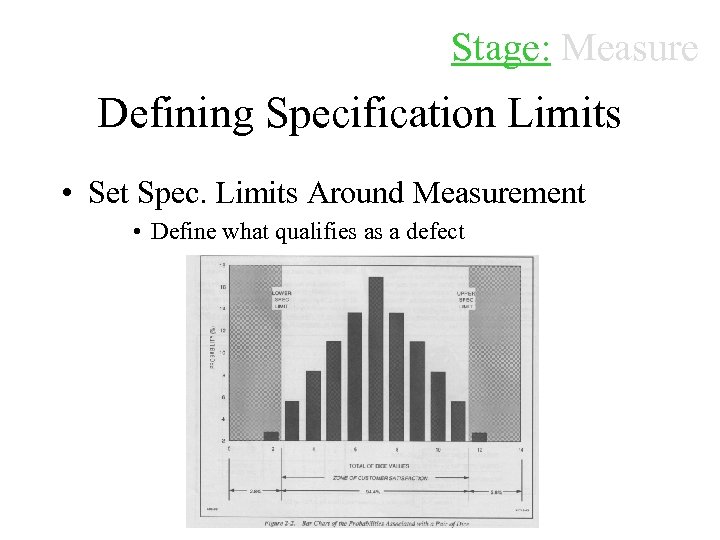 Stage: Measure Defining Specification Limits • Set Spec. Limits Around Measurement • Define what qualifies as a defect
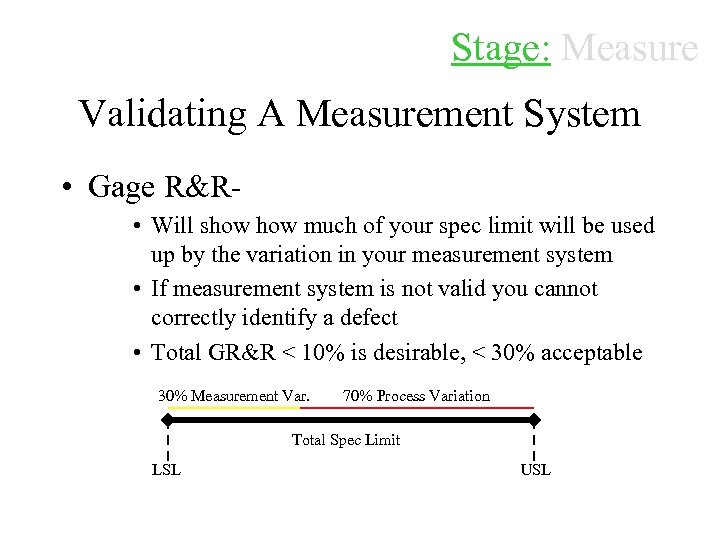 Stage: Measure Validating A Measurement System • Gage R&R- • Will show much of your spec limit will be used up by the variation in your measurement system • If measurement system is not valid you cannot correctly identify a defect • Total GR&R < 10% is desirable, < 30% acceptable 30% Measurement Var. 70% Process Variation Total Spec Limit LSL USL
 Stage: Measure Precision vs. Accuracy Graphical View Target Analogy == Xbar True Value = Bull's Eye I. Precise, not accurate Xbar == True Value II. Accurate, not precise


