Lecture 1_Basic rules.pptx
- Количество слайдов: 22
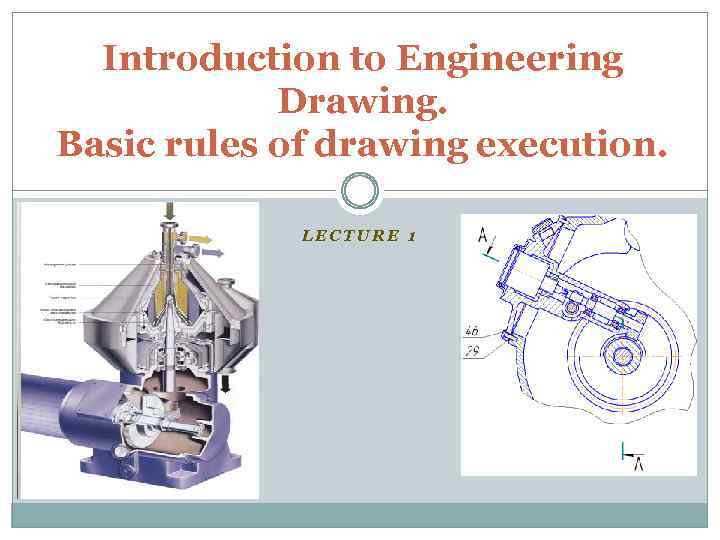
Introduction to Engineering Drawing. Basic rules of drawing execution. LECTURE 1
Drawings definition Drawing is one of the most widely used forms of graphic communication A drawing is a graphic representation of an object (building, equipment, machine and etc. ), or a part of it (unit, detail). Drawings, photographs, slides, transparencies, and sketches are all forms of graphic communication.
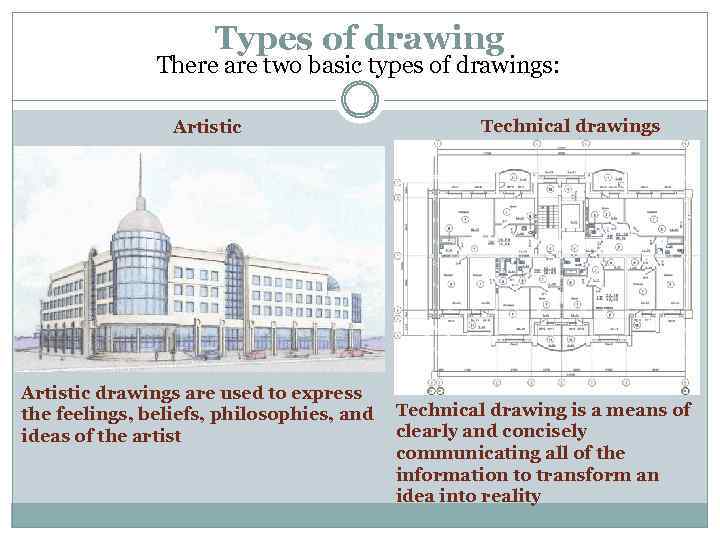
Types of drawing There are two basic types of drawings: Artistic drawings are used to express the feelings, beliefs, philosophies, and ideas of the artist Technical drawings Technical drawing is a means of clearly and concisely communicating all of the information to transform an idea into reality
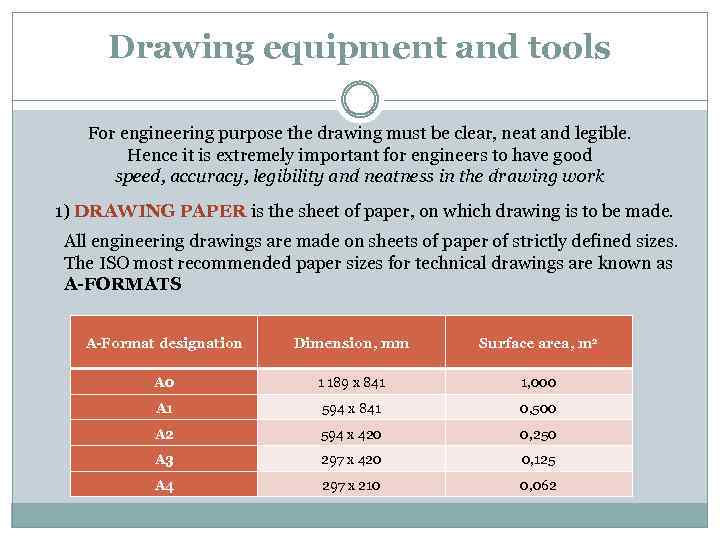
Drawing equipment and tools For engineering purpose the drawing must be clear, neat and legible. Hence it is extremely important for engineers to have good speed, accuracy, legibility and neatness in the drawing work 1) DRAWING PAPER is the sheet of paper, on which drawing is to be made. All engineering drawings are made on sheets of paper of strictly defined sizes. The ISO most recommended paper sizes for technical drawings are known as A-FORMATS A-Format designation Dimension, mm Surface area, m 2 A 0 1 189 x 841 1, 000 A 1 594 x 841 0, 500 A 2 594 x 420 0, 250 A 3 297 x 420 0, 125 A 4 297 x 210 0, 062
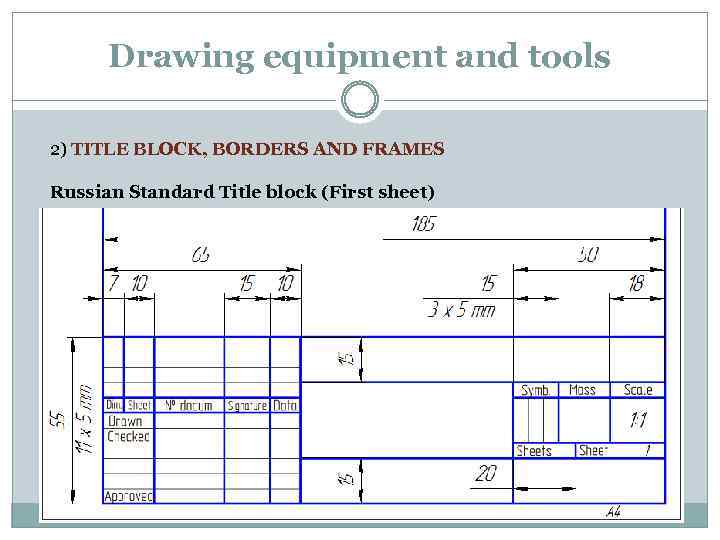
Drawing equipment and tools 2) TITLE BLOCK, BORDERS AND FRAMES Russian Standard Title block (First sheet)
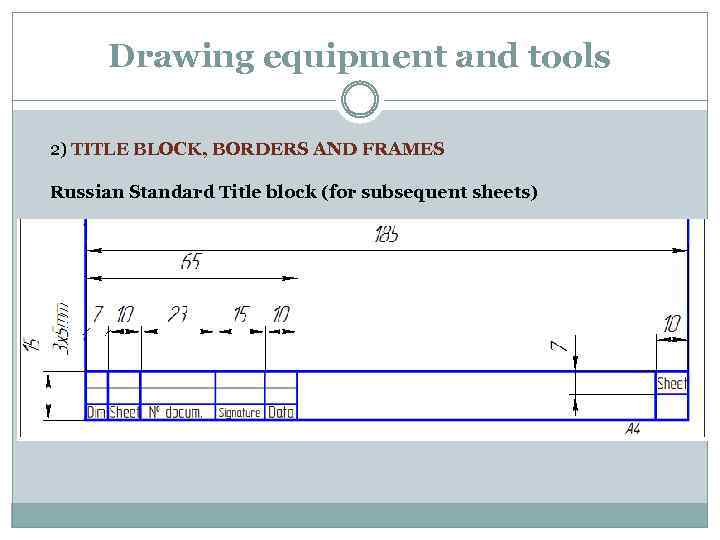
Drawing equipment and tools 2) TITLE BLOCK, BORDERS AND FRAMES Russian Standard Title block (for subsequent sheets)
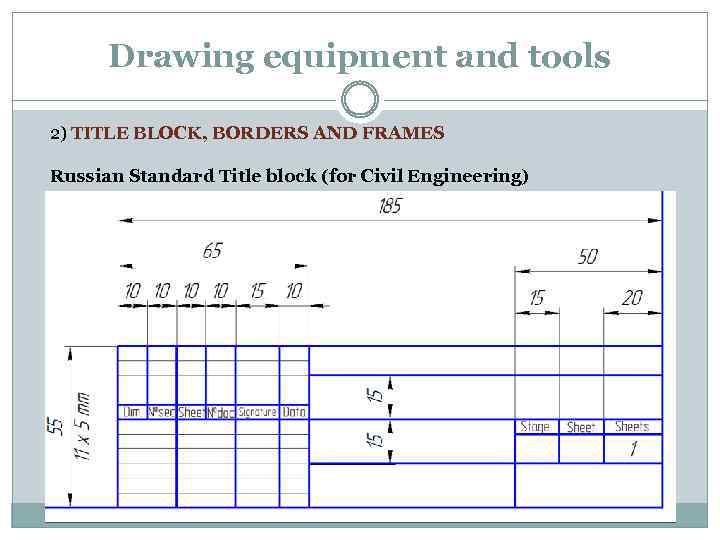
Drawing equipment and tools 2) TITLE BLOCK, BORDERS AND FRAMES Russian Standard Title block (for Civil Engineering)
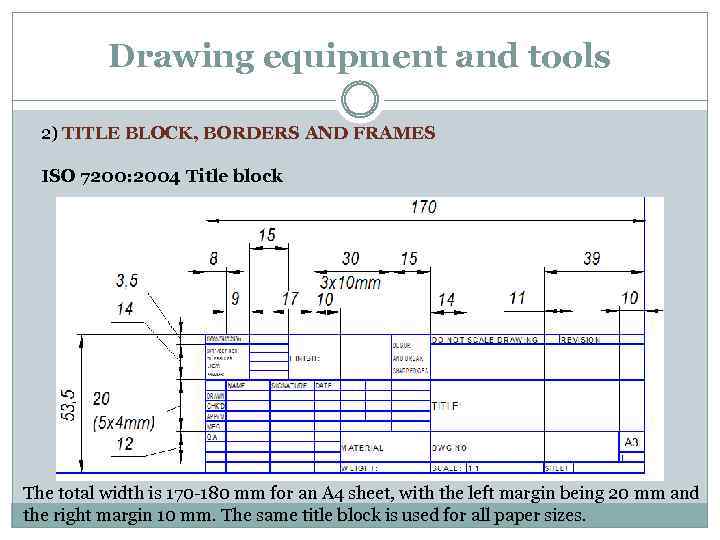
Drawing equipment and tools 2) TITLE BLOCK, BORDERS AND FRAMES ISO 7200: 2004 Title block The total width is 170 -180 mm for an A 4 sheet, with the left margin being 20 mm and the right margin 10 mm. The same title block is used for all paper sizes.
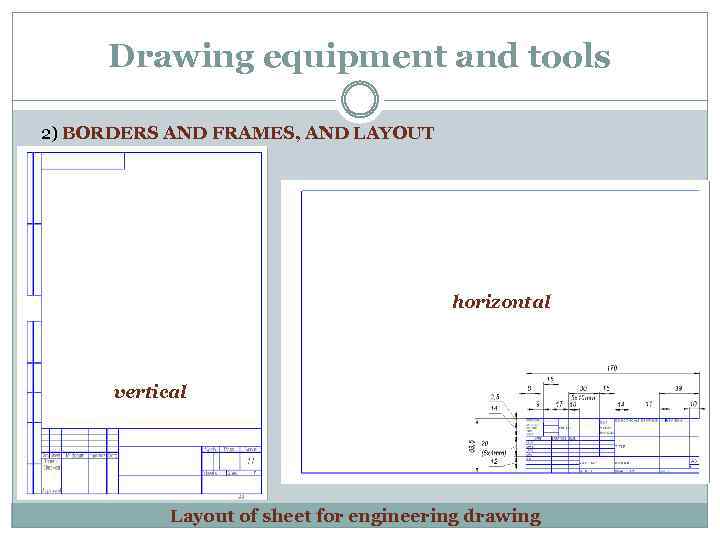
Drawing equipment and tools 2) BORDERS AND FRAMES, AND LAYOUT horizontal vertical Layout of sheet for engineering drawing
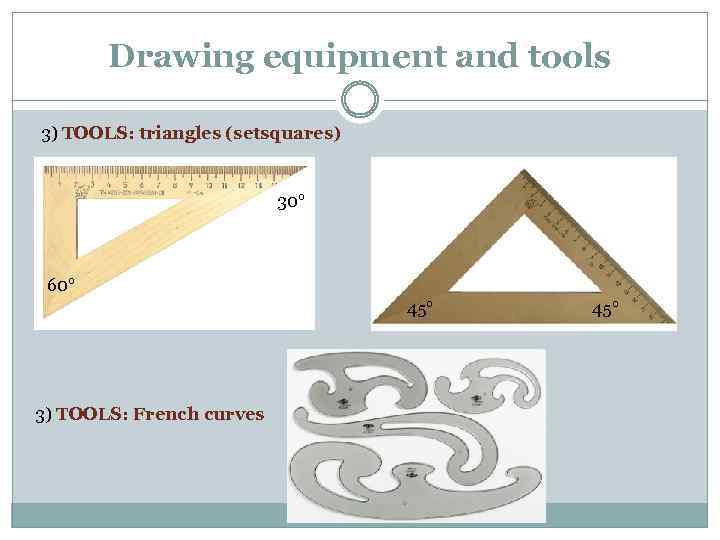
Drawing equipment and tools 3) TOOLS: triangles (setsquares) 30° 60° 45° 3) TOOLS: French curves 45°
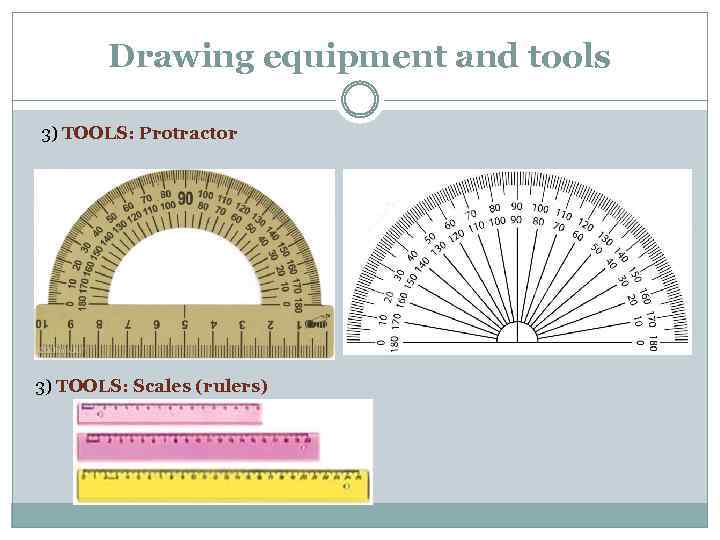
Drawing equipment and tools 3) TOOLS: Protractor 3) TOOLS: Scales (rulers)
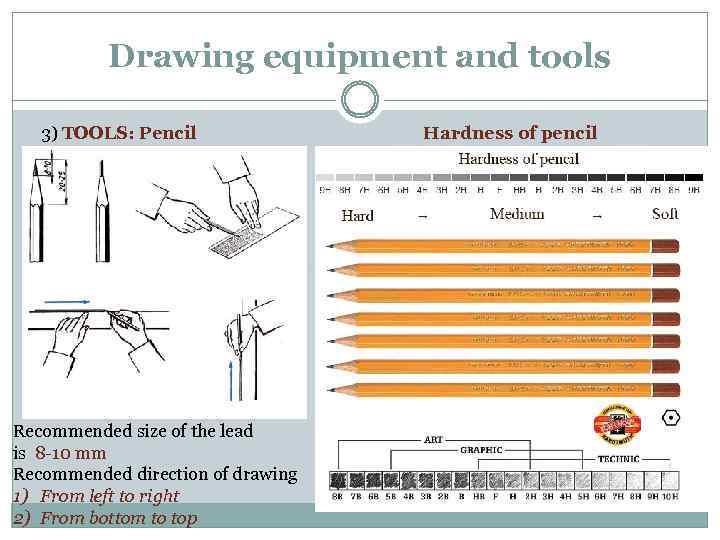
Drawing equipment and tools 3) TOOLS: Pencil Recommended size of the lead is 8 -10 mm Recommended direction of drawing 1) From left to right 2) From bottom to top Hardness of pencil
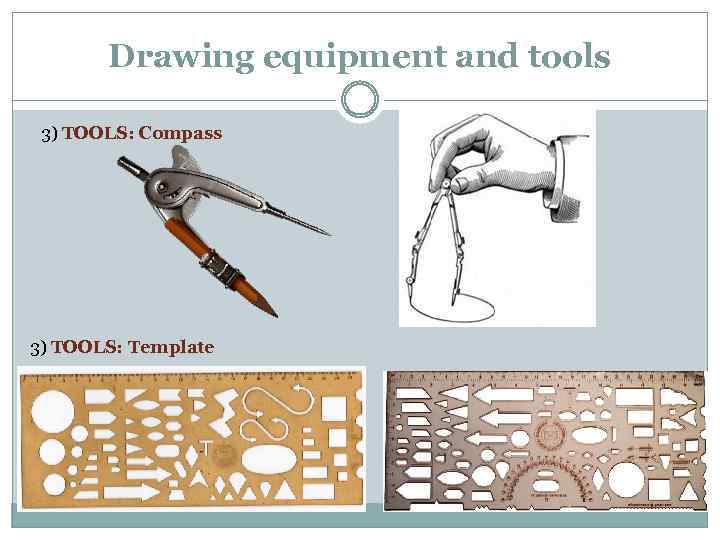
Drawing equipment and tools 3) TOOLS: Compass 3) TOOLS: Template
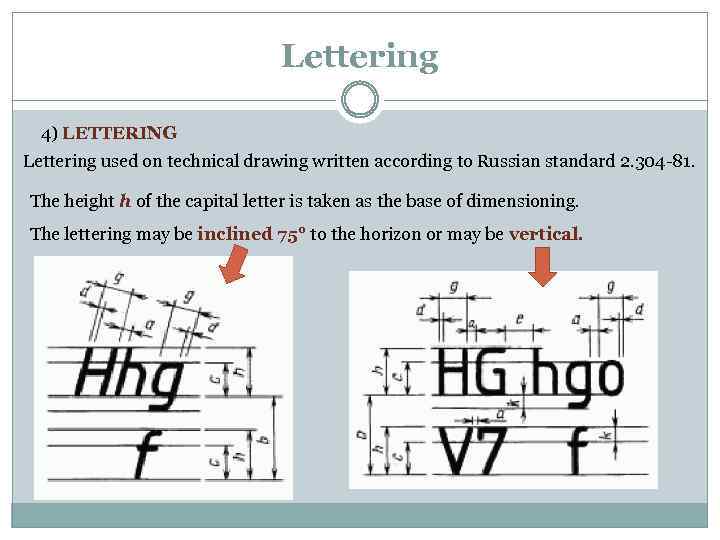
Lettering 4) LETTERING Lettering used on technical drawing written according to Russian standard 2. 304 -81. The height h of the capital letter is taken as the base of dimensioning. The lettering may be inclined 75° to the horizon or may be vertical.
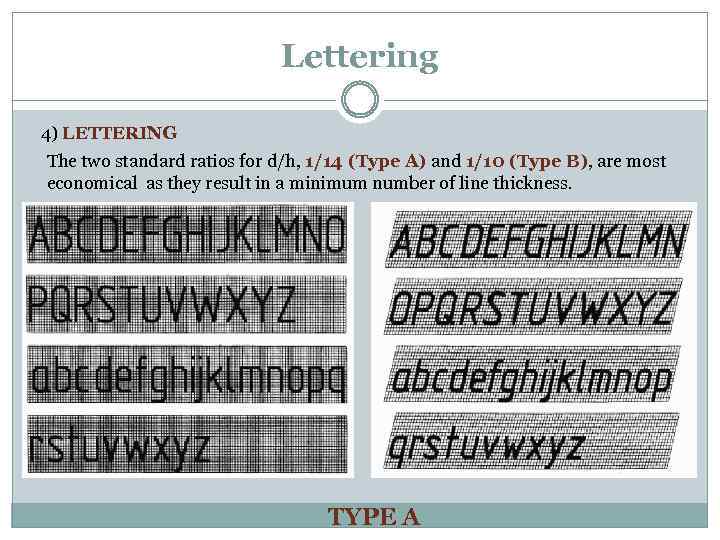
Lettering 4) LETTERING The two standard ratios for d/h, 1/14 (Type A) and 1/10 (Type B), are most economical as they result in a minimum number of line thickness. TYPE A
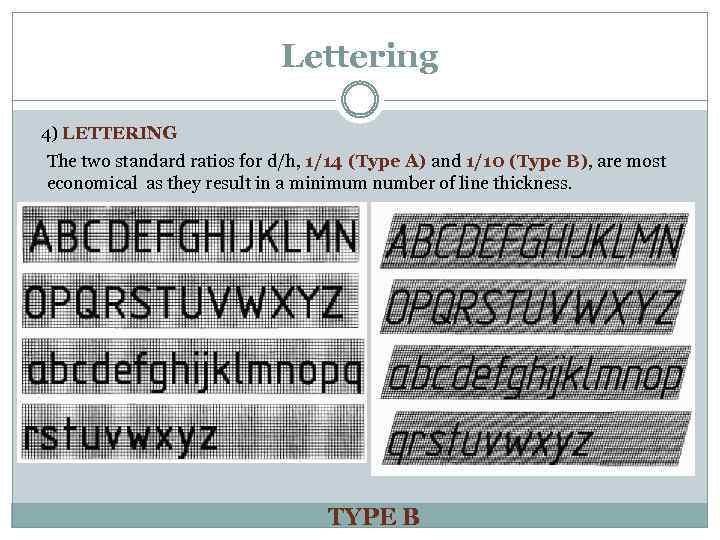
Lettering 4) LETTERING The two standard ratios for d/h, 1/14 (Type A) and 1/10 (Type B), are most economical as they result in a minimum number of line thickness. TYPE B
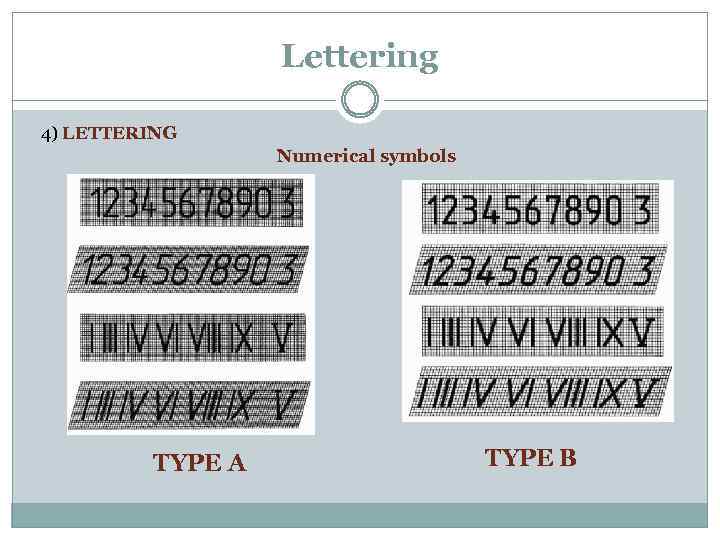
Lettering 4) LETTERING Numerical symbols TYPE A TYPE B
Lines on drawings Each line on a technical drawing has a definite meaning and is drawn in certain ways. In technical drawings, make construction lines so light that they can barely be seen, with a hard sharp pencil such as 4 Hto 6 H. For visible lines, hidden lines, and other “thick” lines use relatively soft pencils, such as F or H. All thin lines except construction line must be thin, but dark. They should be made with a sharp medium grad pencil, such as H or 2 H. Note, that there should also be a distinct contrast in the thickness of different kinds of lines, particularly between the thick lines and thin lines.
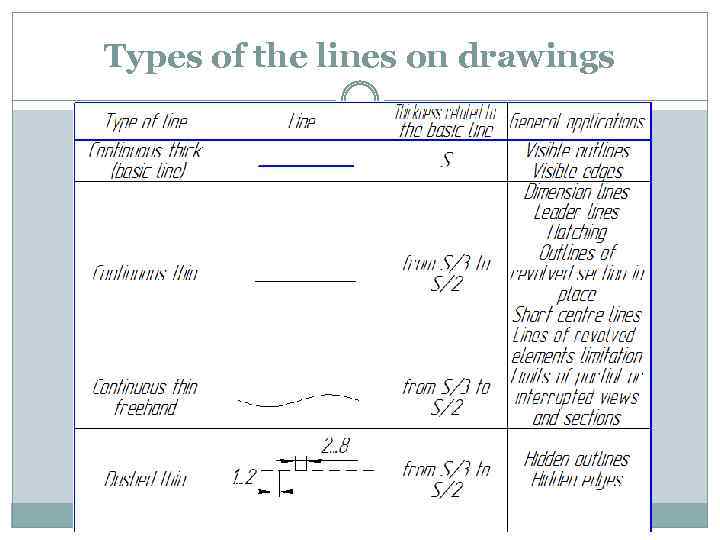
Types of the lines on drawings
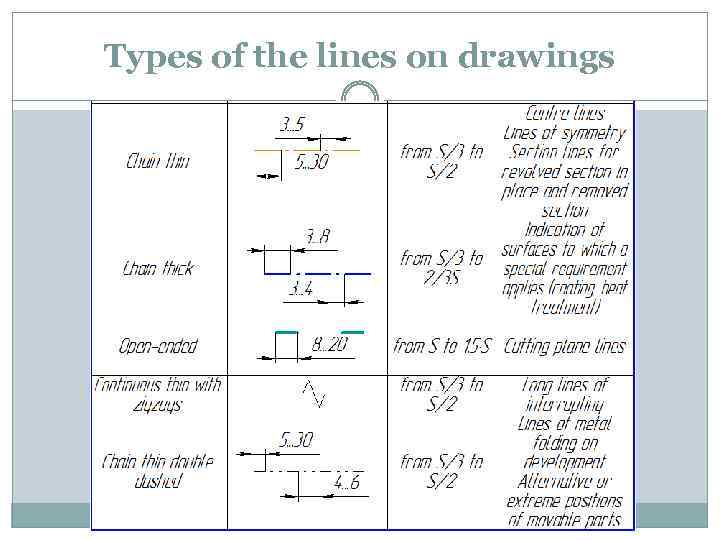
Types of the lines on drawings
Scales Scale is the ratio of the linear dimension of an element of an object as represented in the original drawing to the real linear dimension of the same element of the object itself. 1) When the object is drawn in its full size, a scale with the ratio 1: 1 is used. 2) Enlargement Scale is a scale where the ratio is larger than 1 : 1. These scales are used for describing small elements of the object. 3) Reduction Scale is a scale where ratio is smaller than 1: 1. These scales are used for describing a large element of the object if decreasing does not influence on the object understanding.
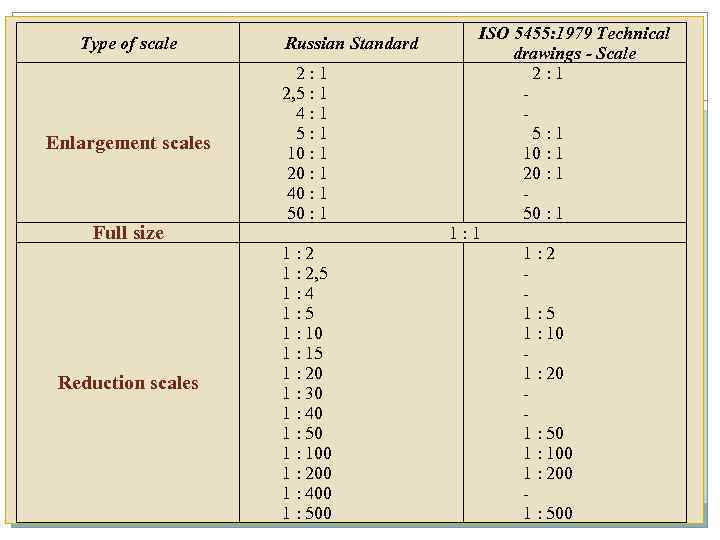
Type of scale Enlargement scales Full size Reduction scales Russian Standard 2: 1 2, 5 : 1 4: 1 5: 1 10 : 1 20 : 1 40 : 1 50 : 1 1: 2 1 : 2, 5 1: 4 1: 5 1 : 10 1 : 15 1 : 20 1 : 30 1 : 40 1 : 50 1 : 100 1 : 200 1 : 400 1 : 500 ISO 5455: 1979 Technical drawings - Scale 2: 1 5: 1 10 : 1 20 : 1 50 : 1 1: 2 1: 5 1 : 10 1 : 20 1 : 50 1 : 100 1 : 200 1 : 500
Lecture 1_Basic rules.pptx