2fbdea80e182ea0c577e4e26df2009bc.ppt
- Количество слайдов: 48
 Inspect. Scan VPI (Virtual Product Inspection)
 Agenda INTRODUCTION TECHNOLOGY § Product Philosophy § Flatbed Scanners § Hardware Configuration PRODUCTS § Overview § Pre Production – Set Up – Virtual Production § Programming – Assembly Programs – Vision Files SUMMARY
 Inspect. Scan VPI (Stencil. Scan Lite + Assembly Module + Component Module) Low Cost - Flexible System Avoid costly Rework Set up processes before production floor SPC sampling during production versus High Cost – Single Function System
 Introduction § Scan. CAD Founded in 1990 - Global Sales & Support Network Smart Sonic – OEM Partner since 2001 § Over 900 Customers in 46 Countries - First Systems Installed in 1987 § Vision Systems - PC- Based - Low Cost, Easy to Use, - Multi purpose
 Inspect. Scan VPI Product Philosophy § Newest Technology • Consumer driven scanner hardware platform • Customer investment protected since 1987 – upgrade path § Applications • Board assembly and hybrid microcircuit production • Process control and setup for PCB’c, stencils, screens, artwork, printed & dispensed materials § Flexible • Many applications on one system • Process control, programming and inspection on one system § Low Cost • Best price/performance ratio in the industry • Many applications at much lower cost than most single function systems § Easy-to-use • Compare to CAD, Gerber or golden part in minutes • Scan and compare parts at all stages of production utilizing multiple layers
 Inspection vs. . Measurement Smart Sonic Inspection Systems § Check 100% of Part – Ensure no bad parts ship § Output is Pass/Fail vs. User Defined Tolerance § Low Cost § Overlay CAD and Image - Very Easy to Program § Fast - Inspect parts with millions of features in minutes § Multi-Purpose - Inspect multiple part types and create data § Can also provide some measurement capability § Complimentary to measurement systems - many customers have both. (Measurement systems not able to inspect 100% of part)
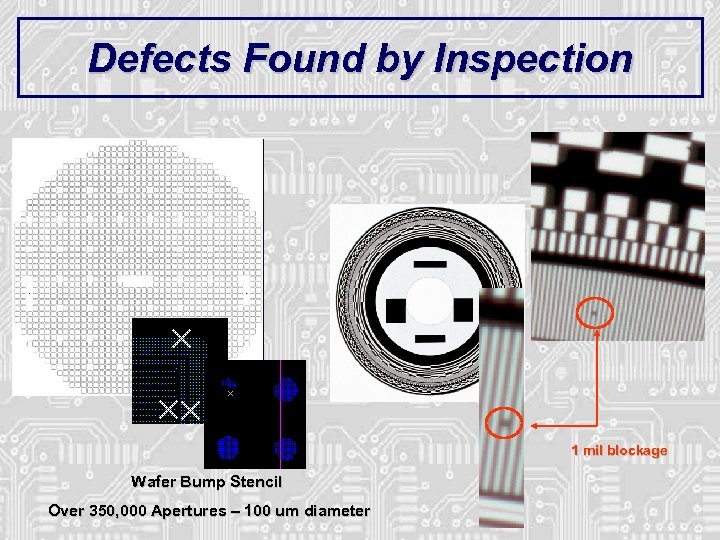 Defects Found by Inspection 1 mil blockage Wafer Bump Stencil Over 350, 000 Apertures – 100 um diameter
 Technology
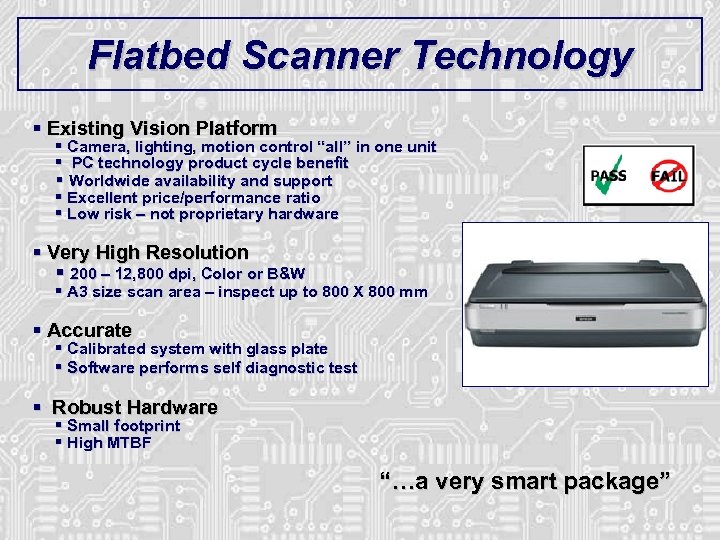 Flatbed Scanner Technology § Existing Vision Platform § Camera, lighting, motion control “all” in one unit § PC technology product cycle benefit § Worldwide availability and support § Excellent price/performance ratio § Low risk – not proprietary hardware § Very High Resolution § 200 – 12, 800 dpi, Color or B&W § A 3 size scan area – inspect up to 800 X 800 mm § Accurate § Calibrated system with glass plate § Software performs self diagnostic test § Robust Hardware § Small footprint § High MTBF “…a very smart package”
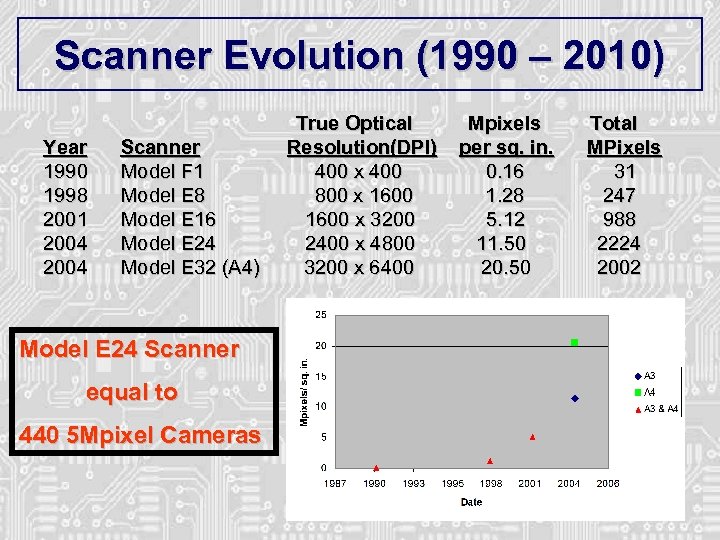 Scanner Evolution (1990 – 2010) True Optical Mpixels Total Year 1990 1998 2001 2004 Scanner Resolution(DPI) per sq. in. MPixels Model F 1 400 x 400 0. 16 31 Model E 8 800 x 1600 1. 28 247 Model E 16 1600 x 3200 5. 12 988 Model E 24 2400 x 4800 11. 50 2224 Model E 32 (A 4) 3200 x 6400 20. 50 2002 Model E 24 Scanner equal to 440 5 Mpixel Cameras
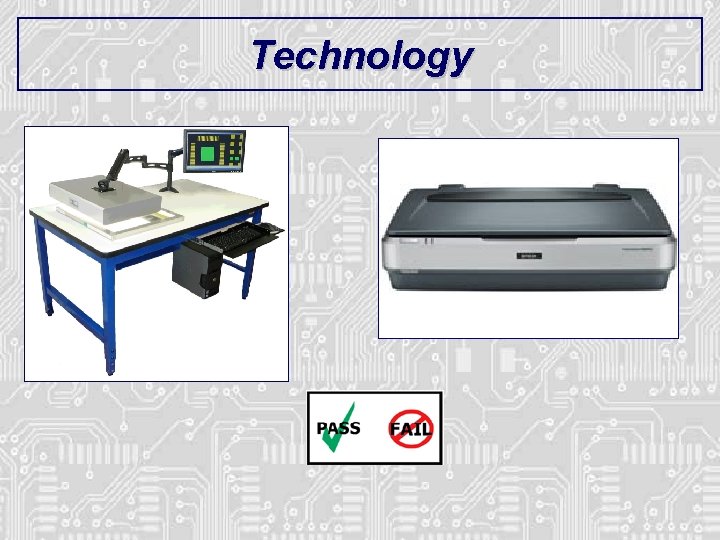
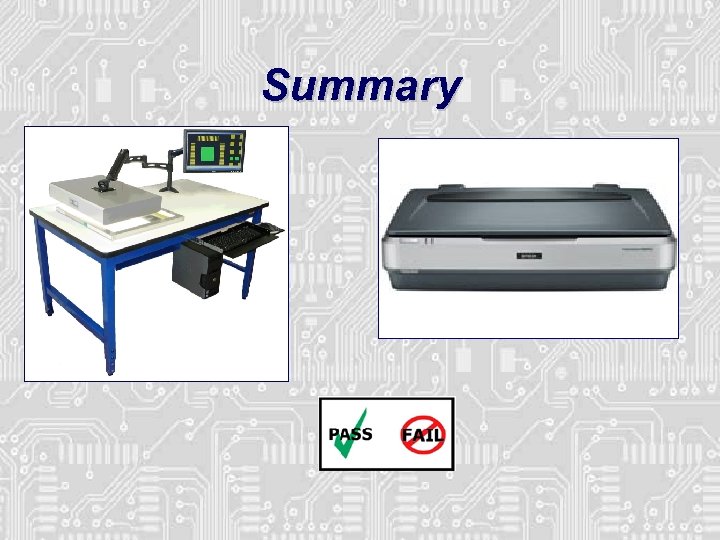
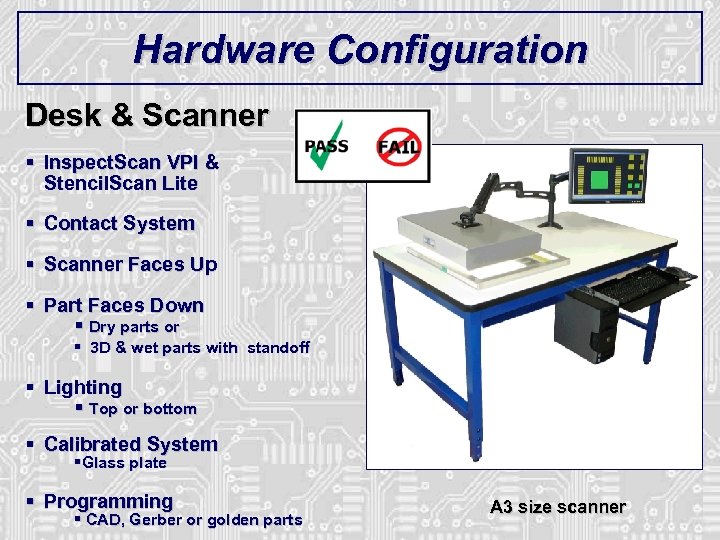 Hardware Configuration Desk & Scanner § Inspect. Scan VPI & Stencil. Scan Lite § Contact System § Scanner Faces Up § Part Faces Down § Dry parts or § 3 D & wet parts with standoff § Lighting § Top or bottom § Calibrated System §Glass plate § Programming § CAD, Gerber or golden parts A 3 size scanner
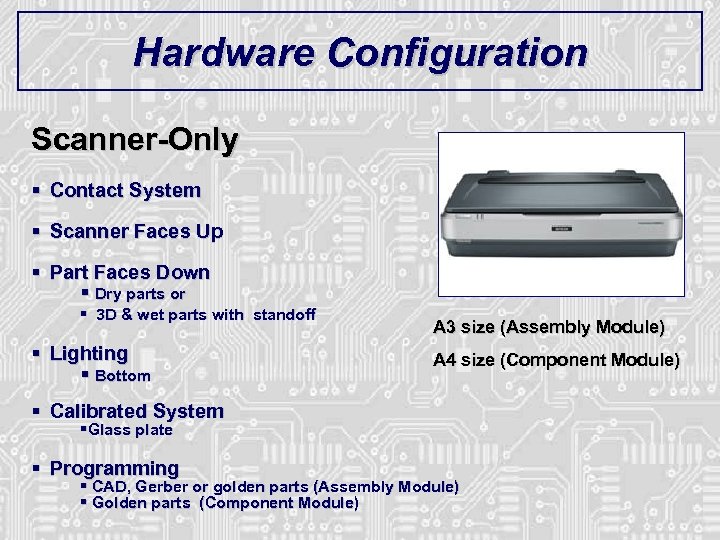 Hardware Configuration Scanner-Only § Contact System § Scanner Faces Up § Part Faces Down § Dry parts or § 3 D & wet parts with standoff § Lighting § Bottom A 3 size (Assembly Module) A 4 size (Component Module) § Calibrated System §Glass plate § Programming § CAD, Gerber or golden parts (Assembly Module) § Golden parts (Component Module)
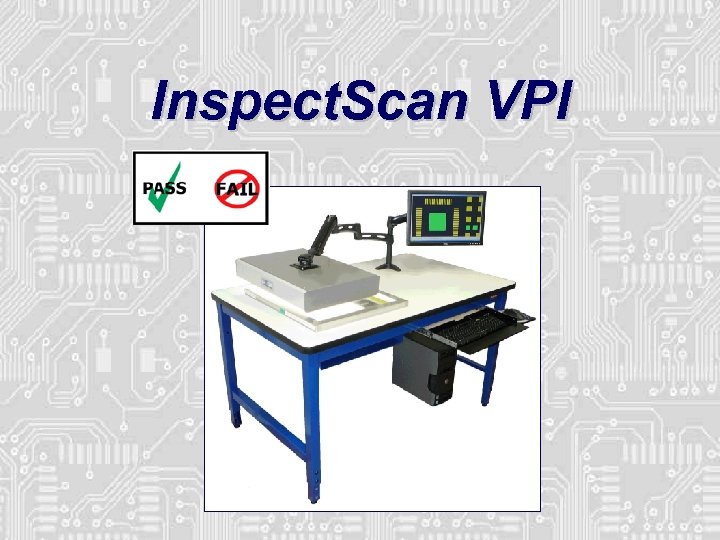 Inspect. Scan VPI
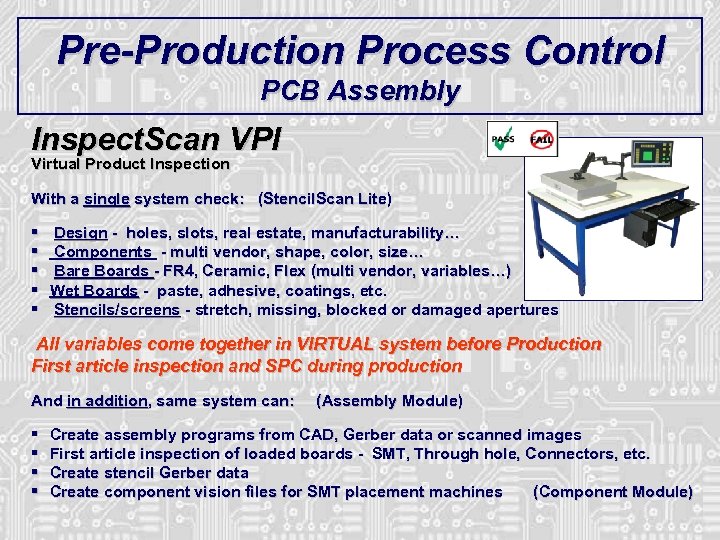 Pre-Production Process Control PCB Assembly Inspect. Scan VPI Virtual Product Inspection With a single system check: (Stencil. Scan Lite) § § § Design - holes, slots, real estate, manufacturability… Components - multi vendor, shape, color, size… Bare Boards - FR 4, Ceramic, Flex (multi vendor, variables…) Wet Boards - paste, adhesive, coatings, etc. Stencils/screens - stretch, missing, blocked or damaged apertures All variables come together in VIRTUAL system before Production First article inspection and SPC during production And in addition, same system can: (Assembly Module) § § Create assembly programs from CAD, Gerber data or scanned images First article inspection of loaded boards - SMT, Through hole, Connectors, etc. Create stencil Gerber data Create component vision files for SMT placement machines (Component Module)
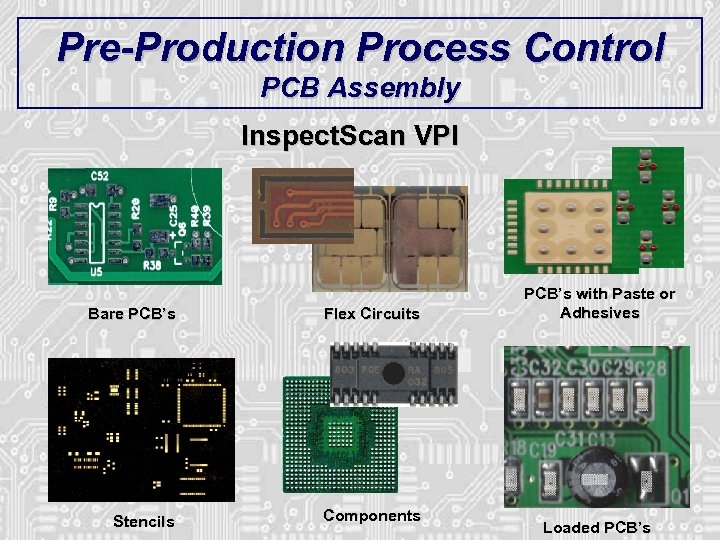 Pre-Production Process Control PCB Assembly Inspect. Scan VPI Bare PCB’s Flex Circuits Stencils Components PCB’s with Paste or Adhesives Loaded PCB’s
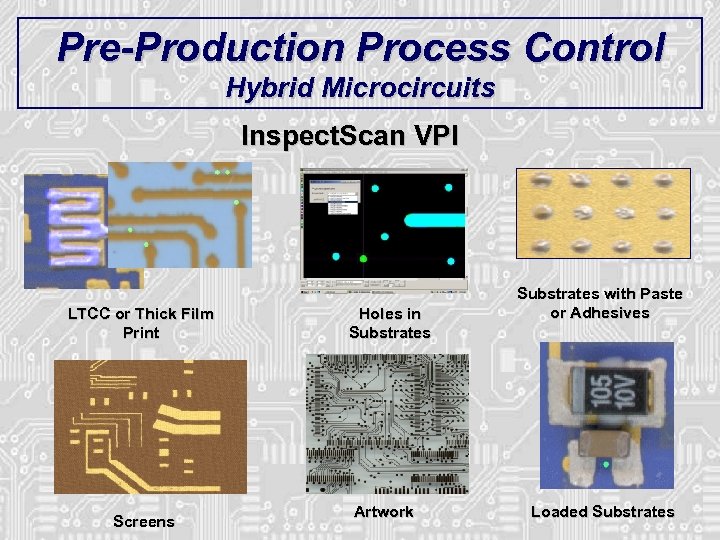 Pre-Production Process Control Hybrid Microcircuits Inspect. Scan VPI LTCC or Thick Film Print Screens Holes in Substrates Artwork Substrates with Paste or Adhesives Loaded Substrates
 Process Control and Inspection Functions
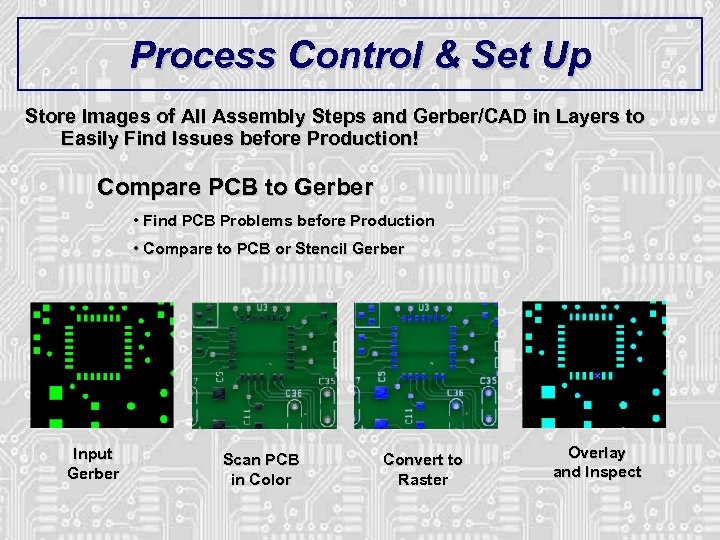 Process Control & Set Up Store Images of All Assembly Steps and Gerber/CAD in Layers to Easily Find Issues before Production! Compare PCB to Gerber • Find PCB Problems before Production • Compare to PCB or Stencil Gerber Input Gerber Scan PCB in Color Convert to Raster Overlay and Inspect
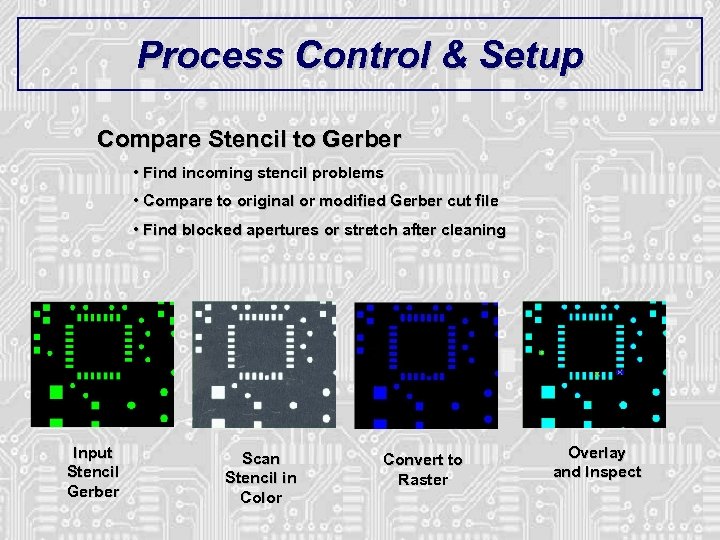 Process Control & Setup Compare Stencil to Gerber • Find incoming stencil problems • Compare to original or modified Gerber cut file • Find blocked apertures or stretch after cleaning Input Stencil Gerber Scan Stencil in Color Convert to Raster Overlay and Inspect
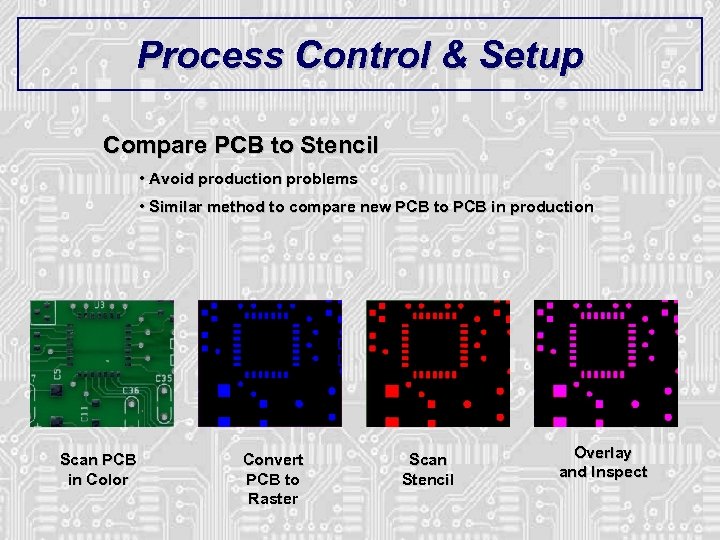 Process Control & Setup Compare PCB to Stencil • Avoid production problems • Similar method to compare new PCB to PCB in production Scan PCB in Color Convert PCB to Raster Scan Stencil Overlay and Inspect
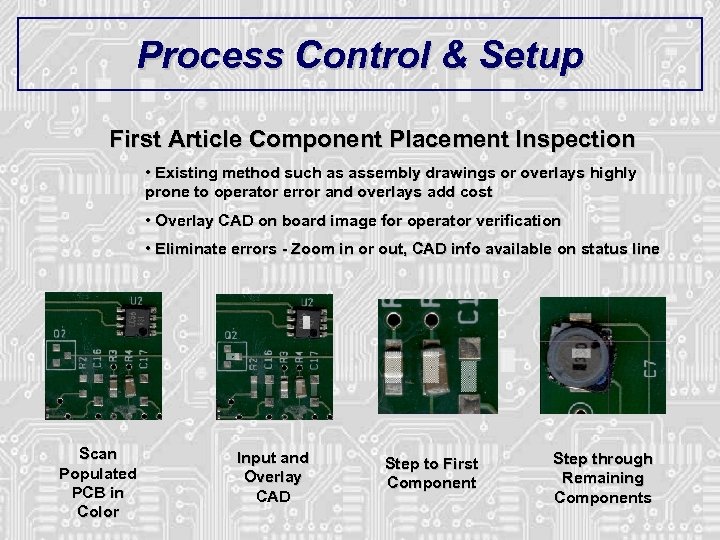 Process Control & Setup First Article Component Placement Inspection • Existing method such as assembly drawings or overlays highly prone to operator error and overlays add cost • Overlay CAD on board image for operator verification • Eliminate errors - Zoom in or out, CAD info available on status line Scan Populated PCB in Color Input and Overlay CAD Step to First Component Step through Remaining Components
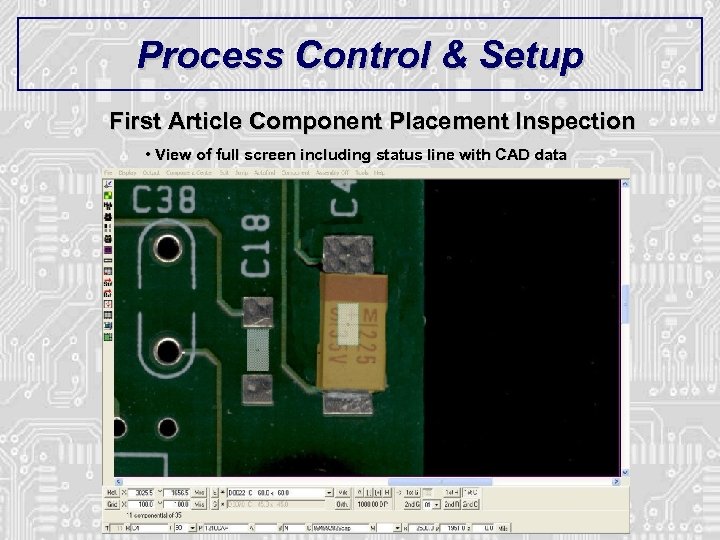 Process Control & Setup First Article Component Placement Inspection • View of full screen including status line with CAD data
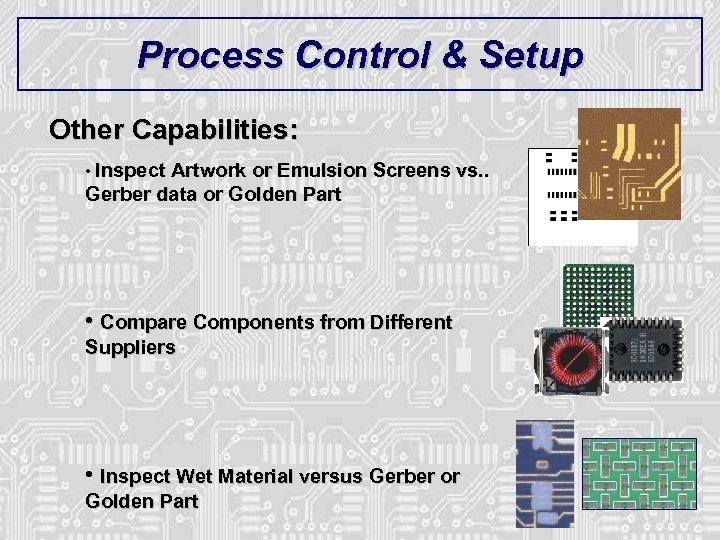 Process Control & Setup Other Capabilities: • Inspect Artwork or Emulsion Screens vs. . Gerber data or Golden Part • Compare Components from Different Suppliers • Inspect Wet Material versus Gerber or Golden Part
 Inspection Process In seven quick and easy steps! 1. 2. 3. 4. 5. 6. 7. Import Gerber file Scan stencil or screen at appropriate dpi Super-impose scanned image and Gerber Fine align scanned image and Gerber Inspect automatically Review errors Print certification report
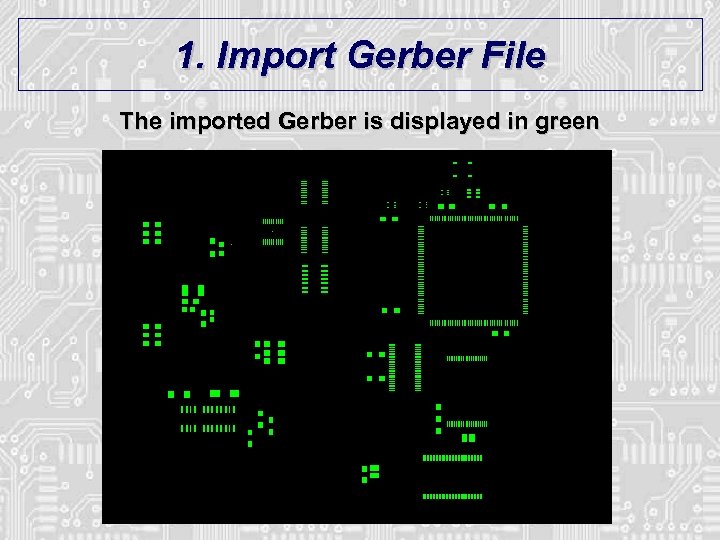 1. Import Gerber File The imported Gerber is displayed in green
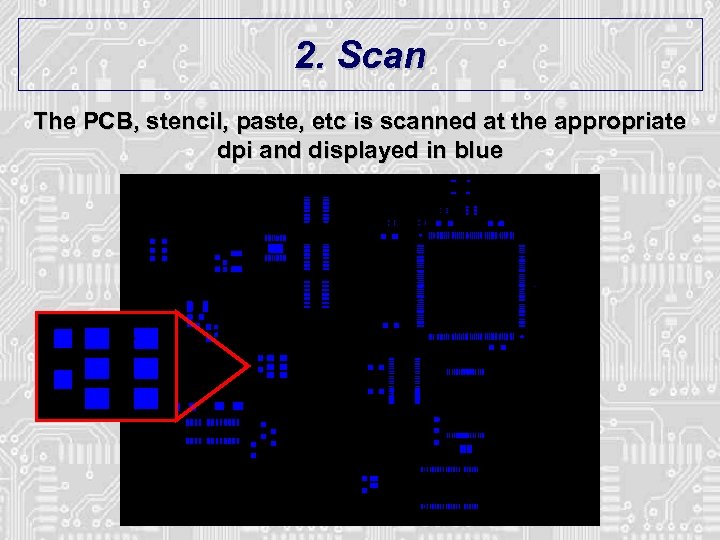 2. Scan The PCB, stencil, paste, etc is scanned at the appropriate dpi and displayed in blue
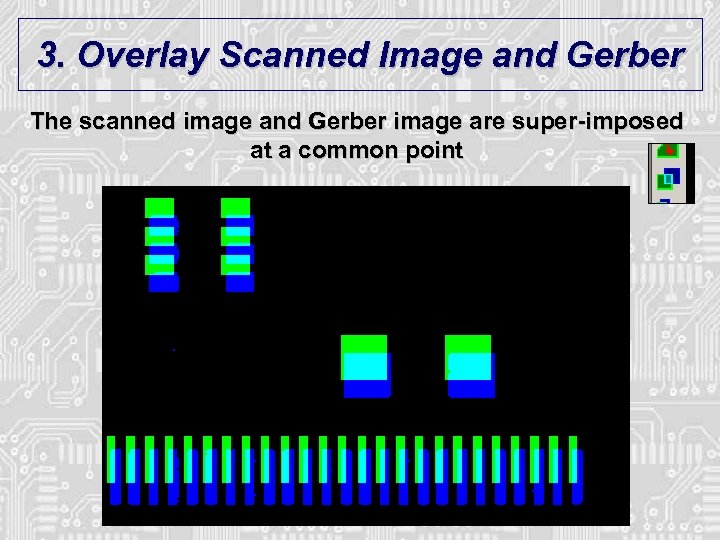 3. Overlay Scanned Image and Gerber The scanned image and Gerber image are super-imposed at a common point
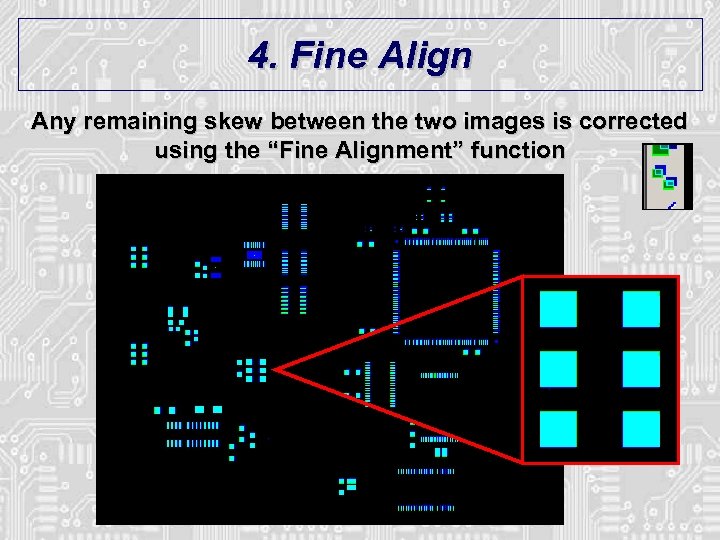 4. Fine Align Any remaining skew between the two images is corrected using the “Fine Alignment” function
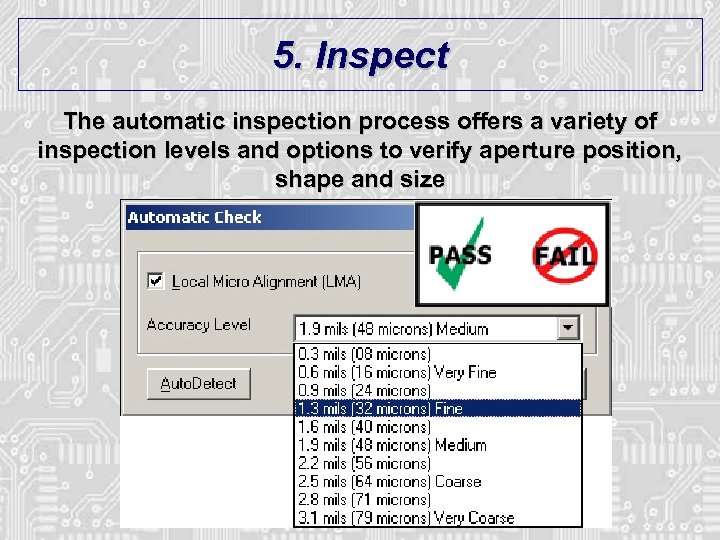 5. Inspect The automatic inspection process offers a variety of inspection levels and options to verify aperture position, shape and size
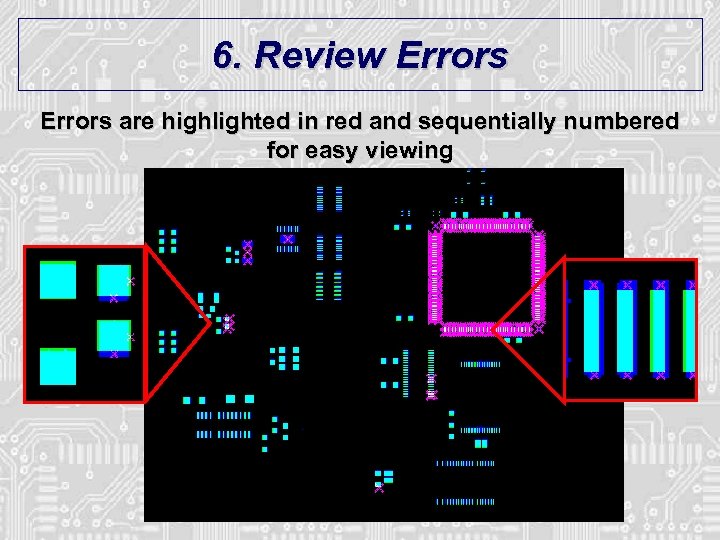 6. Review Errors are highlighted in red and sequentially numbered for easy viewing
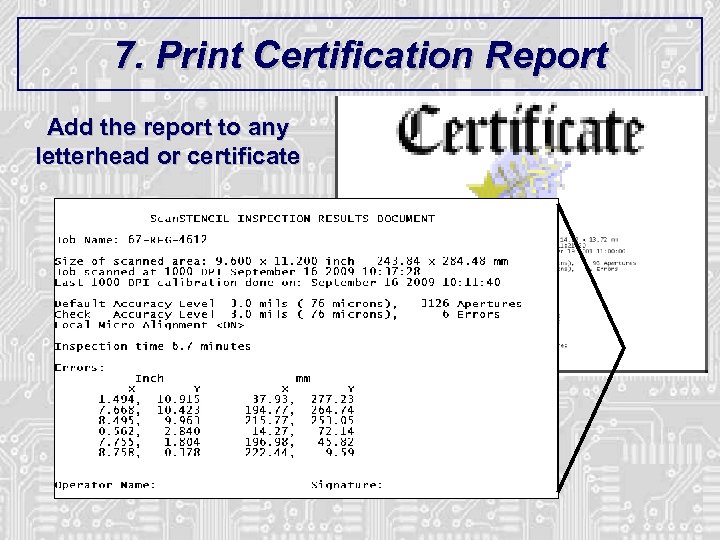 7. Print Certification Report Add the report to any letterhead or certificate
 Programming Functions
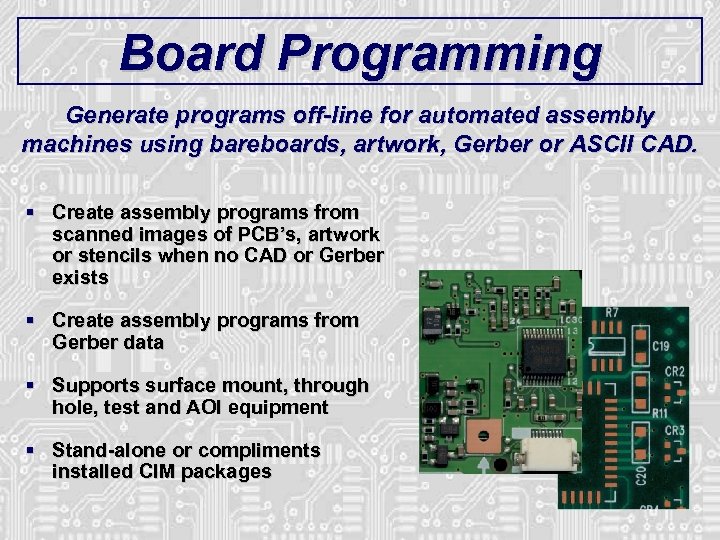 Board Programming Generate programs off-line for automated assembly machines using bareboards, artwork, Gerber or ASCII CAD. § Create assembly programs from scanned images of PCB’s, artwork or stencils when no CAD or Gerber exists § Create assembly programs from Gerber data § Supports surface mount, through hole, test and AOI equipment § Stand-alone or compliments installed CIM packages
 Programming Process In three quick and easy steps! 1. 2. 3. Input data Process data Output program files
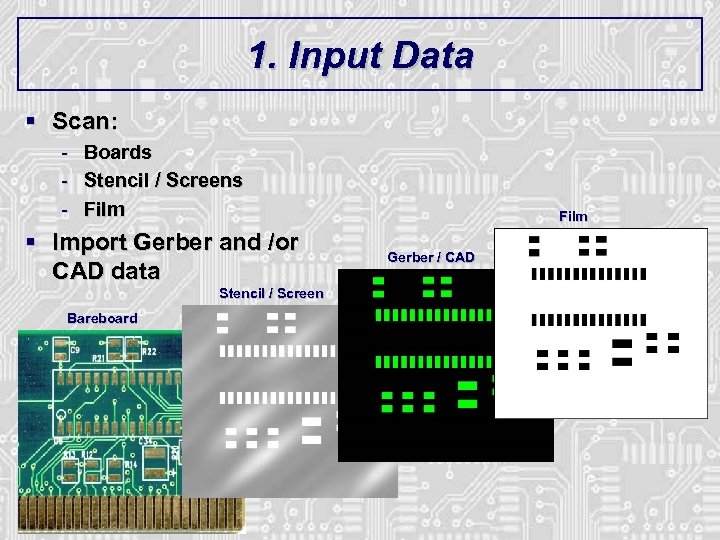 1. Input Data § Scan: - Boards Stencil / Screens Film § Import Gerber and /or CAD data Stencil / Screen Bareboard Film Gerber / CAD
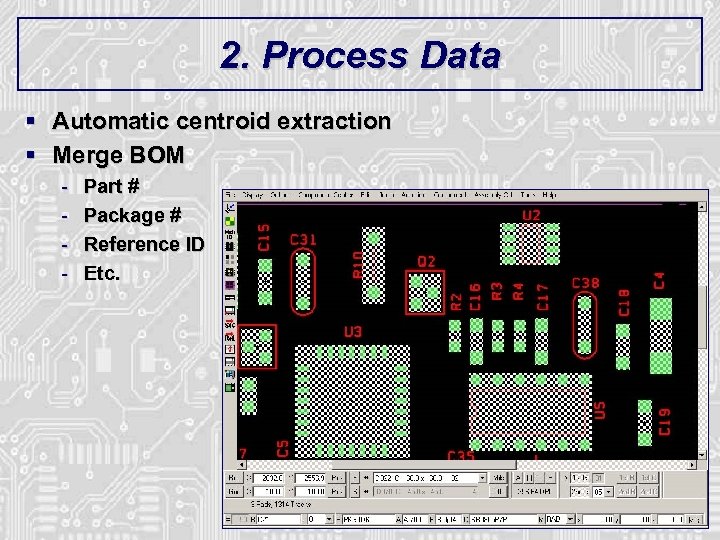 2. Process Data § Automatic centroid extraction § Merge BOM - Part # Package # Reference ID Etc.
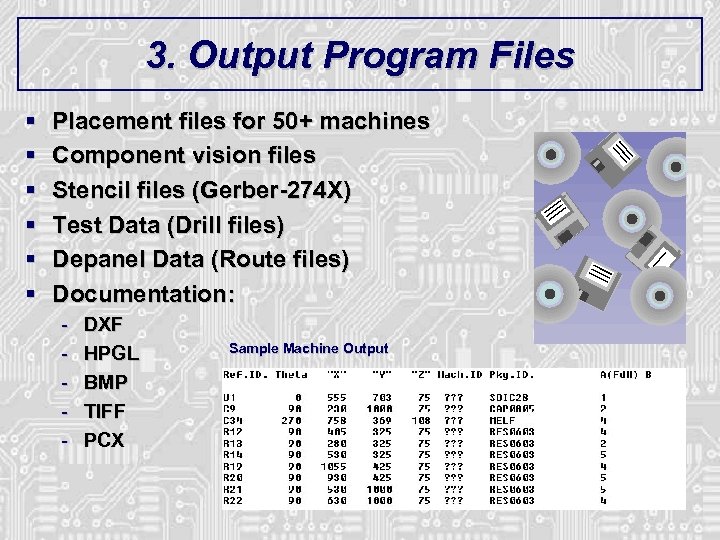 3. Output Program Files § § § Placement files for 50+ machines Component vision files Stencil files (Gerber-274 X) Test Data (Drill files) Depanel Data (Route files) Documentation: - DXF HPGL BMP TIFF PCX Sample Machine Output
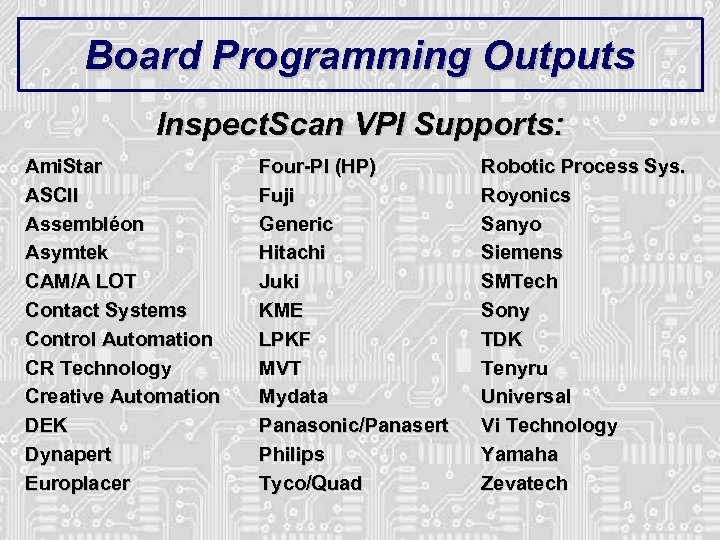 Board Programming Outputs Inspect. Scan VPI Supports: Ami. Star ASCII Assembléon Asymtek CAM/A LOT Contact Systems Control Automation CR Technology Creative Automation DEK Dynapert Europlacer Four-PI (HP) Fuji Generic Hitachi Juki KME LPKF MVT Mydata Panasonic/Panasert Philips Tyco/Quad Robotic Process Sys. Royonics Sanyo Siemens SMTech Sony TDK Tenyru Universal Vi Technology Yamaha Zevatech
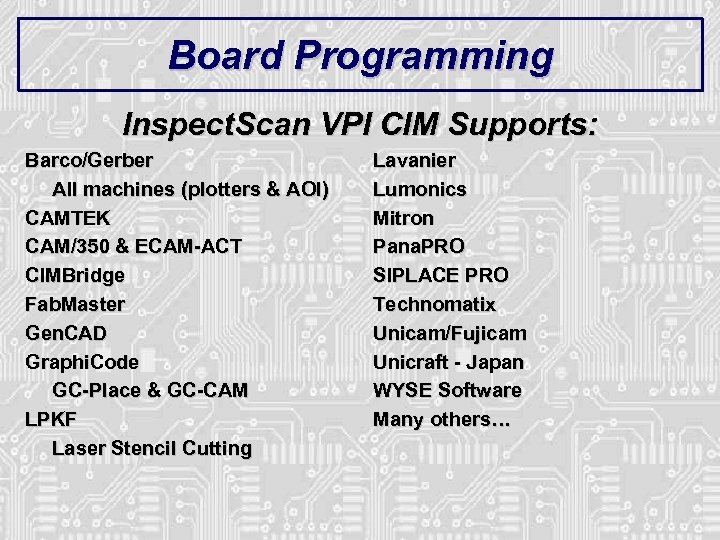 Board Programming Inspect. Scan VPI CIM Supports: Barco/Gerber All machines (plotters & AOI) CAMTEK CAM/350 & ECAM-ACT CIMBridge Fab. Master Gen. CAD Graphi. Code GC-Place & GC-CAM LPKF Laser Stencil Cutting Lavanier Lumonics Mitron Pana. PRO SIPLACE PRO Technomatix Unicam/Fujicam Unicraft - Japan WYSE Software Many others…
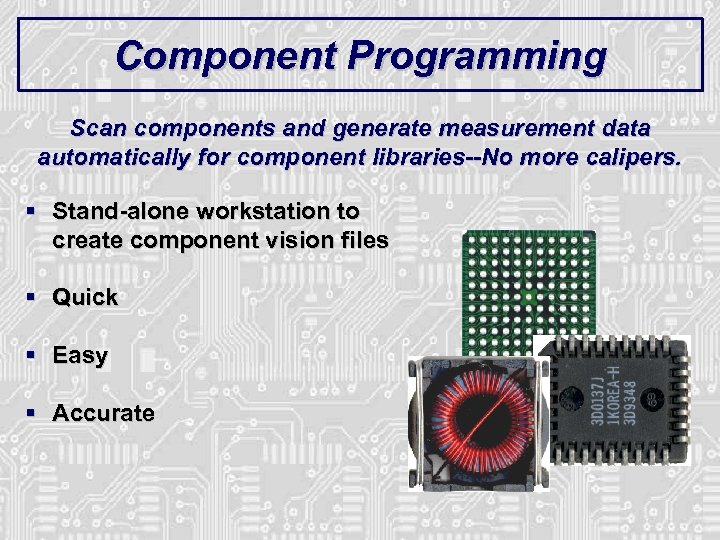 Component Programming Scan components and generate measurement data automatically for component libraries--No more calipers. § Stand-alone workstation to create component vision files § Quick § Easy § Accurate
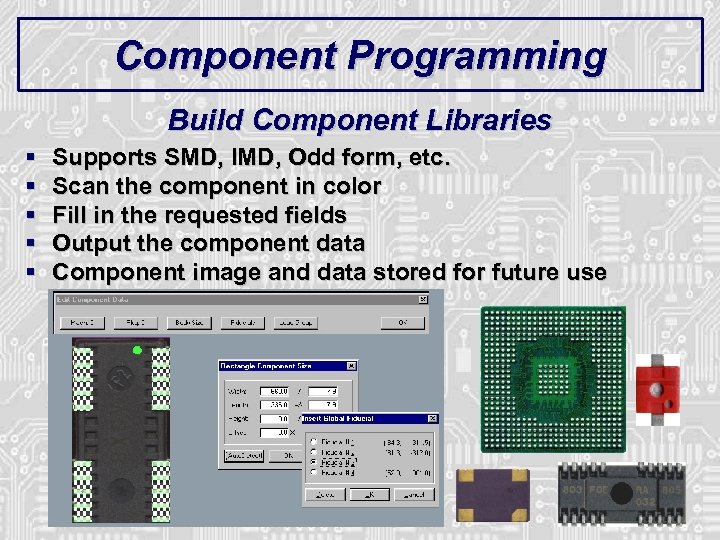 Component Programming Build Component Libraries § § § Supports SMD, IMD, Odd form, etc. Scan the component in color Fill in the requested fields Output the component data Component image and data stored for future use
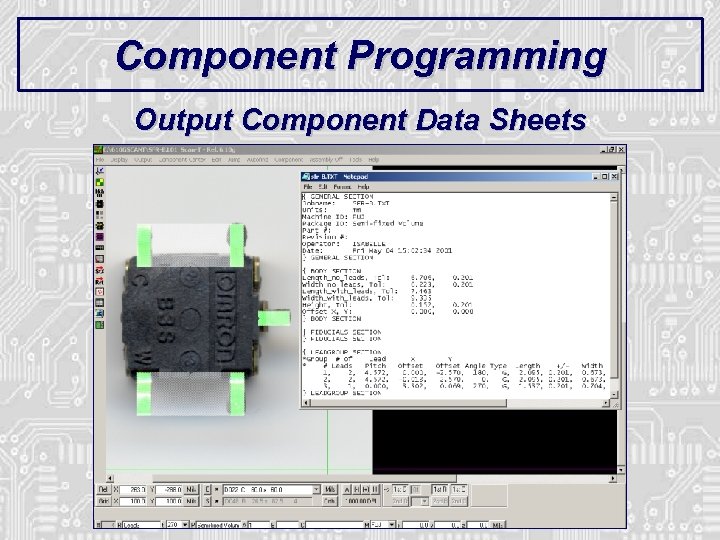 Component Programming Output Component Data Sheets
 SMT Magazine Article § GOOD NEWS: Scan. INSPECT VPI ROI ARTICLE: § “Using Stencil Design to Reduce SMT Defects” - SMT Magazine, April 2006 § www. electroiq. com/index/display/smt-article-display/252912/articles/smt/volume 20/issue-4/features/using-stencil-design-to-reduce-smt-defects. html Click Here § Case Study of benefits of making a STENCIL that matches the PCB § 125, 000 units over three weeks to obtain the data § Board measurements made using CMM at 6 reference points § Modify Gerber data to match board § Stencil made to PCB instead of Gerber § 43% solder paste defect reduction…. . !!!
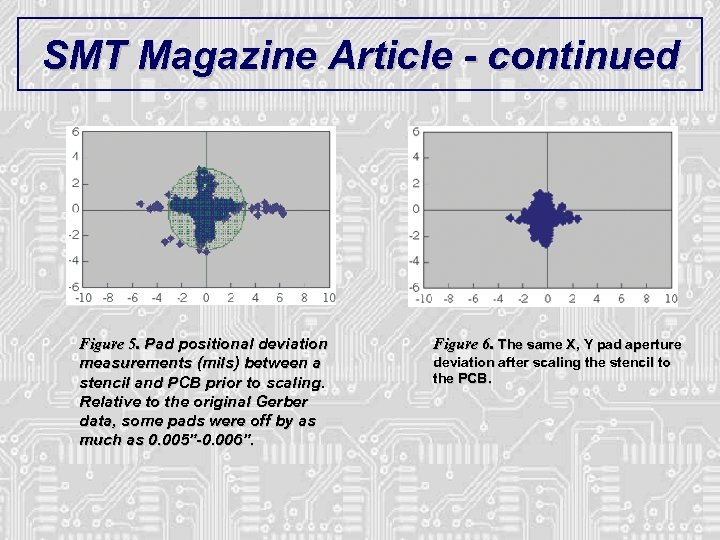 SMT Magazine Article - continued Figure 5. Pad positional deviation measurements (mils) between a stencil and PCB prior to scaling. Relative to the original Gerber data, some pads were off by as much as 0. 005”-0. 006”. Figure 6. The same X, Y pad aperture deviation after scaling the stencil to the PCB.
 Summary
 Inspect. Scan VPI § Catch problems BEFORE production floor – “Virtual problem” § Catch problems DURING production – “Sampling for SPC” § Eliminate REWORK § Environmentally friendly § Quick program set up and change over § Reduce operator, engineer & management stress § Focus on SOLUTIONS versus problems Eliminate SURPRISES…!!!
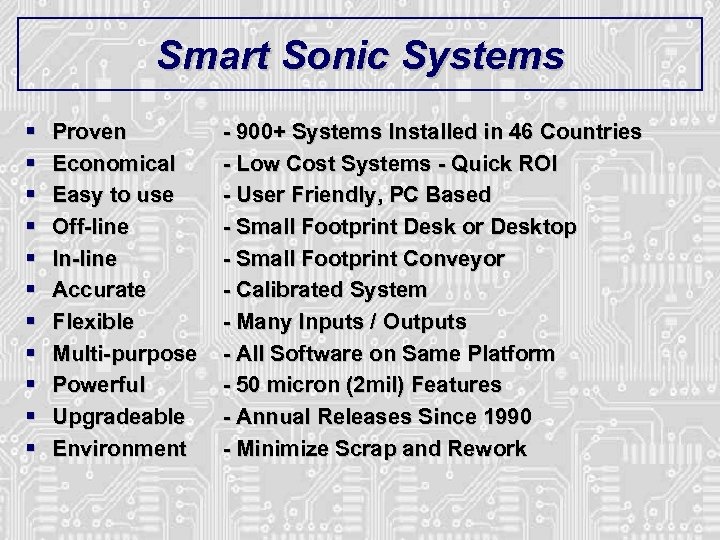 Smart Sonic Systems § § § Proven Economical Easy to use Off-line In-line Accurate Flexible Multi-purpose Powerful Upgradeable Environment - 900+ Systems Installed in 46 Countries - Low Cost Systems - Quick ROI - User Friendly, PC Based - Small Footprint Desk or Desktop - Small Footprint Conveyor - Calibrated System - Many Inputs / Outputs - All Software on Same Platform - 50 micron (2 mil) Features - Annual Releases Since 1990 - Minimize Scrap and Rework
 SMART SONIC CORPORATION 837 E. 79 Street · Cleveland, Ohio 44103 · U. S. A. TEL: +1 -818 -610 -7900 · FAX: +1 -216 -881 -8950 E-mail: smt@Smart. Sonic. com · Web Site: www. Smart. Sonic. com


