99655a5be6b3e293f1cde13b5d748b7e.ppt
- Количество слайдов: 34
 Guide to Downing the Watcher 3. 0
 Contents The Watcher 3. 0 Requirements Overview Tentacle Guide Preparation Phase 1 Phase 2 Phase 3 Links
 Requirements Equipment A Microphone (Useful – The Watcher can be done without Voicechat!) Athelas Potions Celebrant Potions Hope Tokens (Preferably +50 Hope for 30/40 Minute Tokens) Battle Lore and Warding Scrolls Food (Optional) Legendary Items – Gem Settings with + incoming healing Radiance Armour A minimum of 50 Radiance, comprised of any of the following: * 5 x pieces from the +10 Radiance Armour Set * In addition, +15 Radiance Armour Set pieces (From Ho. M, Ho. C, WW) * In addition, +20 Radiance Armour Set pieces (From DN / Watcher)
![Requirements Traits: Virtues Empathy (Recomm’d) [Rank 10: +450 Armour Value] Justice (Recomm’d) [Rank 10: Requirements Traits: Virtues Empathy (Recomm’d) [Rank 10: +450 Armour Value] Justice (Recomm’d) [Rank 10:](https://present5.com/presentation/99655a5be6b3e293f1cde13b5d748b7e/image-4.jpg) Requirements Traits: Virtues Empathy (Recomm’d) [Rank 10: +450 Armour Value] Justice (Recomm’d) [Rank 10: +143 Morale, +60 ICMR] Innocence (Recomm’d) [Rank 10: -5% Melee Dmg] Valour (Recomm’d) [Rank 10: +286 Morale, +8 Might] Compassion (Hunters) [Rank 10: -5% Ranged Dmg] Honesty (Optional) [Rank 10: +123 Power, +270 Armour Value] Loyalty (Optional) [Rank 10: +62 Power, +150 Armour Value] Traits: Class and Legendary Traits Take a look at the Class Guides for more information on Recommended Traits. Burglar Captain Champion Guardian Hunter Loremaster Minstrel Runekeeper Warden
Requirements Traits: Virtues Empathy (Recomm’d) [Rank 10: +450 Armour Value] Justice (Recomm’d) [Rank 10: +143 Morale, +60 ICMR] Innocence (Recomm’d) [Rank 10: -5% Melee Dmg] Valour (Recomm’d) [Rank 10: +286 Morale, +8 Might] Compassion (Hunters) [Rank 10: -5% Ranged Dmg] Honesty (Optional) [Rank 10: +123 Power, +270 Armour Value] Loyalty (Optional) [Rank 10: +62 Power, +150 Armour Value] Traits: Class and Legendary Traits Take a look at the Class Guides for more information on Recommended Traits. Burglar Captain Champion Guardian Hunter Loremaster Minstrel Runekeeper Warden
 Overview There are 3 Phases to the Watcher battle! A map appears on the next page. Phase 1 – The Shore Phase • Players attack two Massive Tentacles while avoiding The Watcher’s AOE attack! This involves a lot of running! Phase 2 – The Deep Water Phase • • • Crushing and Squeezing Tentacle adds on shore are dealt with. Two Massive Tentacles in the middle of the Vile Maw need to be killed. Every minute, a Player will be dangled by a Strangling Tentacle. Phase 3 – The Watcher Fight! • • • Two Massive Tentacles either side of the Watcher appear – one needs to be killed, whilst the other is taken down to 10 K (10, 000) Morale in a ‘Cycle’. The Watcher can take damage and be slain in this phase! Huzzah! More Players will be dangled.
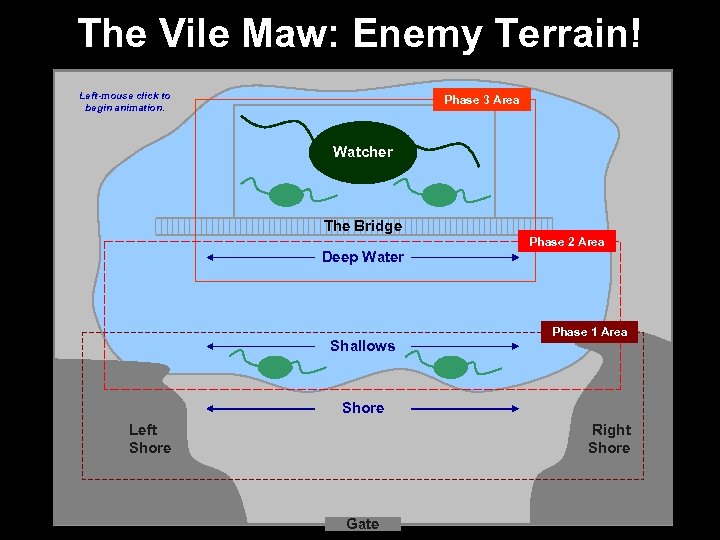 The Vile Maw: Enemy Terrain! Left-mouse click to begin animation. Phase 3 Area Watcher The Bridge Phase 2 Area Deep Water Shallows Phase 1 Area Shore Left Shore Right Shore Gate
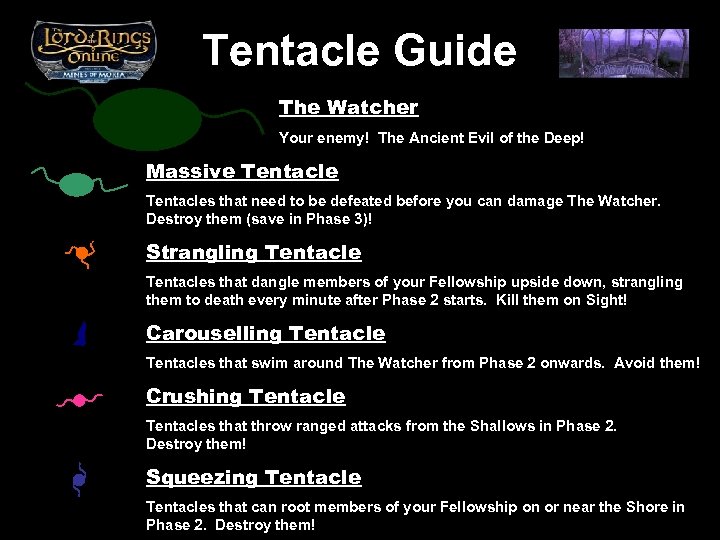 Tentacle Guide The Watcher Your enemy! The Ancient Evil of the Deep! Massive Tentacles that need to be defeated before you can damage The Watcher. Destroy them (save in Phase 3)! Strangling Tentacles that dangle members of your Fellowship upside down, strangling them to death every minute after Phase 2 starts. Kill them on Sight! Carouselling Tentacles that swim around The Watcher from Phase 2 onwards. Avoid them! Crushing Tentacles that throw ranged attacks from the Shallows in Phase 2. Destroy them! Squeezing Tentacles that can root members of your Fellowship on or near the Shore in Phase 2. Destroy them!
 Preparation Basic Raiding Etiquette There a few simple things to keep in mind when organising or participating in a Raid – a few tips appear below. Fellowship Leader(s) should do most of the talking – it’s hard to co-ordinate a battle with 12 Players talking over each other! If you’re in trouble (i. e. being strangled/dangled or rooted by a Tentacle), you have permission to talk! Let the Raid know you need help – use your name, speak up and let everyone know what’s going on asap! • i. e. “PLAYER 1 DANGLING!!!” Agree to Loot Rules prior to the start of the battle. Create a Fellowship and convert it into a Raid, inviting all 12 -Players who plan on Downing the Watcher! Set 2 HUNTERS and 1 TANK (usually a GUARD) as RAID ASSIST targets.
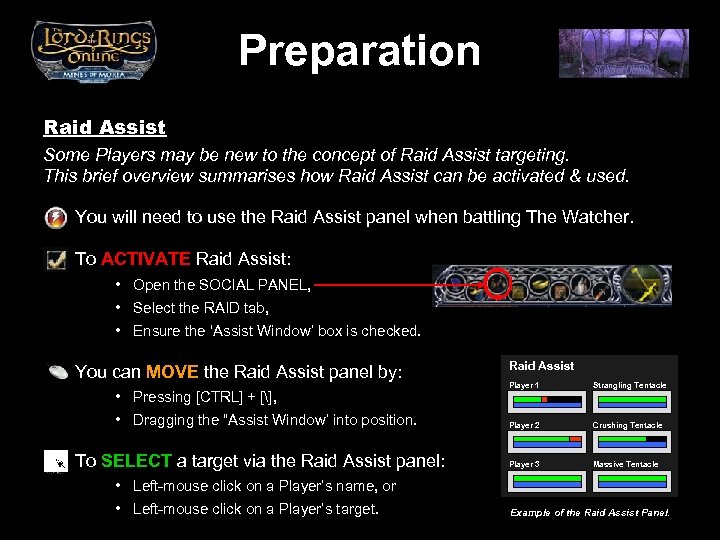 Preparation Raid Assist Some Players may be new to the concept of Raid Assist targeting. This brief overview summarises how Raid Assist can be activated & used. You will need to use the Raid Assist panel when battling The Watcher. To ACTIVATE Raid Assist: • Open the SOCIAL PANEL, • Select the RAID tab, • Ensure the ‘Assist Window’ box is checked. You can MOVE the Raid Assist panel by: • Pressing [CTRL] + [], • Dragging the “Assist Window’ into position. To SELECT a target via the Raid Assist panel: Raid Assist Player 1 Strangling Tentacle Player 2 Crushing Tentacle Player 3 Massive Tentacle • Left-mouse click on a Player’s name, or • Left-mouse click on a Player’s target. Example of the Raid Assist Panel.
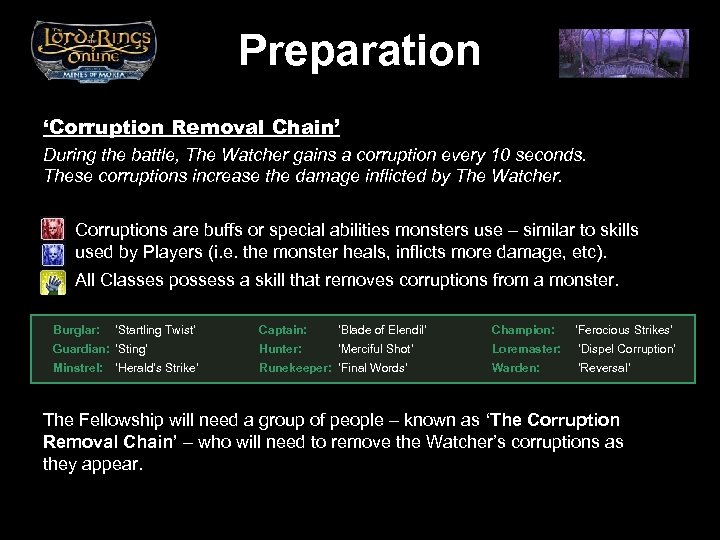 Preparation ‘Corruption Removal Chain’ During the battle, The Watcher gains a corruption every 10 seconds. These corruptions increase the damage inflicted by The Watcher. Corruptions are buffs or special abilities monsters use – similar to skills used by Players (i. e. the monster heals, inflicts more damage, etc). All Classes possess a skill that removes corruptions from a monster. Burglar: ‘Startling Twist’ Captain: ‘Blade of Elendil’ Champion: ‘Ferocious Strikes’ Guardian: ‘Sting’ Hunter: ‘Merciful Shot’ Loremaster: ‘Dispel Corruption’ Minstrel: Runekeeper: ’Final Words’ Warden: ‘Reversal’ ‘Herald’s Strike’ The Fellowship will need a group of people – known as ‘The Corruption Removal Chain’ – who will need to remove the Watcher’s corruptions as they appear.
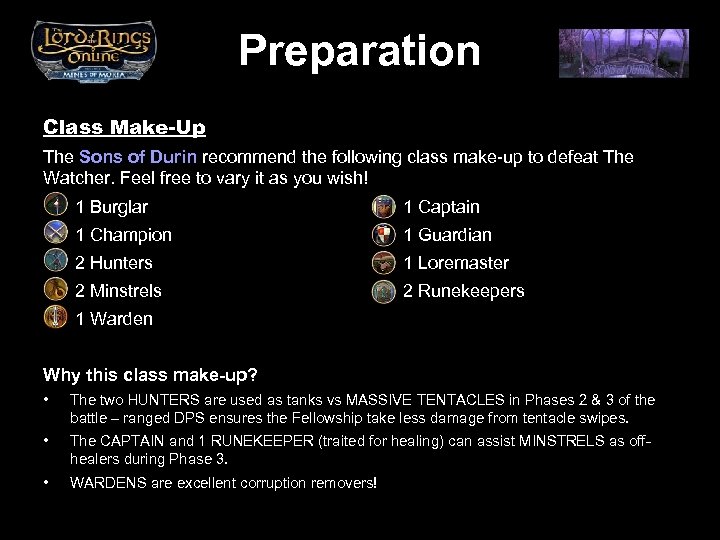 Preparation Class Make-Up The Sons of Durin recommend the following class make-up to defeat The Watcher. Feel free to vary it as you wish! 1 Burglar 1 Captain 1 Champion 1 Guardian 2 Hunters 1 Loremaster 2 Minstrels 2 Runekeepers 1 Warden Why this class make-up? • The two HUNTERS are used as tanks vs MASSIVE TENTACLES in Phases 2 & 3 of the battle – ranged DPS ensures the Fellowship take less damage from tentacle swipes. • The CAPTAIN and 1 RUNEKEEPER (traited for healing) can assist MINSTRELS as offhealers during Phase 3. • WARDENS are excellent corruption removers!
 Preparation Gather all members of the Raid together at the Vile Maw – there is a Summoning Horn that can be used to muster Players. Ensure all Players are grouped closely together outside the Vile Maw. Use a Hope Token, Battle and Warding Scrolls for each Fellowship Group participating in the Raid. Enter the Vile Maw and ensure all Players line up – single file – just passed the Gate into the Watcher’s Chamber. Perform a “Ready Check” to ensure ALL Players entered the Vile Maw successfully (PCs crash, the LOTRO Client crashes, Players wander off and go AFK without letting anyone know, emergencies occur!). Eat food. Spend Destiny to buy “Continuing Hope” or “Sustained Hope” if necessary (this adds +10 Radiance for up to 30 or 15 minutes). Begin the countdown – start the fight!
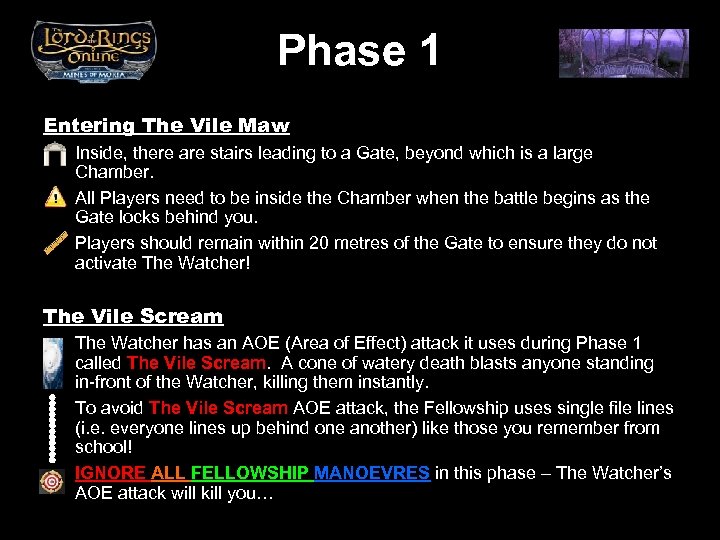 Phase 1 Entering The Vile Maw Inside, there are stairs leading to a Gate, beyond which is a large Chamber. All Players need to be inside the Chamber when the battle begins as the Gate locks behind you. Players should remain within 20 metres of the Gate to ensure they do not activate The Watcher! The Vile Scream The Watcher has an AOE (Area of Effect) attack it uses during Phase 1 called The Vile Scream. A cone of watery death blasts anyone standing in-front of the Watcher, killing them instantly. To avoid The Vile Scream AOE attack, the Fellowship uses single file lines (i. e. everyone lines up behind one another) like those you remember from school! IGNORE ALL FELLOWSHIP MANOEVRES in this phase – The Watcher’s AOE attack will kill you…
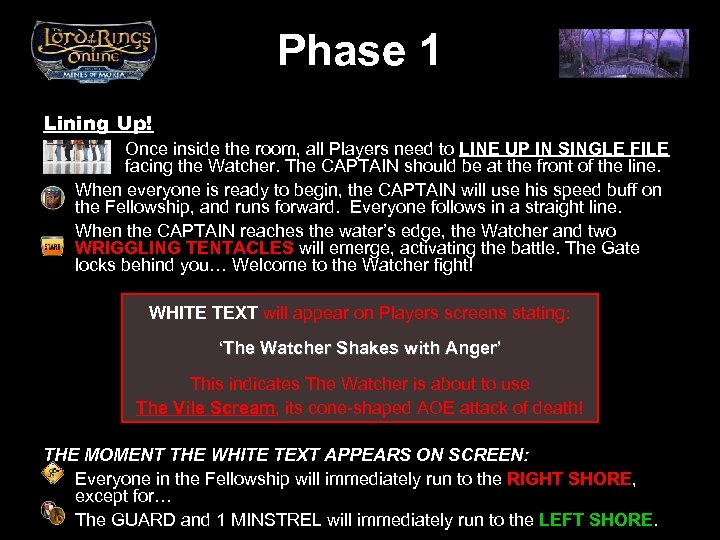 Phase 1 Lining Up! Once inside the room, all Players need to LINE UP IN SINGLE FILE facing the Watcher. The CAPTAIN should be at the front of the line. When everyone is ready to begin, the CAPTAIN will use his speed buff on the Fellowship, and runs forward. Everyone follows in a straight line. When the CAPTAIN reaches the water’s edge, the Watcher and two WRIGGLING TENTACLES will emerge, activating the battle. The Gate locks behind you… Welcome to the Watcher fight! WHITE TEXT will appear on Players screens stating: ‘The Watcher Shakes with Anger’ This indicates The Watcher is about to use The Vile Scream, its cone-shaped AOE attack of death! THE MOMENT THE WHITE TEXT APPEARS ON SCREEN: Everyone in the Fellowship will immediately run to the RIGHT SHORE, except for… The GUARD and 1 MINSTREL will immediately run to the LEFT SHORE.
 Phase 1 Hit – Run, Hit – Run! Once The Watcher’s Vile Scream attack has finished (i. e. when the WHITE TEXT and cone-shaped jet of water disappears): The Fellowship line up single-file in front of the RIGHT TENTACLE. The GUARD and 1 MINSTREL, who ran left, line up in front of the Left Massive Tentacle – the GUARD tanks the Tentacle. Both groups attack the Tentacle they are facing. Use short inductions as The Vile Scream attack occurs every 30 secs! Prepare to run to the Shore when the dreaded WHITE TEXT appears! Left Wriggling Tentacle Fellowship runs RIGHT if RIGHT TENTACLE is up. Fellowship lines up single. File behind the GUARD and MINSTREL if the RIGHT TENTACLE is defeated, and runs LEFT if the AOE attack occurs once more. Left Shore Right Wriggling Tentacle GUARD & FELLOWSHIP The Watcher Shakes MINSTREL with Anger Gate Right Shore Left-mouse click to begin animation.
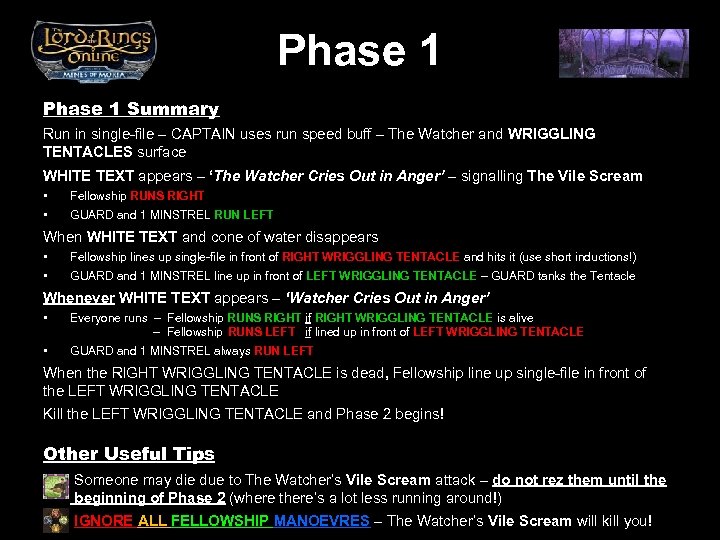 Phase 1 Summary Run in single-file – CAPTAIN uses run speed buff – The Watcher and WRIGGLING TENTACLES surface WHITE TEXT appears – ‘The Watcher Cries Out in Anger’ – signalling The Vile Scream • • Fellowship RUNS RIGHT GUARD and 1 MINSTREL RUN LEFT When WHITE TEXT and cone of water disappears • • Fellowship lines up single-file in front of RIGHT WRIGGLING TENTACLE and hits it (use short inductions!) GUARD and 1 MINSTREL line up in front of LEFT WRIGGLING TENTACLE – GUARD tanks the Tentacle Whenever WHITE TEXT appears – ‘Watcher Cries Out in Anger’ • Everyone runs – Fellowship RUNS RIGHT if RIGHT WRIGGLING TENTACLE is alive – Fellowship RUNS LEFT if lined up in front of LEFT WRIGGLING TENTACLE • GUARD and 1 MINSTREL always RUN LEFT When the RIGHT WRIGGLING TENTACLE is dead, Fellowship line up single-file in front of the LEFT WRIGGLING TENTACLE Kill the LEFT WRIGGLING TENTACLE and Phase 2 begins! Other Useful Tips Someone may die due to The Watcher’s Vile Scream attack – do not rez them until the beginning of Phase 2 (where there’s a lot less running around!) IGNORE ALL FELLOWSHIP MANOEVRES – The Watcher’s Vile Scream will kill you!
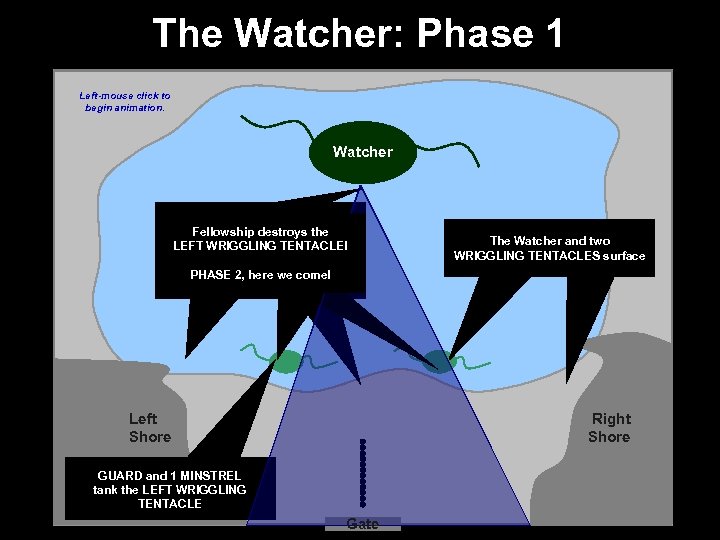 The Watcher: Phase 1 Left-mouse click to begin animation. Watcher WHITE TEXT stating The Watcher’s. Shakesbehind the Fellowship lines up with Anger’ ‘The Fellowship destroys the Watcher AOE attack occurs The WRIGGLING TENTACLE! LEFT Fellowship run towards GUARD and MINSTREL and appears the left a straight line attacks. Shore inbehind DIES!!! Anyone Left Massive Tentacle PHASE 2, here RUNS! Everybody we come! Left Shore The Watcher and two Fellowship DESTROYS the Fellowship runs RIGHT!!! Everyone else attacks the WRIGGLING TENTACLES surface Right Massive Tentacle! Right Massive Tentacle Right Shore GUARD and 1 MINSTREL GUARD and MINSTREL tank the LEFT 1 WRIGGLING run LEFT!!! TENTACLE Gate
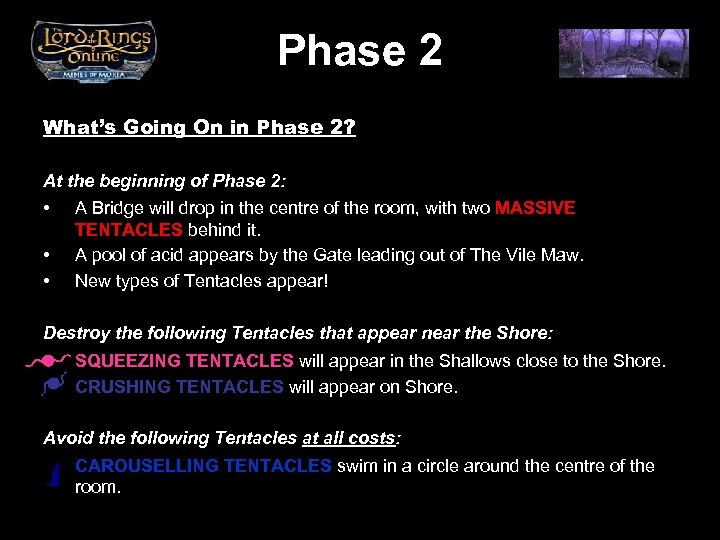 Phase 2 What’s Going On in Phase 2? At the beginning of Phase 2: • • • A Bridge will drop in the centre of the room, with two MASSIVE TENTACLES behind it. A pool of acid appears by the Gate leading out of The Vile Maw. New types of Tentacles appear! Destroy the following Tentacles that appear near the Shore: SQUEEZING TENTACLES will appear in the Shallows close to the Shore. CRUSHING TENTACLES will appear on Shore. Avoid the following Tentacles at all costs: CAROUSELLING TENTACLES swim in a circle around the centre of the room.
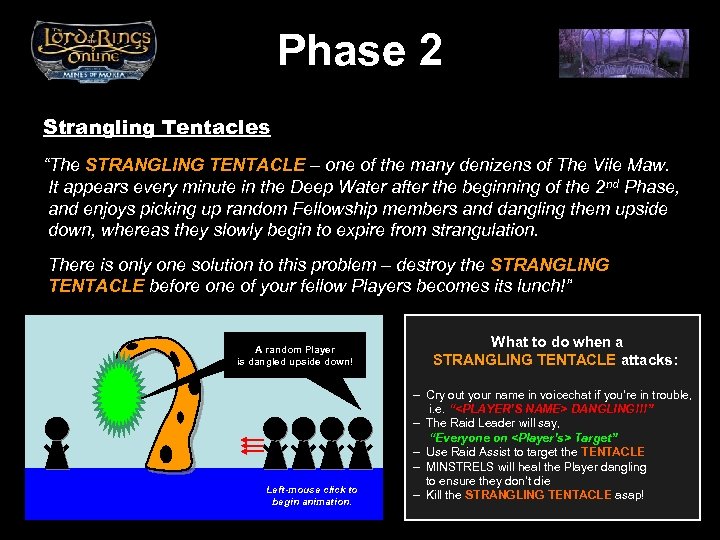 Phase 2 Strangling Tentacles “The STRANGLING TENTACLE – one of the many denizens of The Vile Maw. It appears every minute in the Deep Water after the beginning of the 2 nd Phase, and enjoys picking up random Fellowship members and dangling them upside down, whereas they slowly begin to expire from strangulation. There is only one solution to this problem – destroy the STRANGLING TENTACLE before one of your fellow Players becomes its lunch!” Raid Leader says, Player. The out, cries A Fellowship attacksthe MINSTRELS heal A“Everyone on random NAME> “
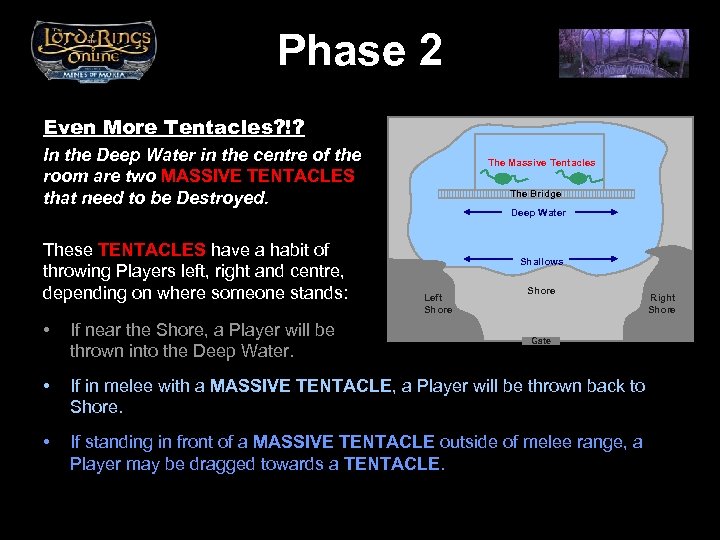 Phase 2 Even More Tentacles? !? In the Deep Water in the centre of the room are two MASSIVE TENTACLES that need to be Destroyed. These TENTACLES have a habit of throwing Players left, right and centre, depending on where someone stands: The Massive Tentacles The Bridge Deep Water Shallows Left Shore • If near the Shore, a Player will be thrown into the Deep Water. • If in melee with a MASSIVE TENTACLE, a Player will be thrown back to Shore. • If standing in front of a MASSIVE TENTACLE outside of melee range, a Player may be dragged towards a TENTACLE. Gate Right Shore
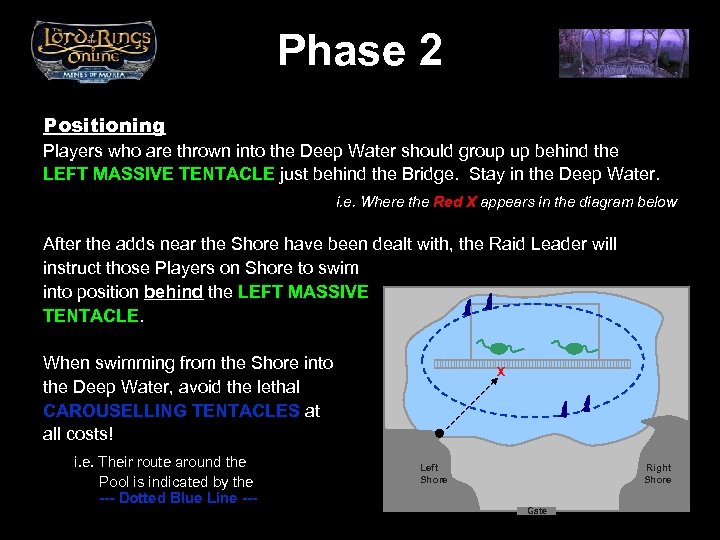 Phase 2 Positioning Players who are thrown into the Deep Water should group up behind the LEFT MASSIVE TENTACLE just behind the Bridge. Stay in the Deep Water. i. e. Where the Red X appears in the diagram below After the adds near the Shore have been dealt with, the Raid Leader will instruct those Players on Shore to swim into position behind the LEFT MASSIVE TENTACLE. When swimming from the Shore into the Deep Water, avoid the lethal CAROUSELLING TENTACLES at all costs! i. e. Their route around the Pool is indicated by the --- Dotted Blue Line --- X Left Shore Right Shore Gate
 Phase 2 Destroying the Massive Tentacles After dealing with the CRUSHING and SQUEEZING TENTACLES near the Shore, the MASSIVE TENTACLES are next! The Fellowship should use ranged attacks to destroy the LEFT MASSIVE TENTACLE (this ensures the Fellowship take less damage from swipes). After this, the RIGHT MASSIVE TENTACLE will need to be attacked at range: • • • The Fellowship should group up behind the Bridge in line with the RIGHT TENTACLE. When the RIGHT TENTACLE reaches 20, 000 Morale (20 k), avoid using Damage over Time (Do. T) attacks. Continue attacking the RIGHT TENTACLE until it reached 10, 000 Morale (10 k). When the RIGHT TENTACLE is at 10 k Morale, everyone in the Fellowship should hit their [ESCAPE] or [F 1] key to target themselves. The Group can comfortably sit in position, recovering Morale and Power, until everyone is ready to begin The Transition into Phase 3.
 Phase 2 Summary Bridge drops and everyone moves to the front of the Left Shore Tentacles to be aware of near the Shore: • • • Carouselling Tentacles – Swim around The Watcher, do 3, 000+ dmg and you die if they hit you. Ignore & avoid! Crushing Tentacles – Throw ranged attacks from the shallow water near the shore – DPS at range Squeezing Tentacles – Root Fellowship members on shore – DPS both via melee and range Players will be thrown into the Deep Water near the Bridge by The Watcher • • Stand behind the Bridge in line with the MASSIVE TENTACLE the Fellowship is targeting and attack the Tentacle When the CAROUSELLING TENTALCES have passed by, the Raid Leader will instruct all Fellowship members on-shore to swim out and stand with those Players already in the Deep Water STRANGLING TENTACLES will appear every minute after Phase 2 begins: • • Cry out, “
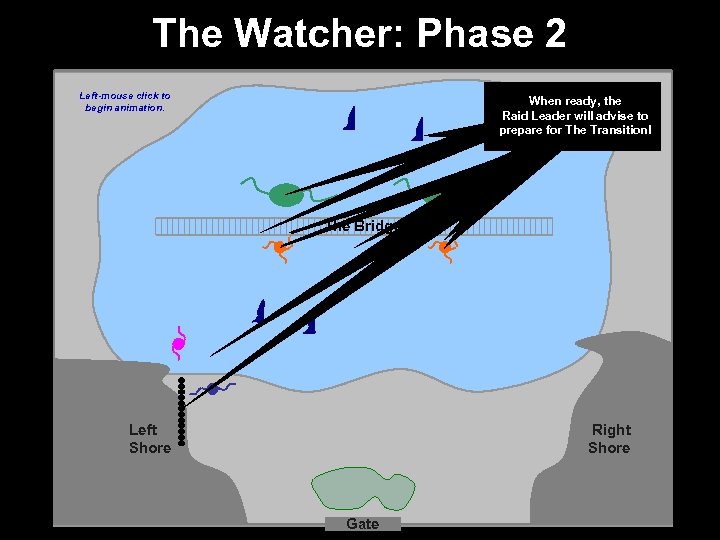 The Watcher: Phase 2 Left-mouse click to begin animation. Fellowship ready, & for a Playermemberreturns& STRANGLINGinstructs Raid Leadermoves into When. Bridge drops range Fellowship attacks the Player. RIGHTwaits lines Raidinbeing of says, to Fellowship TENTACLE The Leader strangled Fellowship instructs AWhen attackthe Raid Deep Water CAROUSELLING CRUSHING @ Leader the MASSIVE LEFT MASSIVE TENTACLE acidappearsand
 Transition Preparing for The Transition The Fellowship has made it through Phases 1 & 2, is sitting in the Deep Water staring at the RIGHT MASSIVE TENTACLE, and about to begin Phase 3. Before doing anything else, ensure: All MINSTRELS can use ‘Cry of the Chorus’, The CAPTAIN can use ‘In Harm’s Way’ & ‘Last Stand’, The Fellowship knows how many rezzes are available, Check Hope, Battle and Warding Scroll buffs, and reapply if necessary. When ready, the Raid Leader will ask a HUNTER to take the RIGHT MASSIVE TENTACLE down to 4, 000 Morale (4 k). Do not kill the RIGHT MASSIVE TENTACLE – when it is destroyed 12 TENTACLES appear, one for each member of the Fellowship!
 Transition Beginning The Transition Ensure the Fellowship is in a tight group, almost standing on top of each other. The CAPTAIN places their banner in the centre of the Bridge. Wait for a STRANGLING TENTACLE to appear and dangle a Player. Once the STRANGLING TENTACLE is killed, the Raid Leader should slowly count down from 5 – during this time: • MINSTRELS use ‘Cry of the Chorus”, “Ballad of War”, followed by “Anthem of the Free Peoples”, • MINSTREL with CHAMPION(s) and CAPTAIN(s) in their group can optionally use “Fellowship’s Heart” if they wish, as the melee classes will take a lot of damage from the 12 TENTACLES, • CAPTAIN(s) uses “In Harm’s Way” & “Last Stand”. When the countdown ends, the Fellowship attacks the RIGHT MASSIVE TENTACLE at range. When the MASSIVE TENTACLE is destroyed, 12 TENTACLES appear – one for each member of the Fellowship.
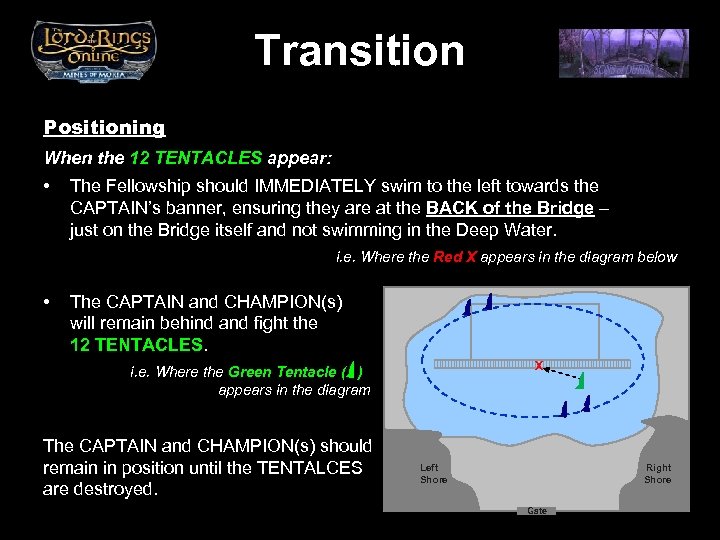 Transition Positioning When the 12 TENTACLES appear: • The Fellowship should IMMEDIATELY swim to the left towards the CAPTAIN’s banner, ensuring they are at the BACK of the Bridge – just on the Bridge itself and not swimming in the Deep Water. i. e. Where the Red X appears in the diagram below • The CAPTAIN and CHAMPION(s) will remain behind and fight the 12 TENTACLES. X i. e. Where the Green Tentacle ( ) appears in the diagram The CAPTAIN and CHAMPION(s) should remain in position until the TENTALCES are destroyed. Left Shore Right Shore Gate
 Transition Surviving The Transition During the Transition: • MINSTRELS will be focussed on healing their Fellowship back to full health, followed by primarily healing the CAPTAIN and CHAMPION(s) to ensure they survive the 12 TENTACLES, • HUNTERS and RUNEKEEPER(s) can assist for a short time the melee classes focussed on the 12 TENTACLES at range with AOE attacks, • The BURGLAR can try to trigger a Fellowship Manoeuvre on one of the 12 TENTACLES, with the Fellowship going ALL GREEN for healing! Melee classes on the TENTACLES should not participate in the Fellowship. There a few problems that can occur at this point: • A STRANGLING TENTACLE may appear and dangle a random Player – if this occurs, ranged Characters will need to free the dangler immediately! • Phase 3 will likely begin while the 12 TENTACLES are being destroyed, and two MASSIVE TENTACLES emerge from the deep…
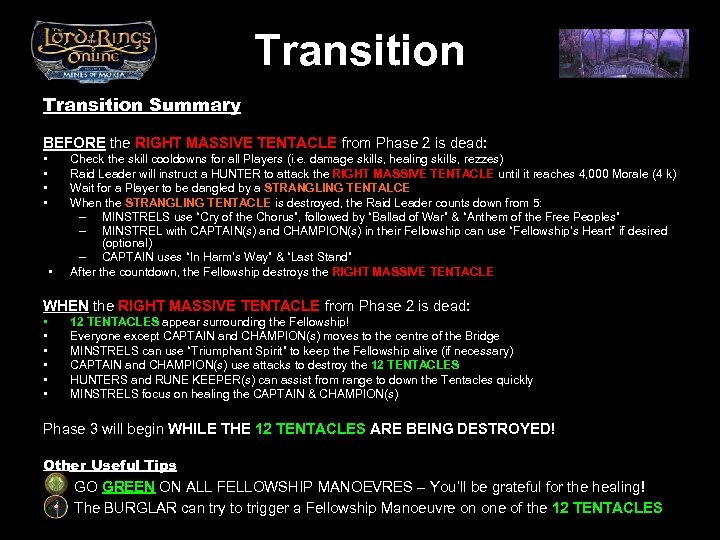 Transition Summary BEFORE the RIGHT MASSIVE TENTACLE from Phase 2 is dead: • • • Check the skill cooldowns for all Players (i. e. damage skills, healing skills, rezzes) Raid Leader will instruct a HUNTER to attack the RIGHT MASSIVE TENTACLE until it reaches 4, 000 Morale (4 k) Wait for a Player to be dangled by a STRANGLING TENTALCE When the STRANGLING TENTACLE is destroyed, the Raid Leader counts down from 5: – MINSTRELS use “Cry of the Chorus”, followed by “Ballad of War” & “Anthem of the Free Peoples” – MINSTREL with CAPTAIN(s) and CHAMPION(s) in their Fellowship can use “Fellowship’s Heart” if desired (optional) – CAPTAIN uses “In Harm’s Way” & “Last Stand” After the countdown, the Fellowship destroys the RIGHT MASSIVE TENTACLE WHEN the RIGHT MASSIVE TENTACLE from Phase 2 is dead: • • • 12 TENTACLES appear surrounding the Fellowship! Everyone except CAPTAIN and CHAMPION(s) moves to the centre of the Bridge MINSTRELS can use “Triumphant Spirit” to keep the Fellowship alive (if necessary) CAPTAIN and CHAMPION(s) use attacks to destroy the 12 TENTACLES HUNTERS and RUNE KEEPER(s) can assist from range to down the Tentacles quickly MINSTRELS focus on healing the CAPTAIN & CHAMPION(s) Phase 3 will begin WHILE THE 12 TENTACLES ARE BEING DESTROYED! Other Useful Tips GO GREEN ON ALL FELLOWSHIP MANOEVRES – You’ll be grateful for the healing! The BURGLAR can try to trigger a Fellowship Manoeuvre on one of the 12 TENTACLES
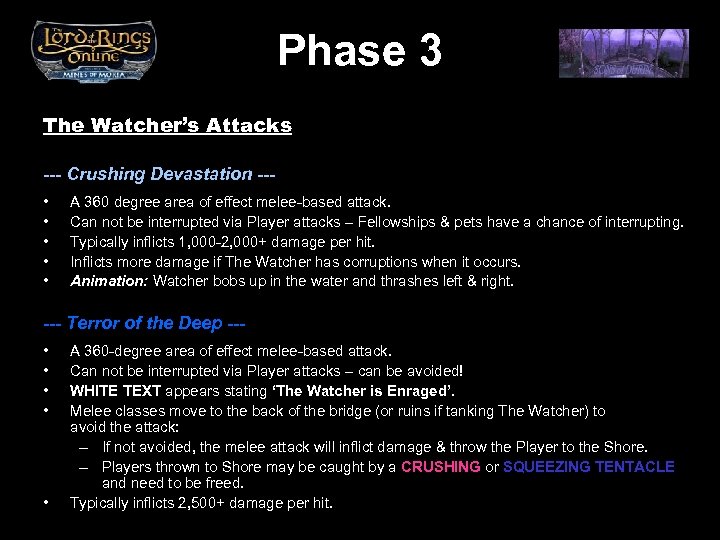 Phase 3 The Watcher’s Attacks --- Crushing Devastation -- • • • A 360 degree area of effect melee-based attack. Can not be interrupted via Player attacks – Fellowships & pets have a chance of interrupting. Typically inflicts 1, 000 -2, 000+ damage per hit. Inflicts more damage if The Watcher has corruptions when it occurs. Animation: Watcher bobs up in the water and thrashes left & right. --- Terror of the Deep -- • • • A 360 -degree area of effect melee-based attack. Can not be interrupted via Player attacks – can be avoided! WHITE TEXT appears stating ‘The Watcher is Enraged’. Melee classes move to the back of the bridge (or ruins if tanking The Watcher) to avoid the attack: – If not avoided, the melee attack will inflict damage & throw the Player to the Shore. – Players thrown to Shore may be caught by a CRUSHING or SQUEEZING TENTACLE and need to be freed. Typically inflicts 2, 500+ damage per hit.
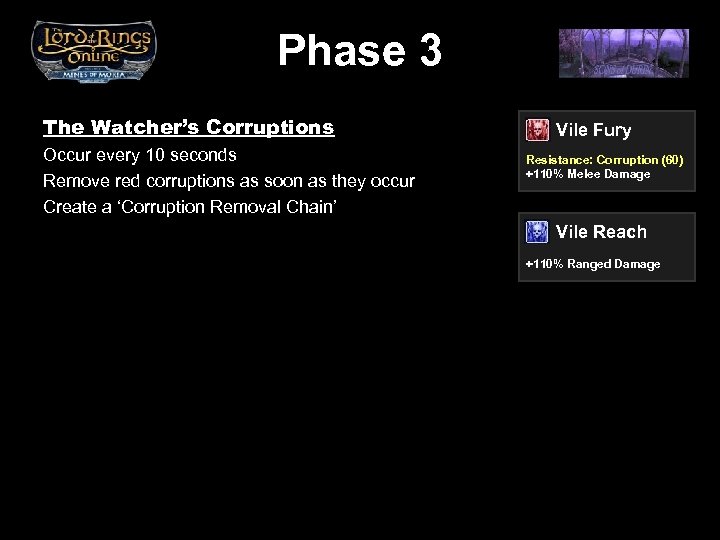 Phase 3 The Watcher’s Corruptions Occur every 10 seconds Remove red corruptions as soon as they occur Create a ‘Corruption Removal Chain’ Vile Fury Resistance: Corruption (60) +110% Melee Damage Vile Reach +110% Ranged Damage
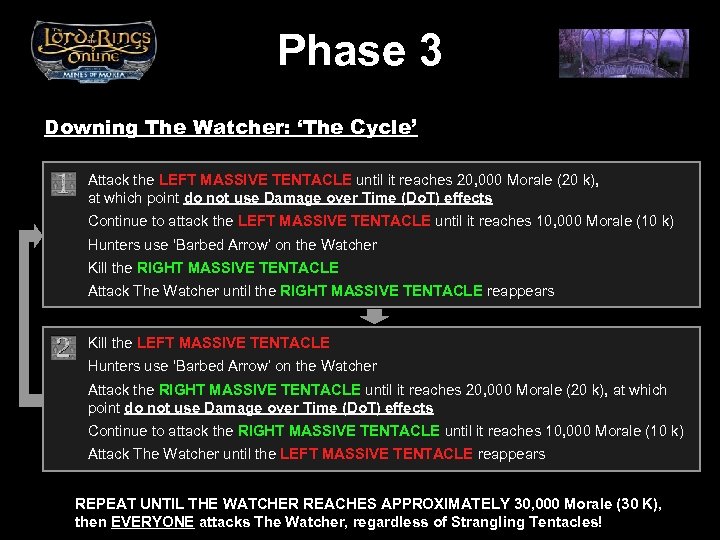 Phase 3 Downing The Watcher: ‘The Cycle’ Attack the LEFT MASSIVE TENTACLE until it reaches 20, 000 Morale (20 k), at which point do not use Damage over Time (Do. T) effects Continue to attack the LEFT MASSIVE TENTACLE until it reaches 10, 000 Morale (10 k) Hunters use ‘Barbed Arrow’ on the Watcher Kill the RIGHT MASSIVE TENTACLE Attack The Watcher until the RIGHT MASSIVE TENTACLE reappears Kill the LEFT MASSIVE TENTACLE Hunters use ‘Barbed Arrow’ on the Watcher Attack the RIGHT MASSIVE TENTACLE until it reaches 20, 000 Morale (20 k), at which point do not use Damage over Time (Do. T) effects Continue to attack the RIGHT MASSIVE TENTACLE until it reaches 10, 000 Morale (10 k) Attack The Watcher until the LEFT MASSIVE TENTACLE reappears REPEAT UNTIL THE WATCHER REACHES APPROXIMATELY 30, 000 Morale (30 K), then EVERYONE attacks The Watcher, regardless of Strangling Tentacles!
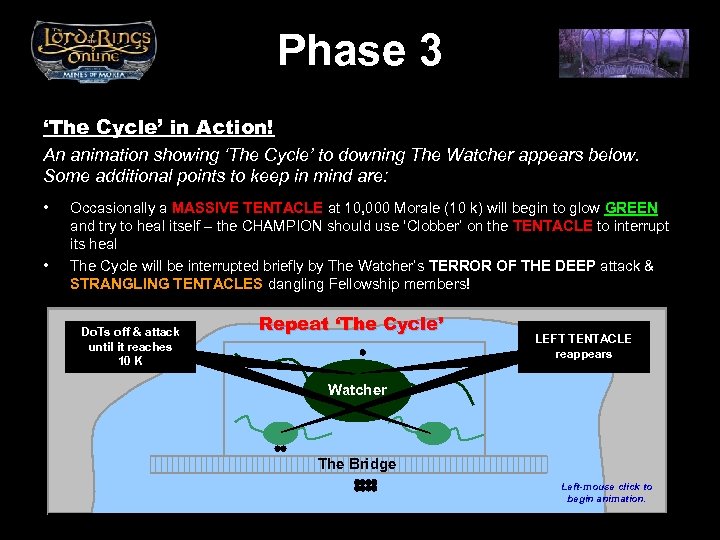 Phase 3 ‘The Cycle’ in Action! An animation showing ‘The Cycle’ to downing The Watcher appears below. Some additional points to keep in mind are: • • Occasionally a MASSIVE TENTACLE at 10, 000 Morale (10 k) will begin to glow GREEN and try to heal itself – the CHAMPION should use ‘Clobber’ on the TENTACLE to interrupt its heal The Cycle will be interrupted briefly by The Watcher’s TERROR OF THE DEEP attack & STRANGLING TENTACLES dangling Fellowship members! Do. Ts off &the HUNTERS use Down attack RIGHT TENTACLE Everyone attacks Kill the RIGHT it Arrow’ on ‘Barbed reaches until TENTACLE RIGHT TENTACLE The Watcher reappears The 10 Kk to 20 Watcher Repeat ‘The Cycle’ HUNTERS use Do. Ts off & Down the Everyone attacks LEFTKill the TENTACLE ‘Barbed Arrow’ on LEFT TENTACLE attack until it LEFT TENTACLE The Watcher reappears reahces K K The Watcher to 20 10 Watcher The Bridge Left-mouse click to begin animation.
 Links The Preying Mantis Guide to Downing The Watcher http: //lorebook. lotro. com/wiki/Watcher_Walkthrough Sons of Durin – Downing the Watcher v 3. 0 http: //sonsofdurin. guildlaunch. com/forums/viewtopic. php? sub_domain=sonsofdurin&t=3182890&gid=57500


