3534c4e66cf557d236828fc76480732e.ppt
- Количество слайдов: 94
 DREAM IDEA PLAN IMPLEMENTATION 1
 2
2
 Introduction to Computer Graphics Present to: Amirkabir University of Technology (Tehran Polytechnic) & Semnan University Dr. Kourosh Kiani Email: kkiani 2004@yahoo. com Email: Kourosh. kiani@aut. ac. com Web: aut. ac. com 3
 Amirkabir & Semnan University Computer & Electrical Faculty Lecture 07 3 D viewing 4
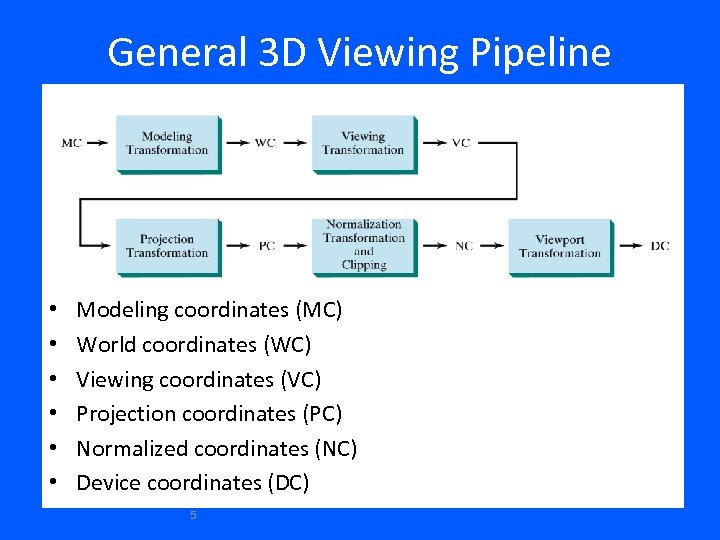 General 3 D Viewing Pipeline • • • Modeling coordinates (MC) World coordinates (WC) Viewing coordinates (VC) Projection coordinates (PC) Normalized coordinates (NC) Device coordinates (DC) 5
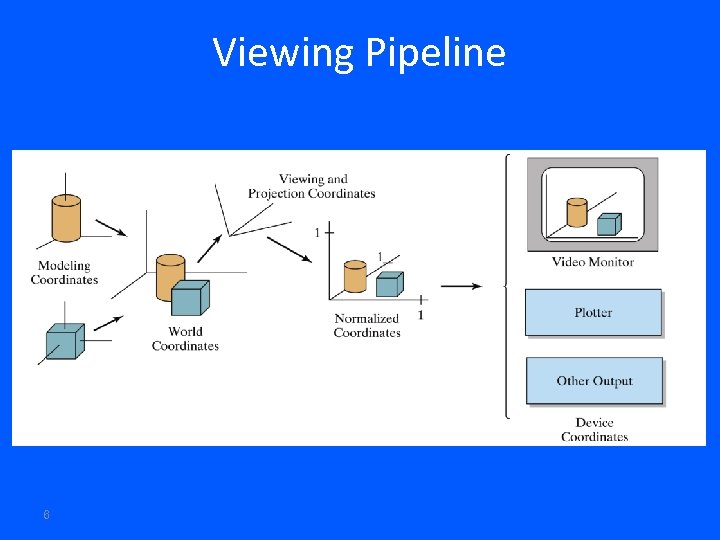 Viewing Pipeline 6
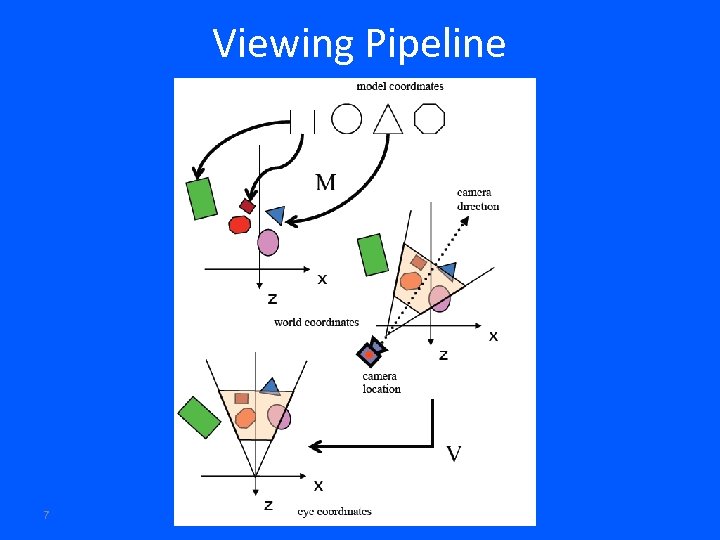 Viewing Pipeline 7
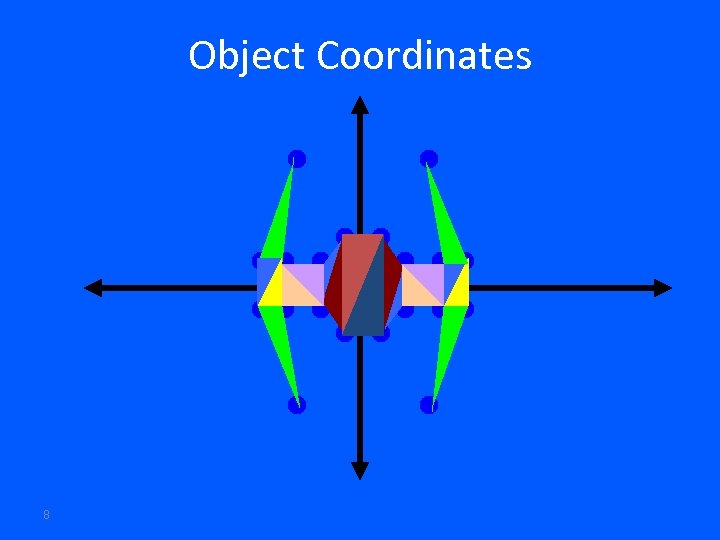 Object Coordinates 8
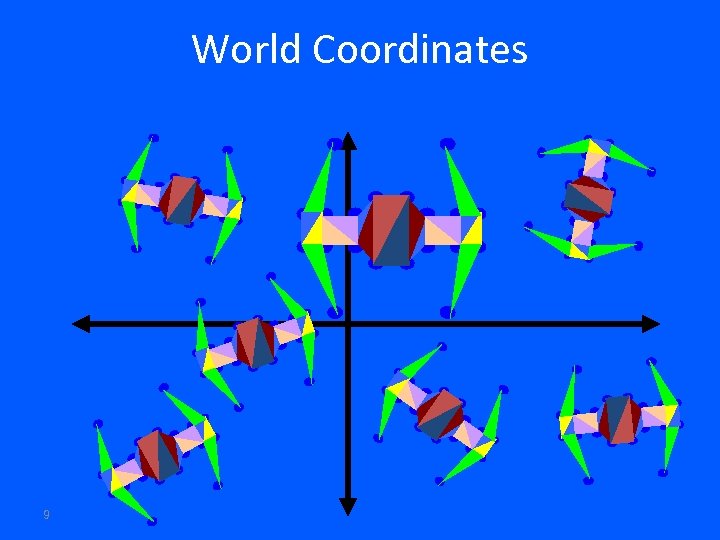 World Coordinates 9
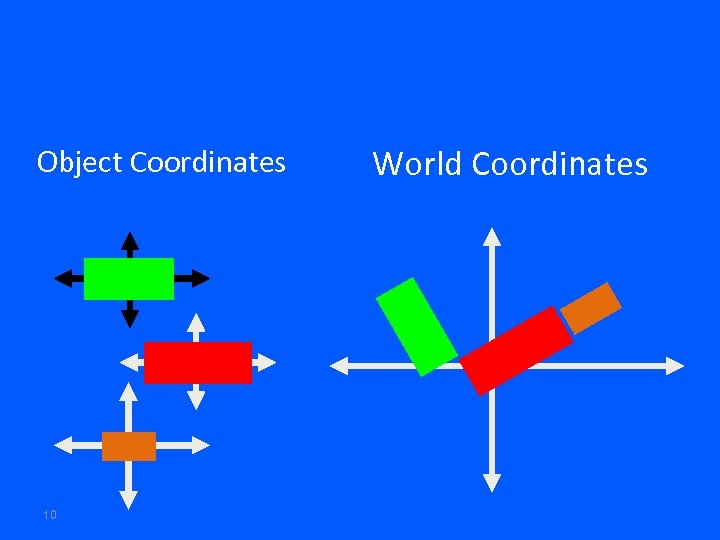 Object Coordinates 10 World Coordinates
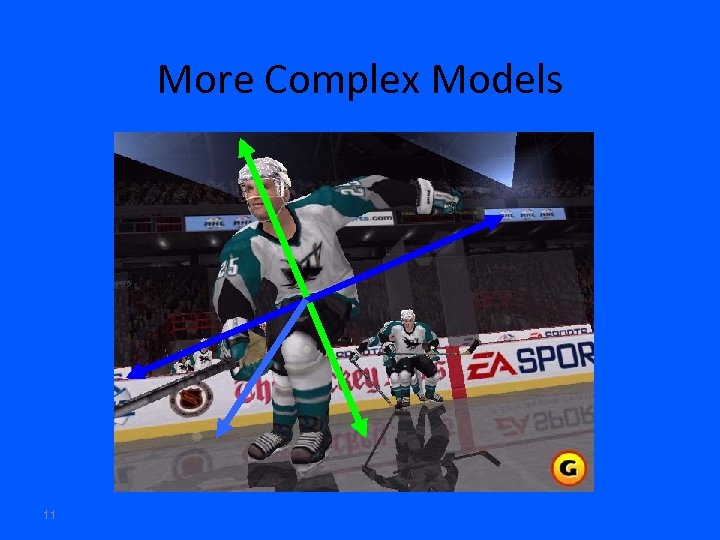 More Complex Models 11
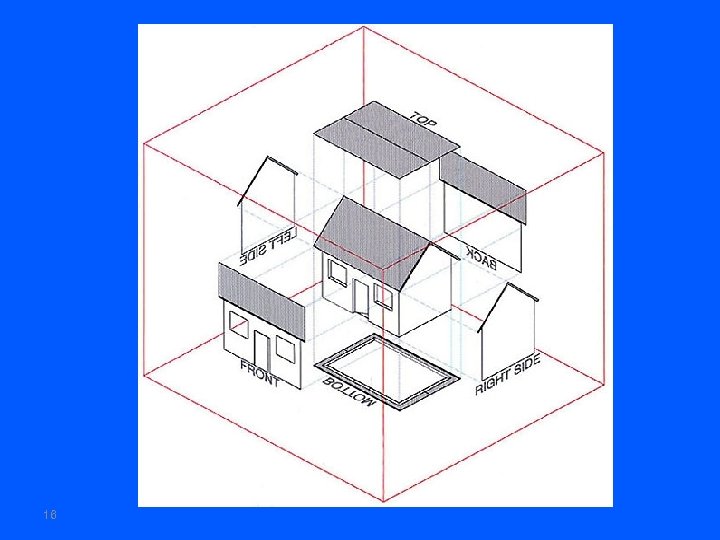
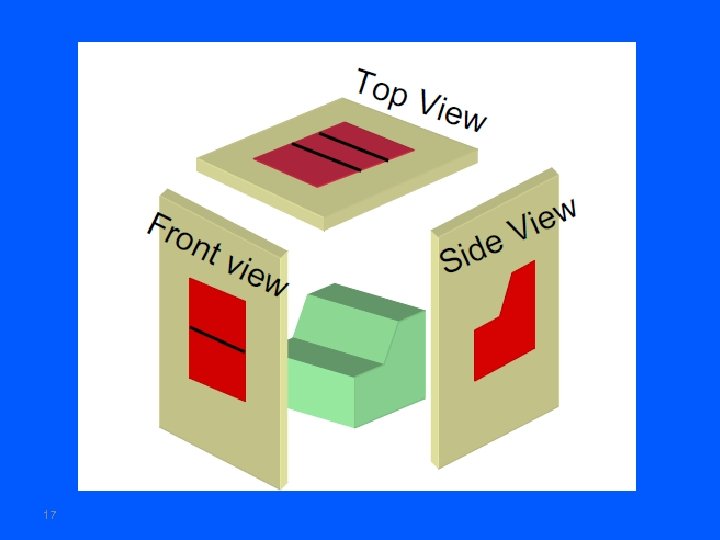
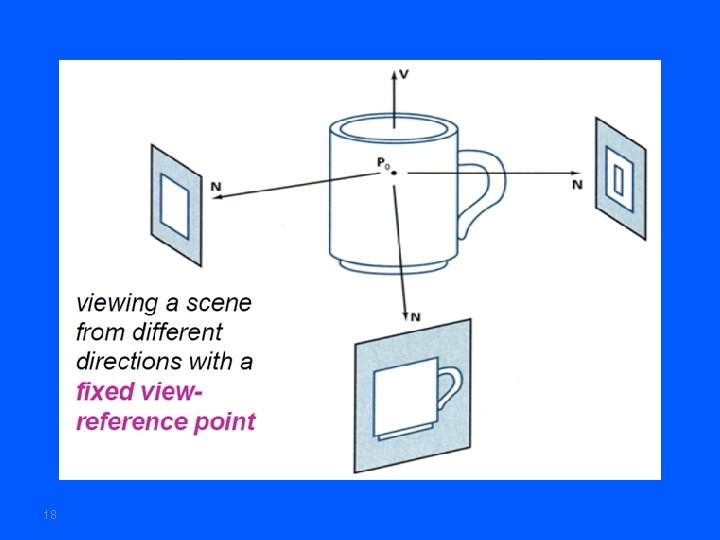
 Projections We will look at several planar geometric 3 D to 2 D Projection: • Parallel Projections Orthographic Oblique • Perspective Projection of a 3 D object is defined by straight projection rays (projectors) emanating from the Center Of Projection (COP) passing through each point of the object and intersecting the projection plane. 12
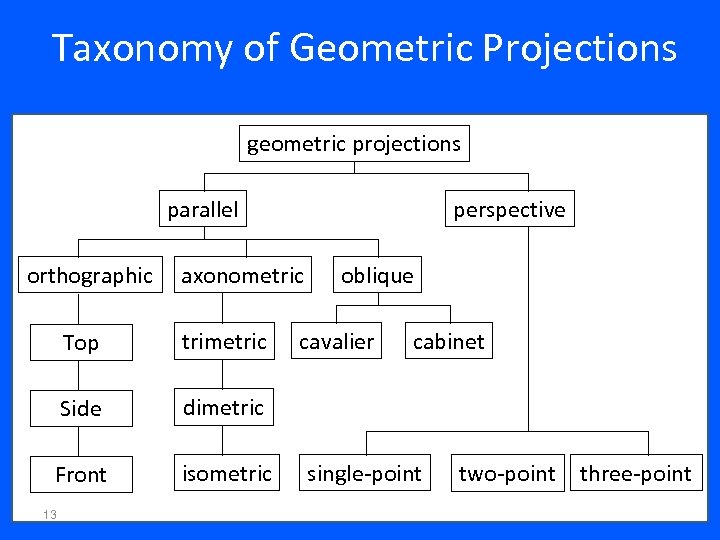 Taxonomy of Geometric Projections geometric projections parallel orthographic perspective axonometric Top trimetric Side isometric cavalier cabinet dimetric Front oblique 13 single-point two-point three-point
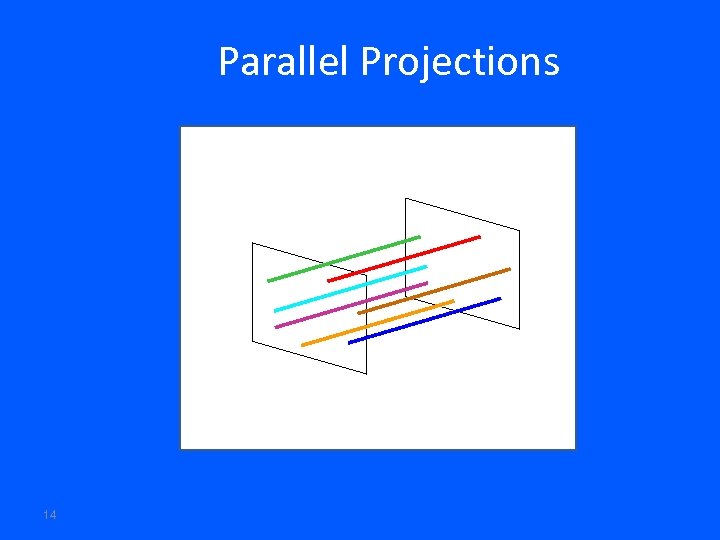 Parallel Projections 14
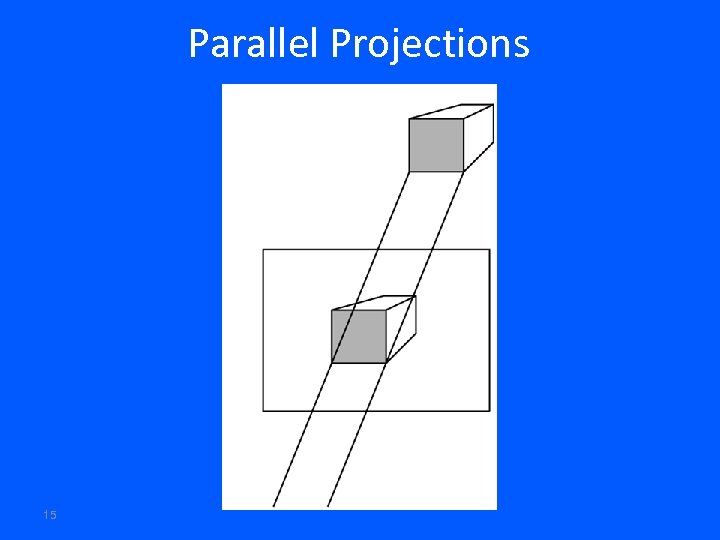 Parallel Projections 15
 16
16
 17
17
 18
18
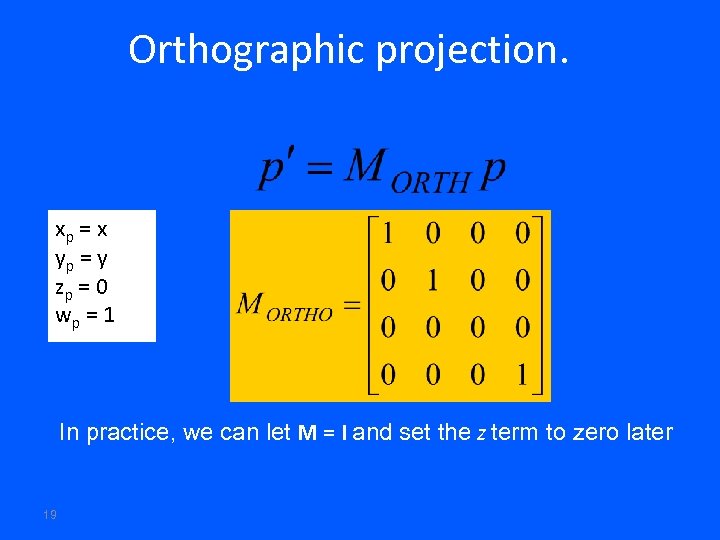 Orthographic projection. xp = x yp = y zp = 0 wp = 1 In practice, we can let M = I and set the z term to zero later 19
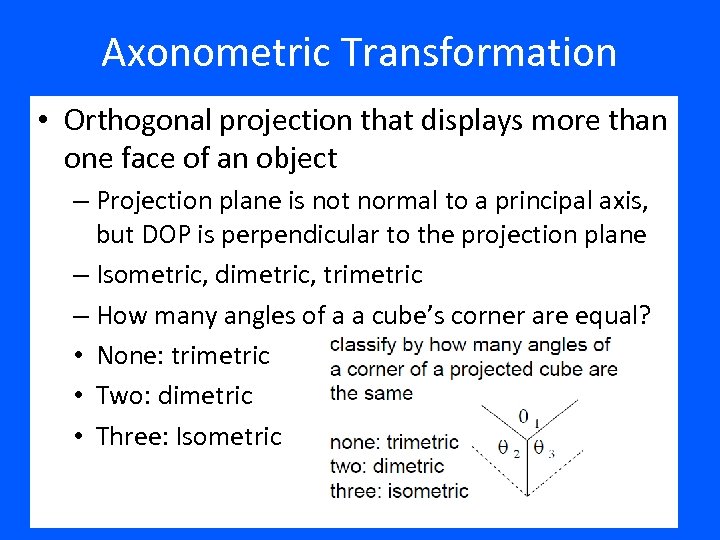 Axonometric Transformation • Orthogonal projection that displays more than one face of an object – Projection plane is not normal to a principal axis, but DOP is perpendicular to the projection plane – Isometric, dimetric, trimetric – How many angles of a a cube’s corner are equal? • None: trimetric • Two: dimetric • Three: Isometric 20
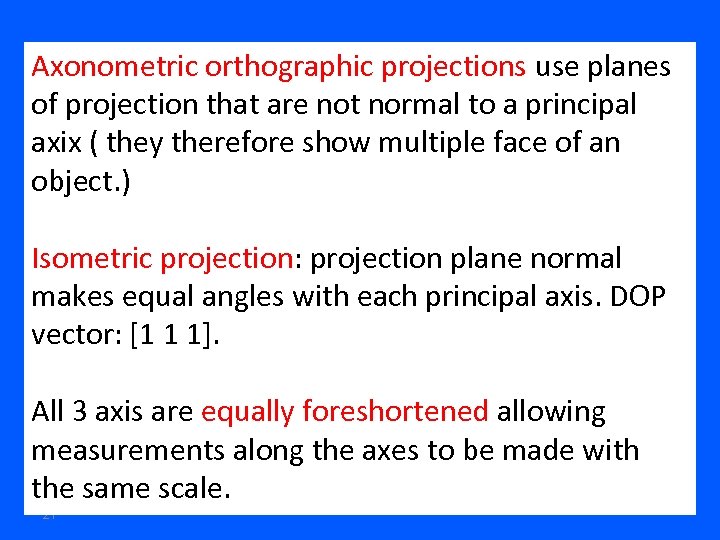 Axonometric orthographic projections use planes of projection that are not normal to a principal axix ( they therefore show multiple face of an object. ) Isometric projection: projection plane normal makes equal angles with each principal axis. DOP vector: [1 1 1]. All 3 axis are equally foreshortened allowing measurements along the axes to be made with the same scale. 21
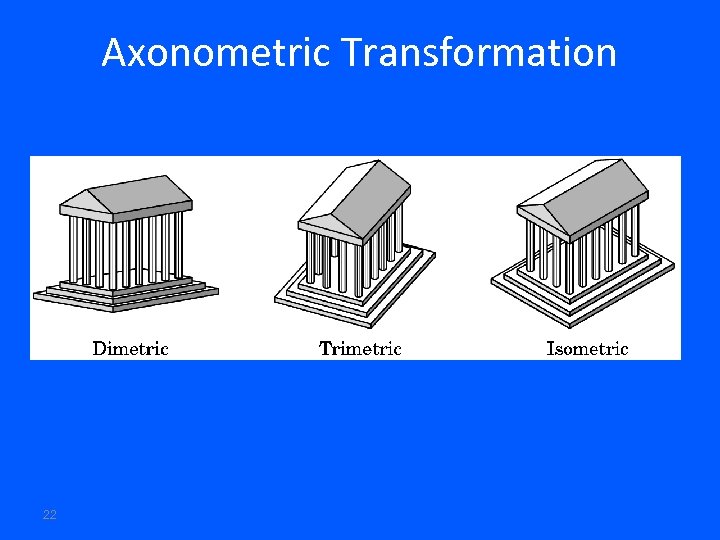 Axonometric Transformation 22
 23
23
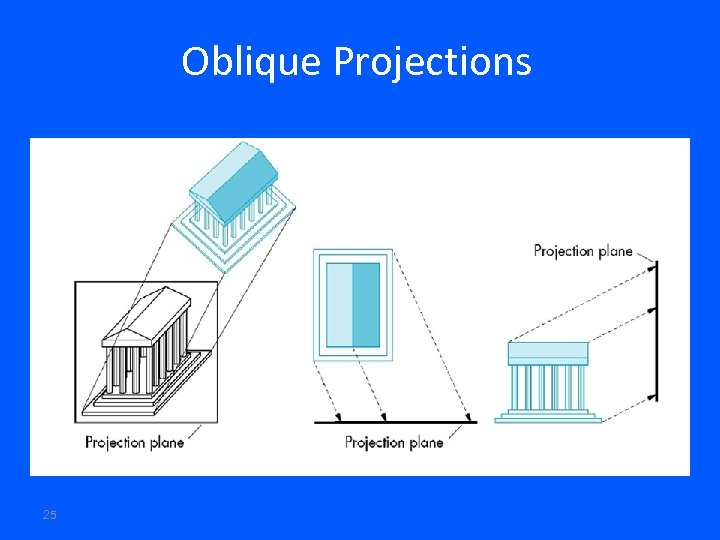
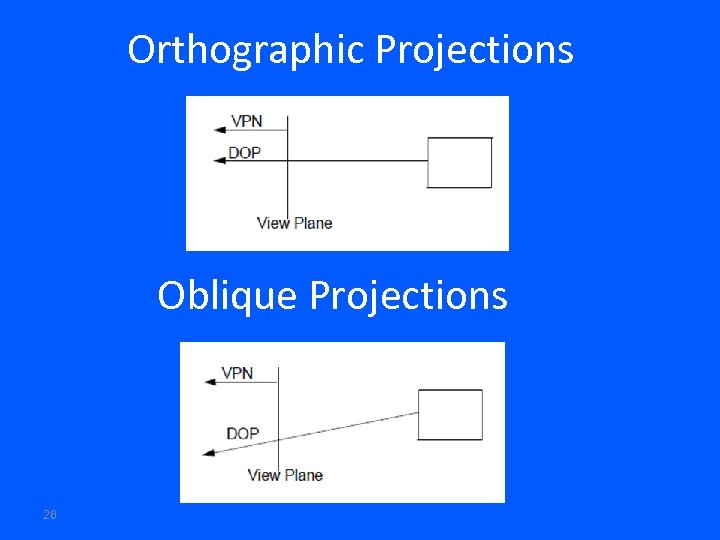
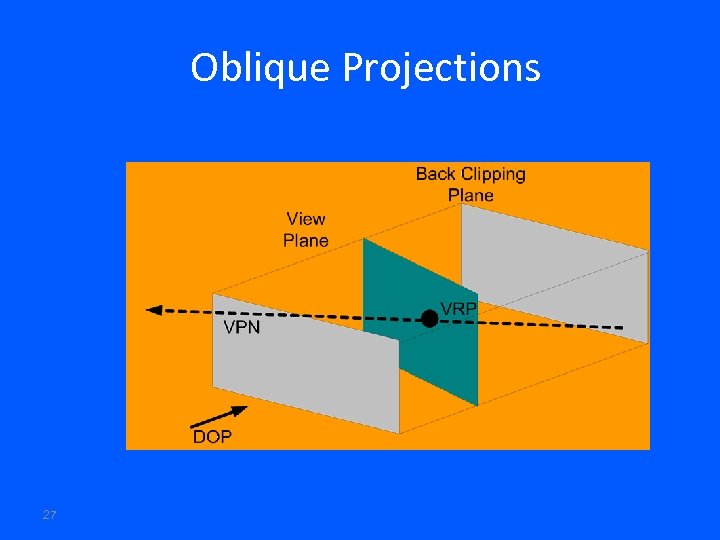
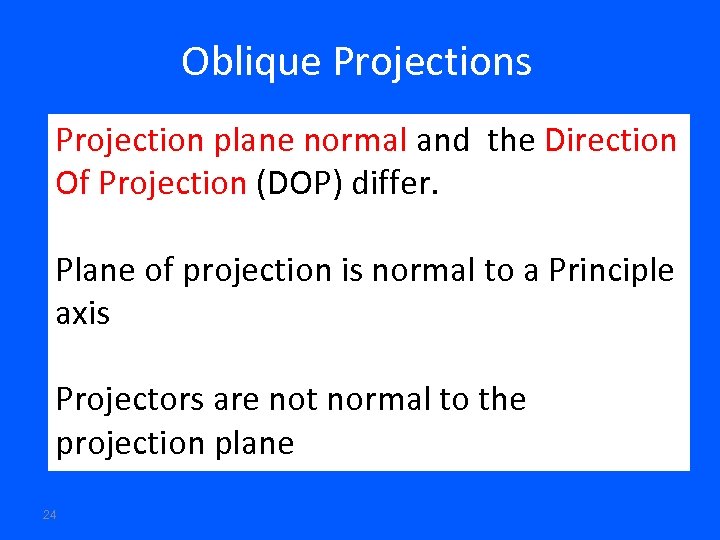 Oblique Projections Projection plane normal and the Direction Of Projection (DOP) differ. Plane of projection is normal to a Principle axis Projectors are not normal to the projection plane 24
 Oblique Projections 25
 Orthographic Projections Oblique Projections 26
 Oblique Projections 27
 Oblique Projections 28
 29
29
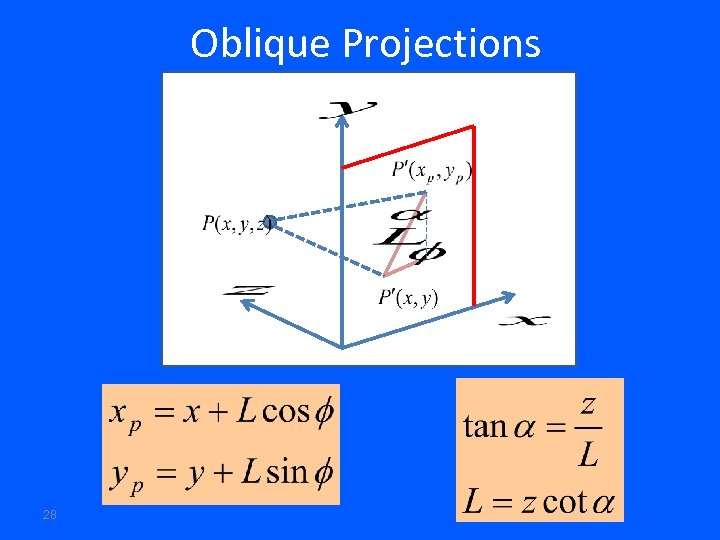
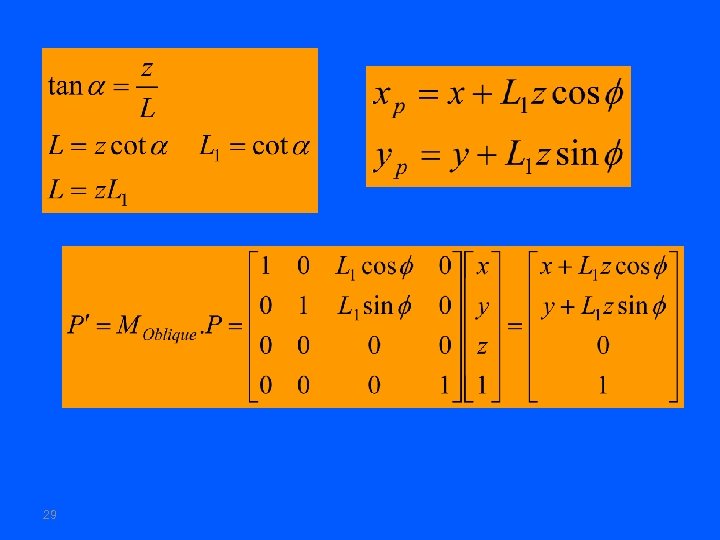
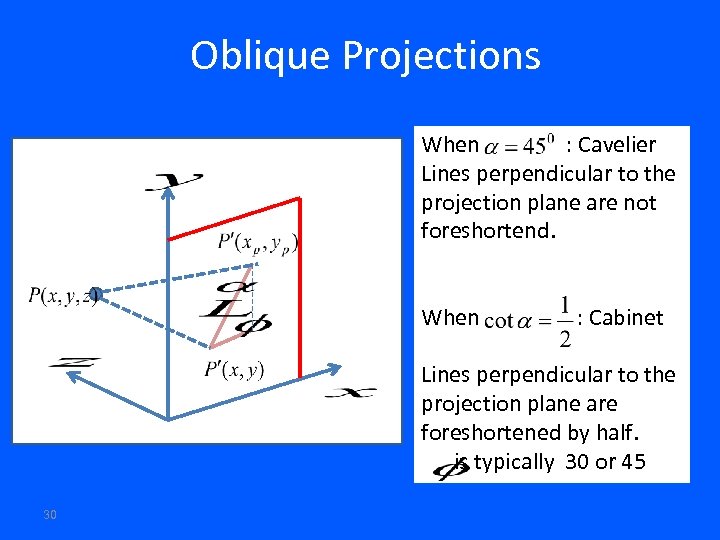 Oblique Projections When : Cavelier Lines perpendicular to the projection plane are not foreshortend. When : Cabinet Lines perpendicular to the projection plane are foreshortened by half. is typically 30 or 45 30
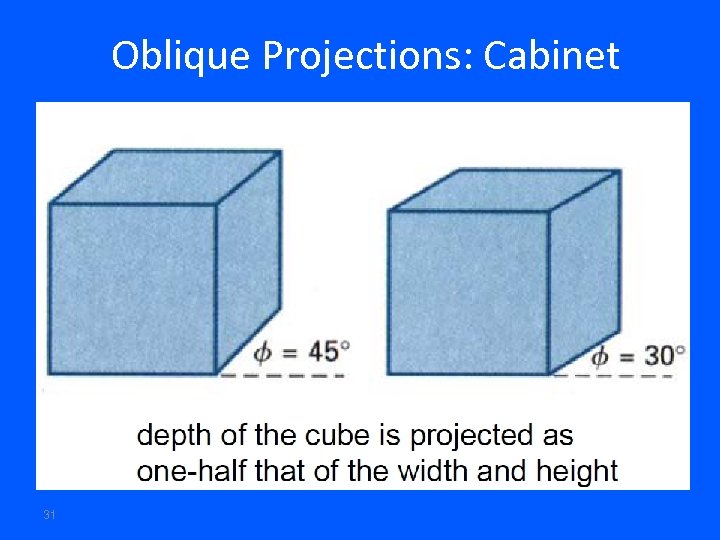 Oblique Projections: Cabinet 31
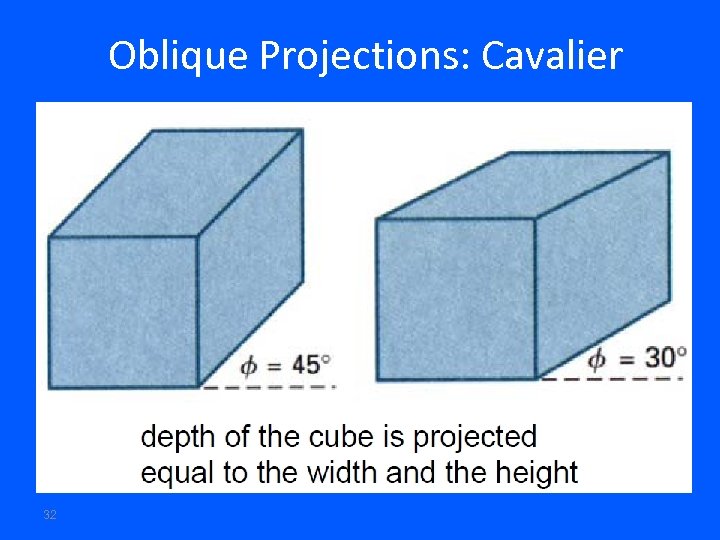 Oblique Projections: Cavalier 32
 33
33
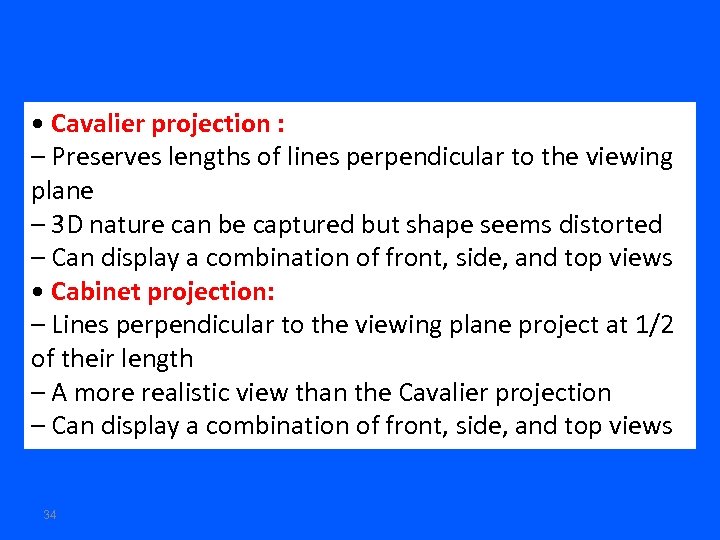 • Cavalier projection : – Preserves lengths of lines perpendicular to the viewing plane – 3 D nature can be captured but shape seems distorted – Can display a combination of front, side, and top views • Cabinet projection: – Lines perpendicular to the viewing plane project at 1/2 of their length – A more realistic view than the Cavalier projection – Can display a combination of front, side, and top views 34
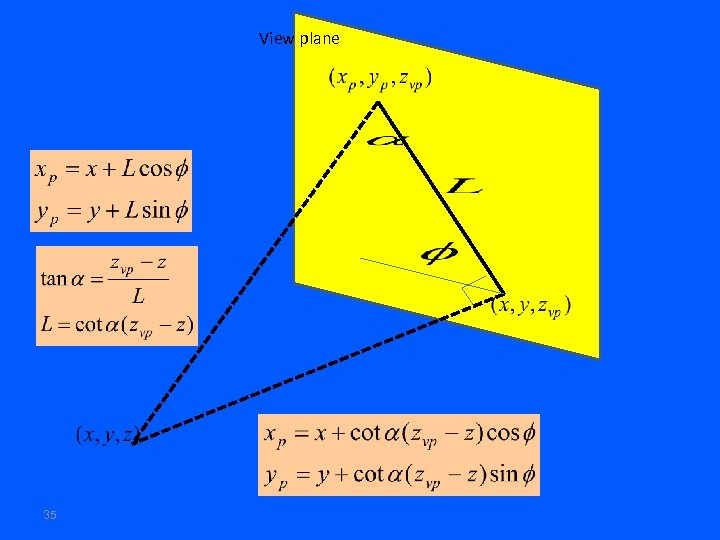 View plane 35
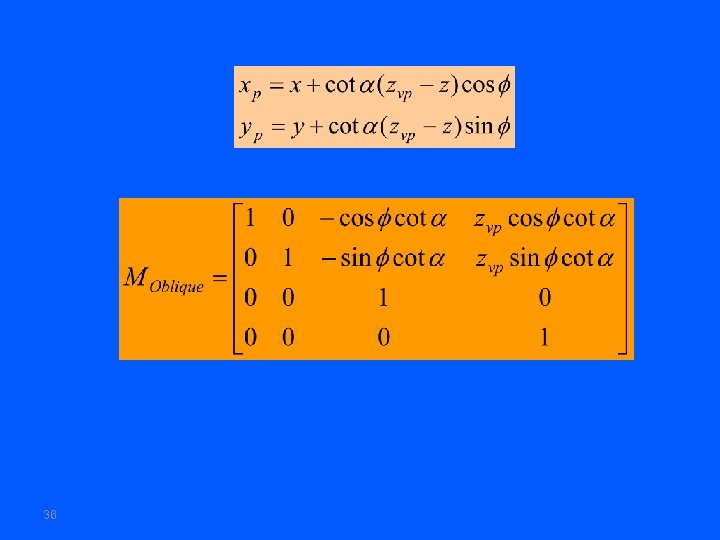 36
36
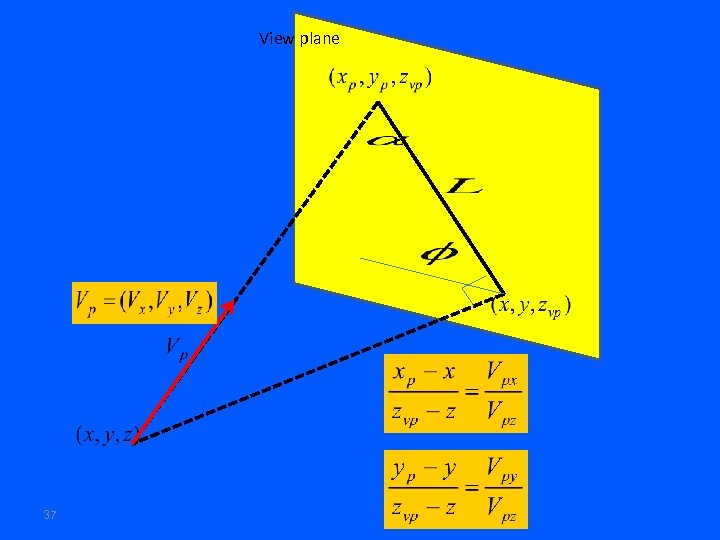 View plane 37
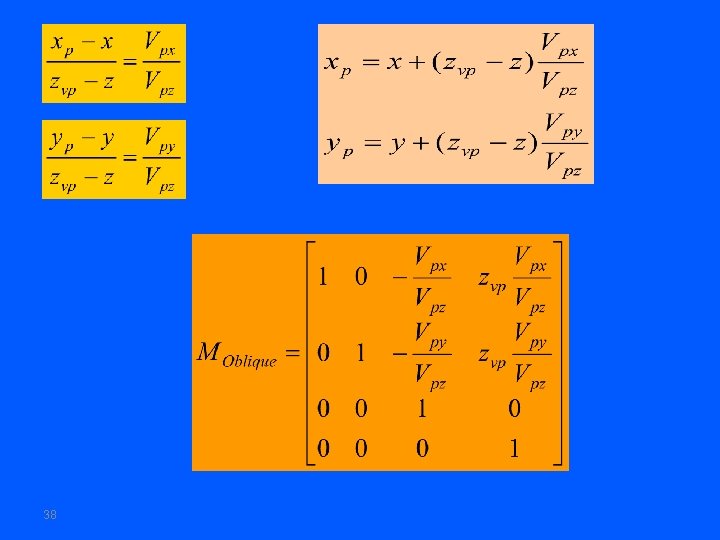 38
38
 Perspective Projections 39
 40
40
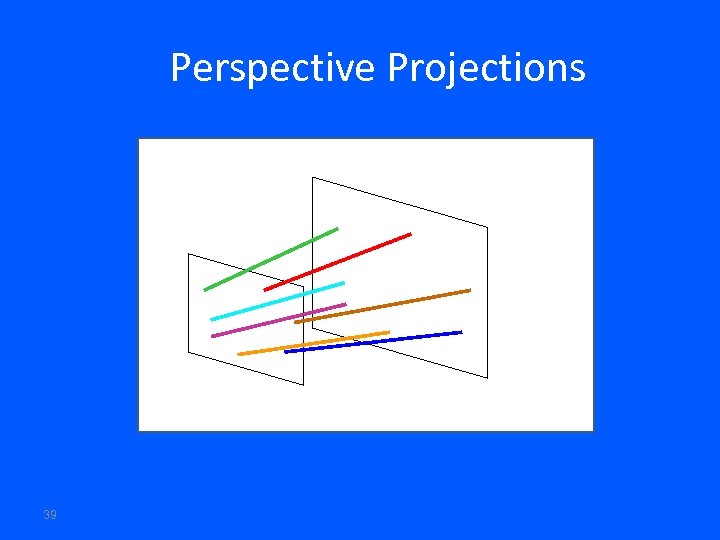
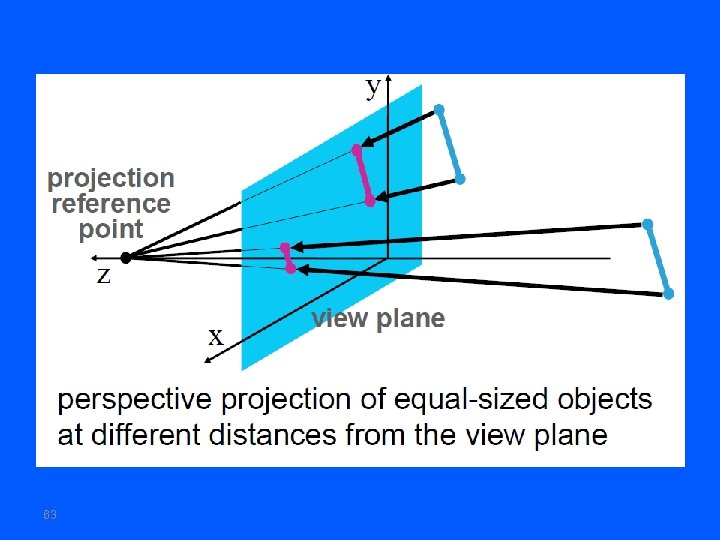
 Perspective Projections Distance from COP to projection plane is finite. The projectors are not parallel and we specify a Center of Projection (COP). Center of Projection is also called the Perspective Reference Point COP = PRP 41
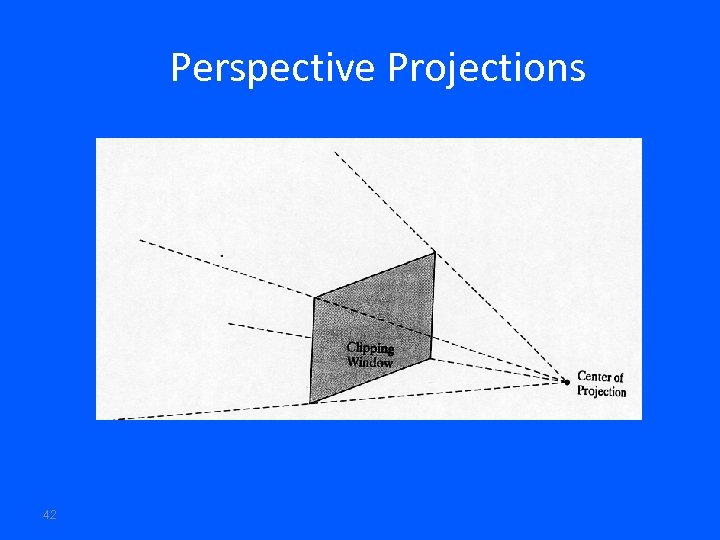 Perspective Projections 42
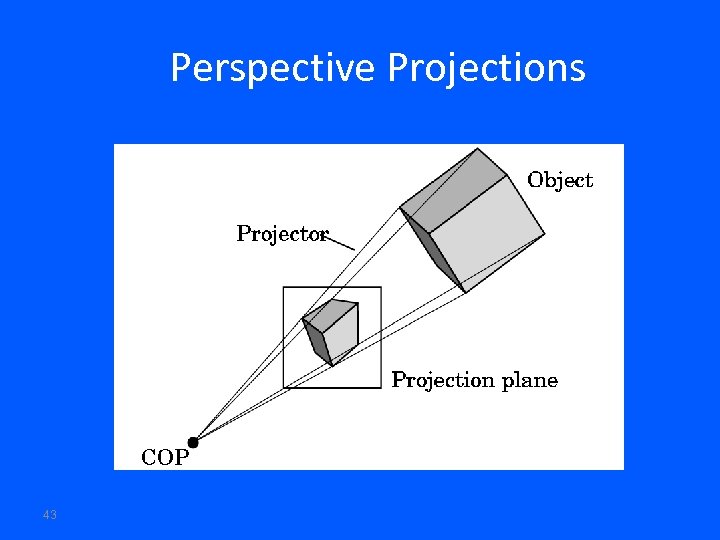 Perspective Projections 43
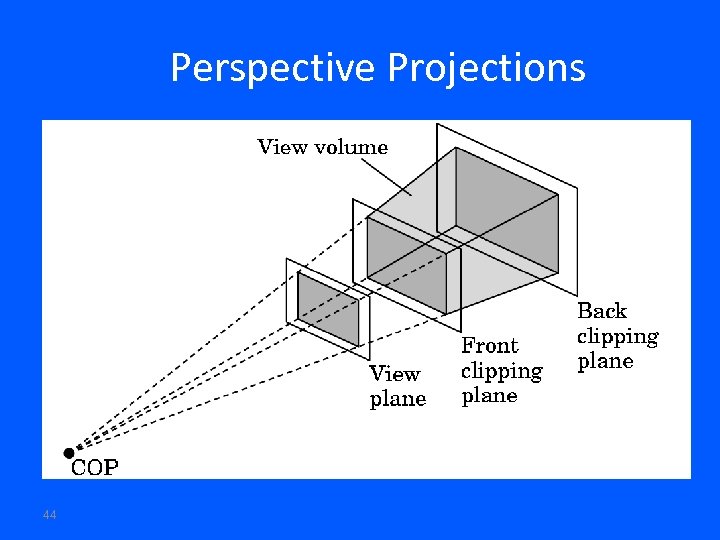 Perspective Projections 44
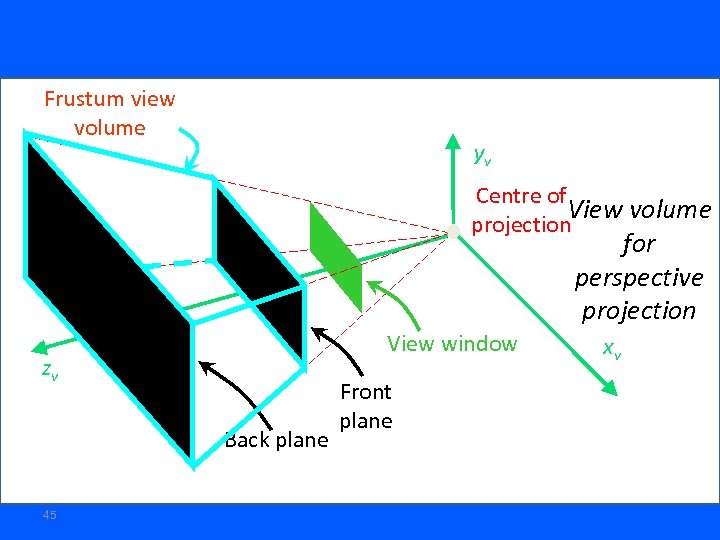 Frustum view volume yv Centre of View volume projection for perspective projection View window zv Back plane 45 Front plane xv
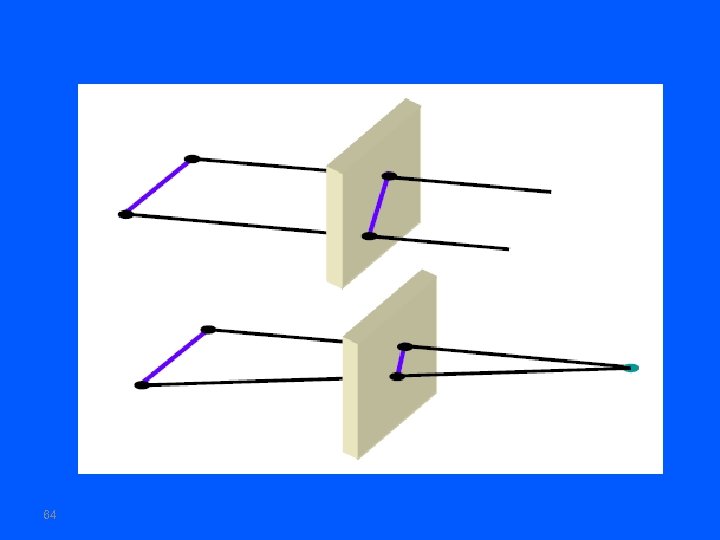
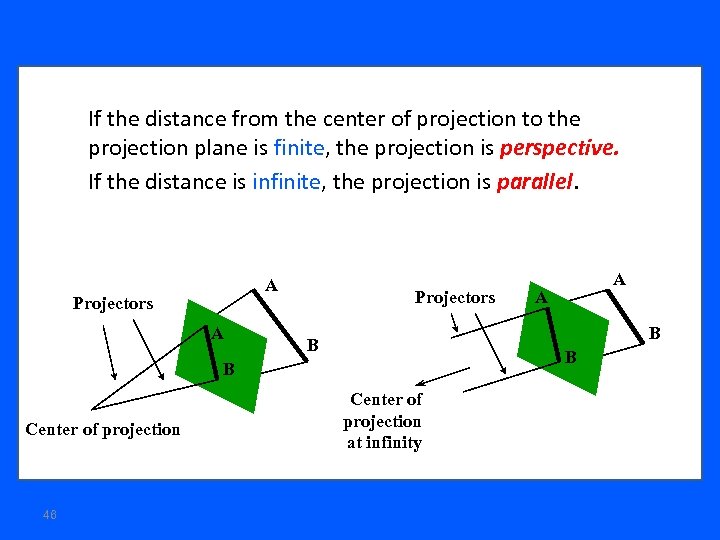 If the distance from the center of projection to the projection plane is finite, the projection is perspective. If the distance is infinite, the projection is parallel. A Projectors 46 A B B Center of projection A Center of projection at infinity
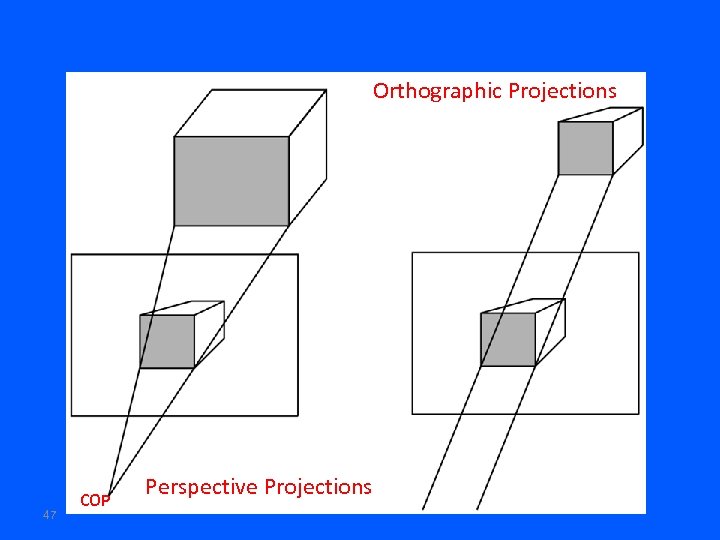 Orthographic Projections 47 COP Perspective Projections
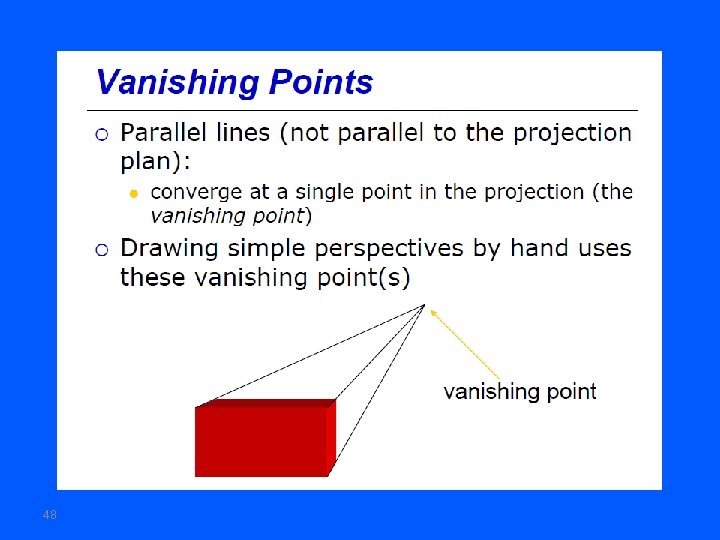 48
48
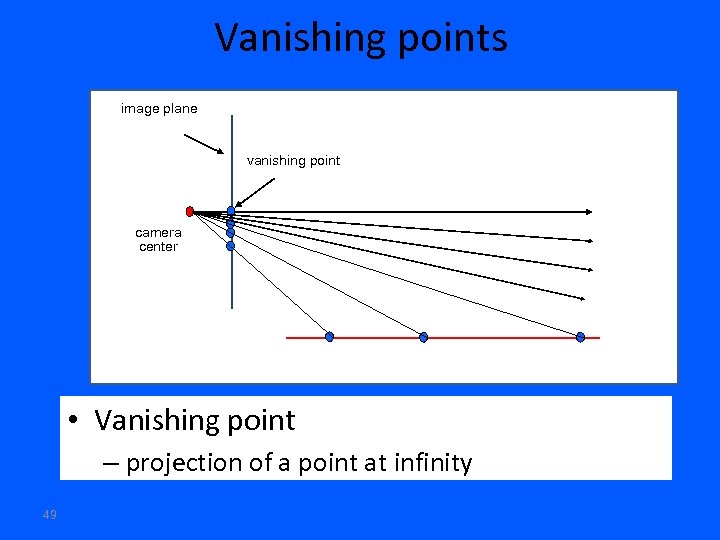 Vanishing points image plane vanishing point camera center • Vanishing point – projection of a point at infinity 49
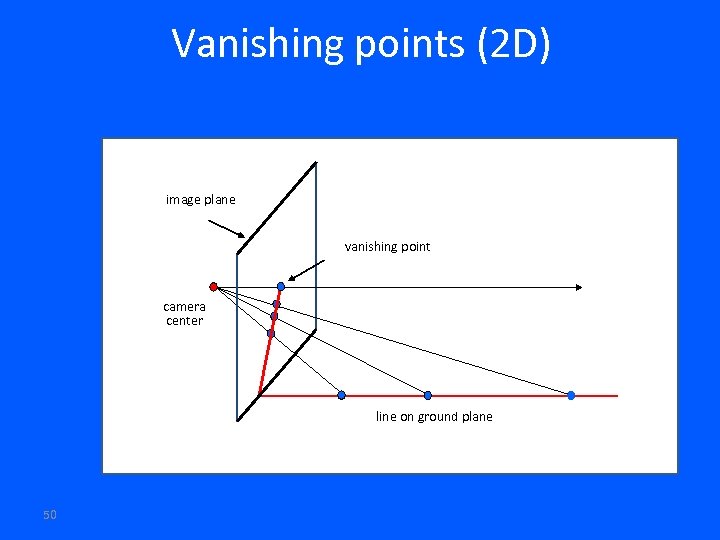 Vanishing points (2 D) image plane vanishing point camera center line on ground plane 50
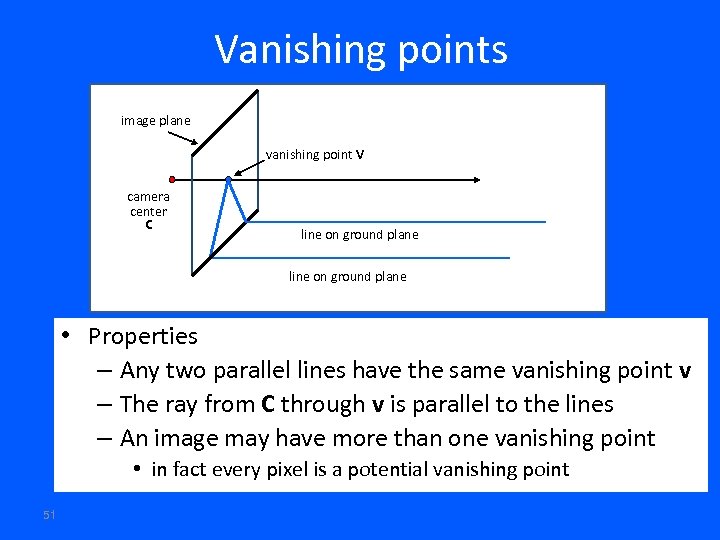 Vanishing points image plane vanishing point V camera center C line on ground plane • Properties – Any two parallel lines have the same vanishing point v – The ray from C through v is parallel to the lines – An image may have more than one vanishing point • in fact every pixel is a potential vanishing point 51
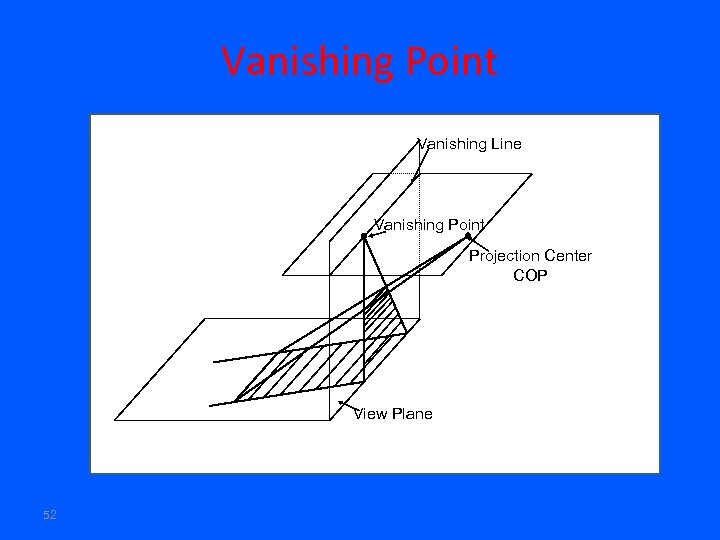 Vanishing Point Vanishing Line Vanishing Point Projection Center COP View Plane 52
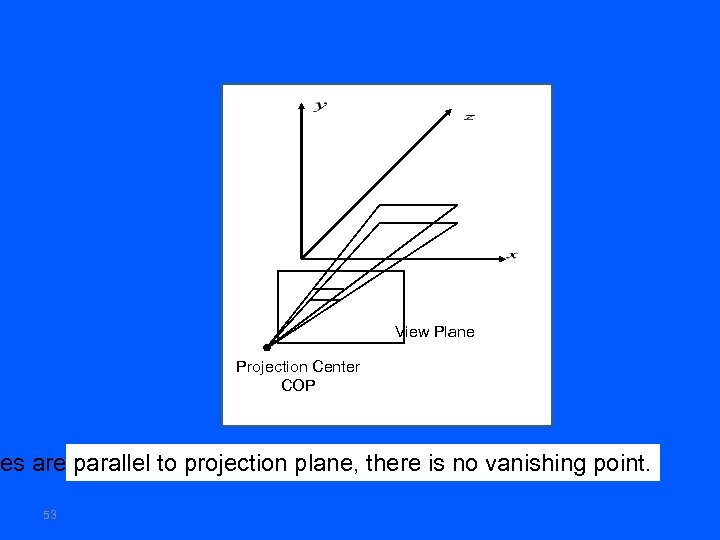 View Plane Projection Center COP es are parallel to projection plane, there is no vanishing point. 53
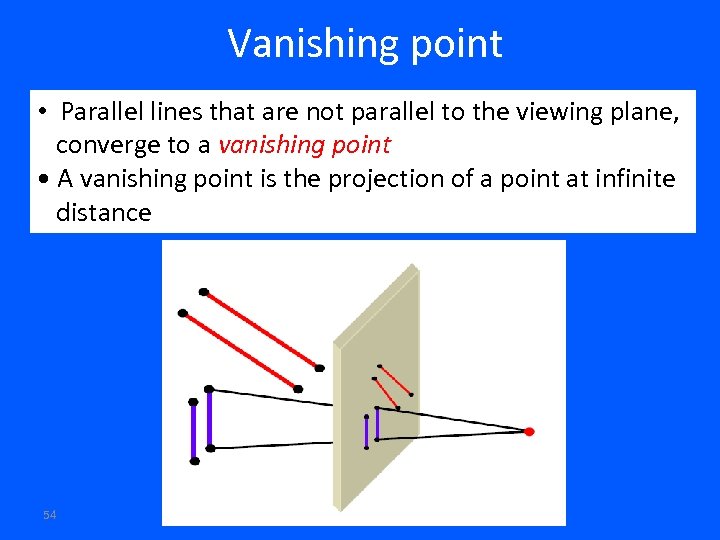 Vanishing point • Parallel lines that are not parallel to the viewing plane, converge to a vanishing point • A vanishing point is the projection of a point at infinite distance 54
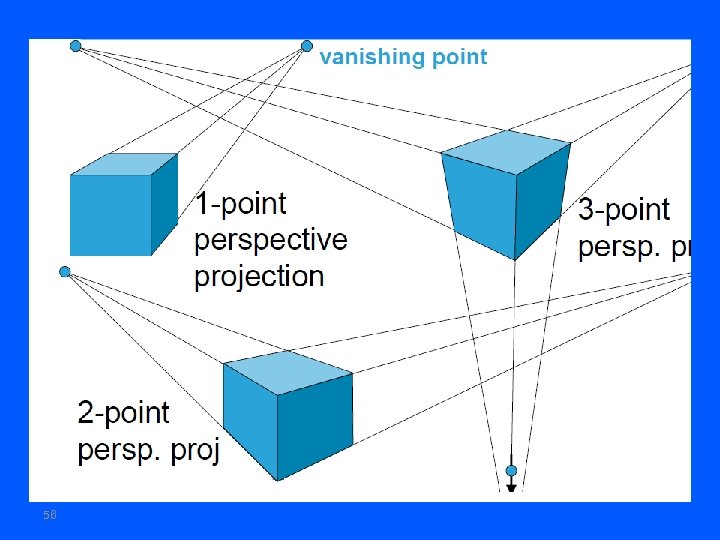
 1. One-point perspective 2. Two-point perspective 3. Three-point perspective 55
 56
56
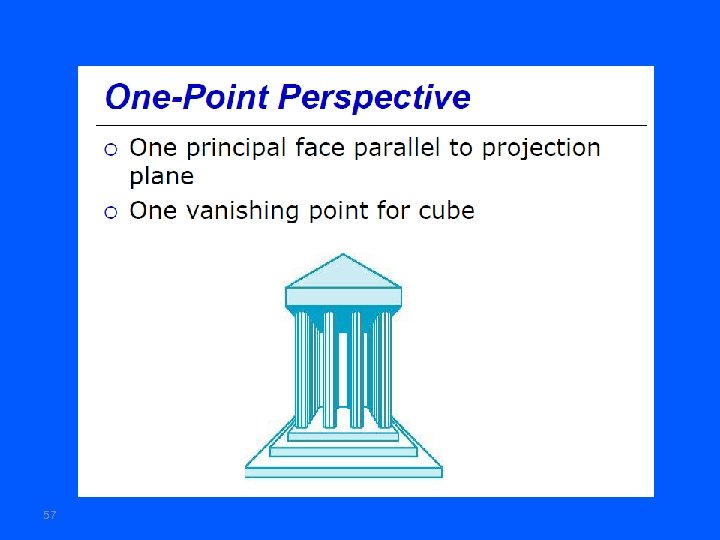 57
57
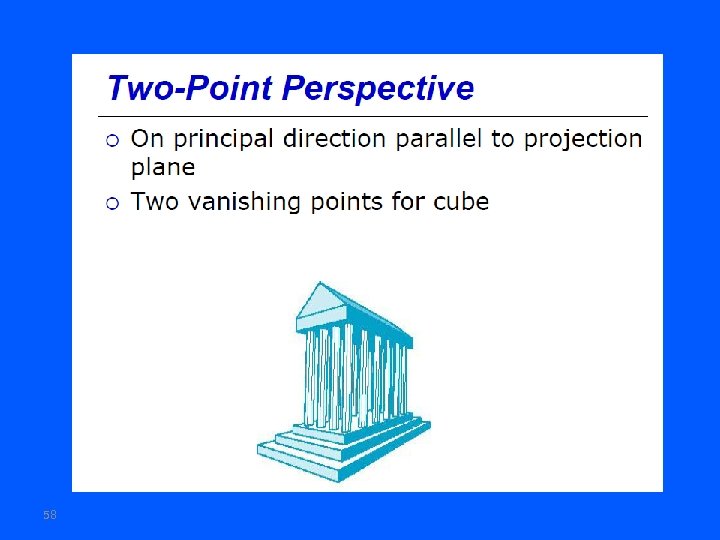 58
58
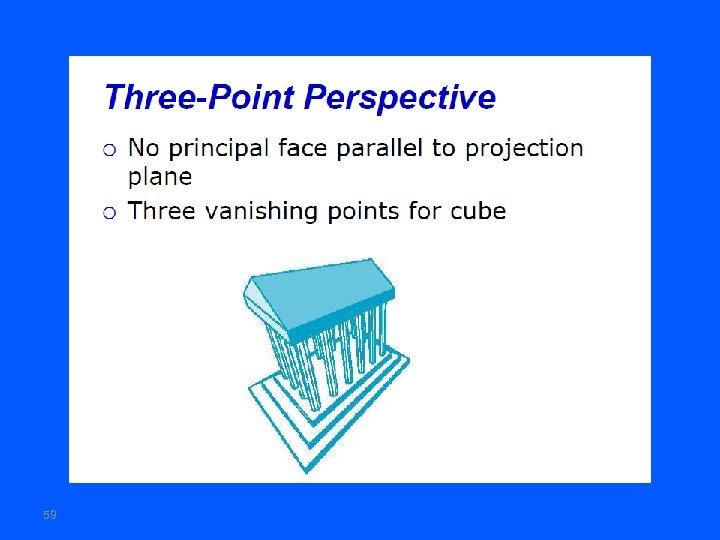 59
59
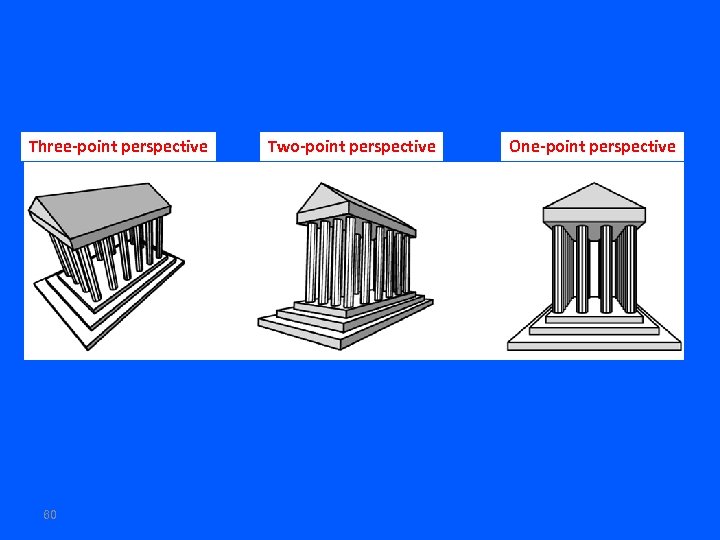 Three-point perspective 60 Two-point perspective One-point perspective
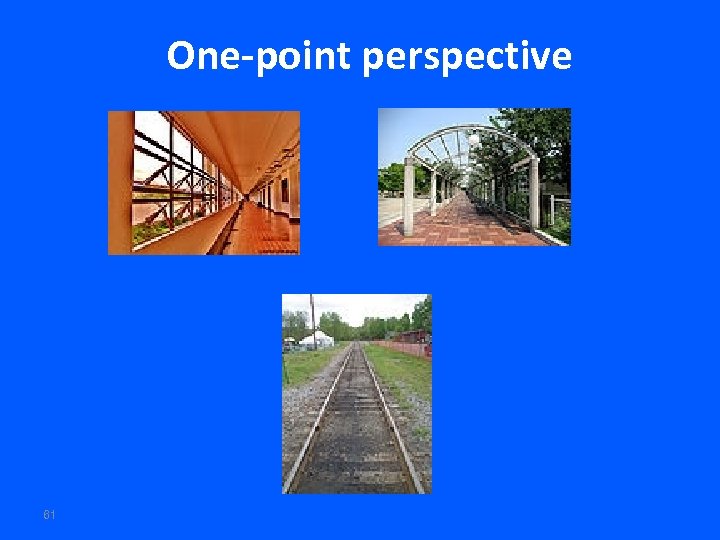 One-point perspective 61
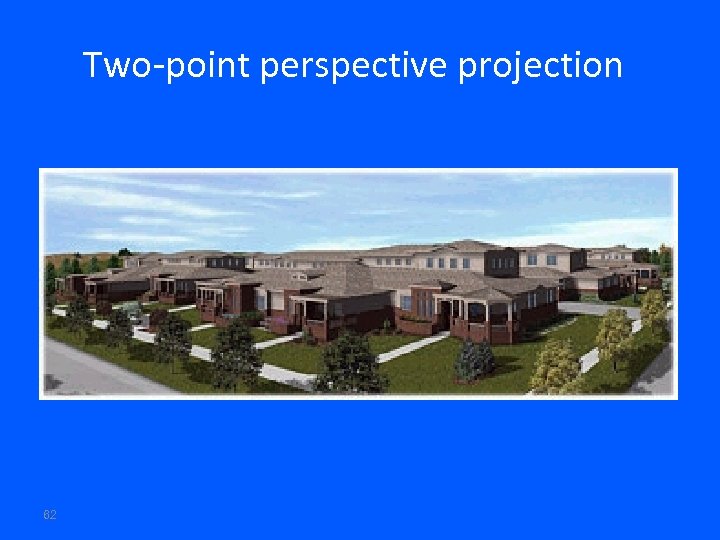 Two-point perspective projection 62
 63
63
 64
64
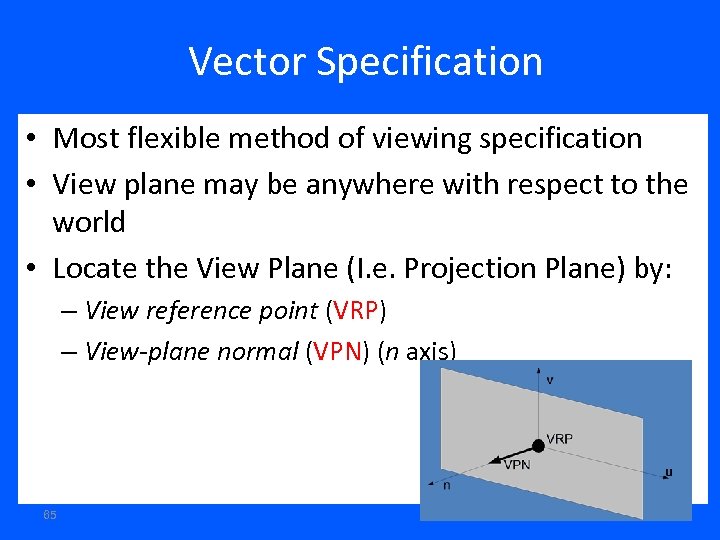 Vector Specification • Most flexible method of viewing specification • View plane may be anywhere with respect to the world • Locate the View Plane (I. e. Projection Plane) by: – View reference point (VRP) – View-plane normal (VPN) (n axis) 65
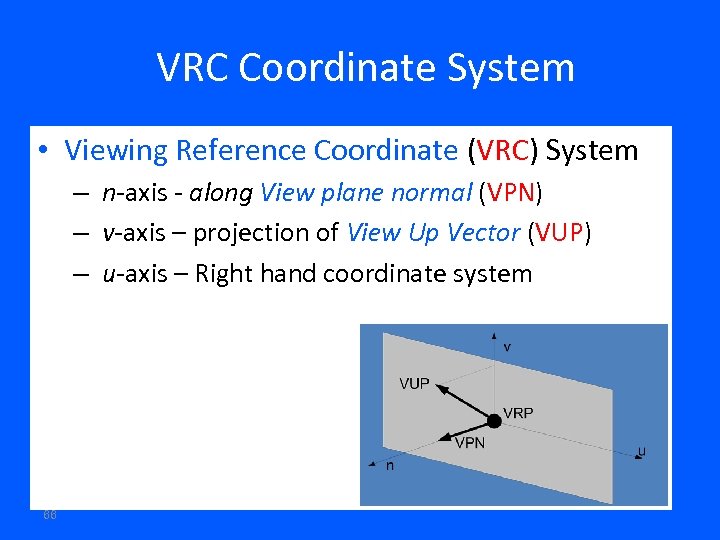 VRC Coordinate System • Viewing Reference Coordinate (VRC) System – n-axis - along View plane normal (VPN) – v-axis – projection of View Up Vector (VUP) – u-axis – Right hand coordinate system 66
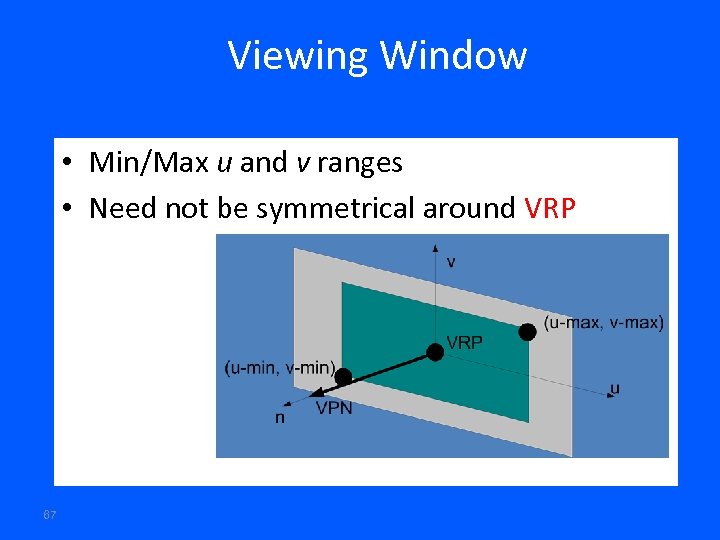 Viewing Window • Min/Max u and v ranges • Need not be symmetrical around VRP 67
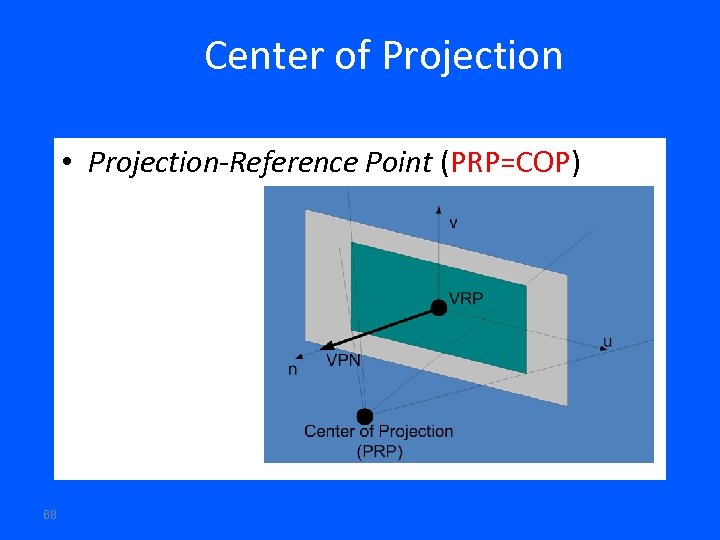 Center of Projection • Projection-Reference Point (PRP=COP) 68
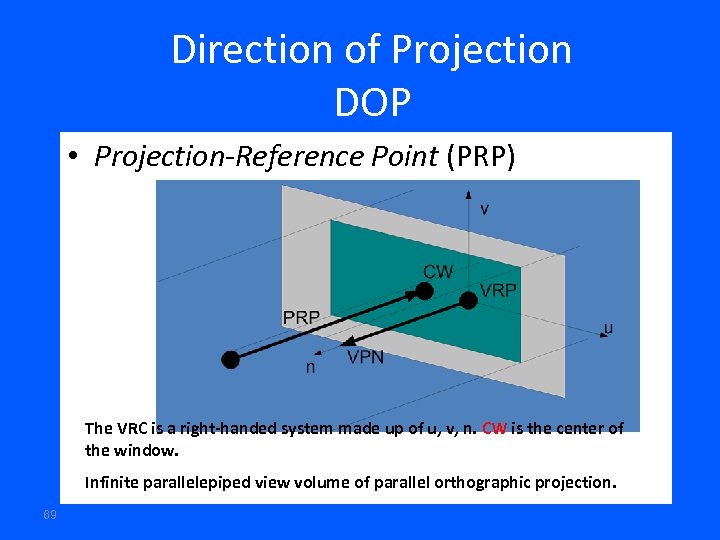 Direction of Projection DOP • Projection-Reference Point (PRP) The VRC is a right-handed system made up of u, v, n. CW is the center of the window. Infinite parallelepiped view volume of parallel orthographic projection. 69
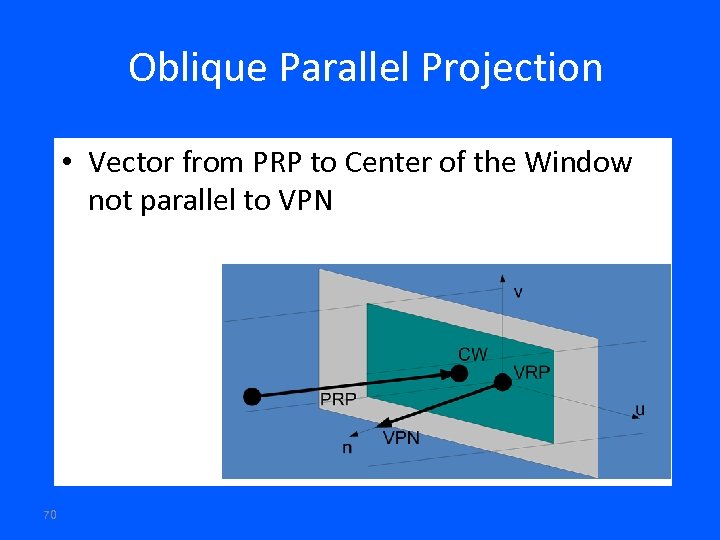 Oblique Parallel Projection • Vector from PRP to Center of the Window not parallel to VPN 70
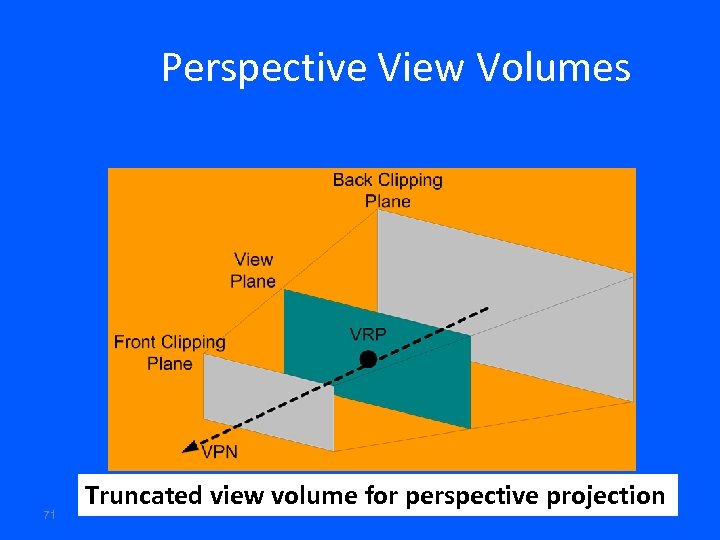 Perspective View Volumes 71 Truncated view volume for perspective projection
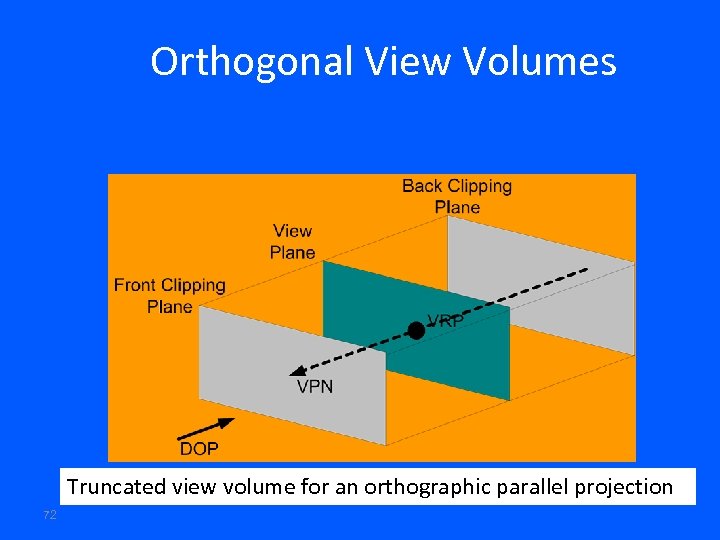 Orthogonal View Volumes Truncated view volume for an orthographic parallel projection 72
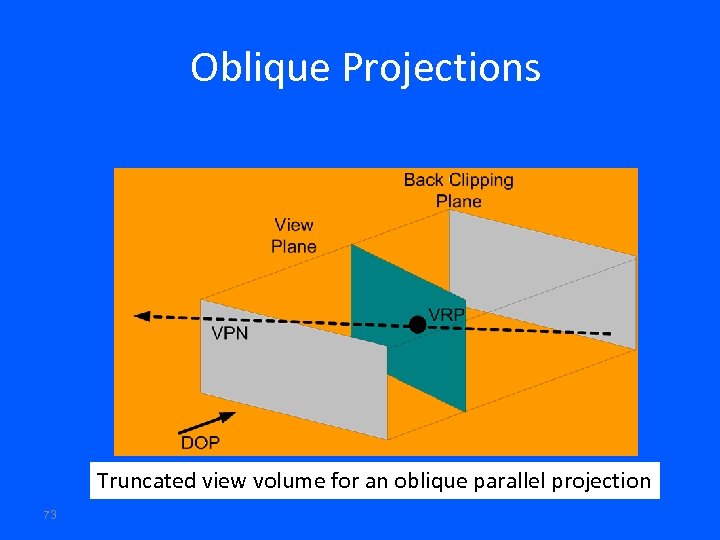 Oblique Projections Truncated view volume for an oblique parallel projection 73
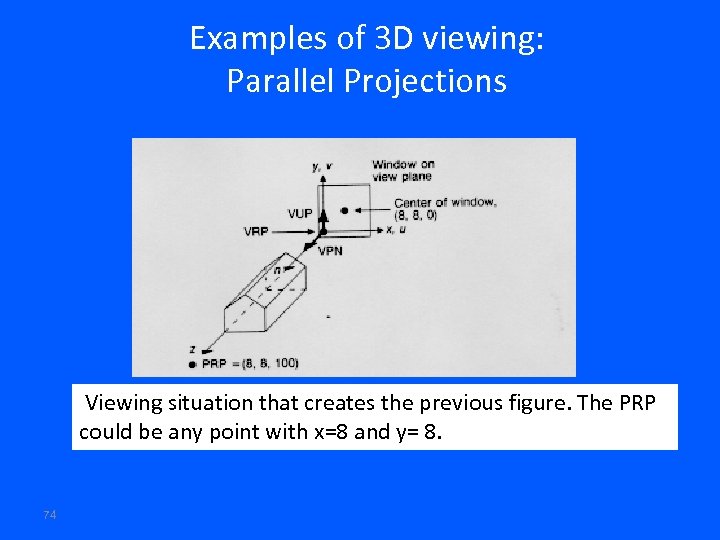 Examples of 3 D viewing: Parallel Projections Viewing situation that creates the previous figure. The PRP could be any point with x=8 and y= 8. 74
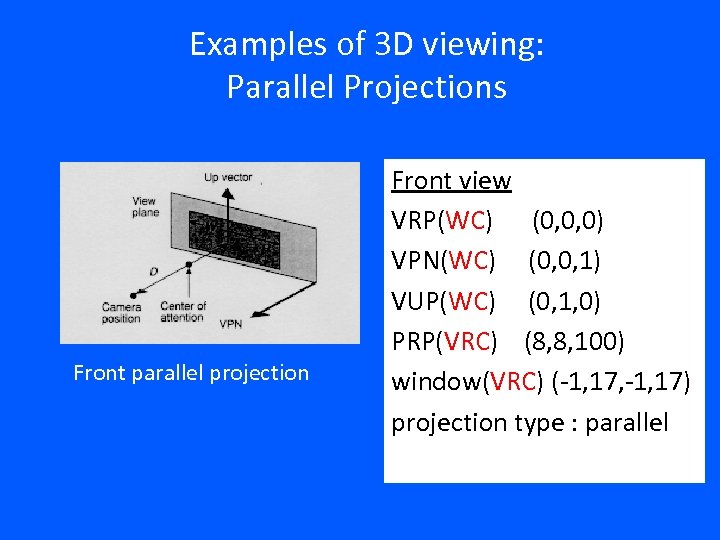 Examples of 3 D viewing: Parallel Projections Front parallel projection Front view VRP(WC) (0, 0, 0) VPN(WC) (0, 0, 1) VUP(WC) (0, 1, 0) PRP(VRC) (8, 8, 100) window(VRC) (-1, 17, -1, 17) projection type : parallel
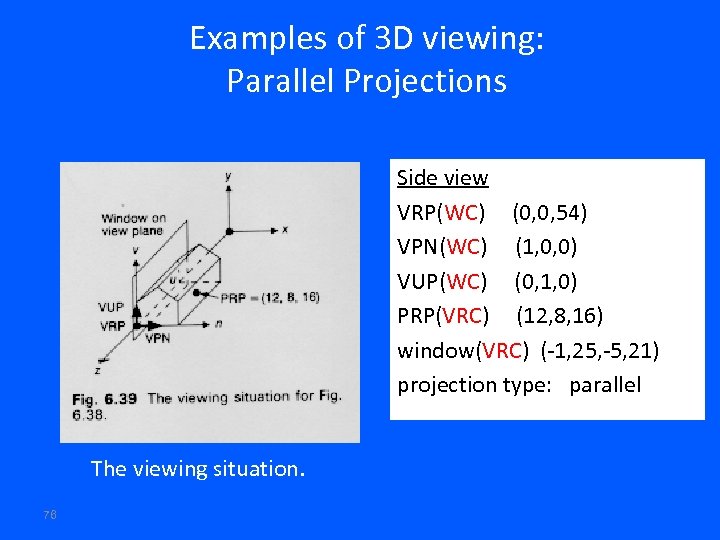 Examples of 3 D viewing: Parallel Projections Side view VRP(WC) (0, 0, 54) VPN(WC) (1, 0, 0) VUP(WC) (0, 1, 0) PRP(VRC) (12, 8, 16) window(VRC) (-1, 25, -5, 21) projection type: parallel The viewing situation. 76
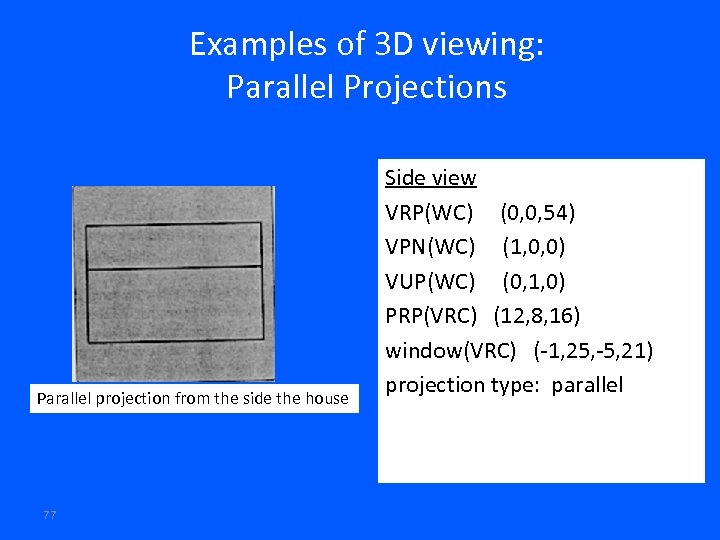 Examples of 3 D viewing: Parallel Projections Parallel projection from the side the house 77 Side view VRP(WC) (0, 0, 54) VPN(WC) (1, 0, 0) VUP(WC) (0, 1, 0) PRP(VRC) (12, 8, 16) window(VRC) (-1, 25, -5, 21) projection type: parallel
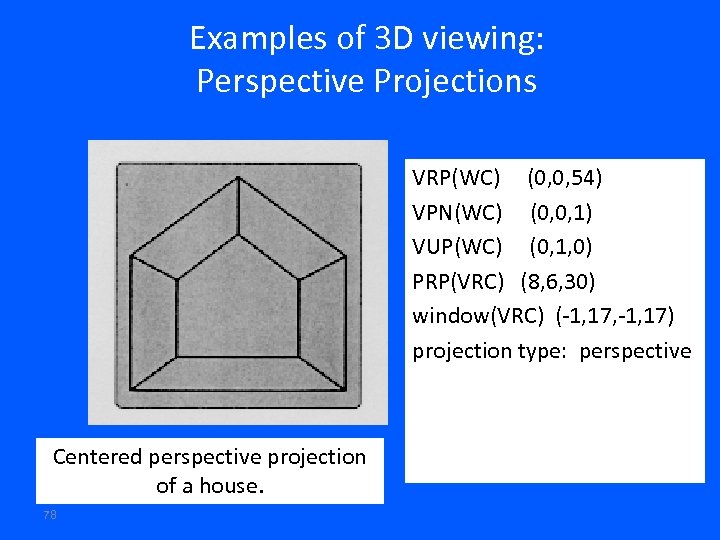 Examples of 3 D viewing: Perspective Projections VRP(WC) (0, 0, 54) VPN(WC) (0, 0, 1) VUP(WC) (0, 1, 0) PRP(VRC) (8, 6, 30) window(VRC) (-1, 17, -1, 17) projection type: perspective Centered perspective projection of a house. 78
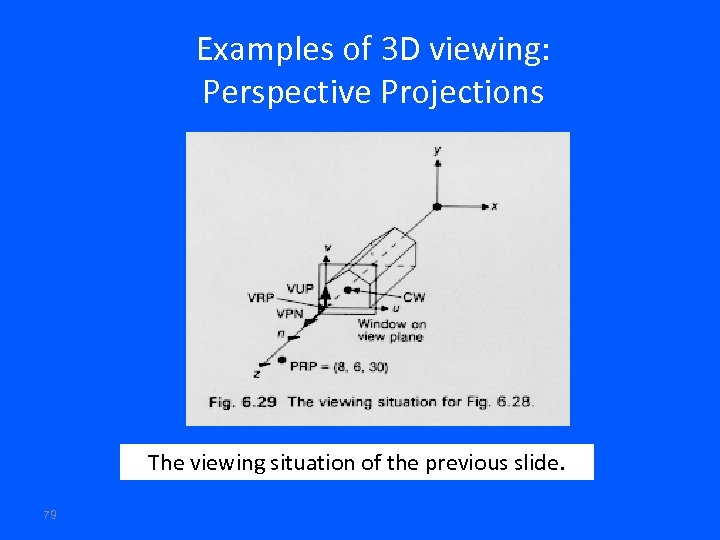 Examples of 3 D viewing: Perspective Projections The viewing situation of the previous slide. 79
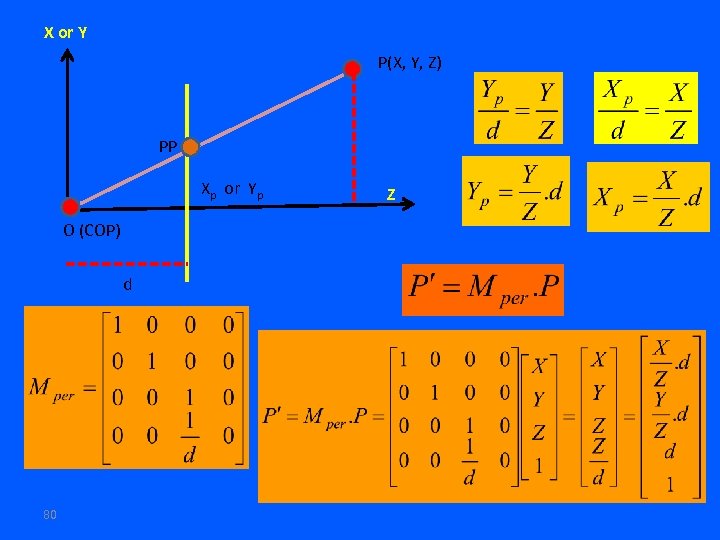 X or Y P(X, Y, Z) PP Xp or Yp O (COP) d 80 Z
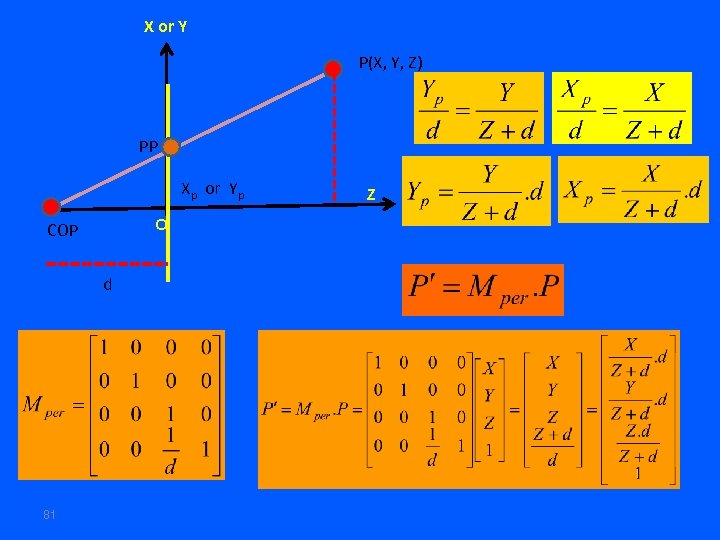 X or Y P(X, Y, Z) PP Xp or Yp o COP d 81 Z
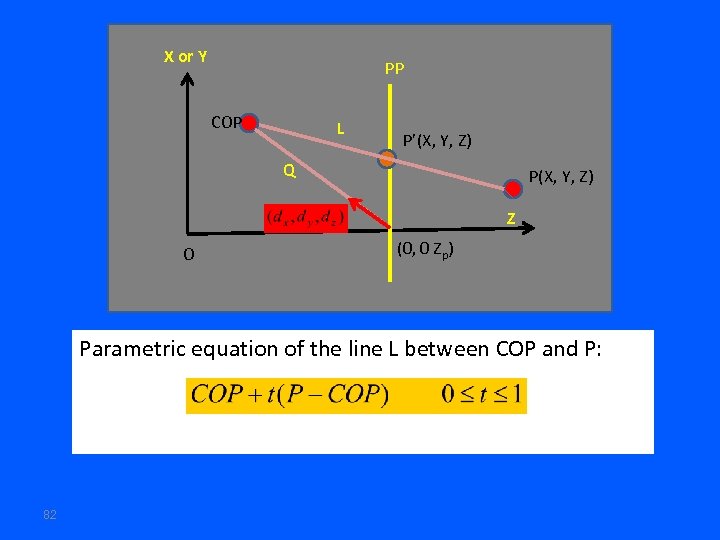 X or Y PP COP L P’(X, Y, Z) Q P(X, Y, Z) Z O (0, 0 Zp) Parametric equation of the line L between COP and P: 82
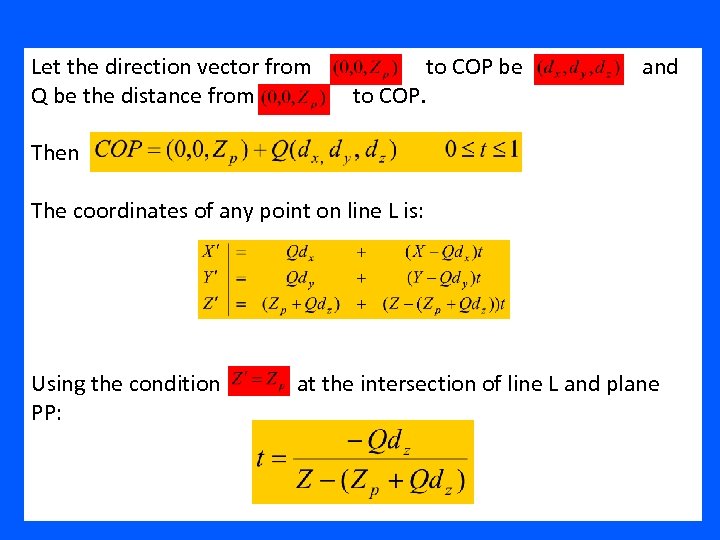 Let the direction vector from Q be the distance from to COP be to COP. and Then The coordinates of any point on line L is: Using the condition PP: 83 at the intersection of line L and plane
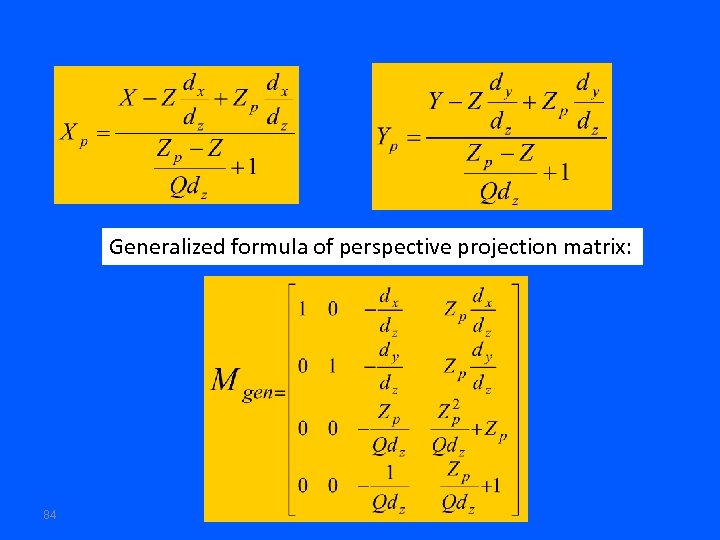 Generalized formula of perspective projection matrix: 84
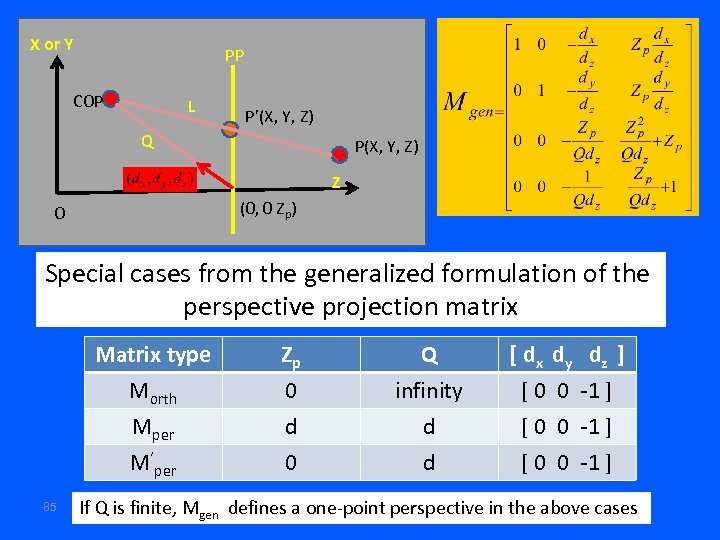 X or Y PP COP L P’(X, Y, Z) Q P(X, Y, Z) Z (0, 0 Zp) O Special cases from the generalized formulation of the perspective projection matrix Matrix type Morth Mper M’per 85 Zp 0 d 0 Q infinity d d [ d x dy [0 0 dz ] -1 ] If Q is finite, Mgen defines a one-point perspective in the above cases
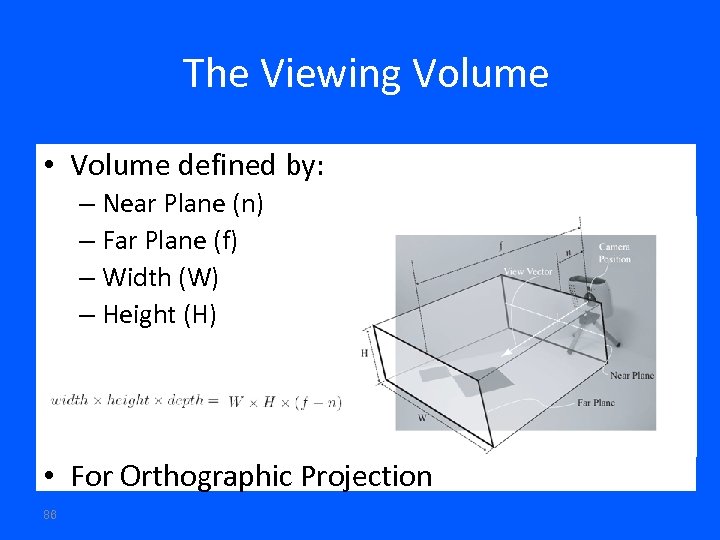 The Viewing Volume • Volume defined by: – Near Plane (n) – Far Plane (f) – Width (W) – Height (H) • For Orthographic Projection 86
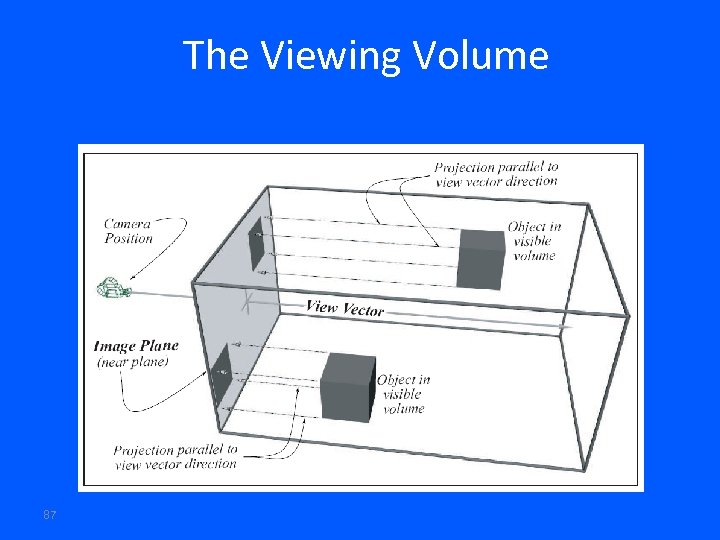 The Viewing Volume 87
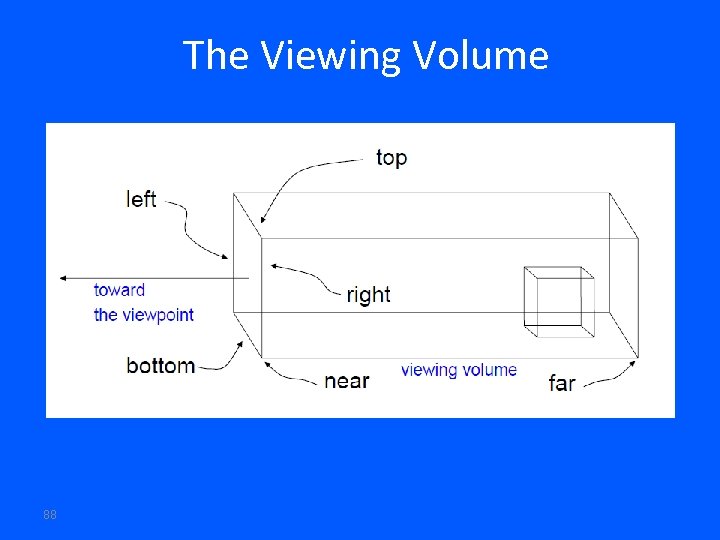 The Viewing Volume 88
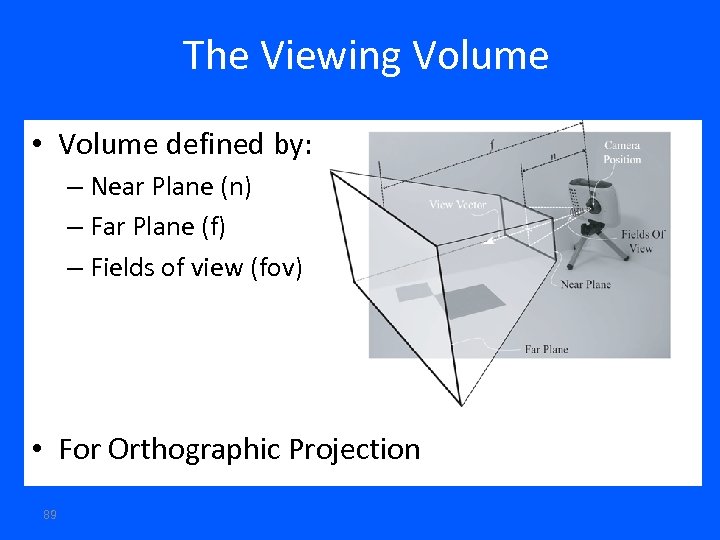 The Viewing Volume • Volume defined by: – Near Plane (n) – Far Plane (f) – Fields of view (fov) • For Orthographic Projection 89
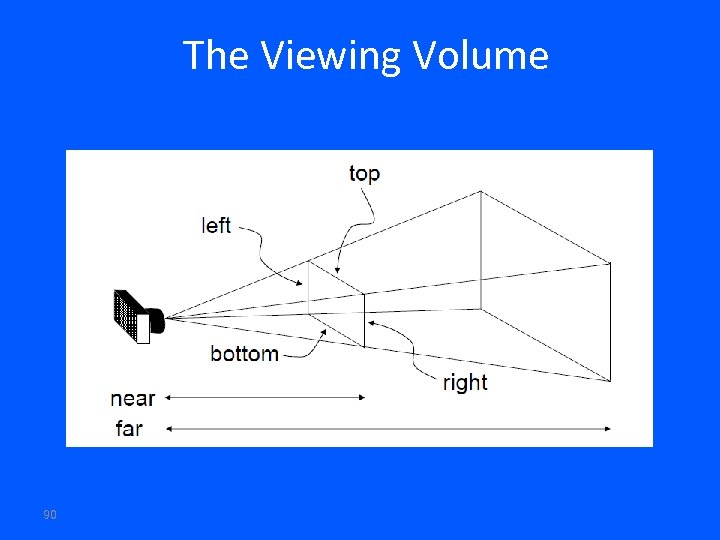 The Viewing Volume 90
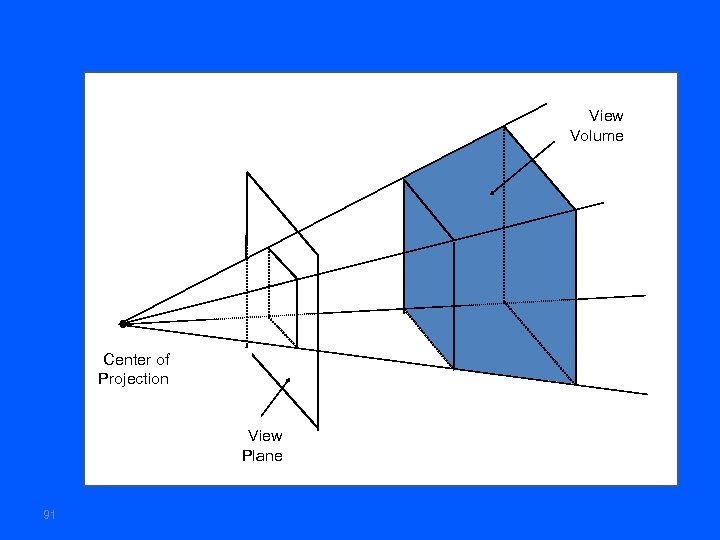 View Volume Center of Projection View Plane 91
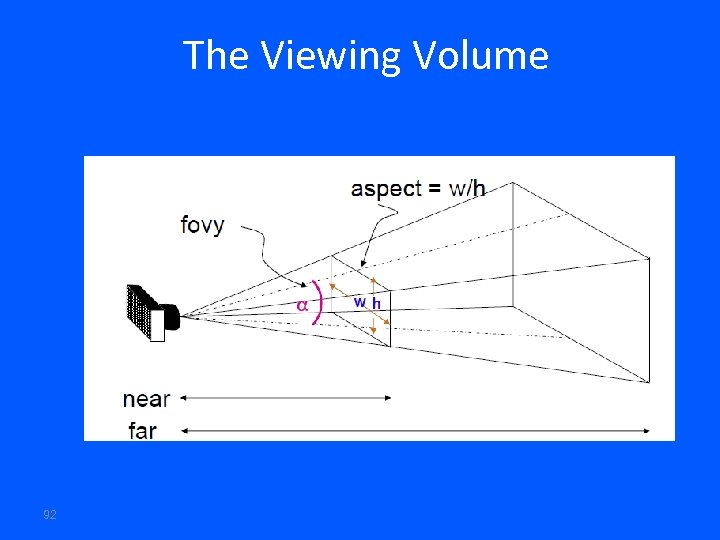 The Viewing Volume 92
 Questions? Discussion? Suggestions ?
 94
94


