b39b1ddc176fc4cad50fab9440d8f853.ppt
- Количество слайдов: 41
 Di. Ni 12 Training
 How does a Digital Level Work? A digital level is really no different from an optical level in a lot of ways. A lot of the principals and methods used with optical levels still need to be used and applied with a digital level. Basically what a digital level is; is a digital “camera” that is aligned with the crosshairs of the instrument. When a measurement is needed the user focuses on the rod and then presses measure which then tells the instrument to “snap” a picture of the rod and compares that image with the same rod pattern stored in memory. A rod reading is then calculated and is stored in memory.
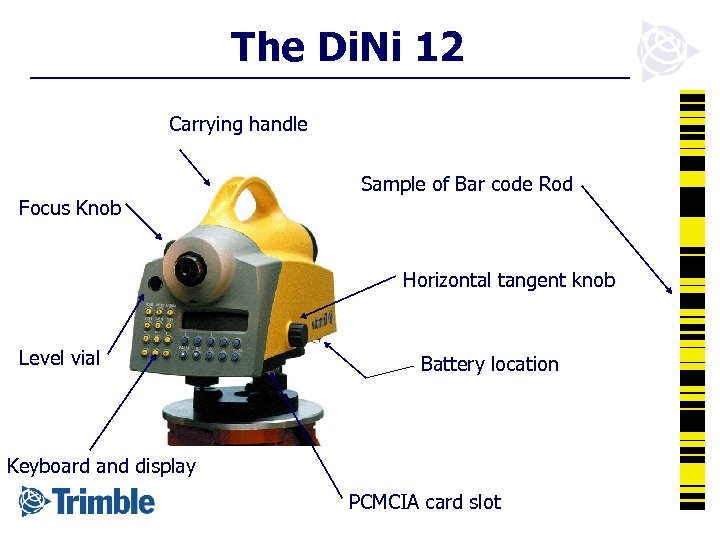 The Di. Ni 12 Carrying handle Focus Knob Sample of Bar code Rod Horizontal tangent knob Level vial Battery location Keyboard and display PCMCIA card slot
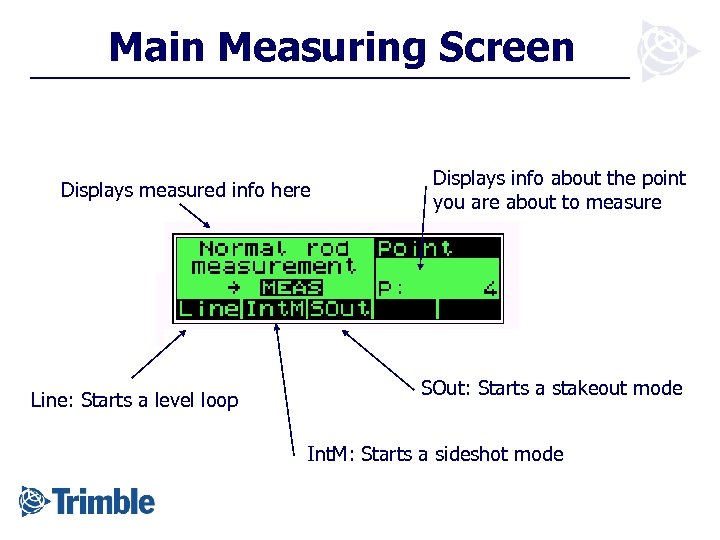 Main Measuring Screen Displays measured info here Line: Starts a level loop Displays info about the point you are about to measure SOut: Starts a stakeout mode Int. M: Starts a sideshot mode
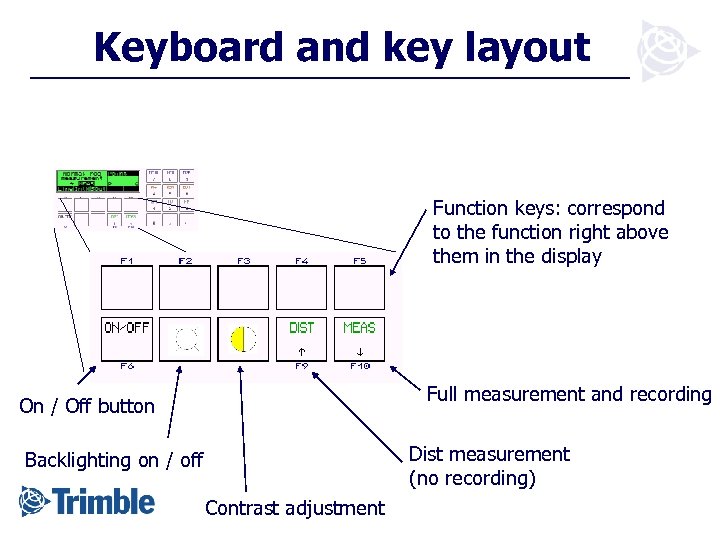 Keyboard and key layout Function keys: correspond to the function right above them in the display Full measurement and recording On / Off button Dist measurement (no recording) Backlighting on / off Contrast adjustment
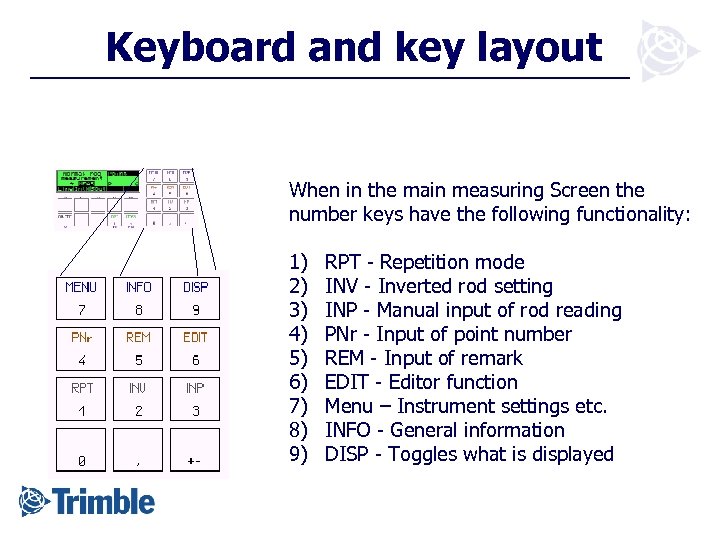 Keyboard and key layout When in the main measuring Screen the number keys have the following functionality: 1) 2) 3) 4) 5) 6) 7) 8) 9) RPT - Repetition mode INV - Inverted rod setting INP - Manual input of rod reading PNr - Input of point number REM - Input of remark EDIT - Editor function Menu – Instrument settings etc. INFO - General information DISP - Toggles what is displayed
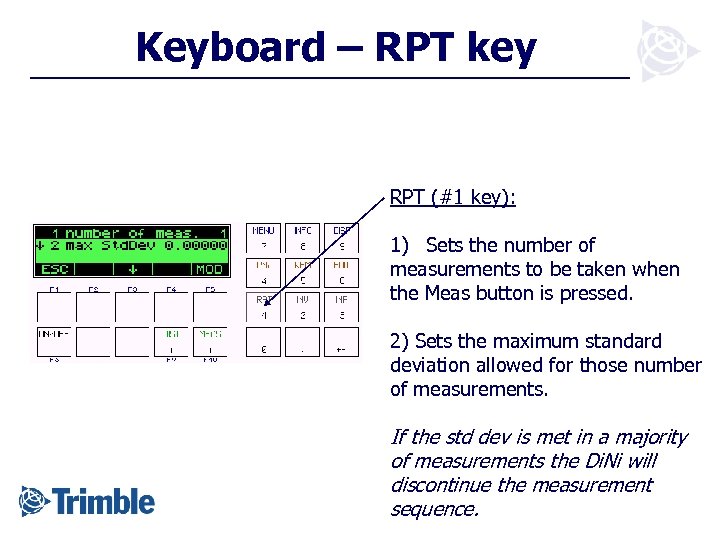 Keyboard – RPT key RPT (#1 key): 1) Sets the number of measurements to be taken when the Meas button is pressed. 2) Sets the maximum standard deviation allowed for those number of measurements. If the std dev is met in a majority of measurements the Di. Ni will discontinue the measurement sequence.
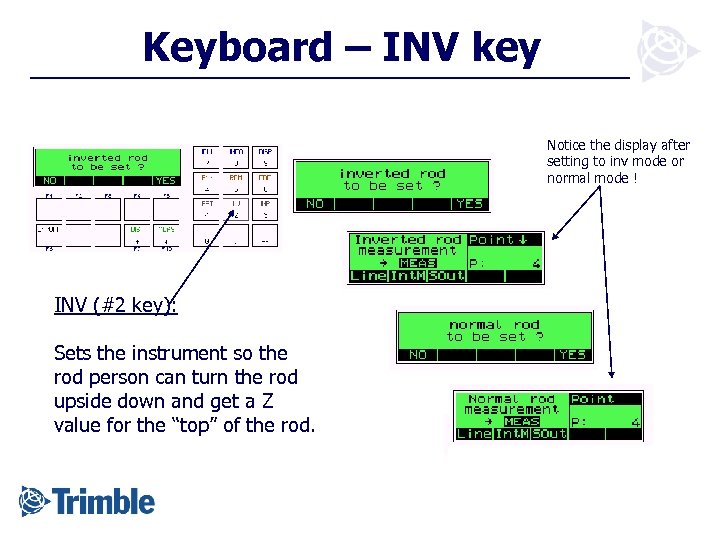 Keyboard – INV key Notice the display after setting to inv mode or normal mode ! INV (#2 key): Sets the instrument so the rod person can turn the rod upside down and get a Z value for the “top” of the rod.
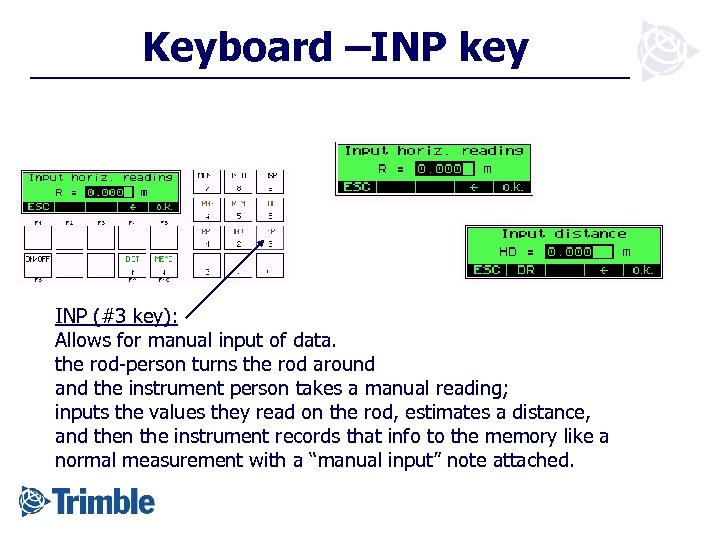 Keyboard –INP key INP (#3 key): Allows for manual input of data. the rod-person turns the rod around and the instrument person takes a manual reading; inputs the values they read on the rod, estimates a distance, and then the instrument records that info to the memory like a normal measurement with a “manual input” note attached.
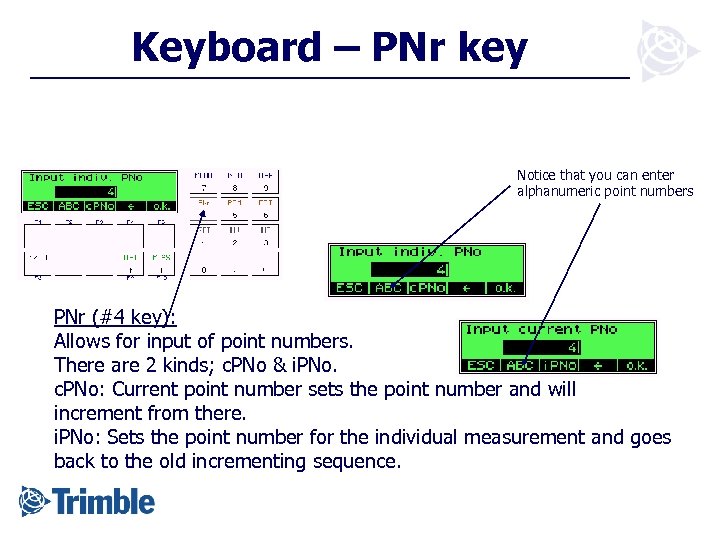 Keyboard – PNr key Notice that you can enter alphanumeric point numbers PNr (#4 key): Allows for input of point numbers. There are 2 kinds; c. PNo & i. PNo. c. PNo: Current point number sets the point number and will increment from there. i. PNo: Sets the point number for the individual measurement and goes back to the old incrementing sequence.
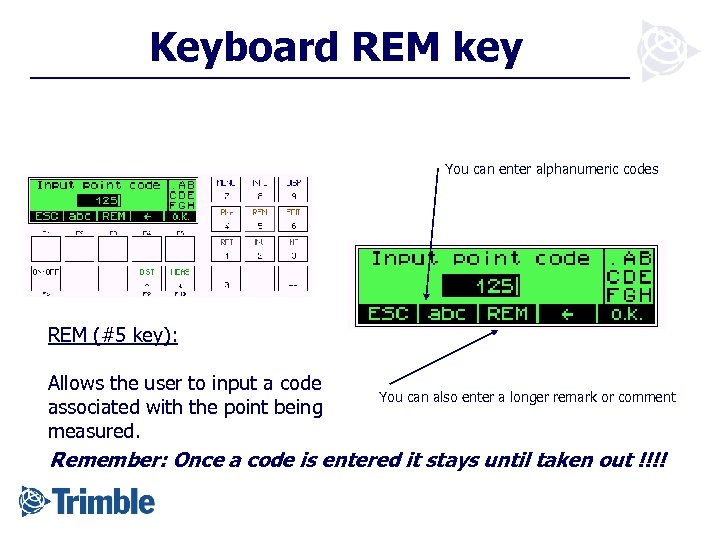 Keyboard REM key You can enter alphanumeric codes REM (#5 key): Allows the user to input a code associated with the point being measured. You can also enter a longer remark or comment Remember: Once a code is entered it stays until taken out !!!!
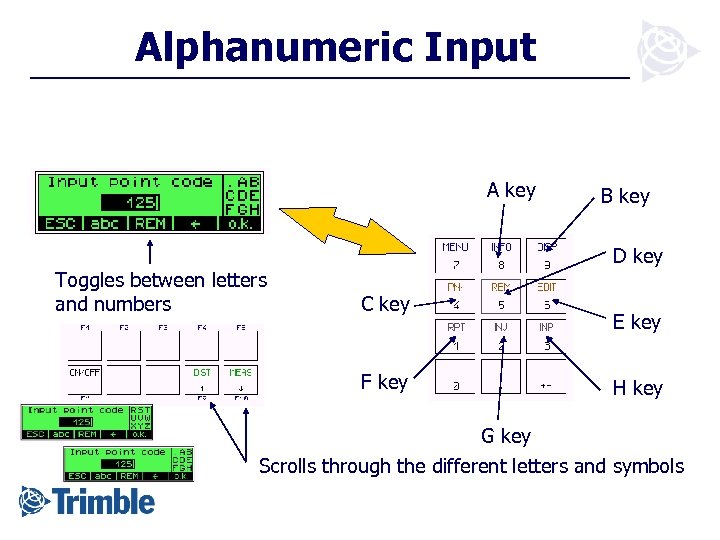 Alphanumeric Input A key Toggles between letters and numbers B key D key C key F key E key H key G key Scrolls through the different letters and symbols
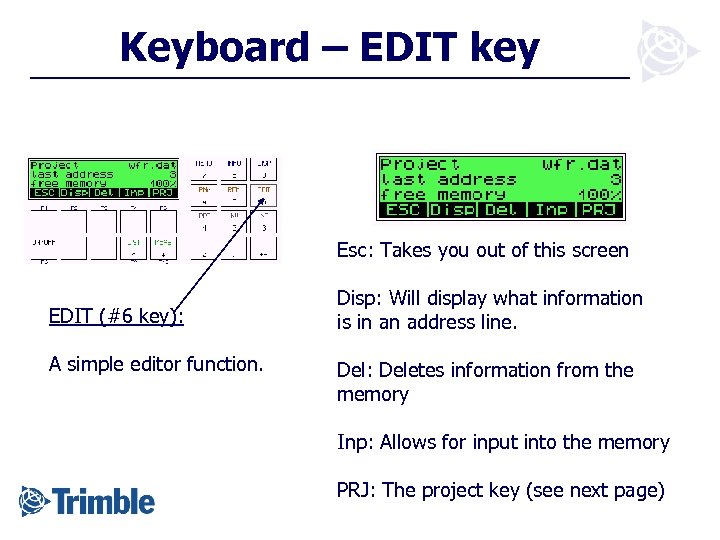 Keyboard – EDIT key Esc: Takes you out of this screen EDIT (#6 key): A simple editor function. Disp: Will display what information is in an address line. Del: Deletes information from the memory Inp: Allows for input into the memory PRJ: The project key (see next page)
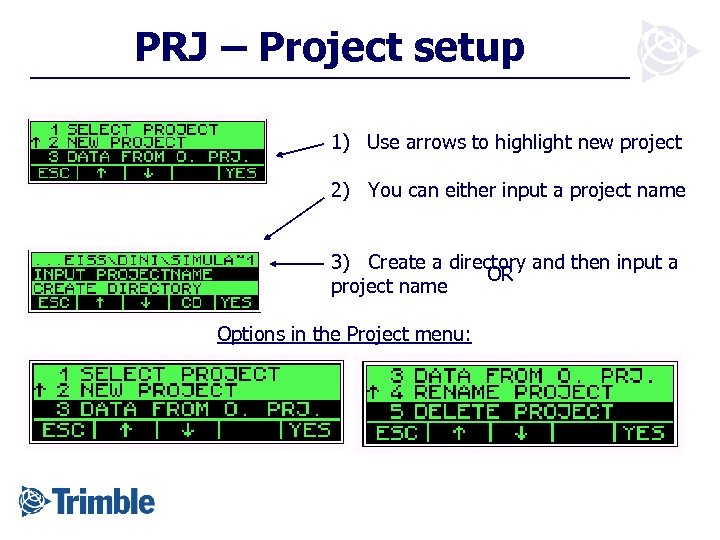 PRJ – Project setup 1) Use arrows to highlight new project 2) You can either input a project name 3) Create a directory and then input a OR project name Options in the Project menu:
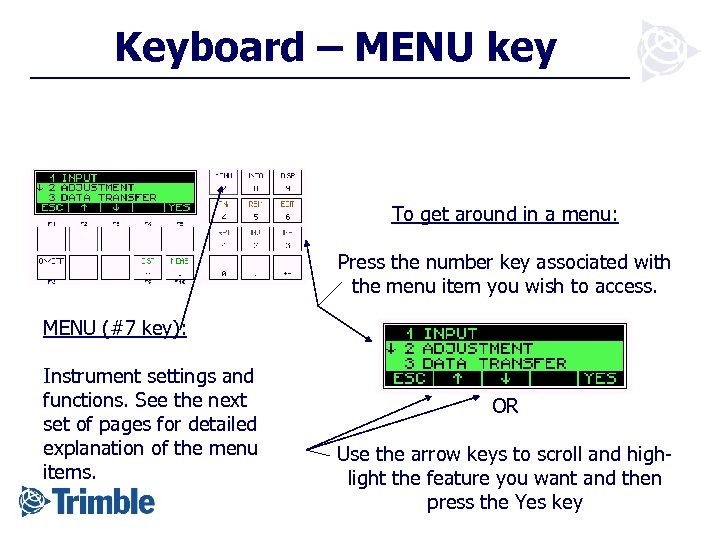 Keyboard – MENU key To get around in a menu: Press the number key associated with the menu item you wish to access. MENU (#7 key): Instrument settings and functions. See the next set of pages for detailed explanation of the menu items. OR Use the arrow keys to scroll and highlight the feature you want and then press the Yes key
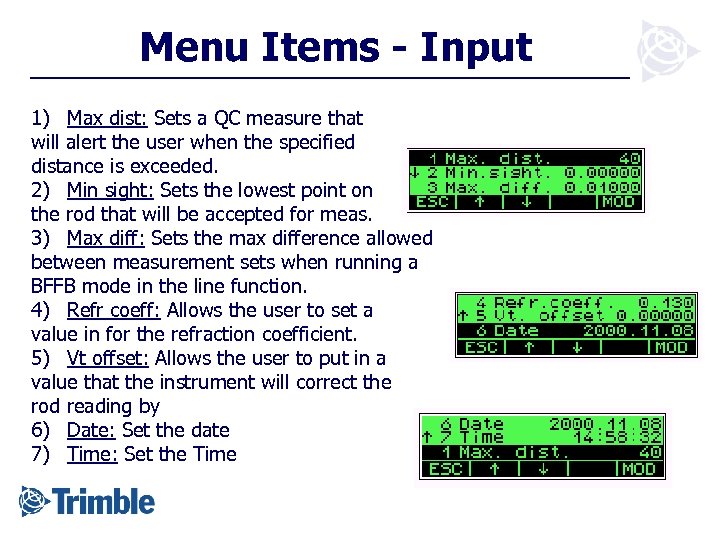 Menu Items - Input 1) Max dist: Sets a QC measure that will alert the user when the specified distance is exceeded. 2) Min sight: Sets the lowest point on the rod that will be accepted for meas. 3) Max diff: Sets the max difference allowed between measurement sets when running a BFFB mode in the line function. 4) Refr coeff: Allows the user to set a value in for the refraction coefficient. 5) Vt offset: Allows the user to put in a value that the instrument will correct the rod reading by 6) Date: Set the date 7) Time: Set the Time
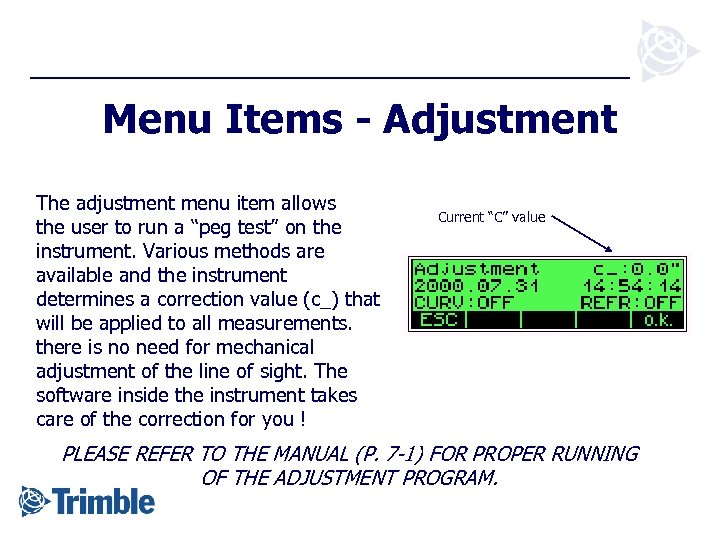 Menu Items - Adjustment The adjustment menu item allows the user to run a “peg test” on the instrument. Various methods are available and the instrument determines a correction value (c_) that will be applied to all measurements. there is no need for mechanical adjustment of the line of sight. The software inside the instrument takes care of the correction for you ! Current “C” value PLEASE REFER TO THE MANUAL (P. 7 -1) FOR PROPER RUNNING OF THE ADJUSTMENT PROGRAM.
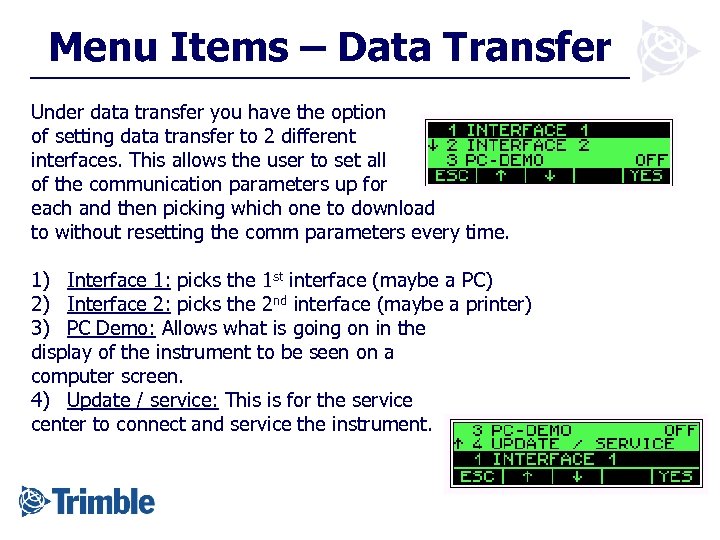 Menu Items – Data Transfer Under data transfer you have the option of setting data transfer to 2 different interfaces. This allows the user to set all of the communication parameters up for each and then picking which one to download to without resetting the comm parameters every time. 1) Interface 1: picks the 1 st interface (maybe a PC) 2) Interface 2: picks the 2 nd interface (maybe a printer) 3) PC Demo: Allows what is going on in the display of the instrument to be seen on a computer screen. 4) Update / service: This is for the service center to connect and service the instrument.
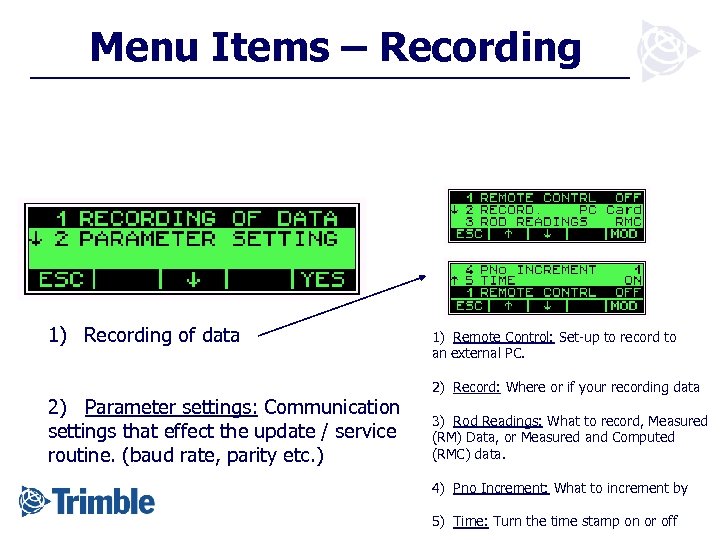 Menu Items – Recording 1) Recording of data 2) Parameter settings: Communication settings that effect the update / service routine. (baud rate, parity etc. ) 1) Remote Control: Set-up to record to an external PC. 2) Record: Where or if your recording data 3) Rod Readings: What to record, Measured (RM) Data, or Measured and Computed (RMC) data. 4) Pno Increment: What to increment by 5) Time: Turn the time stamp on or off
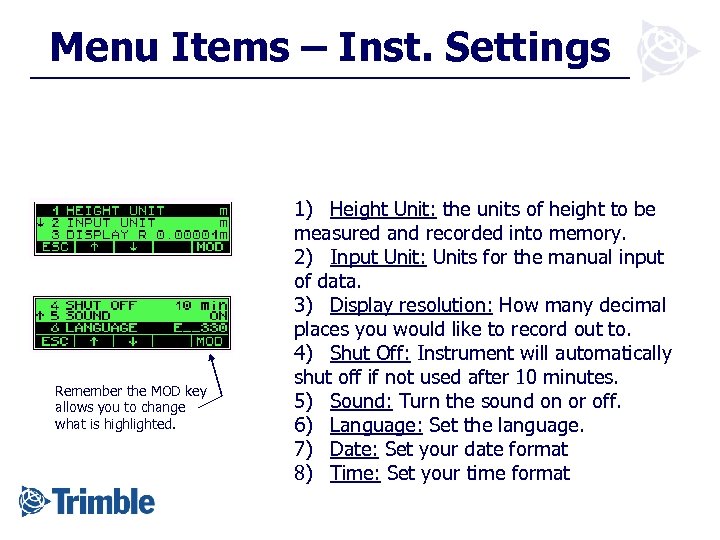 Menu Items – Inst. Settings Remember the MOD key allows you to change what is highlighted. 1) Height Unit: the units of height to be measured and recorded into memory. 2) Input Unit: Units for the manual input of data. 3) Display resolution: How many decimal places you would like to record out to. 4) Shut Off: Instrument will automatically shut off if not used after 10 minutes. 5) Sound: Turn the sound on or off. 6) Language: Set the language. 7) Date: Set your date format 8) Time: Set your time format
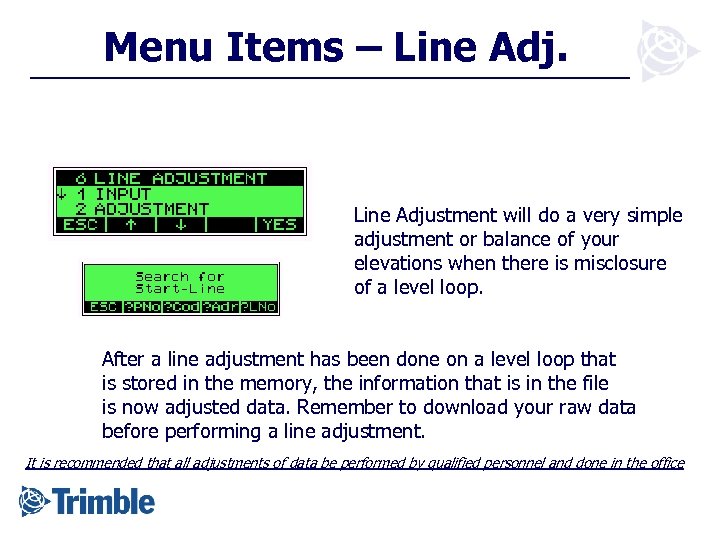 Menu Items – Line Adjustment will do a very simple adjustment or balance of your elevations when there is misclosure of a level loop. After a line adjustment has been done on a level loop that is stored in the memory, the information that is in the file is now adjusted data. Remember to download your raw data before performing a line adjustment. It is recommended that all adjustments of data be performed by qualified personnel and done in the office
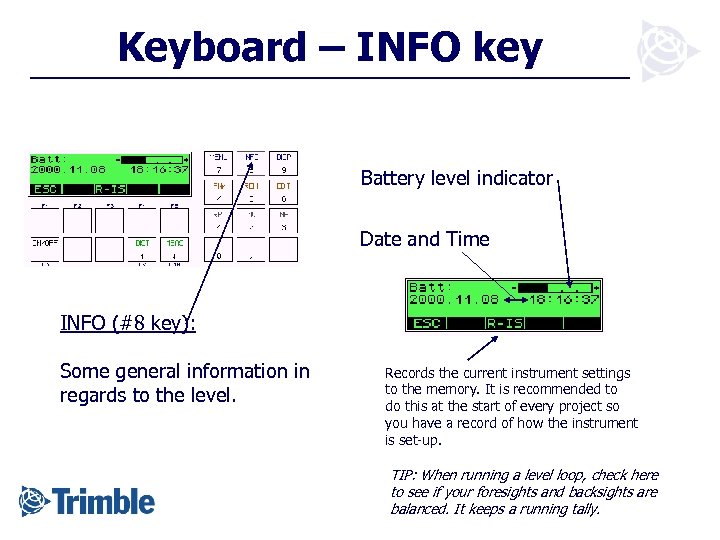 Keyboard – INFO key Battery level indicator Date and Time INFO (#8 key): Some general information in regards to the level. Records the current instrument settings to the memory. It is recommended to do this at the start of every project so you have a record of how the instrument is set-up. TIP: When running a level loop, check here to see if your foresights and backsights are balanced. It keeps a running tally.
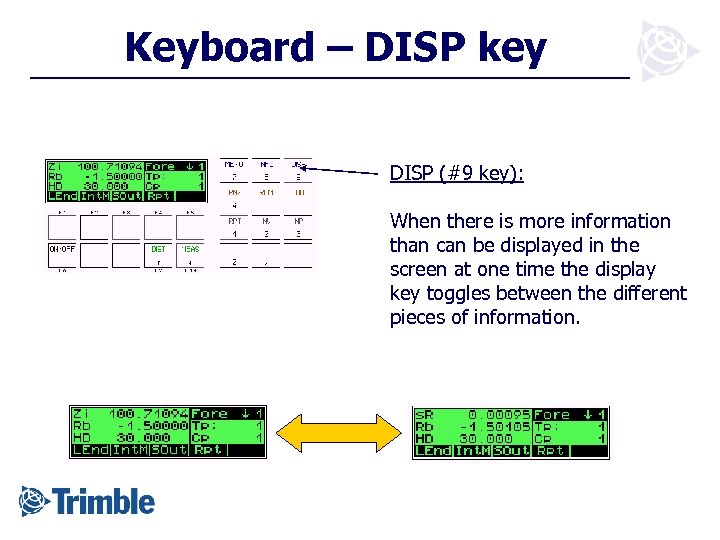 Keyboard – DISP key DISP (#9 key): When there is more information than can be displayed in the screen at one time the display key toggles between the different pieces of information.
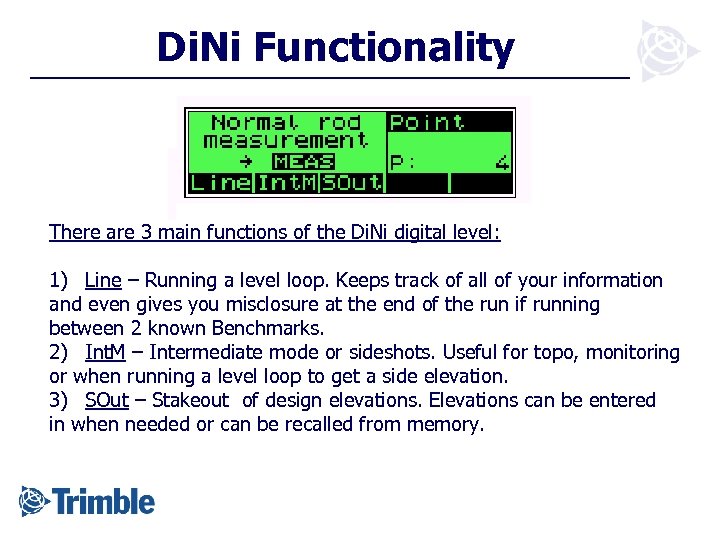 Di. Ni Functionality There are 3 main functions of the Di. Ni digital level: 1) Line – Running a level loop. Keeps track of all of your information and even gives you misclosure at the end of the run if running between 2 known Benchmarks. 2) Int. M – Intermediate mode or sideshots. Useful for topo, monitoring or when running a level loop to get a side elevation. 3) SOut – Stakeout of design elevations. Elevations can be entered in when needed or can be recalled from memory.
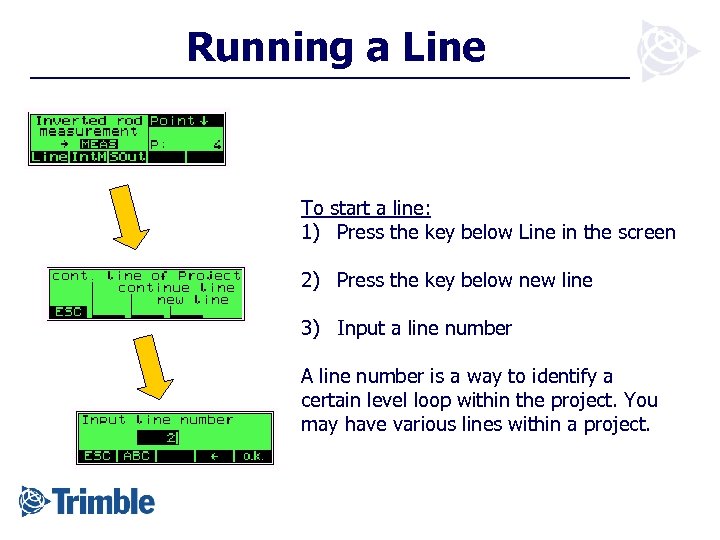 Running a Line To start a line: 1) Press the key below Line in the screen 2) Press the key below new line 3) Input a line number A line number is a way to identify a certain level loop within the project. You may have various lines within a project.
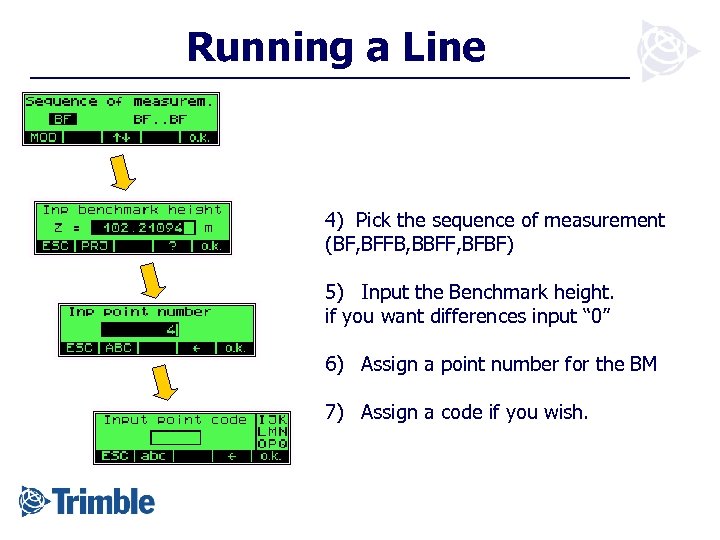 Running a Line 4) Pick the sequence of measurement (BF, BFFB, BBFF, BFBF) 5) Input the Benchmark height. if you want differences input “ 0” 6) Assign a point number for the BM 7) Assign a code if you wish.
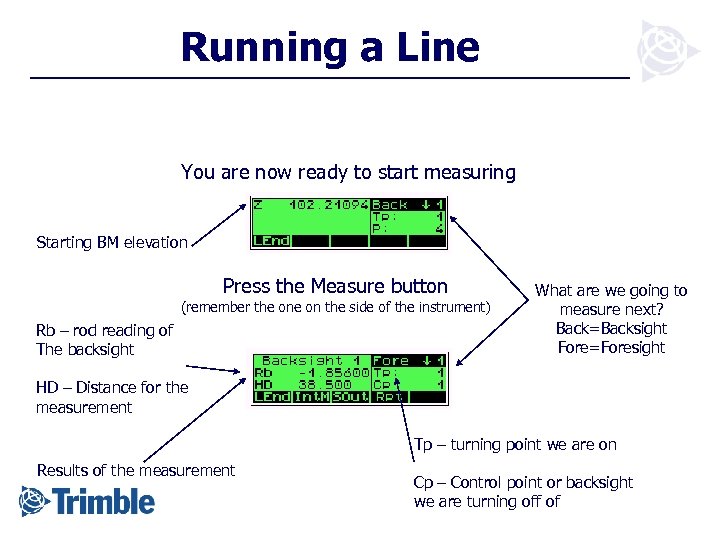 Running a Line You are now ready to start measuring Starting BM elevation Press the Measure button (remember the on the side of the instrument) Rb – rod reading of The backsight What are we going to measure next? Back=Backsight Fore=Foresight HD – Distance for the measurement Tp – turning point we are on Results of the measurement Cp – Control point or backsight we are turning off of
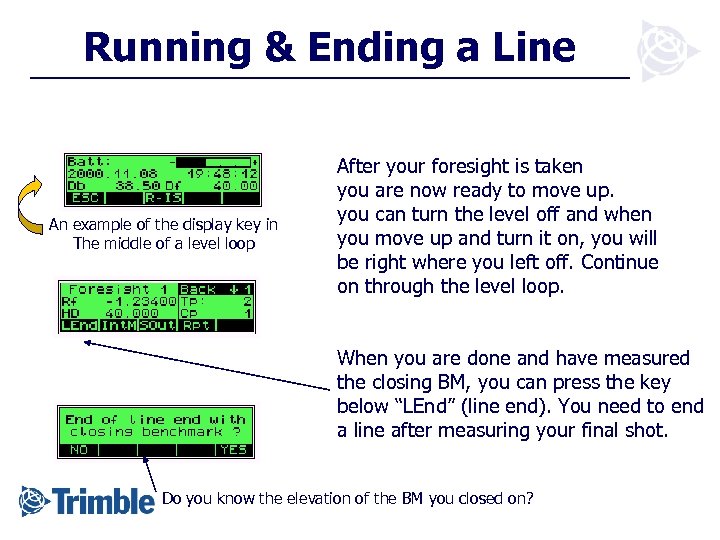 Running & Ending a Line An example of the display key in The middle of a level loop After your foresight is taken you are now ready to move up. you can turn the level off and when you move up and turn it on, you will be right where you left off. Continue on through the level loop. When you are done and have measured the closing BM, you can press the key below “LEnd” (line end). You need to end a line after measuring your final shot. Do you know the elevation of the BM you closed on?
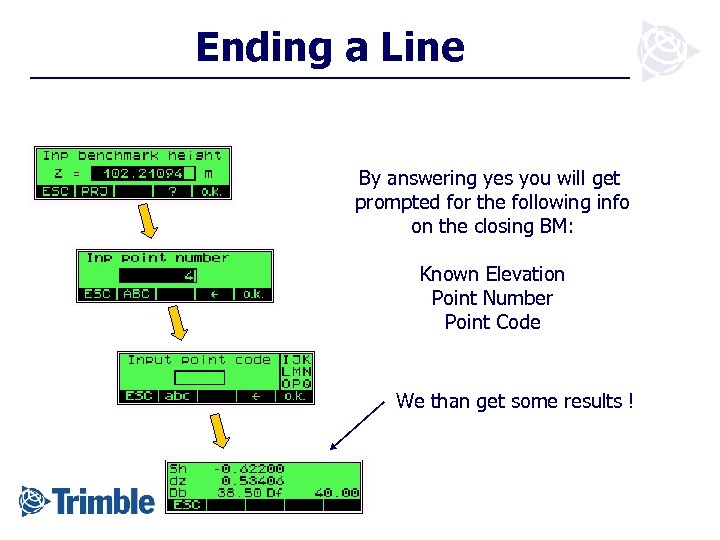 Ending a Line By answering yes you will get prompted for the following info on the closing BM: Known Elevation Point Number Point Code We than get some results !
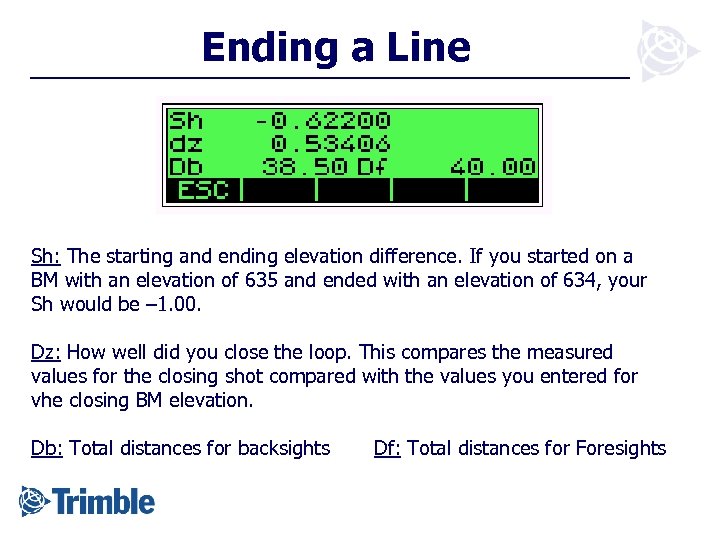 Ending a Line Sh: The starting and ending elevation difference. If you started on a BM with an elevation of 635 and ended with an elevation of 634, your Sh would be – 1. 00. Dz: How well did you close the loop. This compares the measured values for the closing shot compared with the values you entered for vhe closing BM elevation. Db: Total distances for backsights Df: Total distances for Foresights
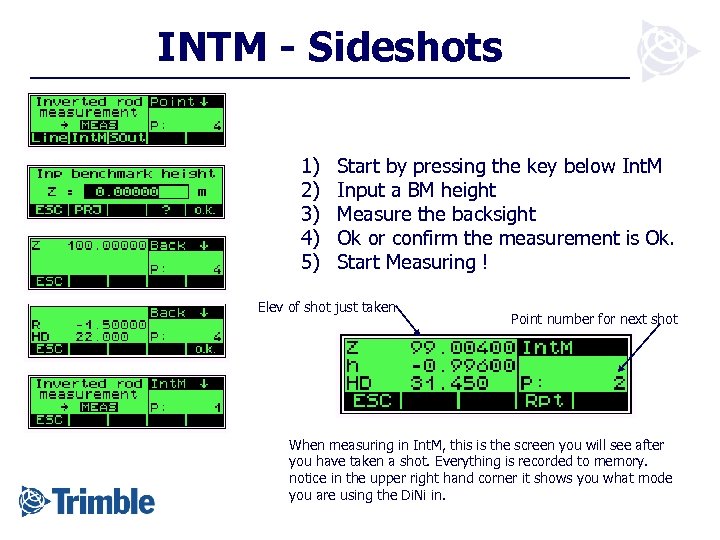 INTM - Sideshots 1) 2) 3) 4) 5) Start by pressing the key below Int. M Input a BM height Measure the backsight Ok or confirm the measurement is Ok. Start Measuring ! Elev of shot just taken Point number for next shot When measuring in Int. M, this is the screen you will see after you have taken a shot. Everything is recorded to memory. notice in the upper right hand corner it shows you what mode you are using the Di. Ni in.
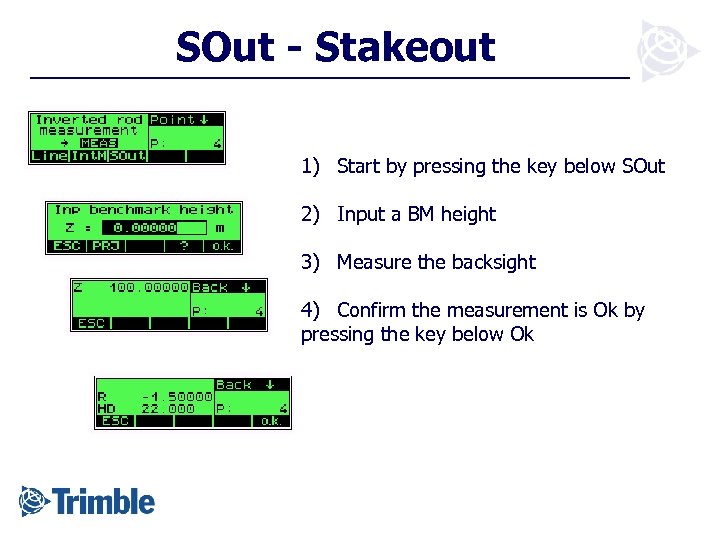 SOut - Stakeout 1) Start by pressing the key below SOut 2) Input a BM height 3) Measure the backsight 4) Confirm the measurement is Ok by pressing the key below Ok
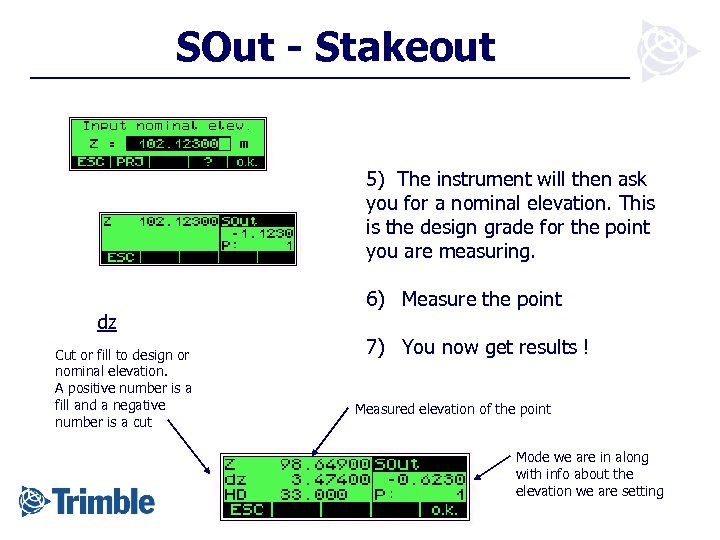 SOut - Stakeout 5) The instrument will then ask you for a nominal elevation. This is the design grade for the point you are measuring. dz Cut or fill to design or nominal elevation. A positive number is a fill and a negative number is a cut 6) Measure the point 7) You now get results ! Measured elevation of the point Mode we are in along with info about the elevation we are setting
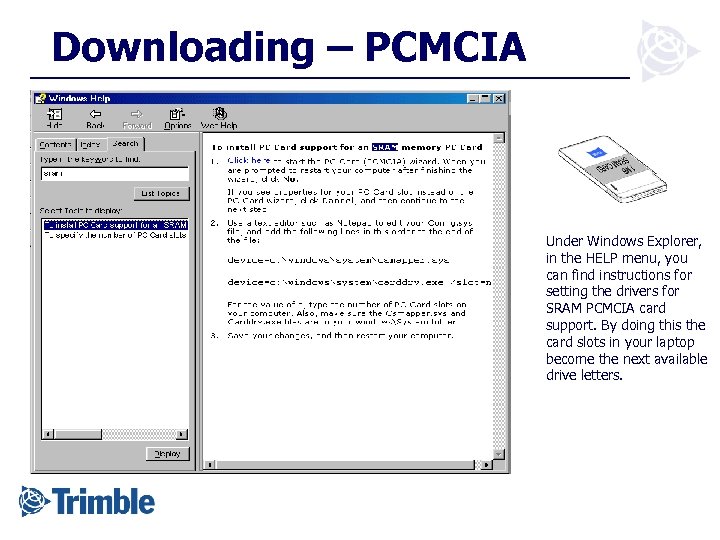 Downloading – PCMCIA Under Windows Explorer, in the HELP menu, you can find instructions for setting the drivers for SRAM PCMCIA card support. By doing this the card slots in your laptop become the next available drive letters.
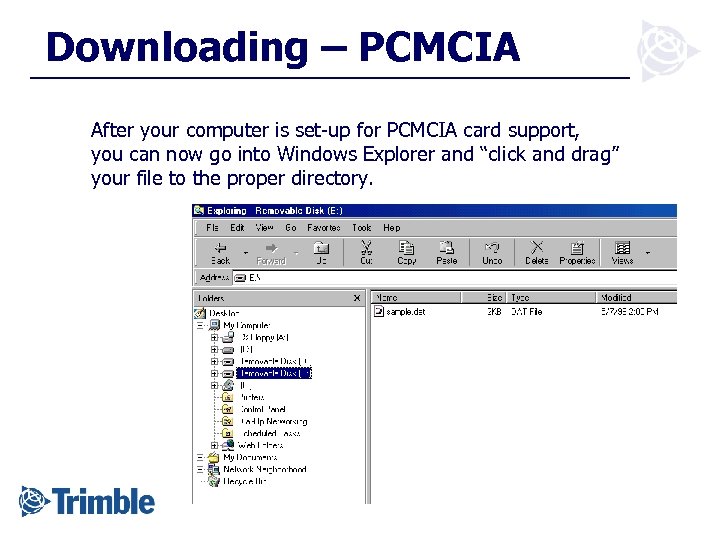 Downloading – PCMCIA After your computer is set-up for PCMCIA card support, you can now go into Windows Explorer and “click and drag” your file to the proper directory.
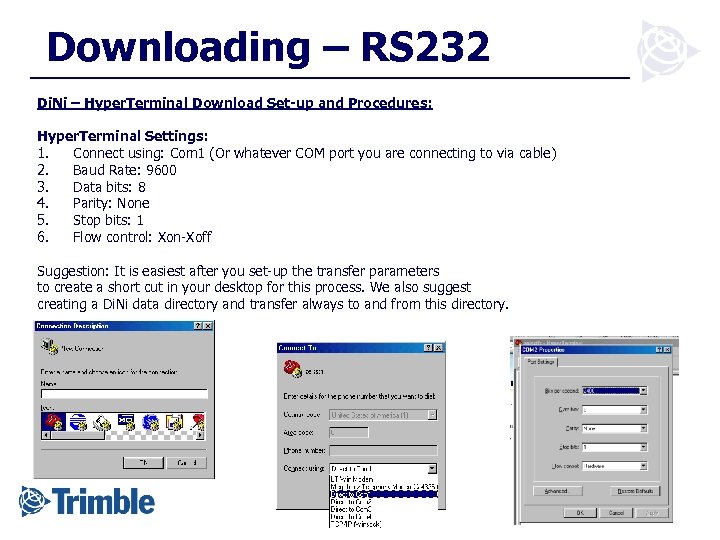 Downloading – RS 232 Di. Ni – Hyper. Terminal Download Set-up and Procedures: Hyper. Terminal Settings: 1. Connect using: Com 1 (Or whatever COM port you are connecting to via cable) 2. Baud Rate: 9600 3. Data bits: 8 4. Parity: None 5. Stop bits: 1 6. Flow control: Xon-Xoff Suggestion: It is easiest after you set-up the transfer parameters to create a short cut in your desktop for this process. We also suggest creating a Di. Ni data directory and transfer always to and from this directory.
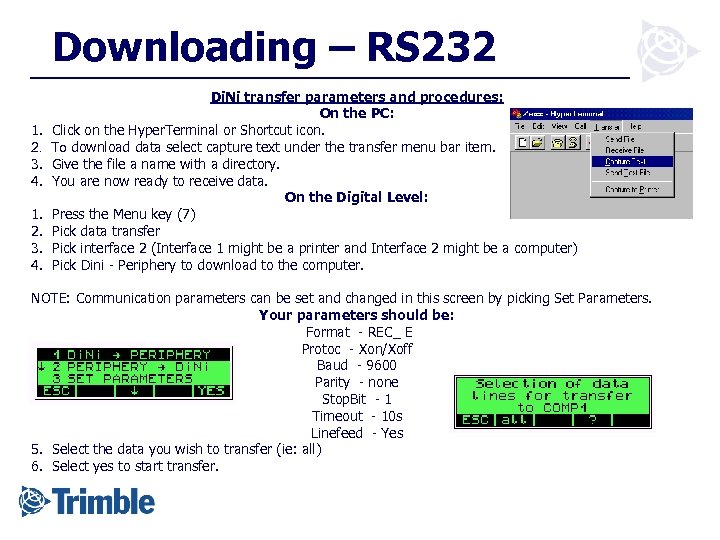 Downloading – RS 232 Di. Ni transfer parameters and procedures: On the PC: 1. Click on the Hyper. Terminal or Shortcut icon. 2. To download data select capture text under the transfer menu bar item. 3. Give the file a name with a directory. 4. You are now ready to receive data. On the Digital Level: 1. Press the Menu key (7) 2. Pick data transfer 3. Pick interface 2 (Interface 1 might be a printer and Interface 2 might be a computer) 4. Pick Dini - Periphery to download to the computer. NOTE: Communication parameters can be set and changed in this screen by picking Set Parameters. Your parameters should be: Format - REC_ E Protoc - Xon/Xoff Baud - 9600 Parity - none Stop. Bit - 1 Timeout - 10 s Linefeed - Yes 5. Select the data you wish to transfer (ie: all) 6. Select yes to start transfer.
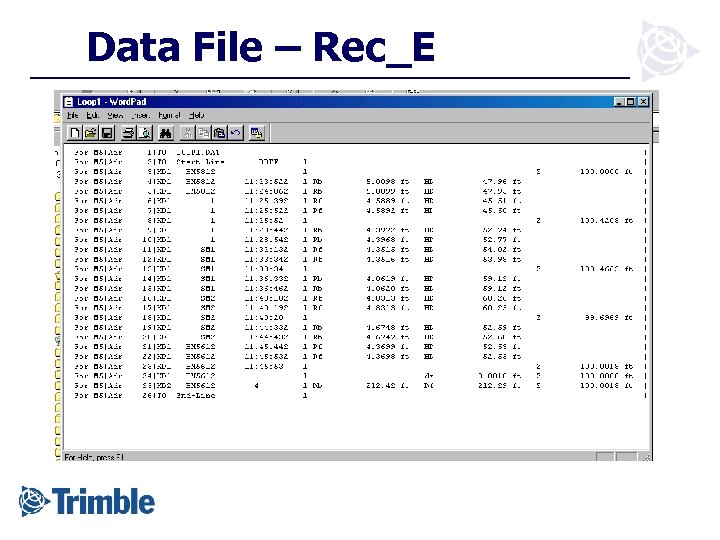
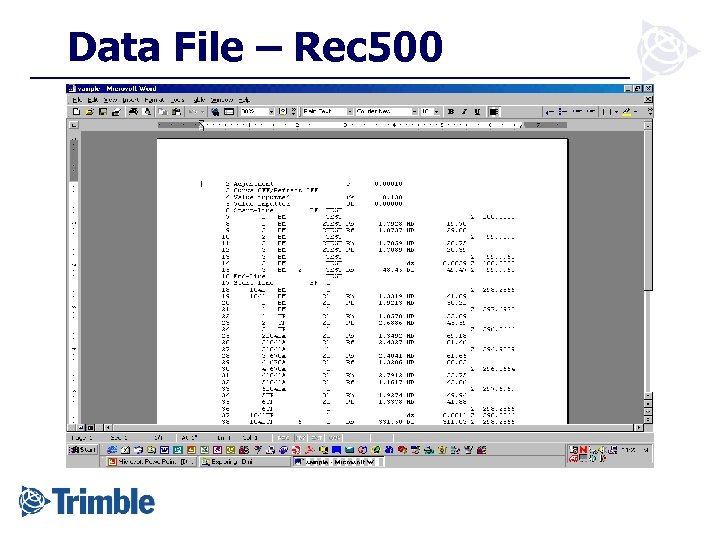
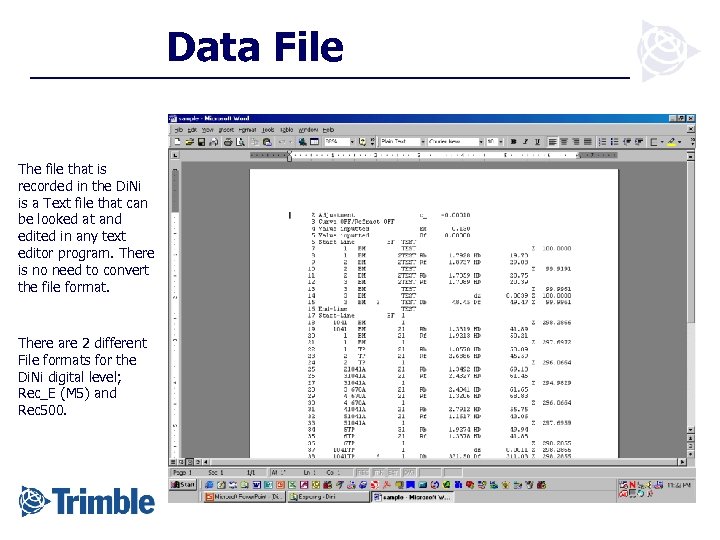 Data File The file that is recorded in the Di. Ni is a Text file that can be looked at and edited in any text editor program. There is no need to convert the file format. There are 2 different File formats for the Di. Ni digital level; Rec_E (M 5) and Rec 500.
 Data File – Rec_E
 Data File – Rec 500
 General Info The Di. Ni needs approx. 30 cm of the rod to measure, about 15 cm above and below the center crosshair. Remember the rod needs to be in focus and the crosshairs on the surface of the rod. The battery is Ni. Mh. It will last about 3 working days and recharges in about 1. 5 hrs. The Di. Ni is a precision instrument and needs to be cared for as such. Routine servicing and calibrating is recommended. Field calibration of the circular level vial is recommended on a regular basis.


