

11606cc3d4696183e52d34fc8421f57f.ppt
- Количество слайдов: 28
 COS 125 DAY 8
 Agenda • Capstone Proposals Due on Feb 23 – Must be a web site – Capstone Project Description sp 09. htm • Assignment 3 DUE • Assignment 4 Posted – Due February 23 @ 9: 35 AM • Quiz 1 will be on March 2 – Chapters 1 -6 – 20 m/c and 4 short essay – Open book, open notes • Lecture/discuss Using Links – http: //perleybrook. umfk. maine. edu/classes/cos 125/HTML 6 ed_ex amples/localindex. html#c 6 – http: //perleybrook. umfk. maine. edu/samples/links. htm
 WYSIWYG vs. TEXT • XHTML is a formatting language and is not well suited for WYSIWYG development. • XHTML programs best as text
 XHTML Review • Basic Format and Structure – Document Format – Block level – Inline • Creating and Using Images – Img tags •
 • • Links Two types of tags – Single sided • < tag /> •
 Template for Transitional XHTML Should be on every page
 Creating Images
 Creating Animations
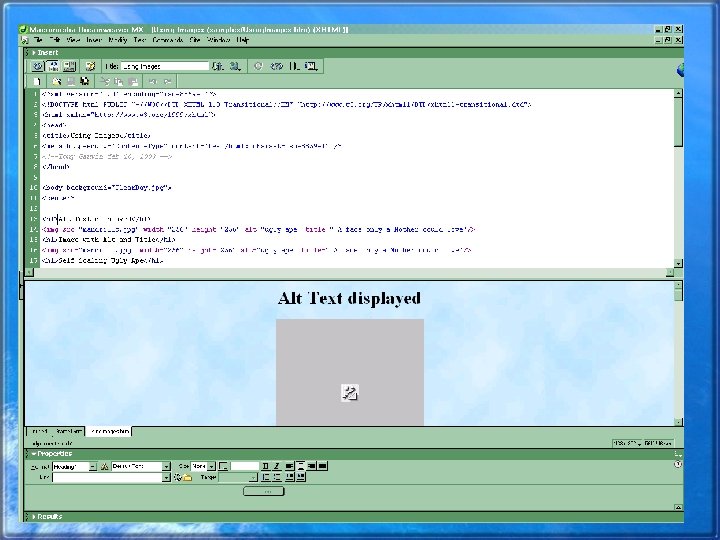
 Adding Images in Dreamweaver Problem
 Links • 3 parts – Destination • Where to go • URLs, Anchors, Files – Label • The part the user sees • Can be text or an image or both – Target • Where the destination will be displayed • In same browser window, a new browser window or a certain browser window
 Creating a link to another webpage • Destination – • Value for href MUST be in “quotes” • Label – Label text • End of link label text
 Creating a Web Link • Use relative URLS if the destination is on the same server (see Chap 1) – “/bios/tonyg. htm” • Use absolute URLs if the destination is on a different server (see Chap 1) – “http: //www. somewhere. com/page. htm” • DO NOT use “click here” as a label – Tacky!! • Labels CANNOT contain block-level elements
 Creating Anchors • An anchor is a labeled place on a Web Page that can be a destination for a Link • text or image • Any element can be a anchor using the “id” attribute –
 Linking to a Specific Anchor • Link to “da. Name” on same page – Go to da. Name • Link to “da. Name” on another page – Go to da. Name
 Target Links to a Specific Browser Windows • You can have the destination appear in a new Browser window so that you may view both the source and destination pages • Same Window (default) – label • New window – label • Existing Windows – label<. a> – If the named window isn’t open it will be created
 Setting a default Target • By default a link opens in the same window that contains the link • To change default – In head section –
 More links • Links can be created to many things – FTP • href=“ftp: //perleybrook. umfk. maine. edu” – E-mail • href=“mailto: name@site. com” – Telnet • href=“telnet: //allagash. umfk. maine. edu” – Files • href=“url/file. ext” • If the browser does have a plug-in for the file it will attempt to download the file
 • Keyboard shortcuts or Hotkeys – Ctrl-C for") Keyboard shortcuts for Links (Access Keys) • Keyboard shortcuts or Hotkeys – Ctrl-C for copy – Ctrl-V for paste • For a link – label – In IE type alt-t – In Netscape ctrl-t • Make sure you don’t override an existing hotkey
Keyboard shortcuts for Links (Access Keys) • Keyboard shortcuts or Hotkeys – Ctrl-C for copy – Ctrl-V for paste • For a link – label – In IE type alt-t – In Netscape ctrl-t • Make sure you don’t override an existing hotkey
 Setting Tab Order • In many application you can use the tab key to move around from section to section • To change how the TAB key works on your web page set a tabindex=“n” attribute – – label N can be 1 to 32767 Smaller N’s will be TAB’ed to first Negative N’s will be skipped
 Using an Image to Label a Link • Simply replace the label text with an image •
 • Border – Most browsers will create a blue border around an image that is a link – You can add a border to any image •
 Image Maps • An Image map is an image with regions that link to different destinations • Two types – Client Side Image Maps • Faster • Most common • Users can see the HTML that creates the map and the possible destinations – Server Side Image Maps • Require a special program running on the server • Hides the destinations from “View Source”
 Creating an Image Map • First divide the image into regions – Circles • Center and radius – Rectangles • Top Left X and Y and Bottom right X and Y – Polygons • X and Y for each vertex of the Polygon
 Finding regions
 Creating a Client Side Image Map • Divide your images into a regions • Create a “map” of the regions –
 Using Dreamweaver for maps
 Add hotspots
The Code
 Assignment # 4 • Examples – http: //perleybrook. umfk. maine. edu/samples/links. htm • Linking Exercise • Due February 23 • Click on icon to see Assignment