 Chapter 10 Conventional Practice in Section View 1
 TOPICS Section view representation of rib, web, spoke and lug. Aligned section Conventional break 2
 Section view representation of rib, web, spoke and lug 3
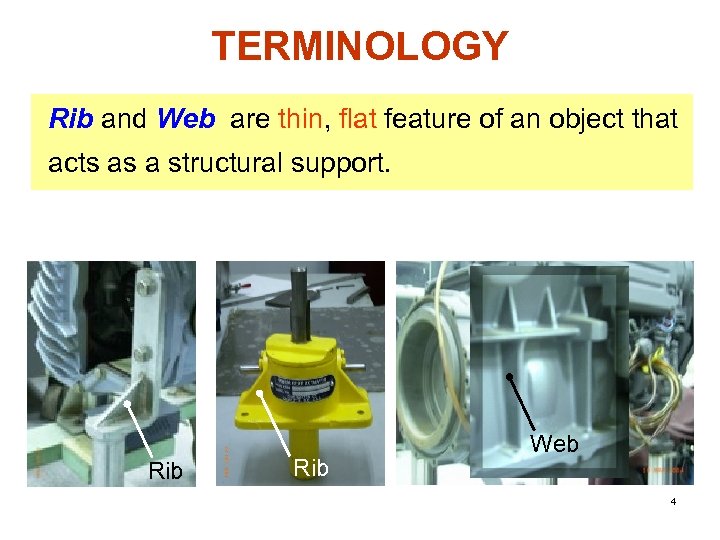 TERMINOLOGY Rib and Web are thin, flat feature of an object that acts as a structural support. Rib Web 4
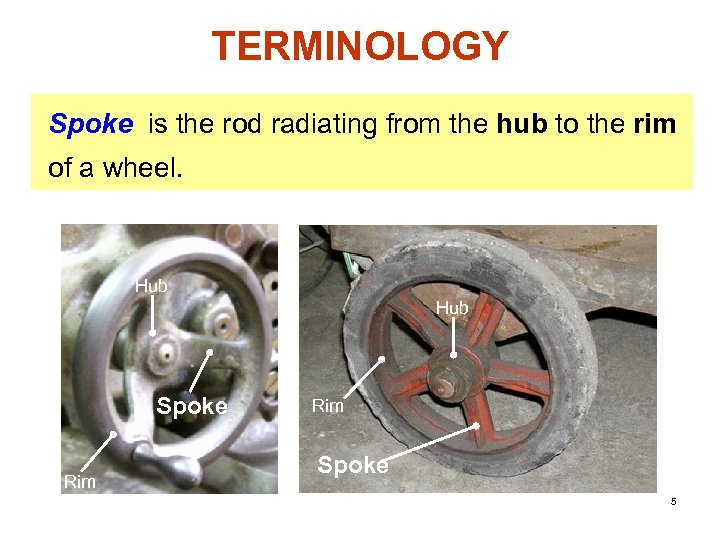 TERMINOLOGY Spoke is the rod radiating from the hub to the rim of a wheel. Hub Spoke Rim Spoke 5
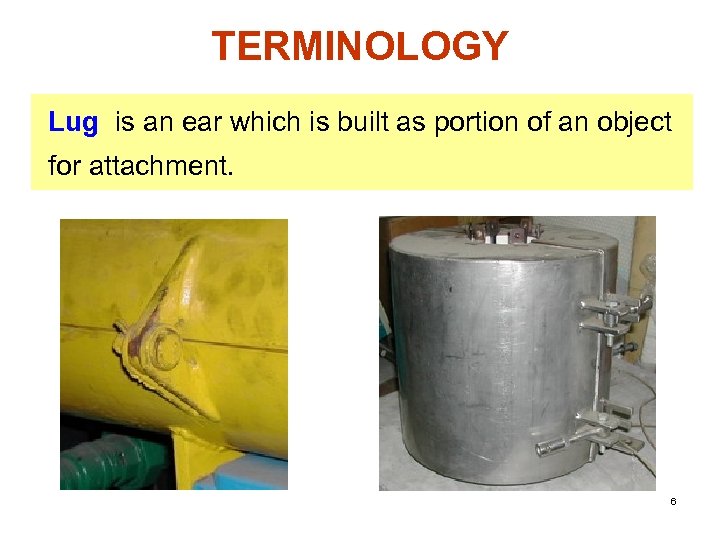 TERMINOLOGY Lug is an ear which is built as portion of an object for attachment. 6
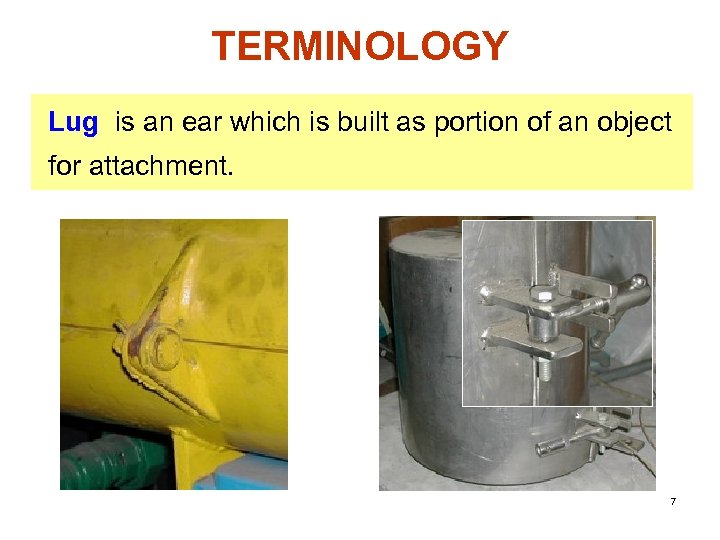 TERMINOLOGY Lug is an ear which is built as portion of an object for attachment. 7
 CONVENTIONAL PRACTICE Omit the section lines on the section view of v Rib, Web and Lug, if the cutting plane is passed flatwise through. v Spoke, if the cutting plane is passed longwise through. 8
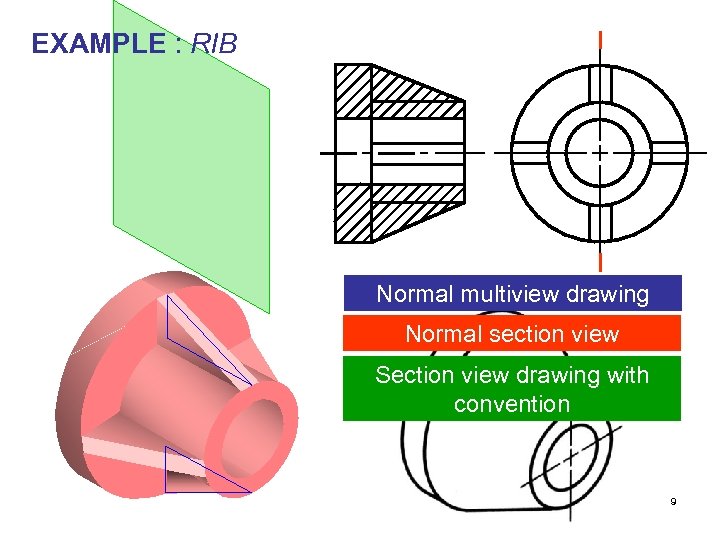 EXAMPLE : RIB Normal multiview drawing Normal section view Section view drawing with convention 9
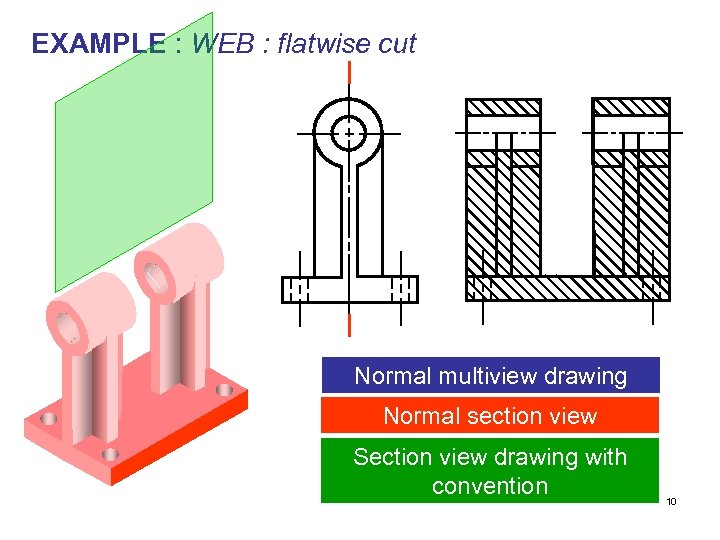 EXAMPLE : WEB : flatwise cut Normal multiview drawing Normal section view Section view drawing with convention 10
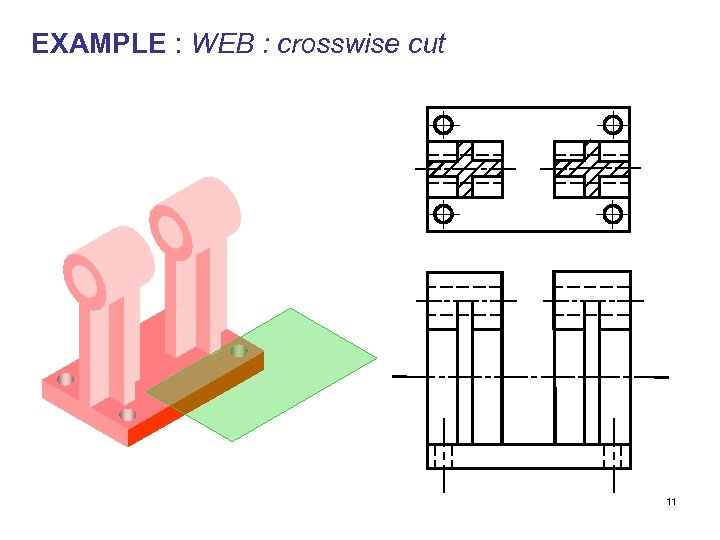 EXAMPLE : WEB : crosswise cut 11
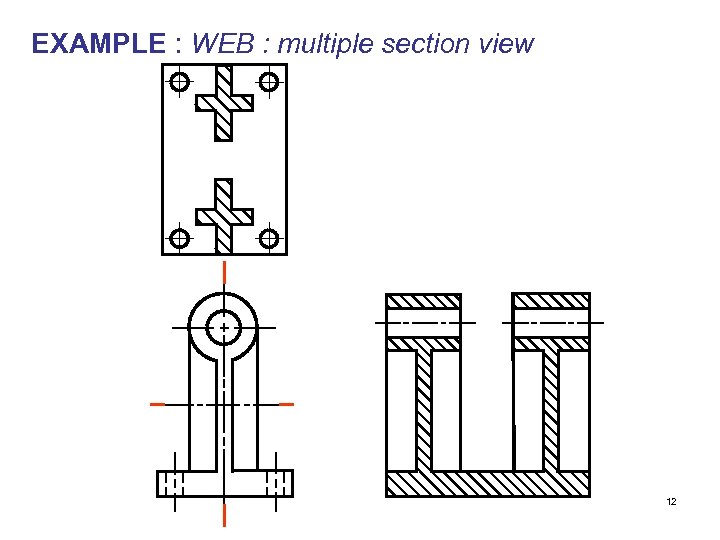 EXAMPLE : WEB : multiple section view 12
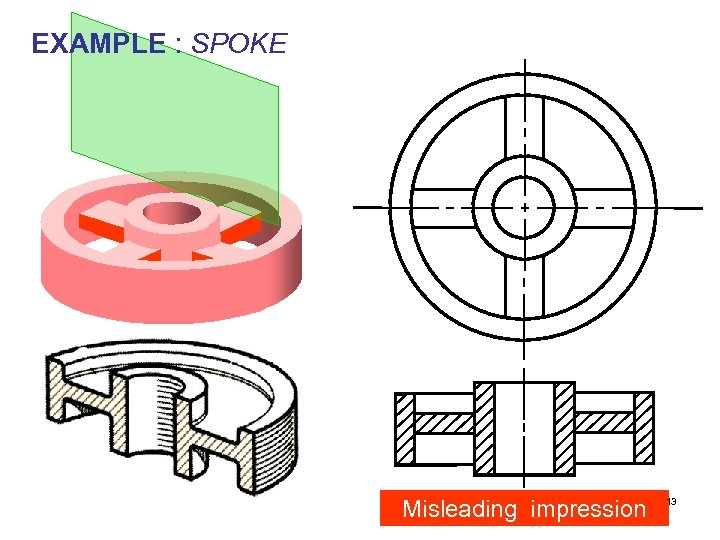 EXAMPLE : SPOKE Misleading impression 13
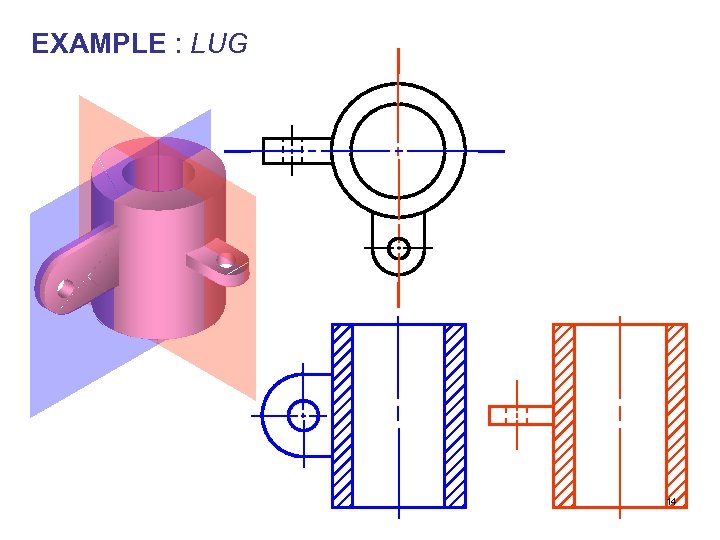 EXAMPLE : LUG 14
 Aligned Section 15
 DEFINITION Aligned section is a section view that is drawn by imaginary rotating the object’s features appeared in a principal view about symmetry axis 16
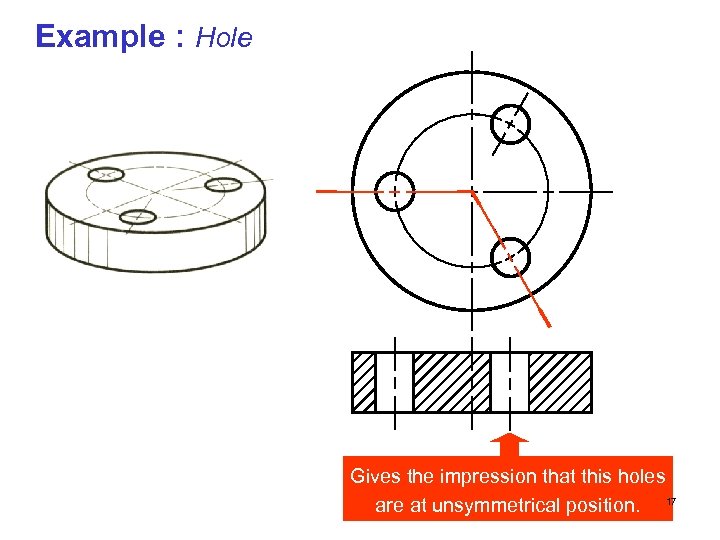 Example : Hole Gives the impression that this holes are at unsymmetrical position. 17
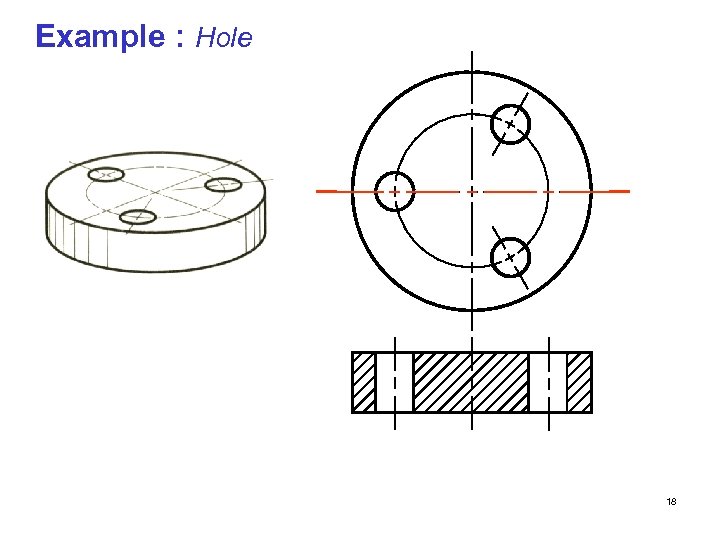 Example : Hole 18
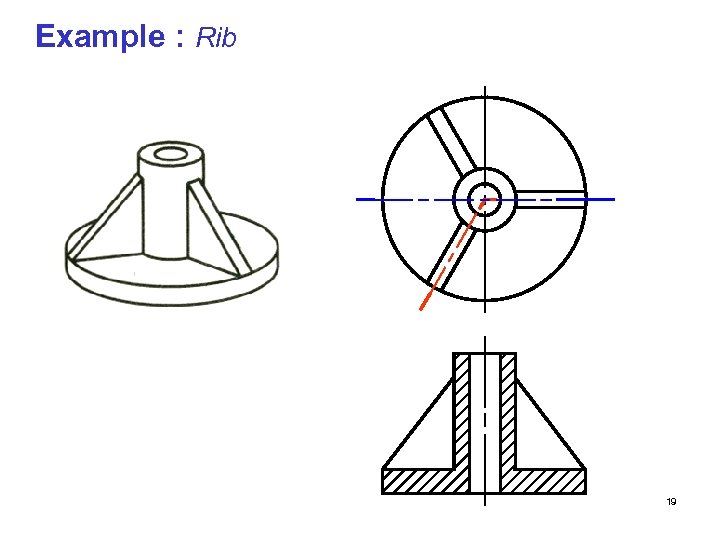 Example : Rib 19
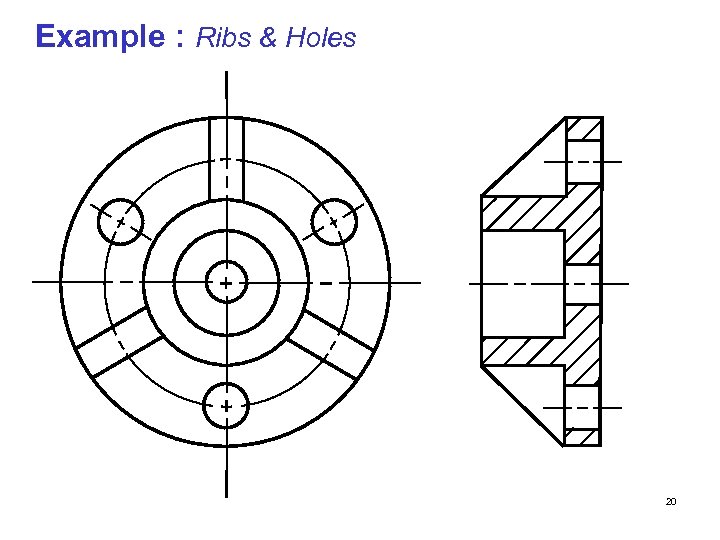 Example : Ribs & Holes 20
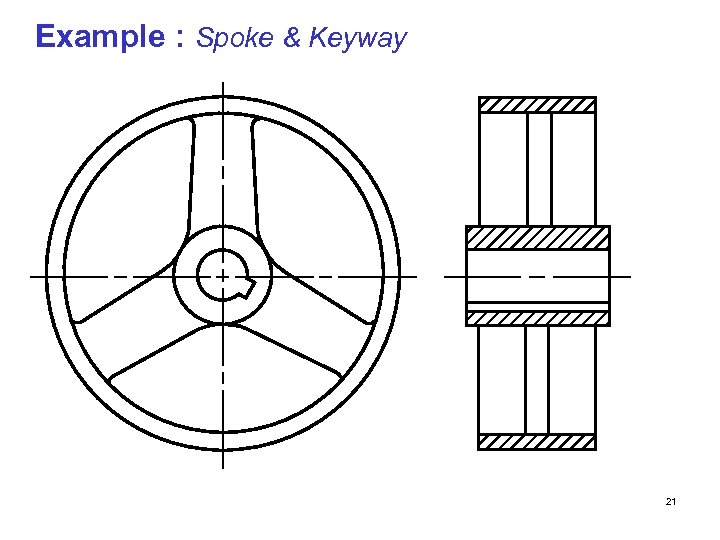 Example : Aligned section& Keyway Example : Spoke of keyway 21
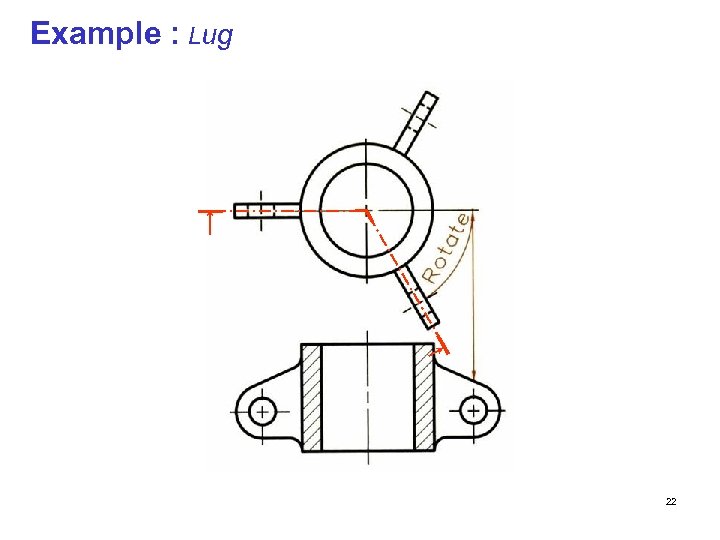 Example : Lug 22
 Conventional Break 23
 CONVENTIONAL PRACTICE For long objects that have to draw in a small scale to fit them on the paper, it is recommended to remove its long portion (which contains no important information) and draw the break lines at the broken ends. 24
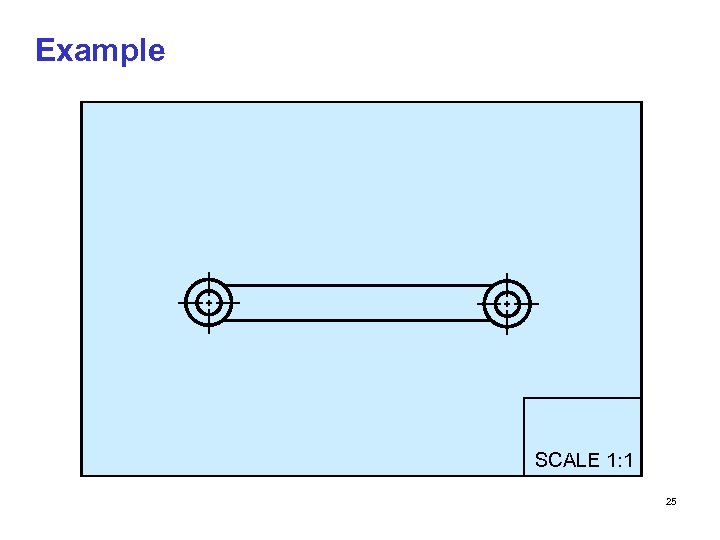 Example SCALE 1: 1 25
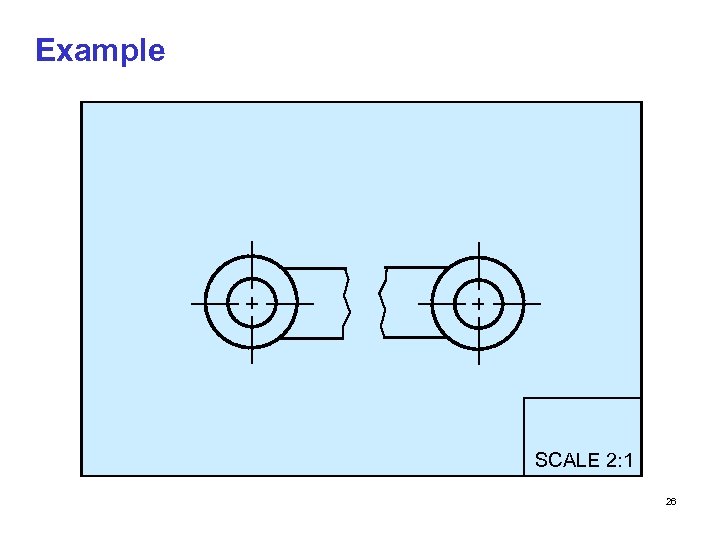 Example SCALE 2: 1 26
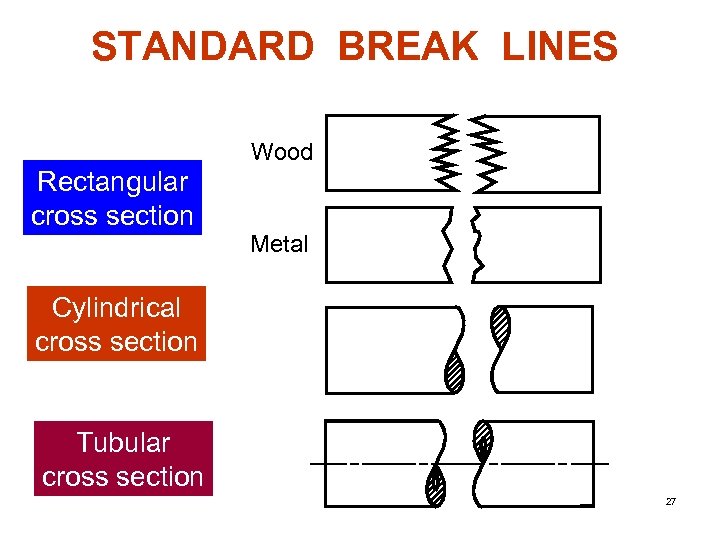 STANDARD BREAK LINES Wood Rectangular cross section Metal Cylindrical cross section Tubular cross section 27
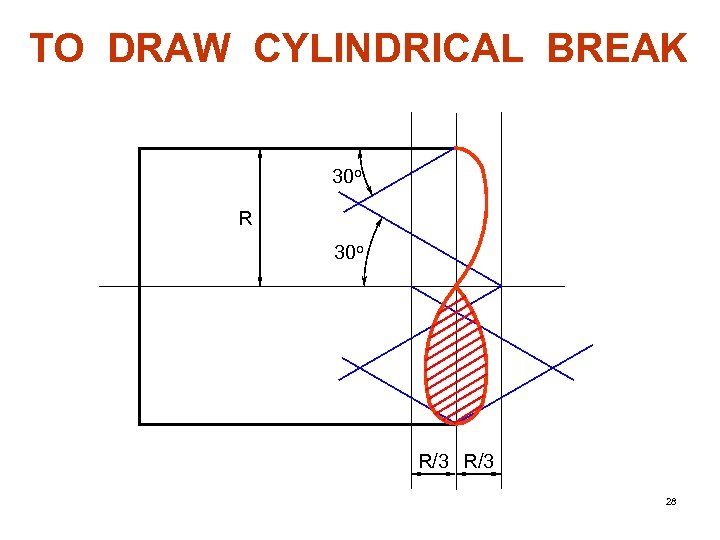 TO DRAW CYLINDRICAL BREAK 30 o R/3 R/3 28
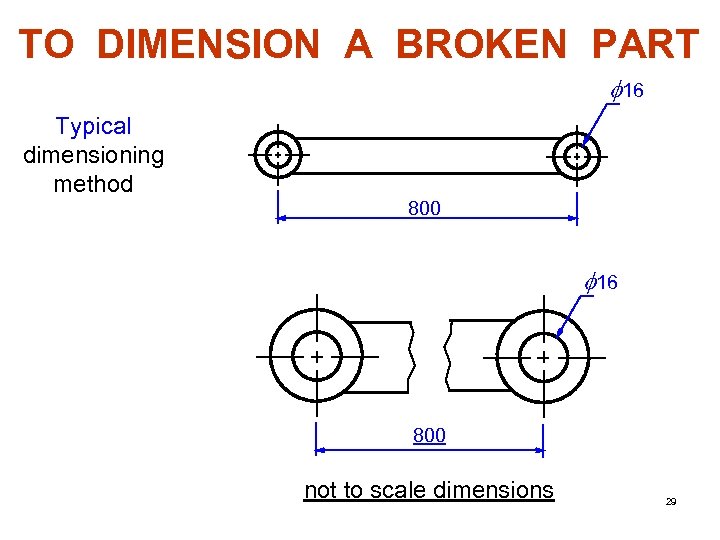 TO DIMENSION A BROKEN PART f 16 Typical dimensioning method 800 f 16 800 not to scale dimensions 29