f7e83b0b4edfaa5a7a5374eb04445e1d.ppt
- Количество слайдов: 49
 Assessment Panel for Precision Engineering Dr. Michael T. Postek Chief, Precision Engineering Division Precision Engineering
 Contents • Agenda • Mission and Organization – MEL – PED • • Resources Developments for PED Operations Accomplishments, Recognition and Awards Division Publications Precision Engineering
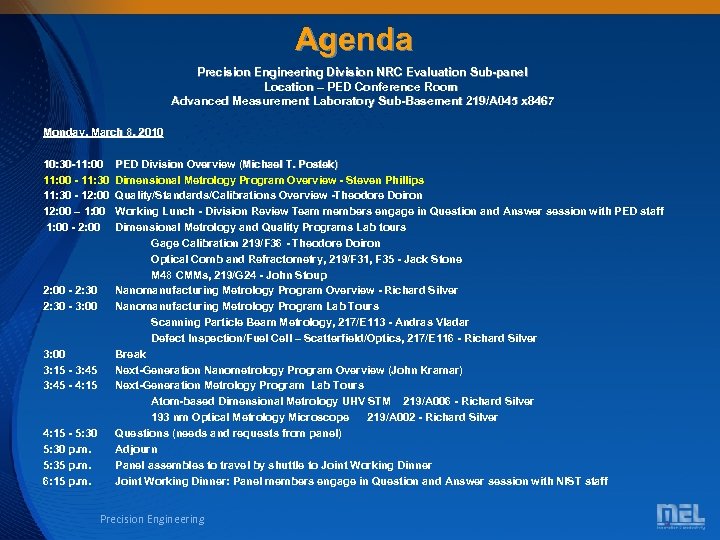
 Agenda Precision Engineering Division NRC Evaluation Sub-panel Location – PED Conference Room Advanced Measurement Laboratory Sub-Basement 219/A 045 x 8467 Monday, March 8, 2010 10: 30 -11: 00 PED Division Overview (Michael T. Postek) 11: 00 - 11: 30 Dimensional Metrology Program Overview - Steven Phillips 11: 30 - 12: 00 Quality/Standards/Calibrations Overview -Theodore Doiron 12: 00 – 1: 00 Working Lunch - Division Review Team members engage in Question and Answer session with PED staff 1: 00 - 2: 00 Dimensional Metrology and Quality Programs Lab tours Gage Calibration 219/F 36 - Theodore Doiron Optical Comb and Refractometry, 219/F 31, F 35 - Jack Stone M 48 CMMs, 219/G 24 - John Stoup 2: 00 - 2: 30 Nanomanufacturing Metrology Program Overview - Richard Silver 2: 30 - 3: 00 Nanomanufacturing Metrology Program Lab Tours Scanning Particle Beam Metrology, 217/E 113 - Andras Vladar Defect Inspection/Fuel Cell – Scatterfield/Optics, 217/E 116 - Richard Silver 3: 00 Break 3: 15 - 3: 45 Next-Generation Nanometrology Program Overview (John Kramar) 3: 45 - 4: 15 Next-Generation Metrology Program Lab Tours Atom-based Dimensional Metrology UHV STM 219/A 006 - Richard Silver 193 nm Optical Metrology Microscope 219/A 002 - Richard Silver 4: 15 - 5: 30 Questions (needs and requests from panel) 5: 30 p. m. Adjourn 5: 35 p. m. Panel assembles to travel by shuttle to Joint Working Dinner 6: 15 p. m. Joint Working Dinner: Panel members engage in Question and Answer session with NIST staff Precision Engineering
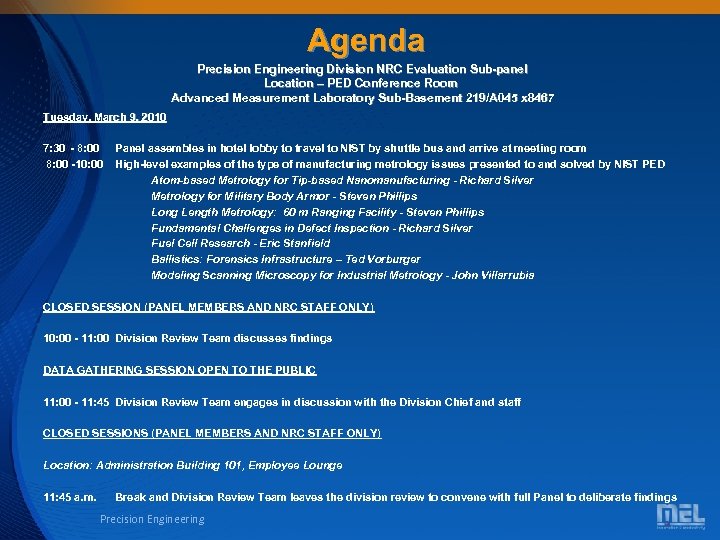 Agenda Precision Engineering Division NRC Evaluation Sub-panel Location – PED Conference Room Advanced Measurement Laboratory Sub-Basement 219/A 045 x 8467 Tuesday, March 9, 2010 7: 30 - 8: 00 Panel assembles in hotel lobby to travel to NIST by shuttle bus and arrive at meeting room 8: 00 -10: 00 High-level examples of the type of manufacturing metrology issues presented to and solved by NIST PED Atom-based Metrology for Tip-based Nanomanufacturing - Richard Silver Metrology for Military Body Armor - Steven Phillips Long Length Metrology: 60 m Ranging Facility - Steven Phillips Fundamental Challenges in Defect Inspection - Richard Silver Fuel Cell Research - Eric Stanfield Ballistics: Forensics Infrastructure – Ted Vorburger Modeling Scanning Microscopy for Industrial Metrology - John Villarrubia CLOSED SESSION (PANEL MEMBERS AND NRC STAFF ONLY) 10: 00 - 11: 00 Division Review Team discusses findings DATA GATHERING SESSION OPEN TO THE PUBLIC 11: 00 - 11: 45 Division Review Team engages in discussion with the Division Chief and staff CLOSED SESSIONS (PANEL MEMBERS AND NRC STAFF ONLY) Location: Administration Building 101, Employee Lounge 11: 45 a. m. Break and Division Review Team leaves the division review to convene with full Panel to deliberate findings Precision Engineering
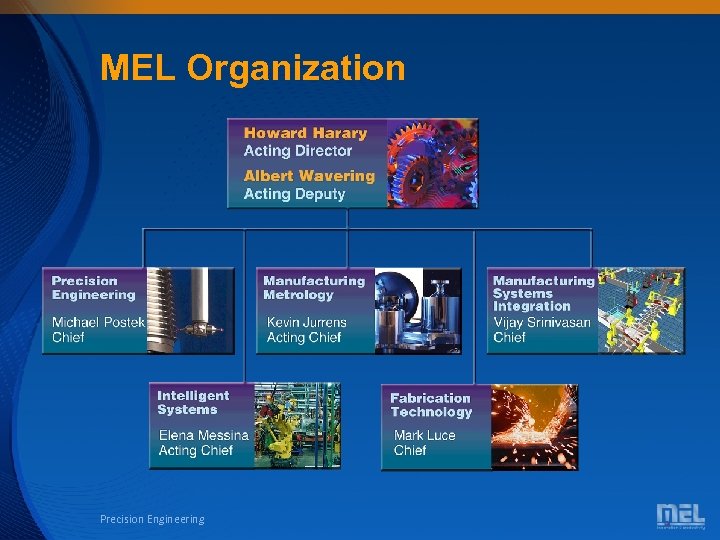 MEL Organization Precision Engineering
 Precision Engineering Division • The mission of the Precision Engineering Division is to provide the foundation of dimensional measurement that meets the needs of the U. S. industrial and scientific communities. • PED attains that goal by: • – – – Conducting research in dimensional measurements; Developing new measurement methods; Providing measurement services; Developing National and International artifact and documentary standards; Disseminating the resulting technology and length-based standards. It is also within the mission of the Precision Engineering Division to provide dimensional metrology assistance to other federal government agencies in order to address problems and needs that leverage NIST expertise, facilities, and capabilities. Precision Engineering
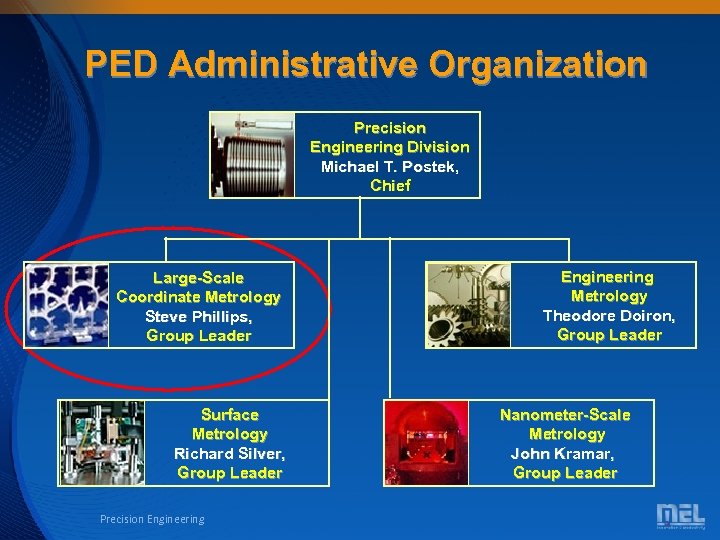 PED Administrative Organization Precision Engineering Division Michael T. Postek, Chief Large-Scale Coordinate Metrology Steve Phillips, Group Leader Surface Metrology Richard Silver, Group Leader Precision Engineering Metrology Theodore Doiron, Group Leader Nanometer-Scale Metrology John Kramar, Group Leader
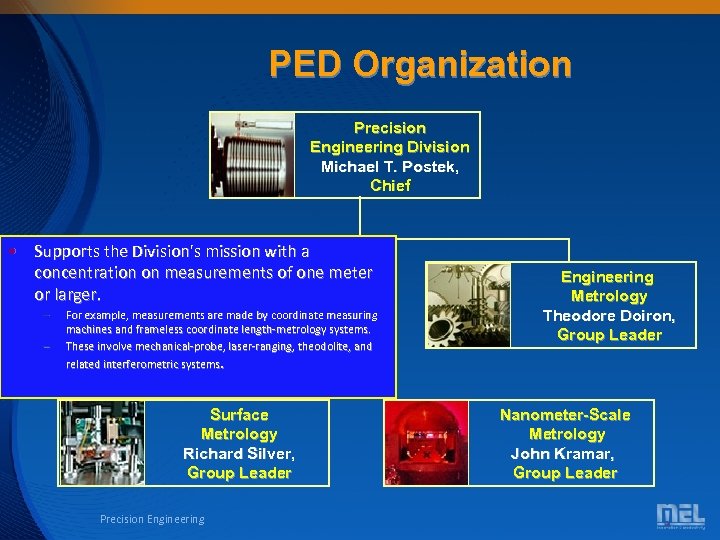 PED Organization Precision Engineering Division Michael T. Postek, Chief • Supports the Division's mission with a concentration on measurements of one meter Large-Scale or larger. Coordinate Metrology – – For example, measurements are made by coordinate measuring Steve Phillips, machines and frameless coordinate length-metrology systems. Group Leader These involve mechanical-probe, laser-ranging, theodolite, and related interferometric systems. Surface Metrology Richard Silver, Group Leader Precision Engineering Metrology Theodore Doiron, Group Leader Nanometer-Scale Metrology John Kramar, Group Leader
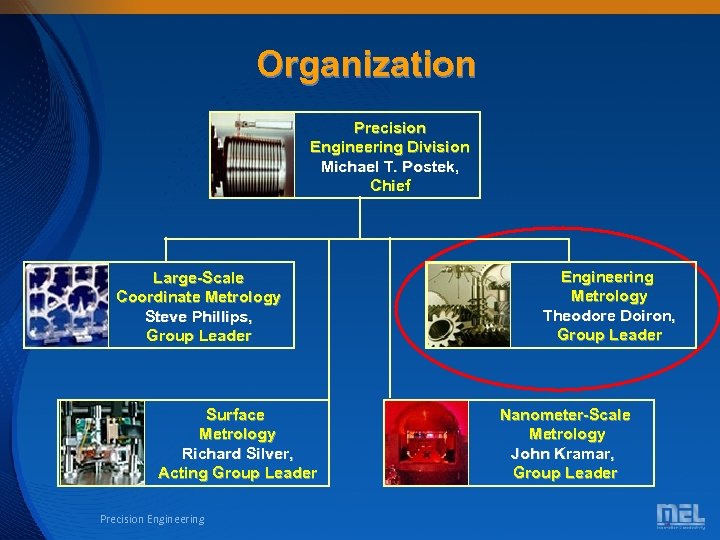 Organization Precision Engineering Division Michael T. Postek, Chief Large-Scale Coordinate Metrology Steve Phillips, Group Leader Surface Metrology Richard Silver, Acting Group Leader Precision Engineering Metrology Theodore Doiron, Group Leader Nanometer-Scale Metrology John Kramar, Group Leader
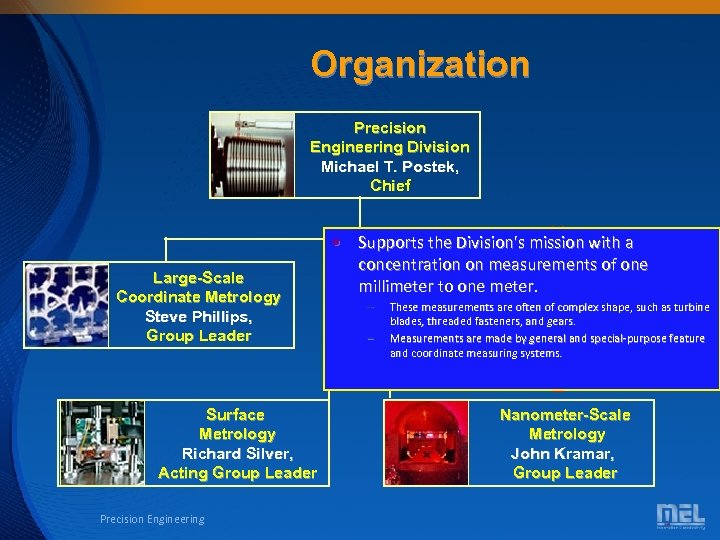 Organization Precision Engineering Division Michael T. Postek, Chief Large-Scale Coordinate Metrology Steve Phillips, Group Leader Surface Metrology Richard Silver, Acting Group Leader Precision Engineering • Supports the Division's mission with a concentration on measurements of one Engineering millimeter to one meter. Metrology – – Metrology These measurements are often of complex shape, such as turbine blades, threaded fasteners, and. Theodore Doiron, gears. Group Leader Measurements are made by general and special-purpose feature and coordinate measuring systems. Nanometer-Scale Metrology John Kramar, Group Leader
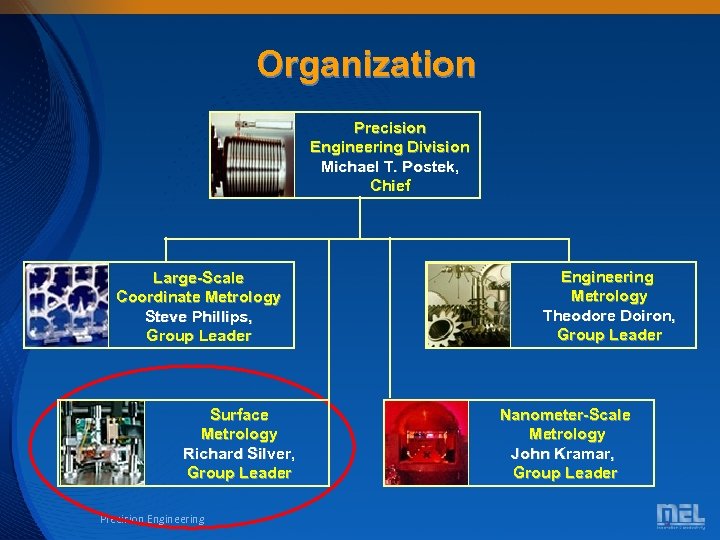 Organization Precision Engineering Division Michael T. Postek, Chief Large-Scale Coordinate Metrology Steve Phillips, Group Leader Surface Metrology Richard Silver, Group Leader Precision Engineering Metrology Theodore Doiron, Group Leader Nanometer-Scale Metrology John Kramar, Group Leader
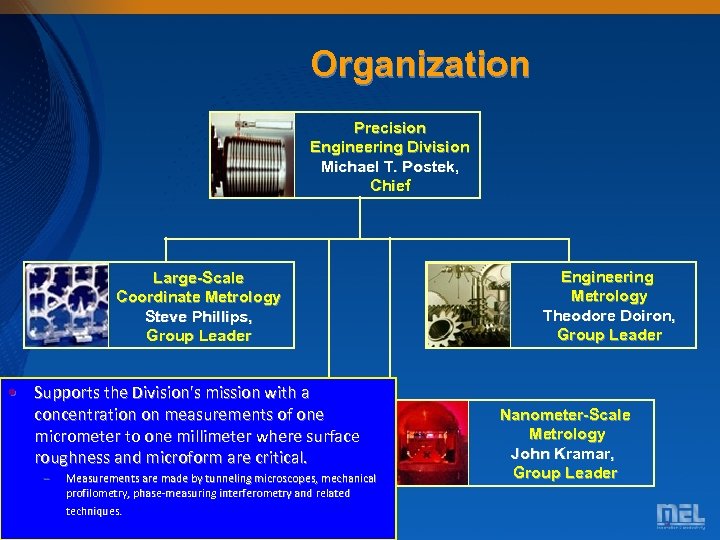 Organization Precision Engineering Division Michael T. Postek, Chief Large-Scale Coordinate Metrology Steve Phillips, Group Leader • Supports the Division's mission with a concentration on measurements of one Surface Metrology micrometer to one millimeter where surface Richard Silver, roughness and microform are critical. – Measurements are. Acting Group Leader mechanical made by tunneling microscopes, profilometry, phase-measuring interferometry and related techniques. Precision Engineering Metrology Theodore Doiron, Group Leader Nanometer-Scale Metrology John Kramar, Group Leader
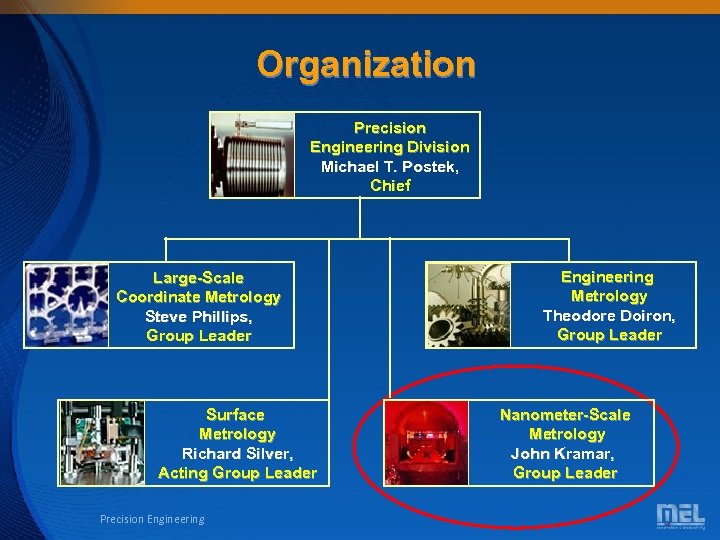 Organization Precision Engineering Division Michael T. Postek, Chief Large-Scale Coordinate Metrology Steve Phillips, Group Leader Surface Metrology Richard Silver, Acting Group Leader Precision Engineering Metrology Theodore Doiron, Group Leader Nanometer-Scale Metrology John Kramar, Group Leader
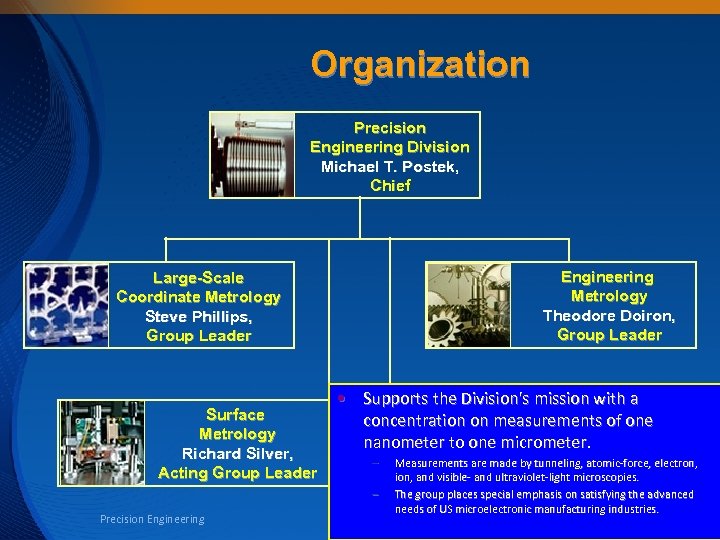 Organization Precision Engineering Division Michael T. Postek, Chief Engineering Metrology Theodore Doiron, Group Leader Large-Scale Coordinate Metrology Steve Phillips, Group Leader Surface Metrology Richard Silver, Acting Group Leader • Supports the Division's mission with a Nanometer-Scale concentration on measurements of one Metrology nanometer to one micrometer. – – Precision Engineering John Kramar, Measurements are made by tunneling, atomic-force, electron, Group Leader ion, and visible- and ultraviolet-light microscopies. The group places special emphasis on satisfying the advanced needs of US microelectronic manufacturing industries.
 Resources Precision Engineering
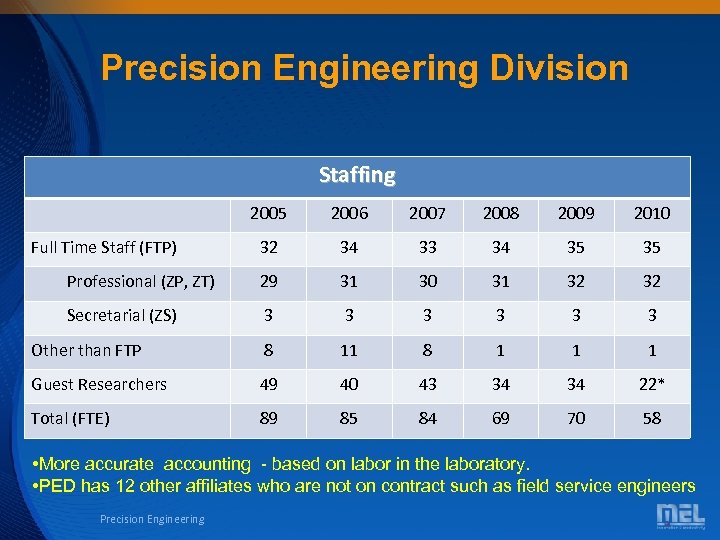 Precision Engineering Division Staffing 2005 2006 2007 2008 2009 2010 32 34 33 34 35 35 Professional (ZP, ZT) 29 31 30 31 32 32 Secretarial (ZS) 3 3 3 Other than FTP 8 11 8 1 1 1 Guest Researchers 49 40 43 34 34 22* Total (FTE) 89 85 84 69 70 58 Full Time Staff (FTP) • More accurate accounting - based on labor in the laboratory. • PED has 12 other affiliates who are not on contract such as field service engineers Precision Engineering
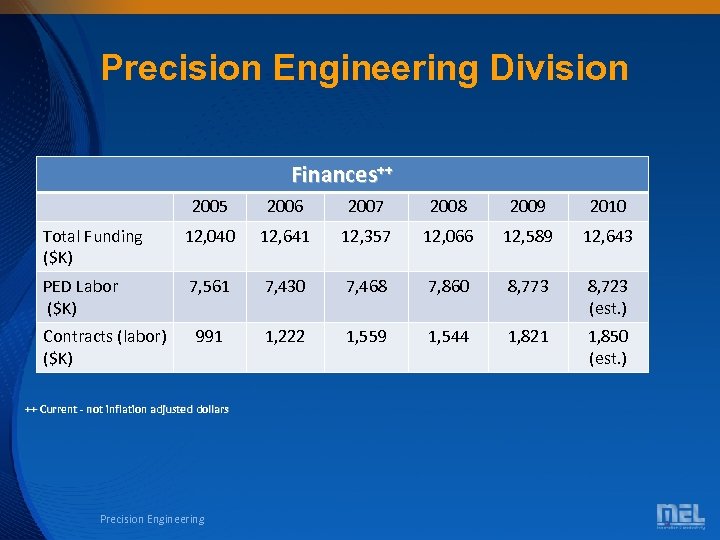 Precision Engineering Division Finances++ 2005 2006 2007 2008 2009 2010 Total Funding ($K) 12, 040 12, 641 12, 357 12, 066 12, 589 12, 643 PED Labor ($K) 7, 561 7, 430 7, 468 7, 860 8, 773 8, 723 (est. ) 991 1, 222 1, 559 1, 544 1, 821 1, 850 (est. ) Contracts (labor) ($K) ++ Current - not inflation adjusted dollars Precision Engineering
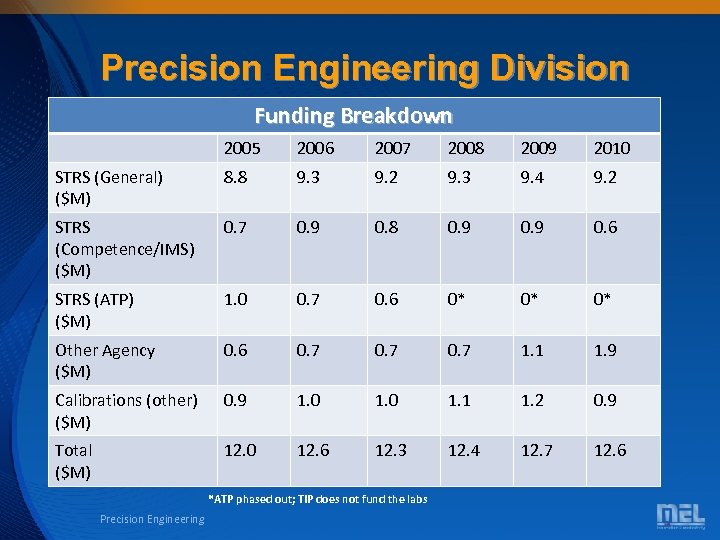 Precision Engineering Division Funding Breakdown 2005 2006 2007 2008 2009 2010 STRS (General) ($M) 8. 8 9. 3 9. 2 9. 3 9. 4 9. 2 STRS (Competence/IMS) ($M) 0. 7 0. 9 0. 8 0. 9 0. 6 STRS (ATP) ($M) 1. 0 0. 7 0. 6 0* 0* 0* Other Agency ($M) 0. 6 0. 7 1. 1 1. 9 Calibrations (other) ($M) 0. 9 1. 0 1. 1 1. 2 0. 9 Total ($M) 12. 0 12. 6 12. 3 12. 4 12. 7 12. 6 *ATP phased out; TIP does not fund the labs Precision Engineering
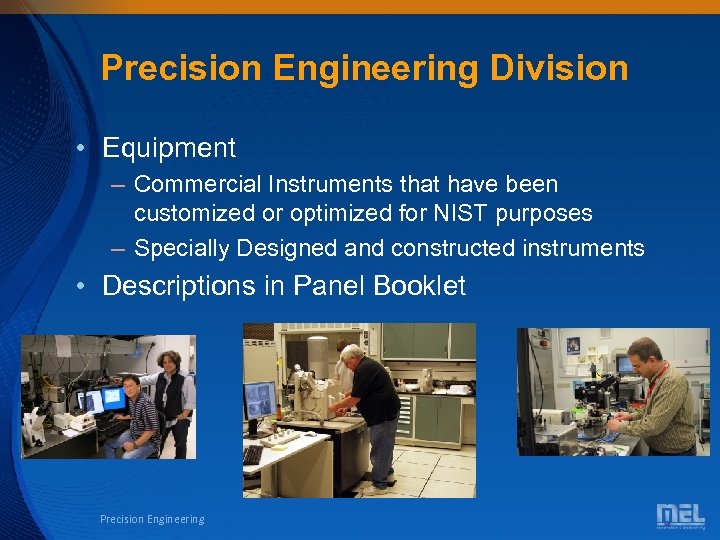 Precision Engineering Division • Equipment – Commercial Instruments that have been customized or optimized for NIST purposes – Specially Designed and constructed instruments • Descriptions in Panel Booklet Precision Engineering
 PED Technical Programs • The Precision Engineering Division has developed three programs to best utilize the talents of its personnel and thus meet its mission with maximum effectiveness. • These three programs are: – – – Dimensional Metrology Nanomanufacturing Metrology Next-Generation Nanometrology • Programs can be composed of cross-group or cross- laboratory projects • Programs discussed by the Program Managers Precision Engineering
 PED Technical Programs • The work undertaken within the PED programs is highly influenced by industrial drivers that reflect important trends in manufacturing, especially: – Increased Pace of Technological Change. • Rapid innovation in many emerging areas, especially nanotechnology • Need for improved measurement accuracy and precision • Requirement for new and more complex measurements – Continual push for higher quality – Globalization • “Flat-world” supply chains* require measurement traceability to the SI • Greater regulatory requirements • Harmonization of international standards that reflect and support U. S. needs * “The World is Flat” by Thomas L. Friedman. columnist at The New York Times Precision Engineering
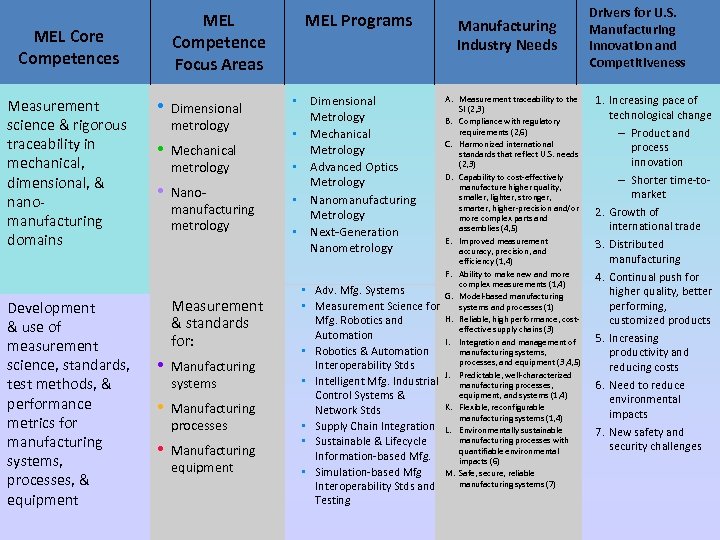 MEL Competence Focus Areas MEL Core Competences Measurement science & rigorous traceability in mechanical, dimensional, & nanomanufacturing domains • Dimensional metrology • • Mechanical metrology Nanomanufacturing metrology MEL Programs • Dimensional Metrology • Mechanical Metrology • Advanced Optics Metrology • Nanomanufacturing Metrology • Next-Generation Nanometrology Manufacturing Industry Needs A. Measurement traceability to the B. C. D. E. F. Development & use of measurement science, standards, test methods, & performance metrics for manufacturing systems, processes, & equipment Measurement & standards for: • Manufacturing systems • Manufacturing processes • Manufacturing equipment Precision Engineering • Adv. Mfg. Systems • Measurement Science for Mfg. Robotics and Automation • Robotics & Automation Interoperability Stds • Intelligent Mfg. Industrial Control Systems & Network Stds • Supply Chain Integration • Sustainable & Lifecycle Information-based Mfg. • Simulation-based Mfg Interoperability Stds and Testing G. H. I. J. K. L. M. SI (2, 3) Compliance with regulatory requirements (2, 6) Harmonized international standards that reflect U. S. needs (2, 3) Capability to cost-effectively manufacture higher quality, smaller, lighter, stronger, smarter, higher-precision and/or more complex parts and assemblies (4, 5) Improved measurement accuracy, precision, and efficiency (1, 4) Ability to make new and more complex measurements (1, 4) Model-based manufacturing systems and processes (1) Reliable, high performance, costeffective supply chains (3) Integration and management of manufacturing systems, processes, and equipment (3, 4, 5) Predictable, well-characterized manufacturing processes, equipment, and systems (1, 4) Flexible, reconfigurable manufacturing systems (1, 4) Environmentally sustainable manufacturing processes with quantifiable environmental impacts (6) Safe, secure, reliable manufacturing systems (7) Drivers for U. S. Manufacturing Innovation and Competitiveness 1. Increasing pace of technological change – Product and process innovation – Shorter time-tomarket 2. Growth of international trade 3. Distributed manufacturing 4. Continual push for higher quality, better performing, customized products 5. Increasing productivity and reducing costs 6. Need to reduce environmental impacts 7. New safety and security challenges
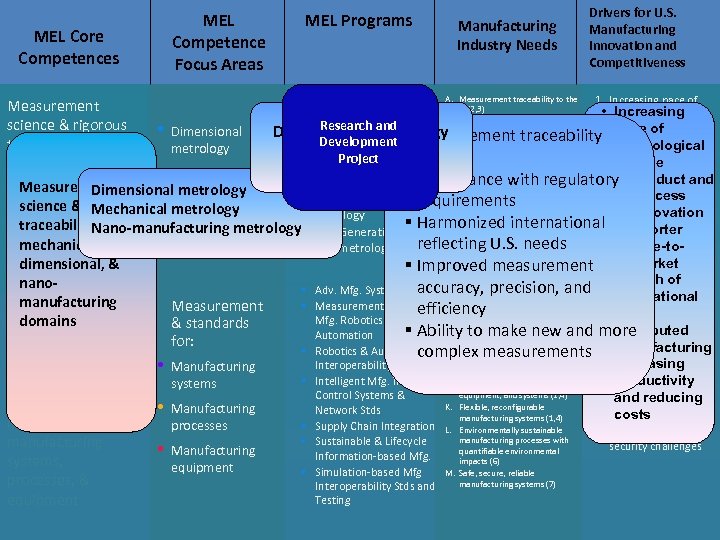 MEL Core Competences MEL Competence Focus Areas MEL Programs Manufacturing Industry Needs Drivers for U. S. Manufacturing Innovation and Competitiveness 1. Increasing pace of • Dimensional Measurement SI (2, 3) • technological change Increasing Metrology B. Compliance with regulatory National and Research and science & rigorous (2, 6) • Dimensional Metrology. C. requirementsinternational – Product Measurement §Measurement traceability pace of and • Mechanical International Development Harmonized traceability in technological process metrology Metrology Services Project Standards Project to the standards that reflect U. S. needs SI Project innovation change (2, 3) mechanical, Program • Advanced Optics • Mechanical D. Capability to cost-effectively Product and § Compliance with regulatory– • Shorter time-to. Metrology dimensional, Dimensionalmetrology & manufacture higher quality, Measurement metrology market smaller, lighter, process • Nanomanufacturing requirements stronger, nanosmarter, higher-precision and/or science & rigorous Mechanical metrology 2. Growth of innovation Metrology • Nanomore complex parts and manufacturing traceability. Nano-manufacturing metrology Next-Generation § Harmonized international trade in assemblies (4, 5) • Shorter • manufacturing E. Improved measurement domains 3. Distributed reflecting U. S. needs mechanical, time-to. Nanometrology accuracy, precision, and manufacturing efficiency (1, 4) market dimensional, & § Improvedtomeasurement F. Ability make new and more 4. Continual push for • Growth of complex measurements (1, 4) nano • Adv. Mfg. Systems accuracy, precision, and higher quality, better G. Model-based manufacturing international manufacturing systems performing, • Measurement Science for Measurement Development efficiency and processes (1) costtrade H. Reliable, high performance, customized products Mfg. Robotics and & standards & domains use of effective supply chains (3) Distributed § Ability to make new and 5. • Increasing more Automation I. Integration and management of for: measurement manufacturing • Robotics & Automation manufacturing systems, complex measurements productivity and processes, and equipment (3, 4, 5) • reducing costs Increasing Interoperability Stds science, standards, • Manufacturing J. Predictable, well-characterized • Intelligent Mfg. Industrial productivity systems manufacturing processes, 6. Need to reduce test methods, & equipment, and systems (1, 4) Control Systems & and reducing environmental performance K. Flexible, reconfigurable • Manufacturing Network Stds impacts costs manufacturing systems (1, 4) metrics for • Supply Chain Integration L. Environmentally sustainable processes 7. New safety and manufacturing processes with • Sustainable & Lifecycle manufacturing security challenges quantifiable environmental • Manufacturing Information-based Mfg. impacts (6) systems, equipment • Simulation-based Mfg M. Safe, secure, reliable processes, & manufacturing systems (7) Interoperability Stds and Testing equipment A. Measurement traceability to the Precision Engineering
 MEL Core Competences MEL Competence Focus Areas MEL Programs Manufacturing Industry Needs Drivers for U. S. Manufacturing Innovation and Competitiveness 1. Increasing pace of • Dimensional Measurement SI (2, 3) • technological change Increasing Metrology B. Compliance with regulatory Overlay and science & rigorous Nanomanufacturing requirements (2, 6) • Dimensional Linewidth – Product Scale and • Bullets Metrology§Measurement traceability pace of and Mechanical. Casings Registration C. Harmonized international traceability in technological process metrology Metrology Project SI Metrology Project to the standards that reflect U. S. needs innovation change mechanical, • Advanced Program (2, 3) Metrology. Optics • Mechanical D. Capability to cost-effectively Product and § Compliance with regulatory– • Shorter time-to. Metrology dimensional, Dimensionalmetrology & manufacture higher quality, Measurement metrology market smaller, lighter, process • Nanomanufacturing requirements stronger, nanosmarter, higher-precision and/or science & rigorous Mechanical metrology 2. Growth of innovation Metrology • Nanomore complex parts and manufacturing traceability. Nano-manufacturing metrology Next-Generation § Harmonized international trade in assemblies (4, 5) • Shorter • manufacturing E. Improved measurement domains 3. Distributed reflecting U. S. needs mechanical, time-to. Nanometrology accuracy, precision, and manufacturing efficiency (1, 4) market dimensional, & § Improvedtomeasurement F. Ability make new and more 4. Continual push for • Growth of complex measurements (1, 4) nano • Adv. Mfg. Systems accuracy, precision, and higher quality, better G. Model-based manufacturing international manufacturing systems performing, • Measurement Science for Measurement Development efficiency and processes (1) costtrade H. Reliable, high performance, customized products Mfg. Robotics and & standards & domains use of effective supply chains (3) Distributed § Ability to make new and 5. • Increasing more Automation I. Integration and management of for: measurement manufacturing • Robotics & Automation manufacturing systems, complex measurements productivity and processes, and equipment (3, 4, 5) • reducing costs Increasing Interoperability Stds science, standards, • Manufacturing J. Predictable, well-characterized • Intelligent Mfg. Industrial productivity systems manufacturing processes, 6. Need to reduce test methods, & equipment, and systems (1, 4) Control Systems & and reducing environmental performance K. Flexible, reconfigurable • Manufacturing Network Stds impacts costs manufacturing systems (1, 4) metrics for • Supply Chain Integration L. Environmentally sustainable processes 7. New safety and manufacturing processes with • Sustainable & Lifecycle manufacturing security challenges quantifiable environmental • Manufacturing Information-based Mfg. impacts (6) systems, equipment • Simulation-based Mfg M. Safe, secure, reliable processes, & manufacturing systems (7) Interoperability Stds and Testing equipment A. Measurement traceability to the Precision Engineering
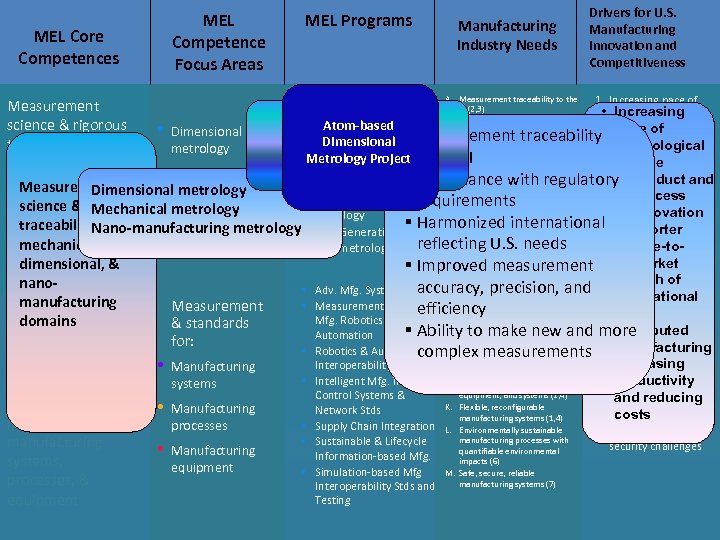 MEL Core Competences MEL Competence Focus Areas MEL Programs Manufacturing Industry Needs Drivers for U. S. Manufacturing Innovation and Competitiveness 1. Increasing pace of • Dimensional Measurement SI (2, 3) • technological change Increasing Metrology Next-Generation B. Compliance with regulatory Nanoparticle and Atom-based science & rigorous requirements (2, 6) • Dimensional – Product Advanced Optics • Advanced Particle Measurement traceability pace of and Mechanical Dimensional § Materials C. Harmonized international traceability in technological process Nanometrology Beam Metrology Project SI Metrology Project to the standards that reflect U. S. needs Metrology Project innovation change (2, 3) mechanical, Project • Advanced Optics Program § Compliance with regulatory– • Shorter time-to • Mechanical D. Capability to cost-effectively Product and Metrology dimensional, Dimensionalmetrology & manufacture higher quality, Measurement metrology market smaller, lighter, process • Nanomanufacturing requirements stronger, nanosmarter, higher-precision and/or science & rigorous Mechanical metrology 2. Growth of innovation Metrology • Nanomore complex parts and manufacturing traceability. Nano-manufacturing metrology Next-Generation § Harmonized international trade in assemblies (4, 5) • Shorter • manufacturing E. Improved measurement domains 3. Distributed reflecting U. S. needs mechanical, time-to. Nanometrology accuracy, precision, and manufacturing efficiency (1, 4) market dimensional, & § Improvedtomeasurement F. Ability make new and more 4. Continual push for • Growth of complex measurements (1, 4) nano • Adv. Mfg. Systems accuracy, precision, and higher quality, better G. Model-based manufacturing international manufacturing systems performing, • Measurement Science for Measurement Development efficiency and processes (1) costtrade H. Reliable, high performance, customized products Mfg. Robotics and & standards & domains use of effective supply chains (3) Distributed § Ability to make new and 5. • Increasing more Automation I. Integration and management of for: measurement manufacturing • Robotics & Automation manufacturing systems, complex measurements productivity and processes, and equipment (3, 4, 5) • reducing costs Increasing Interoperability Stds science, standards, • Manufacturing J. Predictable, well-characterized • Intelligent Mfg. Industrial productivity systems manufacturing processes, 6. Need to reduce test methods, & equipment, and systems (1, 4) Control Systems & and reducing environmental performance K. Flexible, reconfigurable • Manufacturing Network Stds impacts costs manufacturing systems (1, 4) metrics for • Supply Chain Integration L. Environmentally sustainable processes 7. New safety and manufacturing processes with • Sustainable & Lifecycle manufacturing security challenges quantifiable environmental • Manufacturing Information-based Mfg. impacts (6) systems, equipment • Simulation-based Mfg M. Safe, secure, reliable processes, & manufacturing systems (7) Interoperability Stds and Testing equipment A. Measurement traceability to the Precision Engineering
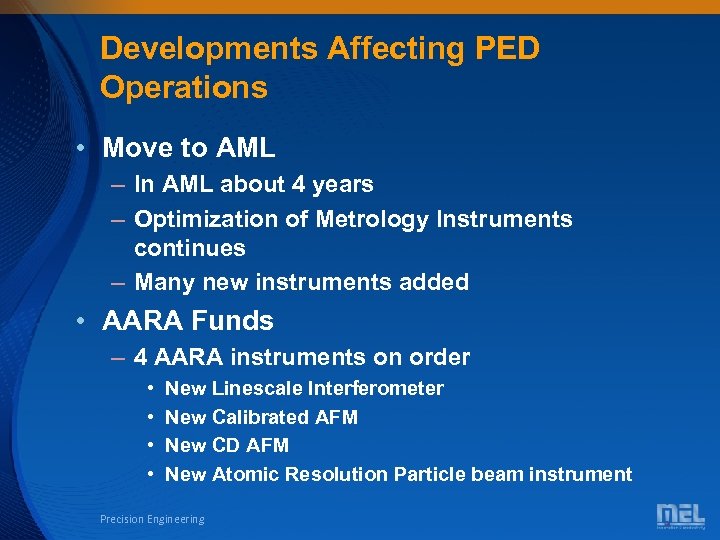 Developments Affecting PED Operations • Move to AML – In AML about 4 years – Optimization of Metrology Instruments continues – Many new instruments added • AARA Funds – 4 AARA instruments on order • • New Linescale Interferometer New Calibrated AFM New CD AFM New Atomic Resolution Particle beam instrument Precision Engineering
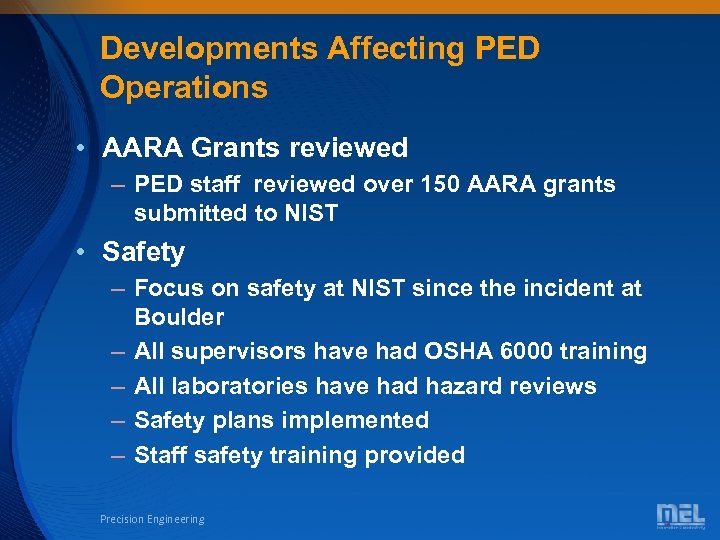 Developments Affecting PED Operations • AARA Grants reviewed – PED staff reviewed over 150 AARA grants submitted to NIST • Safety – Focus on safety at NIST since the incident at Boulder – All supervisors have had OSHA 6000 training – All laboratories have had hazard reviews – Safety plans implemented – Staff safety training provided Precision Engineering
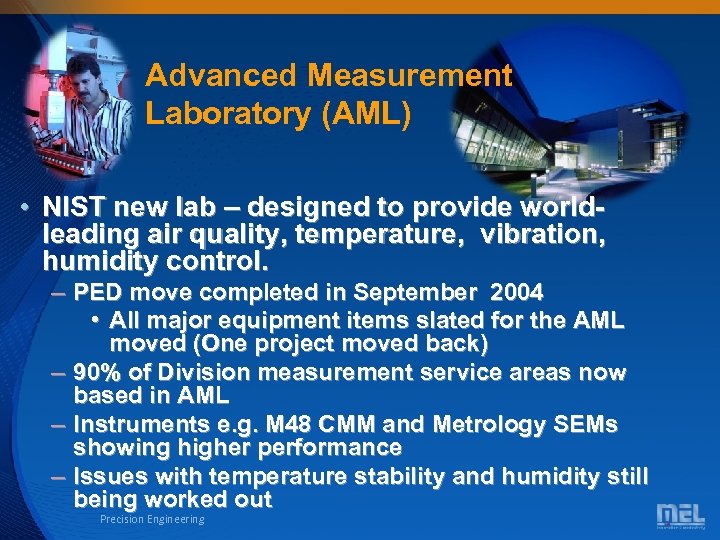 Advanced Measurement Laboratory (AML) • NIST new lab – designed to provide worldleading air quality, temperature, vibration, humidity control. – PED move completed in September 2004 • All major equipment items slated for the AML moved (One project moved back) – 90% of Division measurement service areas now based in AML – Instruments e. g. M 48 CMM and Metrology SEMs showing higher performance – Issues with temperature stability and humidity still being worked out Precision Engineering
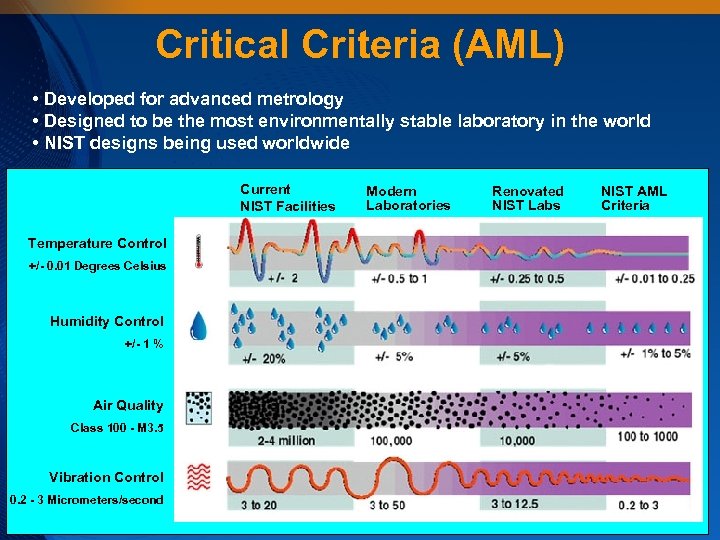 Critical Criteria (AML) • Developed for advanced metrology • Designed to be the most environmentally stable laboratory in the world • NIST designs being used worldwide Current NIST Facilities Temperature Control +/- 0. 01 Degrees Celsius Humidity Control +/- 1 % Air Quality Class 100 - M 3. 5 Vibration Control 0. 2 - 3 Micrometers/second Precision Engineering Modern Laboratories Renovated NIST Labs NIST AML Criteria
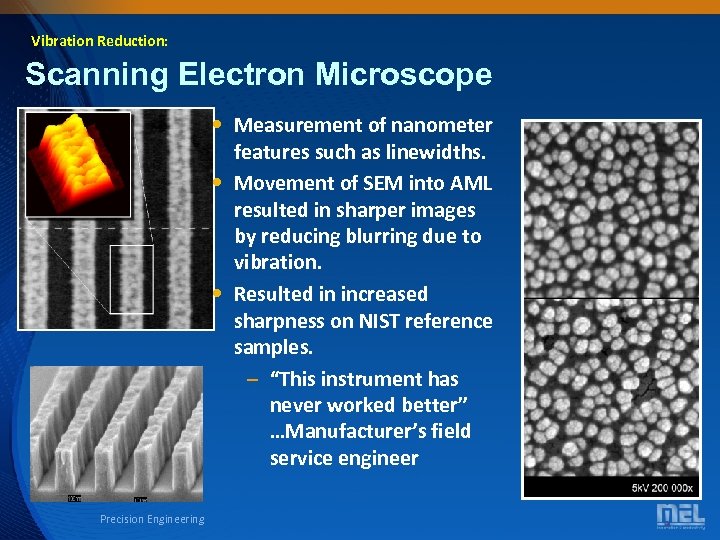 Vibration Reduction: Scanning Electron Microscope • Measurement of nanometer features such as linewidths. • Movement of SEM into AML resulted in sharper images by reducing blurring due to vibration. • Resulted in increased sharpness on NIST reference samples. – “This instrument has never worked better” …Manufacturer’s field service engineer Precision Engineering
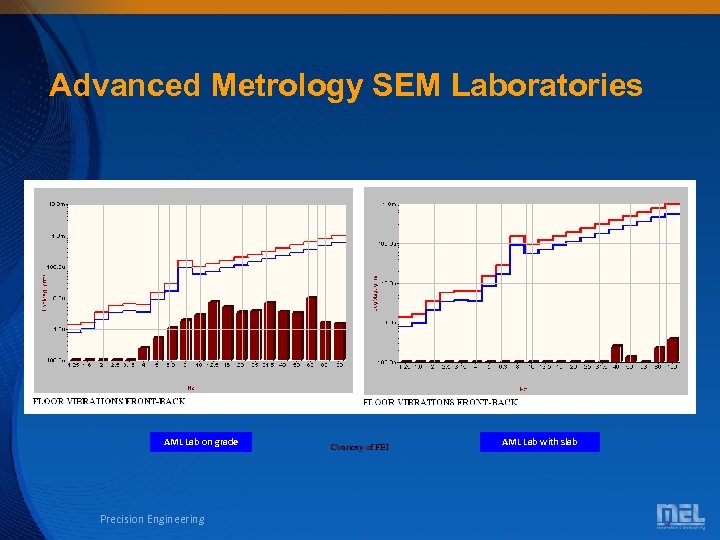 Advanced Metrology SEM Laboratories AML Lab on grade Precision Engineering Courtesy of FEI AML Lab with slab
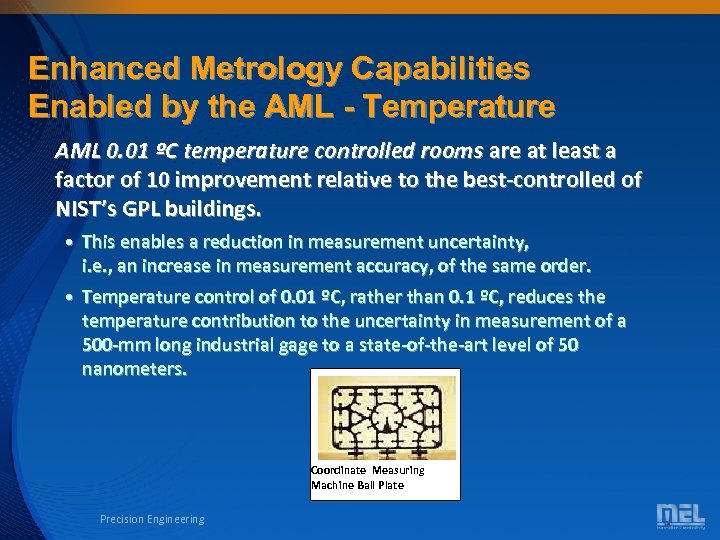 Enhanced Metrology Capabilities Enabled by the AML - Temperature AML 0. 01 ºC temperature controlled rooms are at least a factor of 10 improvement relative to the best-controlled of NIST’s GPL buildings. • This enables a reduction in measurement uncertainty, i. e. , an increase in measurement accuracy, of the same order. • Temperature control of 0. 01 ºC, rather than 0. 1 ºC, reduces the temperature contribution to the uncertainty in measurement of a 500 -mm long industrial gage to a state-of-the-art level of 50 nanometers. Coordinate Measuring Machine Ball Plate Precision Engineering
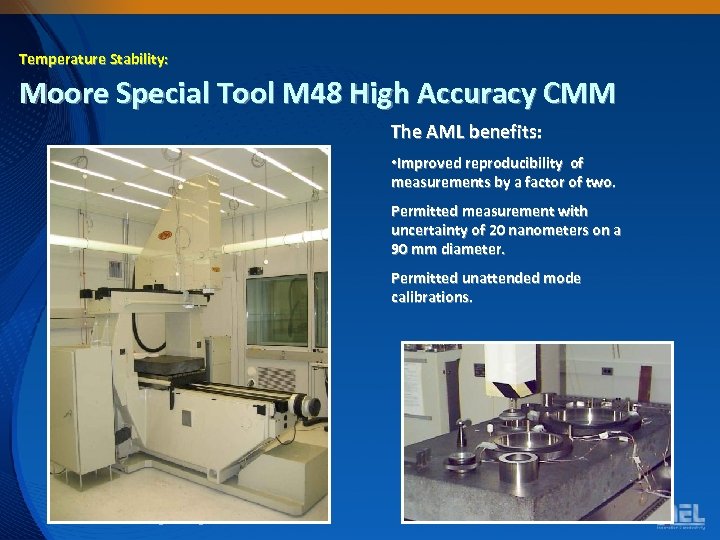 Temperature Stability: Moore Special Tool M 48 High Accuracy CMM The AML benefits: • Improved reproducibility of measurements by a factor of two. Permitted measurement with uncertainty of 20 nanometers on a 90 mm diameter. Permitted unattended mode calibrations. Precision Engineering
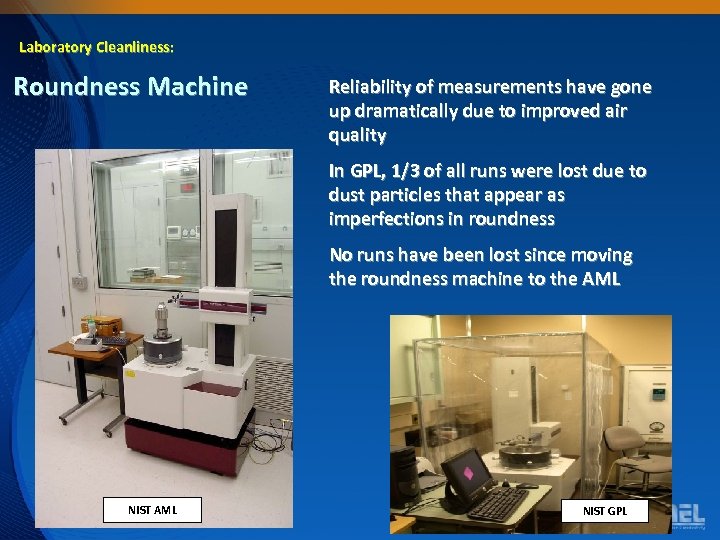 Laboratory Cleanliness: Roundness Machine Reliability of measurements have gone up dramatically due to improved air quality In GPL, 1/3 of all runs were lost due to dust particles that appear as imperfections in roundness No runs have been lost since moving the roundness machine to the AML NIST AML Precision Engineering NIST GPL
 Accomplishments, Recognition and Awards Precision Engineering
 RTI International report: Economic Impact of Measurement in the Semiconductor Industry • NIST plays a leading role in developing SRMs, and most SRMs are either sold directly by NIST or are traceable to NIST standards. • Many instrument and tool providers develop their own inhouse SRMs to calibrate their equipment. These vendorsupplied SRMs are also usually NIST traceable. • SRMs are used by most of the semiconductor supply chain and include the following: – Front-end processing • • • – thin film for transmission electron microscopy, or TEM (NIST SRM 2063 a) – scanning electronic microscopy, or SEM, performance (NIST SRM 2069 b, 8091, and 2800) – optical microscope linewidths (NIST SRM 475 and 476) – implantation standards (NIST SRM 2133– 2137) – ellipsometry (NIST SRM 2531 and 2534) – microscale dimensional measurement (NIST SRM 5001) Precision Engineering
 RTI International report: Economic Impact of Measurement in the Semiconductor Industry • NIST plays a leading role in developing SRMs, and most SRMs are either sold directly by NIST or are traceable to NIST standards. • Many instrument and tool providers develop their own inhouse SRMs to calibrate their equipment. These vendorsupplied SRMs are also usually NIST traceable. • SRMs are used by most of the semiconductor supply chain and include the following: – Front-end processing • • • – thin film for transmission electron microscopy, or TEM (NIST SRM 2063 a) – scanning electronic microscopy, or SEM, performance (NIST SRM 2069 b, 8091, and 2800) – optical microscope linewidths (NIST SRM 475 and 476) – implantation standards (NIST SRM 2133– 2137) – ellipsometry (NIST SRM 2531 and 2534) – microscale dimensional measurement (NIST SRM 5001) Precision Engineering
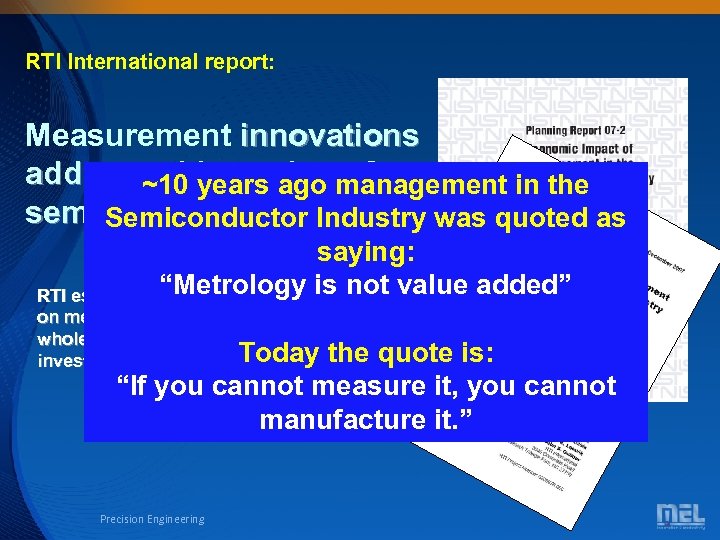 RTI International report: Measurement innovations add up to big savings for ~10 years ago management in the semiconductors Semiconductor Industry was quoted as saying: “Metrology is not value added” RTI estimates that for every $1 spent on measurement, the industry as a whole saw a $3. 30 return on Today the quote is: investment. “If you cannot measure it, you cannot manufacture it. ” Precision Engineering
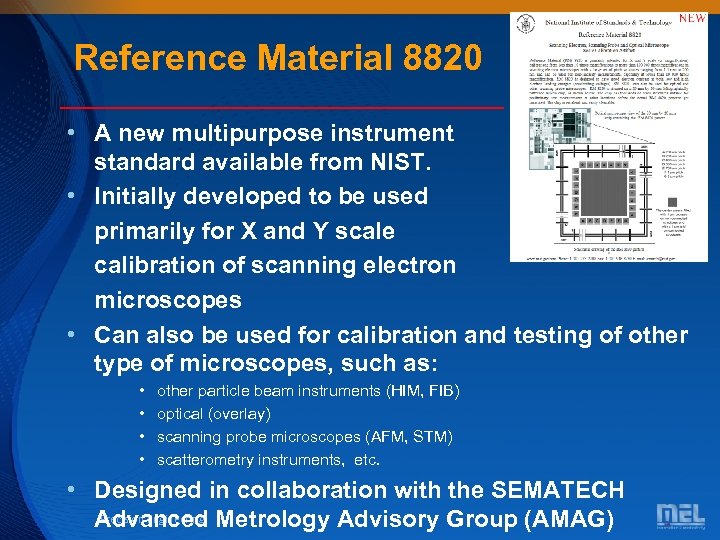 Reference Material 8820 • A new multipurpose instrument calibration standard available from NIST. • Initially developed to be used primarily for X and Y scale calibration of scanning electron microscopes • Can also be used for calibration and testing of other type of microscopes, such as: • • other particle beam instruments (HIM, FIB) optical (overlay) scanning probe microscopes (AFM, STM) scatterometry instruments, etc. • Designed in collaboration with the SEMATECH Precision Engineering Advanced Metrology Advisory Group (AMAG)
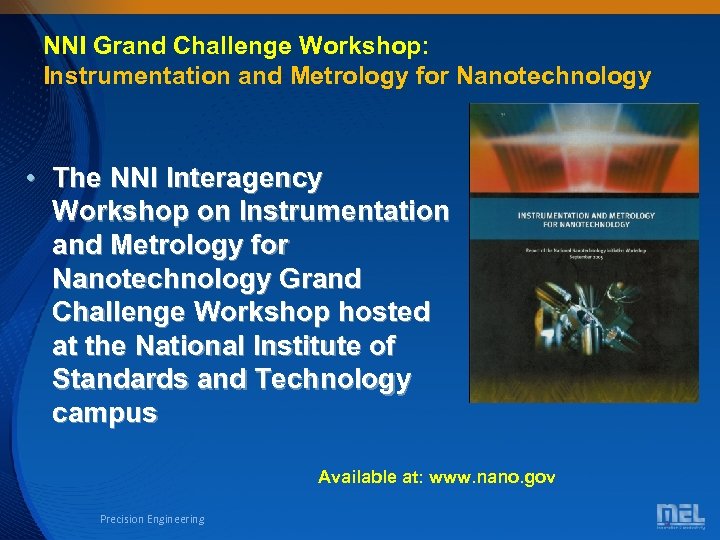 NNI Grand Challenge Workshop: Instrumentation and Metrology for Nanotechnology • The NNI Interagency Workshop on Instrumentation and Metrology for Nanotechnology Grand Challenge Workshop hosted at the National Institute of Standards and Technology campus Available at: www. nano. gov Precision Engineering
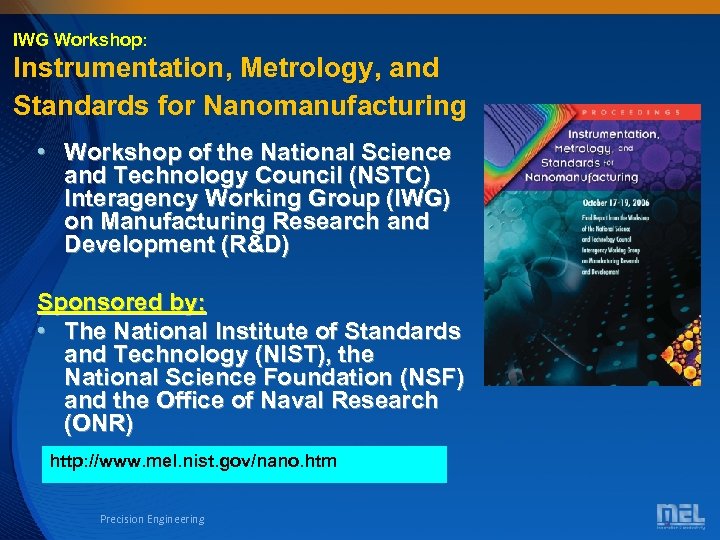 IWG Workshop: Instrumentation, Metrology, and Standards for Nanomanufacturing • Workshop of the National Science and Technology Council (NSTC) Interagency Working Group (IWG) on Manufacturing Research and Development (R&D) Sponsored by: • The National Institute of Standards and Technology (NIST), the National Science Foundation (NSF) and the Office of Naval Research (ONR) http: //www. mel. nist. gov/nano. htm Precision Engineering
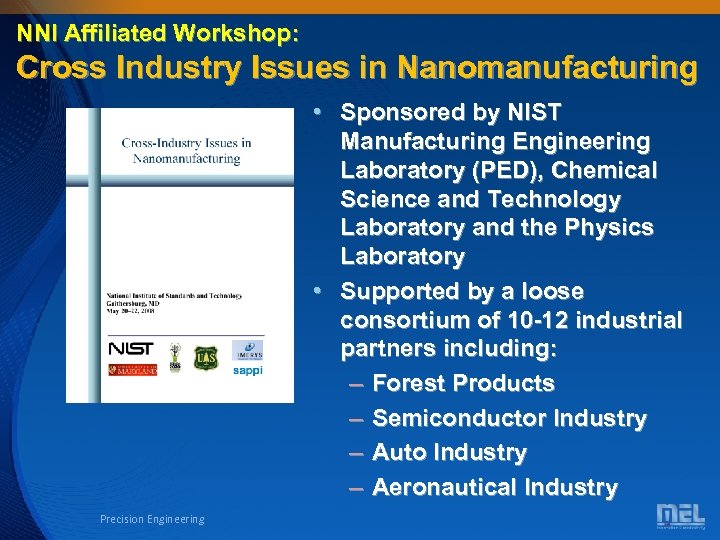 NNI Affiliated Workshop: Cross Industry Issues in Nanomanufacturing • Sponsored by NIST Manufacturing Engineering Laboratory (PED), Chemical Science and Technology Laboratory and the Physics Laboratory • Supported by a loose consortium of 10 -12 industrial partners including: – Forest Products – Semiconductor Industry – Auto Industry – Aeronautical Industry Precision Engineering
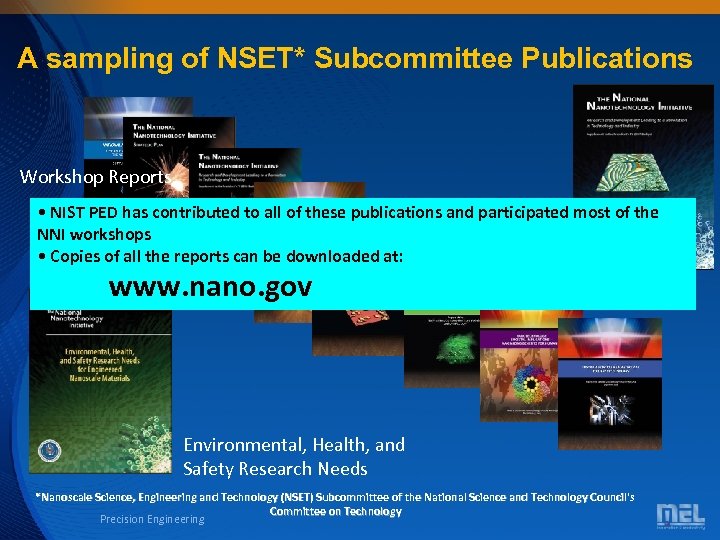 A sampling of NSET* Subcommittee Publications Workshop Reports • NIST PED has contributed to all of these publications and participated most of the Strategic Plan NNI workshops • Copies of all the reports can be downloaded at: www. nano. gov Environmental, Health, and Safety Research Needs *Nanoscale Science, Engineering and Technology (NSET) Subcommittee of the National Science and Technology Council's Committee on Technology Precision Engineering
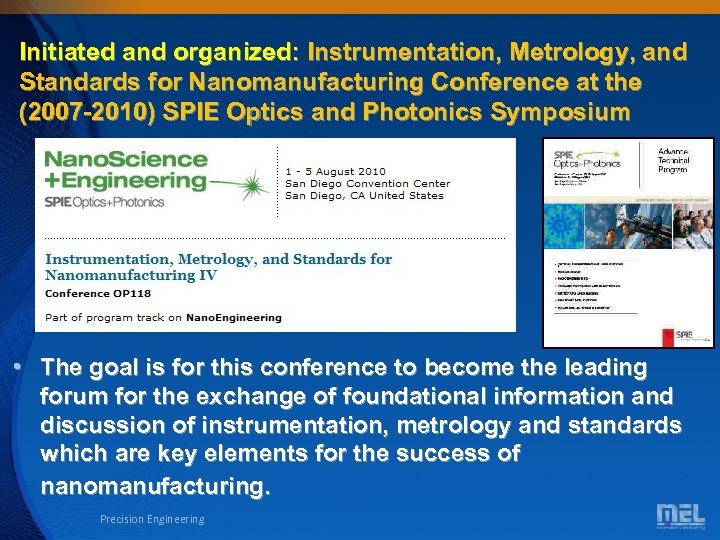 Initiated and organized: Instrumentation, Metrology, and Standards for Nanomanufacturing Conference at the (2007 -2010) SPIE Optics and Photonics Symposium • The goal is for this conference to become the leading forum for the exchange of foundational information and discussion of instrumentation, metrology and standards which are key elements for the success of nanomanufacturing. Precision Engineering
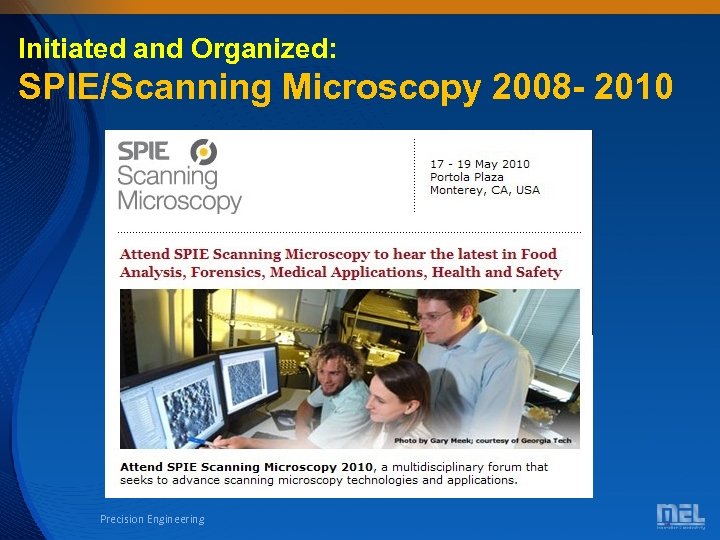 Initiated and Organized: SPIE/Scanning Microscopy 2008 - 2010 Precision Engineering
 Department of Commerce Gold Medal Award Steven D. Phillips and Craig M. Shakarji • For outstanding leadership in national and international standards resulting in the harmonization and advancement of coordinate metrology. • Development of the ISO standard for coordinate measuring machines • Built an international coalition and developed the seminal ISO standard in the field. • Used a novel approach to harmonize the US national standard with the ISO, removing an impediment to US competitiveness. • ISO has chosen the nominees' standardization work as the blueprint for all their emerging standards in coordinate metrology instrumentation, including video system. Precision Engineering
 Other Selected Awards** • Richard Silver, Ravi Attota Nano 50 Award for Scatterfield Optical Microscopy • Jack Stone – DOC Silver Medal for the development of the NIST microfeature CMM probe • Craig Shakarji and Daniel Sawyer – NIST Bronze Medal for the design and fabrication of an operating room computer assisted orthopedic hip surgery artifact • James Potzick – Elected Fellow of SPIE • Chris Blackburn, Bruce Borchardt, Tyler Estler, Steven Phillips and Dan Sawyer -NIST Judson C. French Award, for significant improvements in accuracy and extensions of range in the calibration of long length standards **other awards, achievements and recognitions found in the PED booklet Precision Engineering
 Publications • List in the PED accomplishments book and appended to the read ahead material Precision Engineering
 Agenda Precision Engineering Division NRC Evaluation Sub-panel Location – PED Conference Room Advanced Measurement Laboratory Sub-Basement 219/A 045 x 8467 Monday, March 8, 2010 10: 30 -11: 00 PED Division Overview (Michael T. Postek) 11: 00 - 11: 30 Dimensional Metrology Program Overview - Steven Phillips 11: 30 - 12: 00 Quality/Standards/Calibrations Overview -Theodore Doiron 12: 00 – 1: 00 Working Lunch - Division Review Team members engage in Question and Answer session with PED staff 1: 00 - 2: 00 Dimensional Metrology and Quality Programs Lab tours Gage Calibration 219/F 36 - Theodore Doiron Optical Comb and Refractometry, 219/F 31, F 35 - Jack Stone M 48 CMMs, 219/G 24 - John Stoup 2: 00 - 2: 30 Nanomanufacturing Metrology Program Overview - Richard Silver 2: 30 - 3: 00 Nanomanufacturing Metrology Program Lab Tours Scanning Particle Beam Metrology, 217/E 113 - Andras Vladar Defect Inspection/Fuel Cell – Scatterfield/Optics, 217/E 116 - Richard Silver 3: 00 Break 3: 15 - 3: 45 Next-Generation Nanometrology Program Overview (John Kramar) 3: 45 - 4: 15 Next-Generation Metrology Program Lab Tours Atom-based Dimensional Metrology UHV STM 219/A 006 - Richard Silver 193 nm Optical Metrology Microscope 219/A 002 - Richard Silver 4: 15 - 5: 30 Questions (needs and requests from panel) 5: 30 p. m. Adjourn 5: 35 p. m. Panel assembles to travel by shuttle to Joint Working Dinner 6: 15 p. m. Joint Working Dinner: Panel members engage in Question and Answer session with NIST staff Precision Engineering


