

0c0d49093295d2e234f0be782b5c5af7.ppt
- Количество слайдов: 50
 Accessing and Using Your Network Ch 26
 Accessing Shared Network Resources
 Network Window • Start, Network • Shows devices on your network
 Viewing a Computer's Shared Resources • If the computer has password-protected sharing enabled, and your stored network credentials are not accepted, you see the "Enter Network Password" box
 Shared Resources • Breadcrumb trail address: ▶ Network ▶ SAMEEE • Click address bar to see UNC path: \SAMEEE
 Mapping a Network Folder to a Drive Letter
 Mapping a Network Folder to a Local Drive Letter • Start, right-click Computer, Map Network Drive
 Disconnecting a Mapped Network Folder • In the Computer window, right-click the drive, Disconnect
 Network Folder at the Command Line") Mapping (and Deleting) Network Folder at the Command Line
Mapping (and Deleting) Network Folder at the Command Line
 Creating a Network Location for a Remote Folder
 Creating a Network Location for a Remote Folder • In the Computer window, right-click empty space, click "Add a Network Location" • Go through the wizard • Adds the folder to the Computer window without assigning a drive letter
 Accessing a Shared Printer
 Accessing a Shared Printer • In Network window, open print server. Right-click printer, Connect…
 Add Printer Wizard • In "Devices and Printers", click "Add a Printer" button
 Sharing Resources with the Network
 Sharing Resources with the Network • Start, SHARING, click "Manage advanced sharing settings"
 Creating User Accounts for Sharing • If you use Home. Group, or don't use password protected sharing, you don't need to have local accounts for the users sharing your resources • If you choose to require accounts, they must not have blank passwords
 Monitoring Your Shared Resources • Shared Folders in Computer Management • You can also view open files, and disconnect users
 Working with Network Files Offline
 Working with Network Files Offline • Offline Files is only included in Windows 7 Professional, Enterprise, or Ultimate • Start, OFFLINE, "Manage offline files" • Offline Files is enabled by default
 Making a File or Folder Available for Offline Use • In Windows Explorer, right-click file or folder, click "Always available offline" • The "Always Available Offline" box appears as Windows synchronizes the file
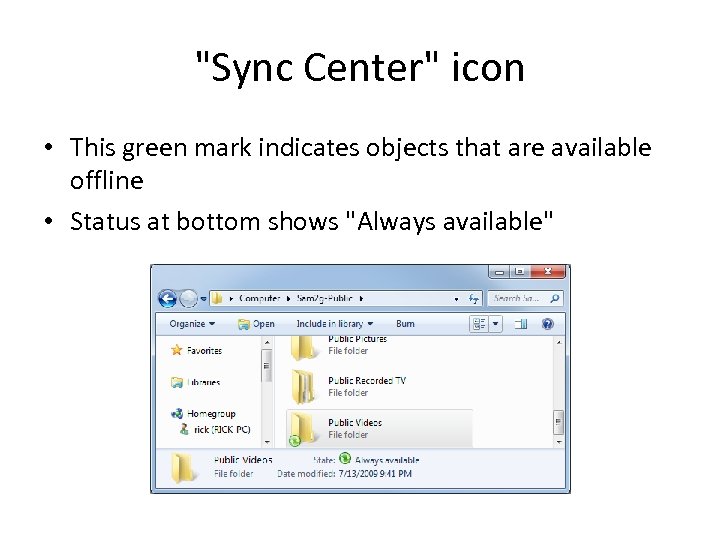 "Sync Center" icon • This green mark indicates objects that are available offline • Status at bottom shows "Always available"
 Changing the Amount of Disk Space Used by Offline Files • In "Manage offline files" • You can also encrypt offline files here
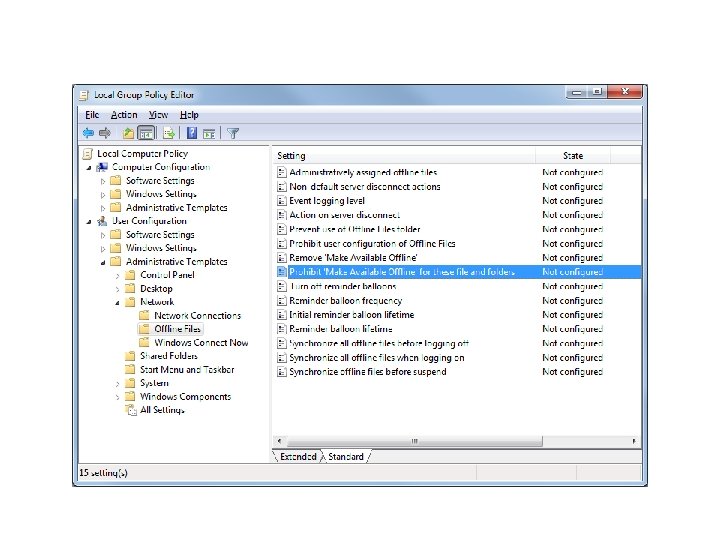
 Prohibiting a Network Folder from Being Made Available Offline • You might want to prevent the slow synchronization, or prevent copies of the file being taken out of the building • This can be adjusted in Group Policy, as well as many other settings of Offline Files
 Sync Center • Start, SYNC • You can open your offline files here
 Leaving a Folder Open • If you leave the network share open when you disconnect, the offline files remain available
 Synchronizing Your Offline Files • Files should synchronize when you reconnect to the network • You can control synchronization in Sync Center
 Offline Files Bugs • It refused to synchronize in my tests, happily keeping different versions of a text file on the client and server. • It's supposed to detect such conflicts and warn you about them, but it did not.
 Making Remote Network Connections Ch 27
 Setting Up the Remote Computer as a Host
 Versions • Only Windows 7 Business, Enterprise, and Ultimate can act as the Remote Computer – The Remote Computer is the one that is controlled by another computer • The Client Computer can use any version of Win XP, Vista, or Windows 7
 Setting Up User Accounts on the Host • Only accounts with passwords can be used to connect • These accounts in can make Remote Desktop Connections – Accounts in the Administrators group – Other accounts added to the Remote Desktop Users group – The currently logged-in user is not necessarily allowed in, the book is wrong on page 586 at the bottom
 Activating Remote Desktop • Start, right-click Computer, Advanced System Properties, Remote tab • The less secure option allows Win XP clients – Win XP Home clients will need to download the client from Microsoft • The last option is best for Win 7 and Vista clients
 Standby and Hibernate • You must disable these for the computer to answer Remote Desktop connection requests • Use Power Options in Control Panel
 Connecting to the Remote Desktop
 Making a Basic Connection • Start, Remote, "Remote Desktop Connection" • The first time you connect, you need to approve a certificate identifying the host • Log in with an account that is in the Remote Desktop Users group on the host machine
 User Logoff • If someone is using the computer, they will be logged off – The other person has 30 seconds to stop the remote session • If you want two people to share the same machine, you need Remote Assistance, not Remote Desktop
 Jump Lists • Recent connections are available in a jump list from the Remote Desktop Connection icon
 Making an Advanced Connection • Click the Options arrow to see these tabs • These settings allow you to customize your experience to suit your hardware and network speed
 Disconnecting from the Remote Desktop • Start, Log Off stops your session and exits • Closing the Remote Desktop Connection window by clicking the X leaves your programs and windows open on the host
 Connecting to the Remote Desktop via the Internet
 Security Measures • Allowing remote desktop from the Internet is obviously risky • Use strong passwords • Change the listening port – Registry adjustment, see link Ch 27 c • Configure Windows Firewall to allow the new port through
 Port Forwarding • Generally you need to configure port forwarding on your router for any server on your network, including Remote Desktop • That's the only way unexpected requests for service can find your computer
 Using Dynamic DNS to Access your Network
 Dynamic DNS • These services will find your machine's IP address even if it changes, and point a DNS name to iy – – Dyn. DNS. org Tzo. com No-ip. com Dlinkdns. com
 Using Virtual Private Network Connections
 Encryption and Remote Desktop • In Group Policy, go to Computer Configuration Administrative Templates - Windows Components - Terminal Services - Encryption and Security.
 Encryption is Optional in Remote Desktop • By default, it used High security (128 -bit AES), but that can be set lower, to dangerously low levels like 56 -bit DES. • Using a Virtual Private Network is a far more secure way to use Remote Desktop • And it frees you from the need to configure port forwarding
 is older and less") PPTP and IPSec • PPTP (Point to Point Tunneling Protocol) is older and less secure • IPSec (IP Security) is newer and more secure
PPTP and IPSec • PPTP (Point to Point Tunneling Protocol) is older and less secure • IPSec (IP Security) is newer and more secure